WARDOGS helicopters look simple from the passenger seat.
Take off.
Fly toward the objective.
Land.
Repeat.
Then you buy your first MH-6.
The helicopter starts rolling sideways.
You overcorrect.
The nose drops.
The ground suddenly fills the entire screen.
Six thousand dollars disappears before you leave the base.
That happens because helicopters in WARDOGS are not ground vehicles with altitude controls added on top.
The flight model separates:
Lift.
Pitch.
Roll.
Yaw.
Momentum.
And each of those needs to be managed deliberately.
The good news is that helicopter flying becomes much easier once you stop fighting the controls and understand what each input actually does.
Current live guides also confirm that the Firing Range lets you practice aircraft without risking your normal vehicle purchase or your passengers' gear, making it the correct place to learn before attempting live transport.
And learning matters.
The cheapest current helicopter, the MH-6, costs about $6,250.
The Z20 Lakota costs about $7,400.
The armed Z20 sits around $8,000.
The AH-6R Rocket helicopter costs about $12,500.
The Havoc costs around $18,000 after a very expensive Pilot unlock.
When you are carrying passengers, the risk becomes even larger.
You are not only flying your money.
You are flying theirs.
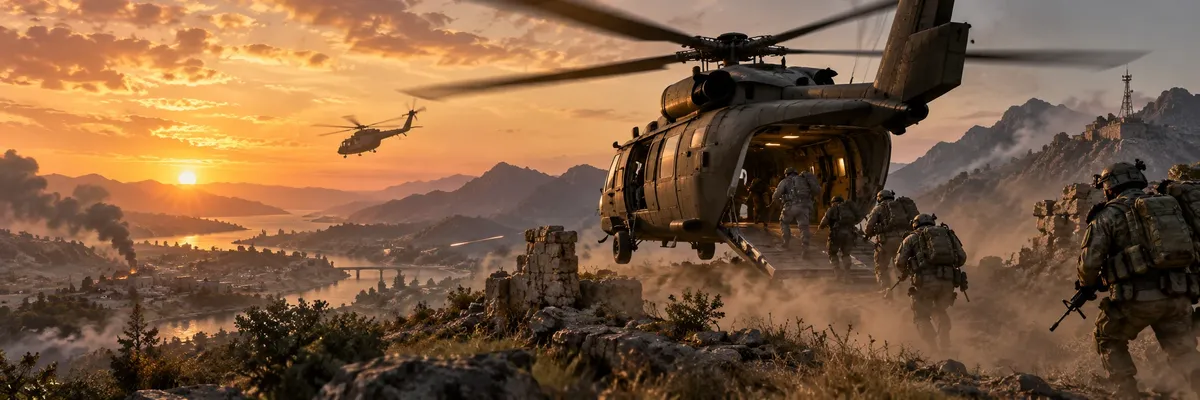
How Helicopter Flight Works in WARDOGS
Helicopter control is built around four separate movements, and learning to separate those movements is the difference between smooth flying and constant overcorrection.
Collective controls whether the helicopter gains or loses lift. Pitch tilts the nose forward or backward and is what creates most forward acceleration and braking. Roll banks the helicopter sideways, while yaw rotates its heading around the vertical axis. New Pilots usually crash because they apply several of these inputs too aggressively at once instead of making small corrections and allowing the aircraft to respond.
The four basic movements are:
Collective – climb or descend.
Pitch – nose forward or backward.
Roll – bank left or right.
Yaw – turn the nose left or right.
The most important thing to understand is that pitch does not simply mean:
Move forward.
When you pitch forward, you tilt the rotor's lift direction.
Part of the helicopter's lift now pulls you forward.
That means aggressive forward pitch can also reduce your vertical margin.
This is why new Pilots sometimes:
Take off.
Immediately push the nose down.
Accelerate.
Lose height.
Hit something.
Smooth flying comes from combining controls gradually.
Helicopter Controls and Keybinds
Do not memorize one internet control layout and assume it must match your game, because WARDOGS helicopter bindings and community recommendations have changed across builds.
Current sources show both the stock modifier-key setup and popular customized mouse-and-keyboard layouts. The safest approach is to open the Rotary Vehicle controls in your current build, understand which input controls collective, cyclic, and yaw, and then keep the same setup long enough to build muscle memory.
A current default-style layout is commonly documented as:
Left Shift – collective up.
Left Ctrl – collective down.
W / S – pitch.
A / D – roll or bank.
Q / E – yaw.
Alt – free look.
C – camera mode.
V – flares where equipped.
F – vehicle interaction.
However, many experienced Pilots remap the aircraft to:
W / S – collective.
A / D – yaw.
Mouse – pitch and roll.
That layout can make very small corrections easier because mouse movement gives much finer cyclic control than binary keyboard inputs. Current settings guides recommend enabling Rotary Vehicle Mouse Control when using this approach.
Neither setup automatically makes you better.
Consistency does.
Pick something that feels controllable.
Then stop changing it every few flights.
Best Helicopter Settings
Fine control matters more than maximum sensitivity, especially during hovering and landing where tiny corrections are more useful than aggressive turns.
If every small mouse movement throws the helicopter sideways, lowering aircraft sensitivity can improve your flying immediately. Current community testing recommends beginning with moderate mouse pitch and roll sensitivity, then changing one setting at a time instead of adjusting several variables simultaneously and losing track of what actually improved the aircraft.
Current community-tested starting points include:
Rotary Vehicle Mouse Control – enabled if using mouse cyclic.
Pitch sensitivity – roughly 30–50%.
Roll or yaw sensitivity – roughly 30–50%.
Air Vehicle Multiplier – adjusted gradually around your normal mouse setup.
Axis Isolation – tuned based on how much you want diagonal mouse input to combine pitch and roll.
These are starting points.
Not mandatory values.
Your:
Mouse DPI.
Normal sensitivity.
Desk space.
Control layout.
all change what feels correct.
A lower setting usually makes learning easier.
You can always increase responsiveness later.
Should You Use Flight Assists?
Flight assists are useful while learning because they can reduce drift and stabilize low-speed flight, but advanced Pilots may eventually disable some assists when they want full control over aggressive maneuvers.
Current WARDOGS settings include systems such as Stability Assist, Auto-Hover, Envelope Limits, and Turn Coordination. Keeping stability and hover assistance enabled while learning can make transport flying easier, while disabling limits becomes more useful once you are comfortable controlling steep banks and fast direction changes manually.
Current community descriptions identify:
Stability Assist – helps damp pitch, roll, and yaw.
Auto-Hover Assist – helps maintain a more stable hover.
Envelope Limits – prevents more extreme aircraft attitudes.
Turn Coordination – assists yaw during banked turns.
Do not disable every assist simply because an experienced Pilot does.
Your goal as a beginner is:
Take off safely.
Fly predictably.
Land without killing passengers.
Advanced maneuverability can come later.
Practice in the Firing Range First
A live match is the most expensive possible place to learn what your helicopter controls do.
The Firing Range gives you a safe environment where aircraft are available for practice without risking normal match cash, passengers, or objective pressure. Use it to develop takeoff, hover, landing, and emergency correction skills before flying a purchased helicopter full of players.
Current guides explicitly recommend the range for helicopter setup and practice.
Start with four exercises.
Hover.
Fly one large circle.
Land.
Repeat.
Then:
Take off.
Fly farther.
Return to the same landing point.
Once you can do that reliably, begin practicing more aggressive approaches.
Do not begin with:
Rooftop landings.
High-speed J-hooks.
Low-altitude canyon flying.
Combat helicopters.
Learn normal flight first.
How to Take Off Safely
A clean takeoff should create altitude before aggressive forward movement so the helicopter has room to recover from mistakes.
The easiest beginner takeoff is vertical and controlled: increase collective, clear nearby objects, stabilize the aircraft, and only then add forward pitch. Trying to climb, bank, turn, and accelerate simultaneously is one of the most common ways to roll a helicopter immediately after leaving the ground.
Start the aircraft.
Let the rotor system become ready.
Increase collective smoothly.
Rise several meters.
Check whether the helicopter is level.
Then add gentle forward pitch.
You do not need to launch like an attack helicopter every time.
When passengers are aboard, a boring takeoff is excellent.
It means everybody survives.
How to Hover
Hovering is not about keeping the helicopter perfectly motionless; it is about recognizing drift early enough that you only need small corrections.
A beginner often waits until the helicopter has already started sliding heavily, then applies a large opposite input and creates a second problem. Better hovering comes from tiny adjustments, returning toward neutral, and allowing the aircraft to settle instead of continuously fighting it.
Watch the environment.
If you are moving right:
Small left correction.
Then neutral.
Do not hold full left until you start sliding the other direction.
Do the same with pitch.
A stable hover teaches you more about the flight model than fast forward flight.
It also directly improves:
Landings.
Supply pickups.
Passenger extraction.
Low-speed combat positioning.
How to Fly Forward Efficiently
Forward speed comes from pitching the helicopter, but excessive pitch reduces your safety margin and makes terrain much harder to avoid.
Once you are clear of the ground, gradually pitch forward until the helicopter accelerates. As speed increases, reduce unnecessary corrections and let momentum carry the aircraft. Constantly swinging the nose and banking hard wastes control authority and makes the flight much less predictable.
At speed, think ahead.
A helicopter does not stop immediately when you level it.
Momentum continues.
That means every landing begins long before the landing zone.
If you wait until you reach the destination before slowing down, you are already late.
How to Turn Without Losing Control
Good helicopter turns combine roll and yaw rather than forcing the aircraft through one axis at a time.
Banking establishes the turn, while yaw helps align the nose with the new direction. The exact balance depends on your assists and control setup, but the important habit is avoiding sudden full-input changes that make the aircraft oscillate or lose altitude unnecessarily.
For a normal transport turn:
Bank gently.
Add yaw.
Maintain enough collective to avoid dropping.
Roll level again as the new heading approaches.
Transport flying does not need dramatic 90-degree banks.
Smooth turns keep passengers alive.
Use Free Look Constantly
Pilots who only look straight ahead miss landing-zone threats, terrain, nearby helicopters, and the obstacles that actually cause most crashes.
Free look lets you examine the ground and surrounding airspace without immediately changing the helicopter's flight direction. Use it before landing, during turns, when checking passengers, and whenever you suspect threats from another direction.
A Pilot should constantly scan:
Landing zone.
Ridgeline.
Power structures.
Tall buildings.
Enemy vehicles.
Smoke trails.
Other helicopters.
Friendly aircraft.
The helicopter moves too quickly for tunnel vision.
How to Land a Helicopter
Landing begins with speed control, not with descending.
The safest approach is to choose the landing point early, start reducing forward speed before reaching it, level the aircraft, and then descend with small collective adjustments. Arriving directly over the landing zone at full speed forces a last-second braking maneuver that frequently becomes an overshoot or crash.
Current flight guides identify excessive approach speed as one of the most common landing mistakes.
A safe landing sequence:
Choose the landing point.
Identify the exit route.
Slow down early.
Level the helicopter.
Reduce altitude gradually.
Keep sideways movement close to zero.
Touch down gently.
Do not immediately exit.
Make sure the helicopter is actually stable.
That last point matters.
Many aircraft are lost because a Pilot thinks:
“We touched the ground.”
then leaves while the helicopter is still sliding or tipping.
Choose the Landing Zone Before You Reach It
Hovering above a battle while searching for somewhere to land is one of the easiest ways to get shot down.
A strong Pilot already knows the primary landing zone and an alternate before beginning the final approach. The LZ should have enough room for the aircraft, cover for passengers, minimal obstacles, and a clear escape path if enemies appear.
Look for:
Open fields behind ridges.
Courtyards.
Wide roads.
Flat clearings.
Sheltered areas behind buildings.
Avoid:
Dense trees.
Narrow alleys.
Power structures.
Rooftops unless highly practiced.
Tiny compounds with only one exit route.
The best landing zone is rarely the one directly on the objective marker.
Land Near the Objective, Not Necessarily Inside It
Transport success is measured by whether your passengers reach the fight alive, not whether you place the helicopter on the exact capture point.
Dropping a squad slightly behind terrain can be far more valuable than landing in the middle of the Hot Zone and losing the aircraft plus every passenger to anti-air or infantry fire. A short walk from safe cover is usually better than a perfect landing location that becomes a mass casualty event.
Current helicopter guides specifically recommend placing passengers behind cover rather than directly on the objective.
Think like this:
Helicopter gets them through the long part.
Infantry covers the final short part.
That is efficient transport.
Abort Bad Landings
A failed approach should become another approach, not a forced landing.
If you arrive too fast, see enemies, lose your angle, notice an obstacle late, or feel the helicopter beginning to destabilize, add power and leave. Going around costs a few seconds. Crashing costs the aircraft, your life, your passengers' lives, and potentially several expensive loadouts.
This is one of the hardest habits for new Pilots.
Once they begin descending, they feel committed.
You are not.
If the landing looks wrong:
Go around.
Reposition.
Try again.
Real value comes from completing the mission safely.
The J-Hook Landing
J-hook landings are useful for experienced Pilots because they bleed speed quickly, but they should not replace learning a normal controlled approach.
A J-hook combines a nose-up flare, roll, yaw, and collective management to rapidly convert forward speed into a tight landing approach. It is extremely useful when executed correctly, but the maneuver leaves little room for error and should be practiced in the Firing Range before being attempted with passengers.
Current community flight guides describe the maneuver as:
Approach with speed.
Flare nose-up.
Roll toward the landing point.
Add yaw to swing the tail around.
Reduce collective as speed disappears.
Level before touchdown.
This is advanced transport flying.
Not beginner flying.
A normal landing completed safely is better than an impressive J-hook that destroys a Z20 full of teammates.
How to Transport Players Properly
Passenger transport is one of the strongest things a helicopter can do because one successful flight can relocate an entire group into objective-relevant terrain.
A transport helicopter should leave HQ with a purpose, carry as many useful passengers as practical, deliver them somewhere survivable, and return for another mission instead of hovering around the fight looking for something to do. The value comes from repeatedly converting distance into objective presence.
The current MH-6 carries six total seats, documented as two crew plus four passengers in current game data. It costs approximately $6,250 and reaches around 350 km/h.
The Z20 Lakota is much larger:
13 seats.
Two crew plus eleven passengers.
Approximately 445 km/h.
Around $7,400.
120 L fuel.
Roughly 27 km tracked range.
That means one Z20 can relocate a major portion of a faction's local fighting strength almost instantly.
Treat that responsibility seriously.
Wait for Passengers When It Makes Sense
An empty transport helicopter wastes the biggest advantage transport aircraft provide.
If several teammates are at HQ and heading toward the same objective, taking off immediately alone usually creates less value than waiting briefly and filling seats. You are already paying for the helicopter and flying the same route, so every useful passenger increases the value of that flight.
Communicate.
Say:
“Transport to Control Zone.”
“Z20 leaving.”
“Tower drop.”
“FOB transport.”
Give players a few moments to board.
Then leave.
Do not sit for several minutes waiting for perfection.
But do not fly a 13-seat transport as your personal taxi.
Tell Passengers Before Landing
Communication reduces the amount of time your helicopter needs to remain vulnerable on the ground.
Passengers who know the landing is coming can prepare to dismount immediately. Passengers who are surprised may sit inside while you remain exposed, forcing the Pilot to choose between waiting under fire and leaving with people still onboard.
Simple communication works.
“Landing behind ridge.”
“Get ready.”
“Dismount fast.”
“Stay inside, LZ hot.”
“Aborting.”
No complicated aviation language is necessary.
Be clear.
Passenger Drop Requests
Current community guides report that passengers can request a drop, which gives the Pilot useful information but does not mean every requested location is safe.
A passenger request should be treated as a suggestion. The Pilot still has the best perspective on aircraft safety and should refuse a landing that would expose the helicopter and everyone onboard unnecessarily.
Current Field Manual guidance notes the passenger drop request interaction.
If a passenger asks:
“Drop here.”
and “here” is:
Directly beneath enemy AA.
A tiny rooftop.
An active tank fight.
The answer can be:
No.
Land somewhere survivable.
Parachute Drops
Parachutes let you deliver players without fully landing, which can be useful when touching down would expose the helicopter too heavily.
The Basic Parachute currently costs about $100 and weighs 2.5 kg, while the Sport Parachute costs about $1,000 and weighs 9 kg. The Basic version is sufficient for a straightforward helicopter bailout, while the Sport version adds glide and landing control for more deliberate airborne insertions.
Current parachute data confirms:
Basic Parachute – $100.
2.5 kg.
Single-use.
Sport Parachute – $1,000.
9 kg.
Glide capability.
Landing flare.
Parachute drops are useful when:
Landing zone is too dangerous.
You want to stay moving.
Passengers need to spread across terrain.
The terrain below is open enough for a safe descent.
Do not force a hot landing when passengers already have a safer way out.
MH-6 – Best Helicopter for Learning and Small Transport
The MH-6 is the ideal first helicopter because it is relatively inexpensive, fast, small, and useful enough that the skills you learn remain relevant later.
Current live data lists the MH-6 at $6,250 with six seats, 350 km/h top speed, 105 L of fuel, roughly 24 km range, a nine-slot trunk, two cargo positions, flares, and 400 hull HP. It is less resistant to small-arms fire than the larger Z20, so staying mobile matters.
Current stats:
Price: $6,250.
Seats: 6.
Top speed: 350 km/h.
Fuel: 105 L.
Range: ~24 km.
Hull: 400 HP.
Main rotor: 400 HP.
Tail rotor: 300 HP.
Small-arms reduction: about 80%.
Use the MH-6 for:
Training.
Small squad transport.
Quick extraction.
Light logistics.
Rapid Control Zone reinforcement.
Its smaller size also makes landing easier.
Z20 Lakota – Best Large Transport Helicopter
The Z20 is the aircraft for moving a serious number of players because it combines thirteen seats, large cargo capacity, high speed, strong small-arms resistance, and flares.
At approximately $7,400, the unarmed Z20 is only moderately more expensive than the MH-6 but carries far more people and is significantly better protected against rifle fire. Its size makes tight landing zones harder, so the Pilot needs stronger approach discipline than with the smaller helicopter.
Current live data:
Pilot requirement: 10.
Unlock: $35,000.
Vehicle price: $7,400.
Seats: 13.
Top speed: 445 km/h.
Fuel: 120 L.
Range: ~27 km.
Hull: 600 HP.
Small-arms reduction: about 95%.
Large trunk.
Large logistics area.
BULKHEAD officially reduced the Pilot unlock cost for the Z20 transport to $35,000 in Season 1.
This is one of the most important transport aircraft in the game.
Do not waste it as a one-person taxi.
Z20 Lakota With Miniguns
The armed Z20 is a transport first and a gunship second, and treating it in the opposite order often gets a full passenger load killed.
The minigun version keeps the large transport capacity while adding two mounted M134D weapons. Its strongest use is letting gunners protect the aircraft during insertion, extraction, or movement rather than encouraging the Pilot to abandon the transport mission to circle infantry positions.
Current data lists:
Pilot 25.
$75,000 unlock.
$8,000 purchase.
445 km/h.
13 seats.
120 L fuel.
600 HP hull.
Two M134D miniguns.
Flares.
About 95% small-arms reduction.
That is a lot of capability for the price.
But remember:
Every passenger makes risky combat flying more expensive.
Deliver them first.
AH-6M Miniguns
The AH-6M is a light attack helicopter that rewards speed, movement, and repeated passes rather than hovering over targets.
The AH-6M is built around two M134D miniguns on the smaller Little Bird airframe. It has only 400 hull HP and roughly 80% small-arms reduction in current data, so it is much less forgiving than a Z20 if you slow down and allow concentrated fire to reach you.
Current data:
Pilot 4.
Season 1 unlock: $50,000.
Vehicle price: $7,000.
Speed: 350 km/h.
Fuel: 105 L.
Range: ~24 km.
Hull: 400 HP.
Miniguns.
Flares.
BULKHEAD officially raised its permanent Pilot unlock from $25,000 to $50,000 for Season 1.
Use attack passes.
Do not hover.
Speed is part of your defense.
AH-6R Rockets
The rocket variant is a specialized ground-attack platform and should not be purchased until you can already fly the Little Bird reliably.
At approximately $12,500, the AH-6R is almost twice the cost of the basic MH-6 and shares the small-airframe vulnerability profile. Its rockets increase ground-attack potential, but the higher investment makes bad terrain choices and unnecessary hovering even more expensive.
Current vehicle databases list the AH-6R at around $12,500.
Use it for:
Vehicle pressure.
Fortified positions.
High-value ground targets.
Not random flying around hoping to find someone.
A rocket helicopter without a mission is simply a more expensive target.
Havoc – High-End Attack Helicopter
The Havoc is the current premium attack helicopter, combining a much stronger hull with autocannon and rocket firepower, but its $18,000 deployment price means every mistake becomes extremely expensive.
The Havoc is a two-crew aircraft with 800 hull HP, roughly 95% small-arms reduction, 400 km/h top speed, flares, a 2A42 autocannon, rocket pods, 130 liters of fuel, and roughly 30 km of tracked range. It unlocks at Pilot 35 after a $500,000 permanent unlock.
Current stats:
Pilot 35.
Unlock: $500,000.
Price: $18,000.
Crew: 2.
Speed: 400 km/h.
Fuel: 130 L.
Range: ~30 km.
Hull: 800 HP.
Main rotor: 400 HP.
Tail rotor: 300 HP.
Autocannon.
Rocket pods.
Flares.
This is not where you learn:
Hovering.
Landing.
Terrain masking.
Attack approaches.
You should know all of that before buying it.
Helicopter Damage and Critical Components
A helicopter does not need to lose all of its hull HP to become effectively doomed, because engines and rotors are separate damage components.
Current shipped-data vehicle entries track the hull, fuel system, engine, tail rotor, and main rotor separately. That means concentrated damage to a rotor or engine can create control problems even while the overall aircraft still appears to have significant hull health remaining.
For the MH-6:
Hull: 400.
Fuel tank: 200.
Engine: 200.
Tail rotor: 300.
Main rotor: 400.
For the Z20:
Hull: 600.
Fuel tank: 200.
Engine: 200.
Tail rotor: 300.
Main rotor: 400.
For the Havoc:
Hull: 800.
Fuel tank: 200.
Engine: 200.
Tail rotor: 300.
Main rotor: 400.
This is why a damaged helicopter may suddenly become harder to control.
Do not assume:
“We still have hull HP, so everything is fine.”
If handling changes:
Land somewhere safe.
Assess.
Repair if possible.
Small-Arms Fire Is Still Dangerous
Larger helicopters resist rifle fire extremely well, but light helicopters can still be chipped down rapidly when several players shoot at them.
Current data gives the MH-6 and AH-6 family roughly 80% small-arms damage reduction, while the Z20 and Havoc sit around 95%. That difference means small Little Bird airframes take substantially more rifle damage under concentrated fire and should avoid slow passes even when no dedicated anti-air is visible.
Do not think:
“They only have rifles.”
A full squad firing at a hovering MH-6 can still create a serious problem.
Keep moving.
Use terrain.
Do not offer them repeated easy shots.
The Biggest Anti-Air Threats
WARDOGS has dedicated air-defense equipment, and once experienced Support players or vehicle crews know you are active, open-sky flying becomes much more dangerous.
Current anti-air options include infantry launchers such as the 9K333 Verba, mobile systems such as the Flakpanzer Gepard, and buildable FOB defenses. These threats exist specifically to punish Pilots who fly predictable routes or hover where they can be tracked.
The current 9K333 Verba unlocks at Support 16 in live data and is tracked with an effective range up to roughly 1,000 meters.
Community helicopter guidance also identifies:
Talon-style SAM defenses.
Vanguard CIWS.
Gepard.
as major threats to aircraft around developed FOBs.
The best defense against anti-air begins before the missile launches.
Do not give it a clean target.
Terrain Masking
Hills and ridges are your most reliable defense because an anti-air weapon cannot track what it cannot see.
Terrain masking means flying low enough that hills, ridgelines, buildings, and terrain folds repeatedly break line of sight between the helicopter and enemy air defenses. It is safer than crossing a huge open valley at maximum altitude and hoping your flares solve everything.
Current Pilot guides strongly recommend terrain masking against anti-air.
Instead of flying:
Straight over the mountain.
Fly:
Along the side.
Behind the ridge.
Then cross quickly where necessary.
This also helps against:
Recon.
Tank gunners.
Infantry.
Enemy helicopters.
Being unseen is better than being hard to hit.
Low Flying Has Its Own Dangers
Flying low defeats long sightlines but dramatically reduces your reaction time to terrain, trees, towers, buildings, and power structures.
The safest Pilot is not always the lowest Pilot. Terrain masking should be deliberate: stay low when you need cover, gain enough altitude when terrain becomes complex, and never let the desire to hide from anti-air turn the next tree line into your biggest threat.
Low flying demands:
Map familiarity.
Free look.
Smooth inputs.
Good frame rate.
Awareness of obstacles.
The stronger you become, the lower you can safely operate.
As a beginner:
Give yourself room.
Flares
Flares are an emergency countermeasure, not permission to fly predictable routes through enemy air defense.
Current helicopter data shows flares equipped on the main airframes, and current control guides commonly place flare deployment on V. Flares are finite, so wasting them randomly can leave you with nothing when an actual missile threat arrives.
Current settings guides list:
V – deploy flares.
Always confirm your live binding.
Use flares when:
You have a credible missile threat.
You are crossing unavoidable exposure.
You need time to break behind terrain.
Do not simply press them continuously because you see enemies.
Your real goal after deploying is:
Break line of sight.
Flares create an opportunity.
Terrain keeps you alive.
Do Not Trust a Missile Warning to Save You
Current community Pilot documentation warns that missile-warning feedback may be limited, making proactive positioning more important than waiting for a perfect lock indicator.
Several current community guides specifically warn that Pilots cannot rely on a detailed directional missile-warning system in the same way they might in more arcade-focused shooters. Because of that, threat awareness and terrain use need to happen before you are already under attack.
Treat developed FOBs as potentially dangerous.
Treat a stationary Gepard as dangerous.
Treat repeated missile activity in one valley as information.
Change route.
Never Fly the Same Route Forever
A safe route becomes unsafe once the enemy learns where you always appear.
Pilots are extremely visible. If you repeatedly leave HQ, cross the same ridge, approach the same side of the Hot Zone, and use the same landing field, enemy Support players can prepare anti-air before you arrive.
Change:
Altitude.
Approach.
Departure.
Landing zone.
Timing.
If the same flight worked four times:
Assume someone noticed.
The fifth run may be the ambush.
Use Speed to Cross Exposed Areas
When terrain cannot hide you, minimize the amount of time enemies have a clean shot.
A fast crossing is safer than hovering indecisively in open sky. Decide where you are going before leaving cover, accelerate through the exposed area, and return behind terrain instead of stopping halfway to reassess.
The Z20 can reach roughly 445 km/h in current live data.
Use that speed.
Its purpose is not simply reducing travel time.
Speed reduces exposure.
Do Not Hover Over the Hot Zone
The Hot Zone attracts the highest concentration of infantry, anti-air, vehicles, and players specifically looking for high-value targets.
Hovering above the central objective makes you visible to everyone from all three factions. Even a heavily protected Z20 or Havoc becomes much easier to kill when it stops moving and gives enemies several seconds to coordinate fire.
Transport Pilot:
Land.
Unload.
Leave.
Attack Pilot:
Pass.
Fire.
Extend.
Reposition.
Do not become an airborne observation tower.
Approach From the Enemy's Weak Side
A landing route should consider where enemy defenses are facing, not only the shortest distance from HQ.
If the enemy is watching the southern road and western ridge, approaching from the same obvious direction may expose the aircraft to every prepared weapon. Helicopters are valuable precisely because they can approach from directions ground vehicles cannot. Use that freedom.
Look for:
Reverse slopes.
Valleys.
Buildings.
Mountain passes.
Low approaches.
Unexpected landing areas.
Air mobility is wasted when you simply follow the road from above.
How to Survive Rifle Fire During Transport
The correct reaction to small-arms fire is usually to finish the safe part of the mission quickly or break away, not stop and search for the shooter.
A transport Pilot carrying passengers should not begin circling infantry because someone fired at the helicopter. Your passengers are the mission. If the landing remains safe, complete it quickly; if it is becoming dangerous, abort and use another LZ.
Do not chase.
Do not retaliate unless the aircraft's role is actually combat.
Transport success comes from:
Arrival.
Survival.
Return.
How to Survive Dedicated Anti-Air
Once serious AA has your corridor covered, continuing to force the same route is usually worse than changing the mission.
A mobile Gepard or developed SAM position can deny a large area. If one route becomes unsafe, use another altitude, another flank, another landing zone, or temporarily switch to ground logistics rather than feeding helicopters into a prepared defense.
Do not think:
“I paid $18,000, so I have to make this route work.”
The aircraft being expensive is exactly why you should not force it.
Adapt.
Helicopter Fuel
Helicopters have enough fuel for multiple useful flights, but repeated long-distance transport still requires planning and refueling.
Current live data gives the MH-6 approximately 105 L and around 24 km of tracked range, the Z20 120 L and around 27 km, and the Havoc 130 L with around 30 km. Those numbers are large enough for several sorties but not infinite on a large battlefield.
MH-6:
105 L.
~24 km.
Z20:
120 L.
~27 km.
Havoc:
130 L.
~30 km.
Do not wait until the gauge is almost empty.
Your final flight may need:
Go-around.
Alternative LZ.
Return to FOB.
Evasive route.
Fuel reserves give you choices.
Refueling at FOBs
A forward refuel location can transform a helicopter from an HQ taxi into a persistent battlefield asset.
Current vehicle guides confirm that fuel can be replenished at suitable FOB infrastructure once the base has been developed. A well-placed FOB therefore lets Pilots remain near the active fight instead of repeatedly crossing the entire map for servicing.
This is especially useful for:
Transport loops.
Armed Z20 support.
Attack helicopters.
Supply flights.
A Pilot working with Support is much more efficient than a Pilot working alone.
Helicopter Repairs
Landing a damaged helicopter is usually better than flying until a rotor or engine failure chooses the landing for you.
Because engines and rotors have their own health pools, damage can make an aircraft increasingly risky even when the main hull is still intact. If the helicopter begins handling strangely, find protected ground or a friendly service position before committing to another dangerous run.
Land somewhere:
Flat.
Protected.
Away from active enemy fire.
Do not land:
Exactly where you were just hit.
Enemy anti-air already knows that location.
Move.
Then service.
Never Repair Under Enemy Observation
A helicopter sitting on the ground is dramatically easier to destroy than one moving through terrain.
If enemy fire forced you down, the position is probably compromised. Move behind terrain if the aircraft is still controllable, or have friendly infantry secure the area before attempting repairs.
A landed helicopter is:
Large.
Stationary.
Expensive.
Perfect artillery or launcher bait.
Treat emergency landings as temporary.
Transport Economy
A good transport helicopter should complete several missions before being lost, because that is how an expensive vehicle becomes economically efficient.
The real question is not whether a Z20 costs $7,400. It is whether that $7,400 helicopter successfully moves one group before dying or repeatedly transports players, supplies, and reinforcements throughout the match. Vehicle survival multiplies value.
One Z20 completing:
Five useful runs
is dramatically more valuable than five Z20s completing:
One run each.
That is why cautious Pilots often outperform reckless Pilots even when the reckless Pilot has more kills.
Passenger Survival Matters More Than Perfect Placement
Your passengers do not need the shortest possible walk; they need to survive long enough to contribute after dismounting.
Community economy tracking differs on exact passenger-delivery payouts, but current sources agree that successful transport and passenger survival create Pilot progression and cash value. That makes safe delivery more useful than dropping directly in the hottest possible location.
The best drop may be:
150 meters behind cover.
Not:
Zero meters from enemy infantry.
Objective proximity matters.
Survival matters more.
Keep the Pilot Loadout Cheap
Your helicopter is already the expensive part of the life, so adding a premium infantry loadout often increases risk without helping you fly.
A Pilot usually spends most of the life inside the aircraft. A simple rifle, Light Armor, basic medical supplies, and possibly a parachute can provide enough emergency capability without turning every helicopter crash into an even larger financial loss.
You do not need:
Premium rifle.
Super Heavy Armor.
Huge ammunition reserve.
Full specialist equipment.
just to transport players.
Spend according to the mission.
Should Pilots Carry Parachutes?
A Basic Parachute is a cheap emergency option, but passengers benefit from carrying one even more than the Pilot because they may need to leave a dying helicopter at altitude.
At roughly $100 and 2.5 kg, the Basic Parachute provides inexpensive bailout insurance. The Sport Parachute offers much better mobility but costs ten times more and weighs 9 kg, so it is more appropriate for deliberate airborne operations than everyday emergency use.
For normal transport:
Basic is usually enough.
For planned airborne flanks:
Sport becomes more interesting.
Attack Helicopter Survival
Attack helicopters survive through movement, terrain, target selection, and short exposure windows—not by absorbing damage indefinitely.
The correct attack pattern is usually to approach from terrain cover, expose the aircraft long enough to attack, then leave before enemy air defense fully reacts. Repeatedly attacking from the same direction teaches every enemy where to aim.
A good attack run:
Approach hidden.
Identify target.
Expose.
Fire.
Extend.
Break sight.
Reposition.
Repeat from another angle.
A bad attack run:
Hover.
Shoot.
Stay.
Shoot.
Wait for missile.
Deploy flare.
Continue hovering.
You can guess which one survives.
Target Priority for Attack Helicopters
Attack aircraft should destroy things that ordinary infantry cannot remove efficiently rather than farming isolated players with no objective value.
High-value targets include exposed vehicles, enemy anti-air when it can be attacked safely, fortified positions, important logistics, enemy transport helicopters, and groups controlling meaningful terrain.
Attack the system.
Not the easiest body.
Destroying a supply truck may weaken an entire FOB.
Destroying a transport helicopter may stop a full reinforcement wave.
Destroying an anti-air platform opens the sky for every friendly Pilot.
That is impact.
Armed Transport Survival
The Z20 Minigun is strongest when its gunners suppress threats while the Pilot continues flying the transport mission.
The aircraft's guns should create safe windows for insertion and extraction rather than encouraging the Pilot to remain exposed. Because the Pilot controls the aircraft and the gunners control the weapons, coordinated crew communication becomes much more important than raw weapon output.
Pilot says:
“Contacts right.”
Gunner engages.
Pilot continues through the approach.
That is teamwork.
Pilot circles for two minutes because the gunner saw one infantry player?
That is mission drift.
Helicopter vs Helicopter Encounters
Air combat is often decided by positioning and awareness before either Pilot begins shooting.
A transport helicopter should normally avoid extended air combat and escape toward friendly anti-air or terrain, while an attack helicopter can be much more aggressive. The important question is whether the enemy aircraft threatens your mission enough to justify breaking from it.
Transport:
Escape.
Attack:
Engage if favorable.
Do not force a Z20 full of passengers into a prolonged dogfight because you want to prove something.
Deliver first.
Common WARDOGS Helicopter Mistakes
Taking Off Before Learning the Controls
The first seconds after takeoff are where many new Pilots lose the aircraft because collective and cyclic inputs get mixed together.
Practice hover first.
Making Huge Corrections
If the helicopter begins drifting, large opposite input often creates an even larger drift in the other direction.
Small input.
Neutral.
Observe.
Landing Too Fast
A fast approach gives you almost no time to correct once the ground and obstacles become close.
Slow down before the LZ.
Landing Directly Inside the Fight
Saving passengers a short run is not worth losing every passenger and the aircraft.
Use protected ground.
Hovering
Stationary helicopters are easy targets for rifles, launchers, Gepards, and SAMs.
Keep moving.
Flying High Across Open Terrain
Altitude removes terrain masking and gives enemy AA long sightlines.
Use ridges.
Flying Too Low Everywhere
Terrain masking becomes terrain collision when the Pilot does not leave enough reaction room.
Use low altitude intelligently.
Repeating One Route
Enemy air defense adapts.
Change direction.
Wasting Flares
Countermeasures are finite.
Deploy when needed, then break sight.
Buying the Havoc to Learn
An $18,000 aircraft is not a training tool.
Use the MH-6.
Carrying Passengers While Practicing Advanced Maneuvers
Your teammates did not buy their loadouts to become part of your J-hook training session.
Use the range.
Ignoring Damage
A damaged rotor or engine can make the next landing much harder.
Service early.
Ignoring Fuel
Long-lived helicopters eventually need support.
Refuel before the emergency.
Turning Transport Into Combat
Passengers board because they want movement.
Complete that mission.
WARDOGS Helicopter FAQ
What Is the Best Helicopter for Beginners?
The MH-6 is the strongest learning choice because it is the cheapest current helicopter, carries a small squad, and teaches the same basic takeoff, hover, landing, terrain-masking, and transport skills required by larger aircraft.
Current price:
Approximately $6,250.
How Many Players Fit in the MH-6?
Six Total Seats
Current shipped-game data lists two crew and four passengers, giving the MH-6 six total seats.
How Many Players Fit in the Z20 Lakota?
Thirteen Total Seats
Current game data lists the Z20 with two crew plus eleven passengers, making it the largest current helicopter transport.
How Much Does the Z20 Cost?
Approximately $7,400
The current Z20 requires Pilot 10 and a $35,000 one-time unlock, followed by approximately $7,400 per aircraft purchase. BULKHEAD officially reduced that unlock cost to $35,000 for Season 1.
How Much Does the Havoc Cost?
Approximately $18,000
Current live data places the Havoc at Pilot 35, with a $500,000 permanent unlock followed by an $18,000 vehicle purchase.
How Do You Deploy Flares?
Current Community Control Guides Commonly Use V
Check your current Rotary Vehicle bindings because controls can be remapped or altered between builds. Current settings references place flares on V in the standard documented layout.
What Is the Best Transport Helicopter?
Z20 Lakota
Its 13-seat capacity, approximately 445 km/h top speed, large cargo space, 600 HP hull, flares, and strong small-arms resistance make the Z20 the most capable dedicated mass-transport helicopter in the current roster.
What Is the Best Attack Helicopter?
Havoc for Maximum Combat Capability
The Havoc currently combines 800 HP, 95% small-arms reduction, autocannon, rocket pods, flares, and a 400 km/h tracked top speed. The tradeoff is its $18,000 purchase price and massive permanent unlock.
Can Rifles Damage Helicopters?
Yes
Current data shows helicopters reducing rather than completely ignoring small-arms damage. Little Bird variants currently reduce it by around 80%, while Z20 and Havoc airframes reduce roughly 95%. Concentrated rifle fire is therefore much more dangerous to the smaller helicopters.
What Is the Main Anti-Air Infantry Weapon?
The 9K333 Verba Is a Major Dedicated AA Threat
Current live data places the Verba at Support 16 with an effective range around 1,000 meters, making it a serious threat to helicopters that remain exposed.
Should You Fly High or Low?
Neither Is Always Correct
High flight improves terrain clearance but exposes you to longer anti-air sightlines. Low flight provides masking but increases collision risk. Strong Pilots change altitude based on terrain and enemy threats rather than using one fixed height.
Should You Land in the Hot Zone?
Usually Only When the Area Is Secure
Dropping passengers behind cover near the objective is usually safer than landing directly inside the highest concentration of enemies. Helicopter transport is successful when the passengers survive and contribute, not when the aircraft touches the exact objective marker.
Is the Sport Parachute Worth It?
Mainly for Deliberate Airborne Movement
The $100 Basic Parachute is lighter and adequate for a normal bailout. The $1,000 Sport Parachute adds glide and better control but weighs 9 kg, making it a much larger loadout commitment.
Final WARDOGS Helicopter Tips
Helicopter flying becomes much easier when you stop trying to be impressive.
Your first goal is control.
Take off vertically.
Stabilize before accelerating.
Use small corrections.
Slow down before the landing zone.
Keep sideways movement low before touchdown.
Abort approaches that feel wrong.
A safe second attempt is better than an expensive first crash.
Then learn the transport side.
A helicopter is one of the fastest ways to convert players sitting at HQ into objective pressure.
The MH-6 carries six total players and currently costs around $6,250.
The Z20 carries thirteen and costs around $7,400, with significantly stronger small-arms resistance and large cargo capacity.
Use those seats.
Do not buy a large transport and fly alone unless there is a specific reason.
When carrying passengers:
Tell them where you are landing.
Choose the LZ before arriving.
Use cover.
Do not hover while everyone slowly decides whether to get out.
Leave when the drop is complete.
And remember that landing directly on the objective is not automatically better.
A squad safely dropped 100–200 meters away can arrive on foot.
A squad killed inside a burning helicopter contributes nothing.
Once you understand transport, start thinking about survival.
Terrain is your strongest armor.
Use hills.
Use ridges.
Use valleys.
Avoid spending long periods in open sky.
Dedicated anti-air exists.
The 9K333 Verba currently reaches roughly 1,000 meters in live game data.
FOBs can build air-defense systems.
The Gepard can move.
Other helicopters can hunt you.
That means your route should never become completely predictable.
If the same valley worked three times:
Think about another valley on the fourth run.
If enemy AA appears:
Do not keep repeating the same flight because you already purchased the aircraft.
Adapt.
Flares help, but they are not your entire survival plan.
Deploy.
Break line of sight.
Get behind terrain.
Then change the approach.
For attack helicopter players, the same principle becomes even more important.
The AH-6M currently costs around $7,000 after its Pilot unlock and uses the lighter 400-HP airframe.
The Havoc costs roughly $18,000 and carries far more protection and firepower, but that price makes every careless hover extremely expensive.
Attack in passes.
Do not become stationary.
Choose meaningful targets.
Enemy vehicle?
Good target.
Enemy transport full of reinforcements?
Good target.
Critical FOB infrastructure?
Potentially high-value.
One random infantry player miles away from anything important?
Probably not worth exposing an $18,000 aircraft.
And pay attention to aircraft health.
WARDOGS tracks important helicopter components separately.
Engine.
Fuel system.
Main rotor.
Tail rotor.
A helicopter can become difficult to fly before the main hull is completely destroyed.
If handling suddenly becomes wrong:
Do not immediately begin another dangerous pass.
Find safety.
Land.
Repair.
Refuel.
Then continue.
That is how a single helicopter purchase becomes several missions instead of one.
Most importantly:
A good Pilot is not the Pilot who flies closest to the ground or performs the most dramatic landing.
A good Pilot is the one teammates trust to board.
They know:
The helicopter will leave safely.
The route will make sense.
The landing will be survivable.
And the Pilot will probably come back for another group.
That trust is one of the biggest advantages a WARDOGS Pilot can build.
Because WARDOGS remains in Early Access, flight settings, aircraft balance, component health, unlock requirements, prices, and control defaults can continue changing. BULKHEAD's official Season 1 changelog confirms the Z20 balance pass, revised Pilot economy, and the slower role-progression curve, while detailed aircraft statistics in this guide come from current shipped-data databases and up-to-date community flight testing. Always check your live Rotary Vehicle controls and in-game vendor if a later patch conflicts with an older guide.
Players who want help progressing Pilot, reaching higher helicopter unlocks, or building the cash required for aircraft can also explore WARDOGS services through BoostRoom.



