What Is a Drill Tower in WARDOGS?
Drill Towers Are Strategic Control Points That Reveal Code Digits
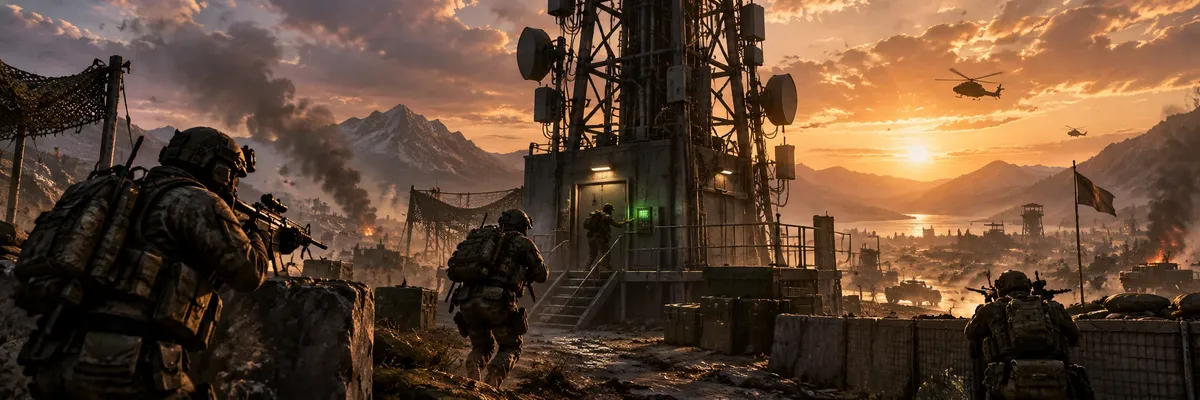
A Drill Tower is a fixed objective inside the active Control Zone that can be captured by interacting with its internal console. Capturing one reveals a digit belonging to the current match’s tower code. Once your faction has the full code, it can activate a tower drill or Hot Zone Magnet and pull the moving Hot Zone toward a tower your team controls.
Current Early Access guides consistently describe the tower loop this way:
Find an active tower.
Clear enemies.
Enter the tower.
Reach the operations room.
Interact with the console.
Capture the tower.
Receive a code digit.
Repeat until your faction knows the complete code.
The important part is that the code is not simply flavor text.
It is the key to controlling the Hot Zone.
That makes towers secondary objectives with enormous strategic value.
Towers Do Not Directly Give Match Points
Capturing a Tower Is Not the Same as Capturing the Control Zone
A tower itself does not directly add a point to your faction’s match score. Current player explanations are clear on this: the value comes from revealing code information and eventually activating the Hot Zone pull, not from treating the tower like a normal scoring flag.
This distinction is critical.
WARDOGS match scoring still comes from objective presence.
The faction with the highest effective presence inside the Control Zone wins the scoring tick.
The tower helps indirectly.
It gives your faction the ability to influence where the Hot Zone goes.
And the Hot Zone makes your players count more heavily toward that presence calculation.
So:
Tower = strategic control.
Hot Zone = multiplied presence.
Control Zone = match scoring.
Three related systems.
Not one.
How to Capture a Drill Tower
Reach the Tower Console and Complete the Capture Interaction
Capturing a tower is not accomplished by simply standing nearby. Current live guides describe a console or operations terminal inside the structure that must be interacted with to claim it for your faction. The tower should also be cleared first because the player using the console can be extremely vulnerable during the interaction.
A practical tower capture usually looks like this.
First:
Approach with teammates.
Recon the structure.
Watch windows.
Watch the roof.
Check nearby ridges.
Look for vehicles.
Then:
Clear defenders.
Enter.
Move toward the operations room.
Find the console.
Interact.
Complete the capture.
Current guides commonly place the tower console around the second or upper operations floor, though descriptions vary slightly depending on how players count the tower’s internal floors.
Do not obsess over:
“Second floor or third floor?”
The useful rule is:
Look for the operations/server-room area and the main console.
Why You Should Clear the Tower First
The Capture Interaction Makes You an Easy Target
A player focused on the console is not watching every doorway, staircase, or window. Attempting the interaction while defenders are still nearby can turn a successful push into an immediate counter-capture. Tower fights therefore work best when one player interacts while teammates secure the building.
Good capture discipline:
One player on console.
One watches stairs.
One watches entrance.
One checks outside approach.
Recon watches surrounding terrain if available.
Medic stays close enough to recover casualties.
This is much safer than:
Everyone crowds around the console.
One grenade arrives.
Whole squad disappears.
What Happens After You Capture a Tower?
Your Faction Learns One Digit of the Current Tower Code
The main reward from tower capture is information. Each successfully captured tower reveals one part of the match-specific code used to activate the Hot Zone pull. Current community guides describe the code as four digits in the common live configuration, while some player reports show uncertainty in matches with different tower counts. The correct approach is to follow the digits and positions shown by the live tower interface.
The best-supported current guides describe a four-digit code.
However, tower counts themselves can vary.
Some current sources report:
2–5 towers.
Others report:
3–5.
Some players remember:
3–4.
That is why you should not write down a permanent rule like:
“There are always exactly four towers.”
Current Early Access documentation instead suggests the configuration can vary by match.
Use the map.
Use the console.
Use the current match.
How the Tower Code Works
Each Tower Gives a Piece of the Combination
The code is assembled across multiple tower captures. Current guides describe each captured tower revealing a specific digit and, in some interfaces, showing its position within the full sequence. Once all necessary digits are known, the faction can enter the completed code at an eligible tower keypad and activate the Hot Zone Magnet.
For example:
Tower A reveals:
Digit 2 in position 1.
Tower B reveals:
Digit 7 in position 2.
Tower C reveals:
Digit 4 in position 3.
Tower D reveals:
Digit 9 in position 4.
The final code becomes:
That example is fictional.
The actual code changes.
Do not expect the same number next match.
Does the Tower Code Carry Between Matches?
No—Treat It as Match-Specific Objective Information
Current tower documentation describes the code as fresh match information rather than a persistent password. A code learned in one game should not be assumed to work in another.
That prevents players from simply memorizing a universal number.
The entire purpose is creating a map-control contest.
Capture towers.
Gather intelligence.
Use the code.
That loop would disappear if the number were permanent.
Can You Guess Missing Digits?
Yes, Current Community Reports Say Players Can Gamble on Incomplete Codes
Several live guides and player discussions report that factions can sometimes enter a partially known combination and attempt to guess missing digits rather than physically capturing every remaining tower. This creates an interesting risk-reward decision when you know most of the sequence but one enemy-held tower is extremely difficult to capture.
For example:
You know:
8 – 3 – ? – 1.
There are ten possibilities for the missing digit.
A squad may decide:
Capture the final tower.
Or attempt guesses.
The exact number of failed attempts allowed before lockout is less consistently documented across current sources.
So do not assume unlimited keypad attempts.
If the live interface warns of failure limits or cooldown:
Take it seriously.
What Happens When the Code Is Correct?
The Tower Activates Its Hot Zone Pull
Entering the complete code activates the tower’s drill or Hot Zone Magnet. The Hot Zone then begins moving toward that tower, giving your faction a chance to fight for the double-value objective on terrain it already controls.
This is the entire reason tower codes matter.
The tower is effectively saying:
“Bring the Hot Zone here.”
Current live sources agree strongly on this mechanic.
Without tower or FOB influence, the Hot Zone roams.
With a successful tower activation:
Your team gains control over the geography of the next major fight.
That is powerful.
Why Pulling the Hot Zone Matters
You Can Force the Enemy to Attack Your Position Instead of Chasing Them
The strongest use of a tower is activating it after your faction has already prepared the surrounding area. If your team has nearby cover, supplies, Medics, Support players, vehicles, and good sightlines, pulling the Hot Zone there turns a neutral objective into a battle on your terms.
Imagine two situations.
Situation one:
Hot Zone sits in enemy-favored terrain.
Your squad runs 600 meters.
Crosses open ground.
Attacks uphill.
Dies.
Situation two:
Your faction captures tower objectives.
Builds defensive infrastructure.
Positions vehicles.
Completes the code.
Activates the tower.
Hot Zone moves toward you.
Now the other factions must attack.
That is the real power of tower control.
Why Towers Are Often Good FOB Locations
Height and Objective Relevance Make Tower Areas Naturally Valuable
Current player discussions frequently describe teams building FOB infrastructure near towers because towers provide elevation, visibility, and direct connection to the Hot Zone code system. A well-built position around a tower can become both an observation point and a future Hot Zone stronghold.
A useful tower FOB can support:
Infantry cover.
Mortars.
Anti-air.
Repair infrastructure.
Supply storage.
Vehicles.
Medical positions.
Recon sightlines.
If the Hot Zone is later pulled there, those investments become immediately relevant.
But remember:
A tower is not automatically the best FOB location.
Terrain matters.
Supply access matters.
Enemy artillery matters.
Vehicle routes matter.
Sometimes another nearby position is safer.
Tower vs FOB Drill
Both Systems Can Influence the Hot Zone, but They Reach That Result Differently
WARDOGS currently has two major ways to intentionally pull the Hot Zone: use the captured-tower code system, or build and fuel a Drill Rig at a FOB. Tower activation requires code control, while FOB drills require construction progression, supplies, and fuel.
Tower path:
Capture towers.
Collect digits.
Enter code.
Activate tower pull.
FOB drill path:
Build FOB.
Construct drill infrastructure.
Supply fuel.
Activate drill.
Pull Hot Zone toward the FOB.
Both solve the same strategic problem:
Where do we want the Hot Zone fight to happen?
But their costs are different.
Main Advantage of Tower Activation
Tower Pull Does Not Depend on Continuously Fueling a Player-Built Drill
Current player reports describe the tower-code route as more difficult to achieve because it requires capturing multiple objectives, but once completed it can trigger the Hot Zone pull without the same ongoing fuel logistics associated with a player-built FOB drill.
This makes tower play attractive early.
Your team spends:
Combat effort.
Coordination.
Map control.
Rather than:
Fuel.
Construction supplies.
Repeated logistics runs.
That does not make it free.
You still need to capture and defend the structures.
Main Advantage of FOB Drills
A Strong Logistics Team Can Influence the Hot Zone Without Recapturing Every Tower
Once a developed FOB has the required construction and enough fuel, the drill system can offer a more repeatable method of pulling the Hot Zone. This is why organized Support, Driver, and logistics groups can become so powerful later in a match.
That creates a natural progression.
Early strategic control:
Towers.
Later sustained control:
FOB infrastructure.
Not always.
But often.
Current Steam discussions reflect that exact pattern, with players describing tower codes as especially relevant before teams establish stronger drill networks.
How Long Does the Tower Pull Last?
Current Community Data Commonly Tracks Around Three Minutes, but Treat Exact Duration as Patch-Sensitive
One current database tracks tower-magnet duration around 180 seconds, with a much longer recharge afterward. These values are not prominently published by BULKHEAD and should therefore be treated as current community measurements rather than permanent official rules.
That means:
Do not activate casually.
Three minutes of favorable Hot Zone geography can be extremely valuable.
Your team should already be ready.
Before activation:
Heal.
Resupply.
Move vehicles.
Position Medics.
Set up anti-air.
Watch enemy approaches.
Then fire the magnet.
Do not waste the window preparing after the Hot Zone arrives.
Tower Cooldowns
A Captured Tower Cannot Necessarily Be Reused Immediately
Current live guides describe tower capture or magnet cooldowns, meaning a tower cannot simply be recaptured and instantly reactivated over and over without limit. Exact cooldown values vary by source and are not fully standardized in public official documentation.
One current community source tracks a long recharge around 900 seconds after the magnet event.
Another guide describes towers becoming capturable only after an opening delay.
Because these timings are patch-sensitive, the safest advice is:
Check the tower icon.
Check the console.
Check the live cooldown.
Do not build a strategy around an old fixed number.
What Rewards Do Drill Towers Give?
The Main Reward Is Strategic, but Current Community Data Also Tracks Cash Payouts
The most important reward from a tower is not money. It is a code digit and eventual control over Hot Zone placement. However, current Early Access community databases also record cash rewards for tower capture and successful magnet activation. Those dollar amounts should be treated as current community-tracked values rather than guaranteed permanent BULKHEAD payouts.
One current community database tracks approximately:
Tower capture: $250.
Capture from an enemy holder: around $750.
Successful magnet activation: around $2,500.
Treat those values cautiously.
Economy balance changes frequently.
The reliable reward hierarchy is:
First:
Code information.
Second:
Hot Zone control.
Third:
Any direct cash reward.
Do not risk an entire squad only because you want a small capture payout.
Take the tower because the objective value matters.
Hot Zone Rewards After a Successful Pull
Moving the Hot Zone Onto Your Position Creates Both Scoring and Economy Opportunities
The Hot Zone is valuable because current community sources consistently report that players inside count double toward Control Zone presence, while BULKHEAD officially promotes the area as double cash. Therefore, activating a tower can create far more economic value indirectly than the tower’s own capture payout.
Imagine:
Six players hold the tower.
Hot Zone arrives.
Those six players now contribute roughly twelve effective players toward objective presence under current live documentation.
They also operate inside the higher-value economy zone.
Then:
Medic revives.
Assault kills.
Support builds.
Recon spots.
More economic actions happen around the highest-value fight.
This is why the tower reward is really a multiplier opportunity.
Tower Roof Loot
Some Current Community References Report Random Equipment on Tower Roofs
A current community objective database notes that tower roofs can contain randomized gear. This should be treated as a secondary bonus, not the reason to contest the tower, and loot availability can change with Early Access patches.
Do not expose yourself on the roof unnecessarily.
Check out some of our most popular WARDOGS services:
Tower roofs are obvious sniper targets.
Loot only when:
Area is safe.
You need it.
Your squad is covering.
The code objective is already secure.
How to Defend a Tower
Control the Stairways, Console, and Surrounding Sightlines
A tower is difficult to hold when defenders all stand on the roof. Strong tower defense uses layers: infantry controls access points, Recon watches surrounding approaches, Medics remain protected, and Support creates useful nearby cover without blocking friendly movement.
Good defensive priorities:
Console.
Main staircase.
Secondary entrances.
Ground-level approach.
Nearby ridge.
Vehicle access.
Helicopter approach.
Do not stack everybody in one room.
One grenade should not delete the whole defense.
Defend the Code, Not Just the Building
Preventing an Enemy From Capturing One Remaining Tower Can Deny Their Entire Code
Because factions need the full code or enough information to guess it, controlling even one key tower can block a cleaner enemy activation. That means you do not always need to own every tower to gain strategic value—you may simply need to deny the enemy their last missing digit.
This becomes especially powerful when:
Enemy already holds several towers.
Your faction controls one.
Their whole code progress depends on your position.
That tower becomes much more valuable than its location alone suggests.
Tower Counterplay
Attack the Objective System Instead of Charging the Hot Zone Head-On
If an enemy faction is preparing to pull the Hot Zone onto a fortified tower, the best response may be disrupting the tower objective before the magnet activates rather than waiting for the Hot Zone to arrive and attacking the finished fortress.
Possible counterplay:
Capture one of their towers.
Interrupt the console interaction.
Kill the code carrier—if communication depends on one player.
Force their squad away.
Attack their nearby FOB.
Destroy supply routes.
Position artillery or mortars.
Prepare armor.
Move Recon into observation positions.
The earlier you respond, the easier it becomes.
Do Tower Codes Reset After Use?
Current Community Reports Indicate the Objective State Can Reset and Generate a New Contest
Player reports describe towers becoming unclaimed or code progress resetting after successful activation, forcing factions to contest them again rather than permanently owning one universal code for the whole match.
That design makes sense.
Otherwise the first faction to complete the code could potentially dominate tower influence forever.
The system instead creates repeated strategic fights.
Again, treat exact reset behavior as patch-sensitive.
Use the live map after every activation.
Can Multiple Teams Work on the Same Code?
Each Faction Tracks Its Own Objective Control
Tower control is faction-based. One team's capture does not simply hand another team the completed code. The three-faction format means every tower can become a conflict between two opponents while the third quietly captures another objective elsewhere.
This is one of the most important strategic effects.
You may attack Manticore at Tower 2.
Meanwhile Lonestar captures Tower 4.
Then:
You and Manticore both weakened each other.
Lonestar advances its code with almost no resistance.
WARDOGS always has a third team.
Do not forget them.
Recon Is Excellent Around Drill Towers
Towers Create Predictable Enemy Movement
Recon becomes especially valuable around tower objectives because players must approach a known structure and often expose themselves while climbing, interacting, or defending. Spotting incoming vehicles and infantry can give tower defenders time to react before the actual assault begins.
Recon should watch:
Roads.
Ridges.
Helicopter approaches.
Nearby FOBs.
Enemy towers.
Likely mortar positions.
But avoid sitting on the absolute highest visible roof forever.
Enemy Recon will be watching too.
Medic Value Is Extremely High in Tower Fights
Reviving Defenders Can Preserve Control Without Repeating the Entire Assault
Tower interiors create concentrated fights where losing two or three players can immediately collapse the defense. A protected Medic can restore those bodies before the enemy reaches the console, preserving both the tower and the code progress it represents.
Medic positioning:
One layer behind frontline.
Not directly at console.
Close to staircase.
Smoke ready.
Revive only after threat is controlled.
A Medic who survives is more important than one extra SMG rushing the entrance.
Support Can Turn a Tower Into a Strongpoint
Construction Makes Tower Control Much Easier When It Solves Real Approaches
Support players can create cover, anti-air, repair positions, and nearby FOB infrastructure that makes a tower easier to defend. The key is not building everywhere—it is strengthening the routes enemies actually use.
Useful construction:
Road blockers.
Protected firing positions.
Cover around exposed approaches.
Vehicle support.
Anti-air when helicopters are common.
Do not block:
Friendly vehicles.
Tower entrance.
Retreat routes.
Supply delivery.
A fortress must still function.
Drivers and Pilots Make Tower Rotations Faster
Tower Objectives Are Spread Across the Control Zone, So Mobility Matters
A squad on foot may capture one tower effectively but arrive too late at the next. Ground transports and helicopters let factions chain objective pressure much faster, especially when trying to complete the final missing digit before another team responds.
Driver:
Move full squad.
Use safe drop.
Keep vehicle alive.
Pilot:
Insert nearby.
Avoid landing directly on roof unless safe.
Leave quickly.
Transport turns code collection from isolated fights into a coordinated map-control strategy.
When Should You Prioritize Towers?
Towers Matter Most When Your Team Can Convert the Code Into Real Hot Zone Control
Capturing every tower is not automatically the correct move in every moment. If your faction has almost no players inside the Control Zone and is losing the score race badly, sending the entire team on a distant code hunt may make the situation worse. Tower play is strongest when there is enough objective presence left to benefit from the eventual Hot Zone pull.
Prioritize towers when:
Your faction can spare a squad.
You already have some objective presence.
Enemy is preparing a tower pull.
Your team has a defensible tower.
You want to bring Hot Zone toward existing infrastructure.
The current Hot Zone position is terrible for your faction.
Do not prioritize every tower simply because it exists.
Strategy means choosing which objective has the highest value now.
Tower Push vs Hot Zone Push
The Better Choice Depends on Immediate Scoring Pressure
Sometimes your team should attack the Hot Zone now. Sometimes it should invest in towers so the next Hot Zone fight happens on better terrain. WARDOGS does not have one universal answer because both short-term score pressure and long-term geographic control matter.
Push Hot Zone immediately when:
Your team is close to taking the next scoring advantage.
Enemy numbers are low.
You can overwhelm the position.
Push towers when:
The current Hot Zone is heavily fortified by an enemy.
Your team controls strong tower terrain.
A completed code is close.
The score race gives you time.
Organized factions often split responsibilities.
One group maintains presence.
Another contests towers.
That is usually stronger than sending everyone to one objective.
Drill Tower Mistakes
Thinking the Tower Scores by Itself
Capturing a tower does not directly replace Control Zone presence.
The tower is strategic.
Players still need to hold the scoring objective.
Capturing a Tower and Forgetting the Code Digit
The digit is the main reason you came.
Communicate it.
Record it.
Share it.
Do not capture and immediately forget what appeared.
Entering the Code Before Your Team Is Ready
The magnet window is valuable.
Do not activate while:
Your squad is dead.
Vehicles are far away.
Medics are absent.
Supplies are empty.
Prepare first.
All Defenders Standing on the Roof
The roof has visibility but also enormous exposure.
Defend the internal routes.
Protect the console.
Use the roof carefully.
Building Too Much Before Securing the Tower
Construction cannot replace infantry control.
First:
Own tower.
Then:
Develop position.
Ignoring the Enemy's Last Tower
If an opposing faction needs only one final code digit, that tower may become the most important objective on the map.
Deny it.
Assuming Tower Counts Are Always Fixed
Current sources disagree on exact tower counts because match configurations can vary.
Use the actual map.
Believing Every Community Cash Number Is Permanent
Direct tower payouts are community-tracked and may change.
The strategic reward matters more.
WARDOGS Drill Tower FAQ
What Is a Drill Tower?
A Drill Tower is an objective inside the Control Zone that can be captured through its internal console. Capturing one reveals a digit of the tower code, which can ultimately be used to activate a Hot Zone pull.
Do Drill Towers Give Match Points?
No, Not Directly
Current player guides consistently state that capturing a tower itself does not add a normal match score point. Its strategic reward is code progress and eventual Hot Zone influence.
How Do You Capture a Tower?
Clear It and Use the Internal Console
Current guides describe entering the tower, reaching the operations/server-room floor, and interacting with the console to complete capture.
What Do You Get for Capturing a Tower?
A Code Digit
Each successful capture reveals one digit belonging to the match’s active tower code. Some interfaces also indicate where that digit belongs in the sequence.
How Many Digits Are in the Code?
Current Live Guides Most Commonly Describe Four Digits
The strongest current Early Access references describe a four-digit code, though tower counts vary between matches and older player discussions occasionally show uncertainty. Follow the current in-game tower interface if it differs after a patch.
Can You Guess the Last Number?
Current Community Reports Say Yes
Players currently report being able to attempt missing digits rather than owning every tower, although keypad failure limits and cooldown behavior should be checked in the live build.
What Happens When You Enter the Correct Tower Code?
The Tower Pulls the Hot Zone Toward It
Check out some of our most popular WARDOGS services:
The completed code activates the tower drill or Hot Zone Magnet, causing the Hot Zone to relocate toward the chosen tower.
Why Is Pulling the Hot Zone Good?
It Lets You Fight on Prepared Ground
The Hot Zone gives increased objective presence value and double cash according to current live documentation. Pulling it toward a tower your faction already controls lets you prepare defenses before the highest-value fight arrives.
Is a Tower Better Than a FOB Drill?
They Solve the Same Problem Differently
Tower activation requires code control. FOB drills require construction, fuel, and logistics. Tower play is often valuable before full infrastructure is established, while FOB drills can provide more repeatable influence once a faction has a strong base.
Do Towers Give Cash?
Current Community Sources Track Cash Rewards, but Exact Values Are Not Officially Fixed
One current database records direct money for captures and magnet activation, but those dollar amounts should be considered patch-sensitive community data rather than guaranteed BULKHEAD values.
How Many Towers Spawn?
It Can Vary
Current sources commonly report between roughly two and five active towers depending on the Control Zone configuration. The map is the best source for the current match.
Do Tower Codes Reset?
Current Player Reports Say the Objective State Can Reset After Activation
Live discussions describe towers/code control resetting after a successful pull, creating another contest rather than giving permanent Hot Zone control to one faction.
Final WARDOGS Drill Tower Tips
Drill Towers are easy to ignore when you first start playing WARDOGS.
They do not look as immediately valuable as the Hot Zone.
They do not give the same obvious satisfaction as a tank.
They do not produce constant kills.
But strategically, they can be some of the most powerful objectives on the map.
The tower system is simple once you understand the loop.
Capture a tower.
Get a code digit.
Capture more towers.
Complete the code.
Enter the code at the tower you want to use.
Pull the Hot Zone toward your position.
Then:
Defend it.
That is the core system.
The important part is what happens around it.
A coordinated faction can:
Capture a favorable tower.
Build nearby infrastructure.
Position Support players.
Move Medics inside.
Set up anti-air.
Bring vehicles.
Collect the remaining code.
Then activate.
Now the highest-value objective moves toward a position the faction already prepared.
That is dramatically stronger than constantly chasing the Hot Zone through neutral terrain.
But towers do not replace the main objective.
Capturing towers alone does not win the match.
Your faction still needs effective player presence inside the Control Zone.
The Hot Zone still needs to be occupied.
Enemies still need to be removed.
Medics still need to revive.
Vehicles still need to move players.
Support still needs supplies.
The tower simply lets you control where the most important part of that fight happens.
That is why the best tower squads do not think:
“We captured the tower. Job finished.”
They think:
“Now how do we convert this into objective control?”
Sometimes that means:
Hold the tower.
Sometimes:
Leave a small defense and capture the next one.
Sometimes:
Guess the final digit.
Sometimes:
Attack the enemy’s final tower instead.
Sometimes:
Do nothing with towers because your faction desperately needs more bodies inside the current Hot Zone.
WARDOGS gives you several strategic layers at once.
The skill is knowing which layer matters most right now.
For rewards, keep the hierarchy clear.
The biggest reward is not a small capture payment.
The biggest reward is controlling the battlefield.
A completed tower code can bring the Hot Zone onto fortified terrain.
That can improve:
Scoring presence.
Cash opportunities.
Defensive efficiency.
Revive efficiency.
Vehicle positioning.
FOB value.
And the amount of pressure placed on the other two factions.
A single successful tower play can therefore influence far more money and score than the tower’s direct payout ever could.
Because WARDOGS remains in Early Access, exact tower counts, capture cooldowns, magnet duration, reset behavior, keypad limits, and cash rewards can change. Current September 2026 live sources strongly agree on the central mechanic—tower capture reveals code digits, the completed code activates a tower Hot Zone pull, and tower capture itself does not directly score the match—while the more detailed timing and economy values remain community-tracked.
Players who want help progressing their account, unlocking stronger Support equipment, building cash, or reaching higher Driver and Pilot unlocks can also explore WARDOGS services through BoostRoom.



