Shadow Temple Dungeon Overview
The Shadow Temple is located beneath Kakariko Graveyard, accessible through a hidden entrance high above the cemetery.
You'll explore it as Adult Link after completing the required story progression and learning the Nocturne of Shadow.
The dungeon focuses on illusions and dangerous environmental traps.
You'll regularly use the Lens of Truth to reveal hidden objects and the Hover Boots to cross gaps that cannot be reached through ordinary movement.
Dungeon information:
Location: Kakariko Graveyard
Playable character: Adult Link
Required song: Nocturne of Shadow
Required equipment: Hookshot, Lens of Truth, and Din's Fire
Recommended equipment: Fairy Bow, Iron Boots, Longshot, Bombs, and Master Sword
Main dungeon item: Hover Boots
Additional items: Dungeon Map, Compass, and Boss Key
Small Keys: Five
Gold Skulltulas: Five
Mini-boss: Dead Hand
Final boss: Phantom Shadow Beast – Bongo Bongo
Boss reward: Heart Container
Story reward: Shadow Medallion
The Shadow Temple contains several underground floors connected through lifts, pits, narrow corridors, and hidden passages.
You'll begin by obtaining the Hover Boots, then descend into the lower levels.
Eventually, you'll ride a ghostly ship and solve the final puzzles leading toward Bongo Bongo.
Important: The Nintendo Switch 2 remake replaces the original Lens of Truth's handheld appearance with the Lenses of Truth, a wearable goggle-style item. Both names refer to the equipment used to reveal illusions.
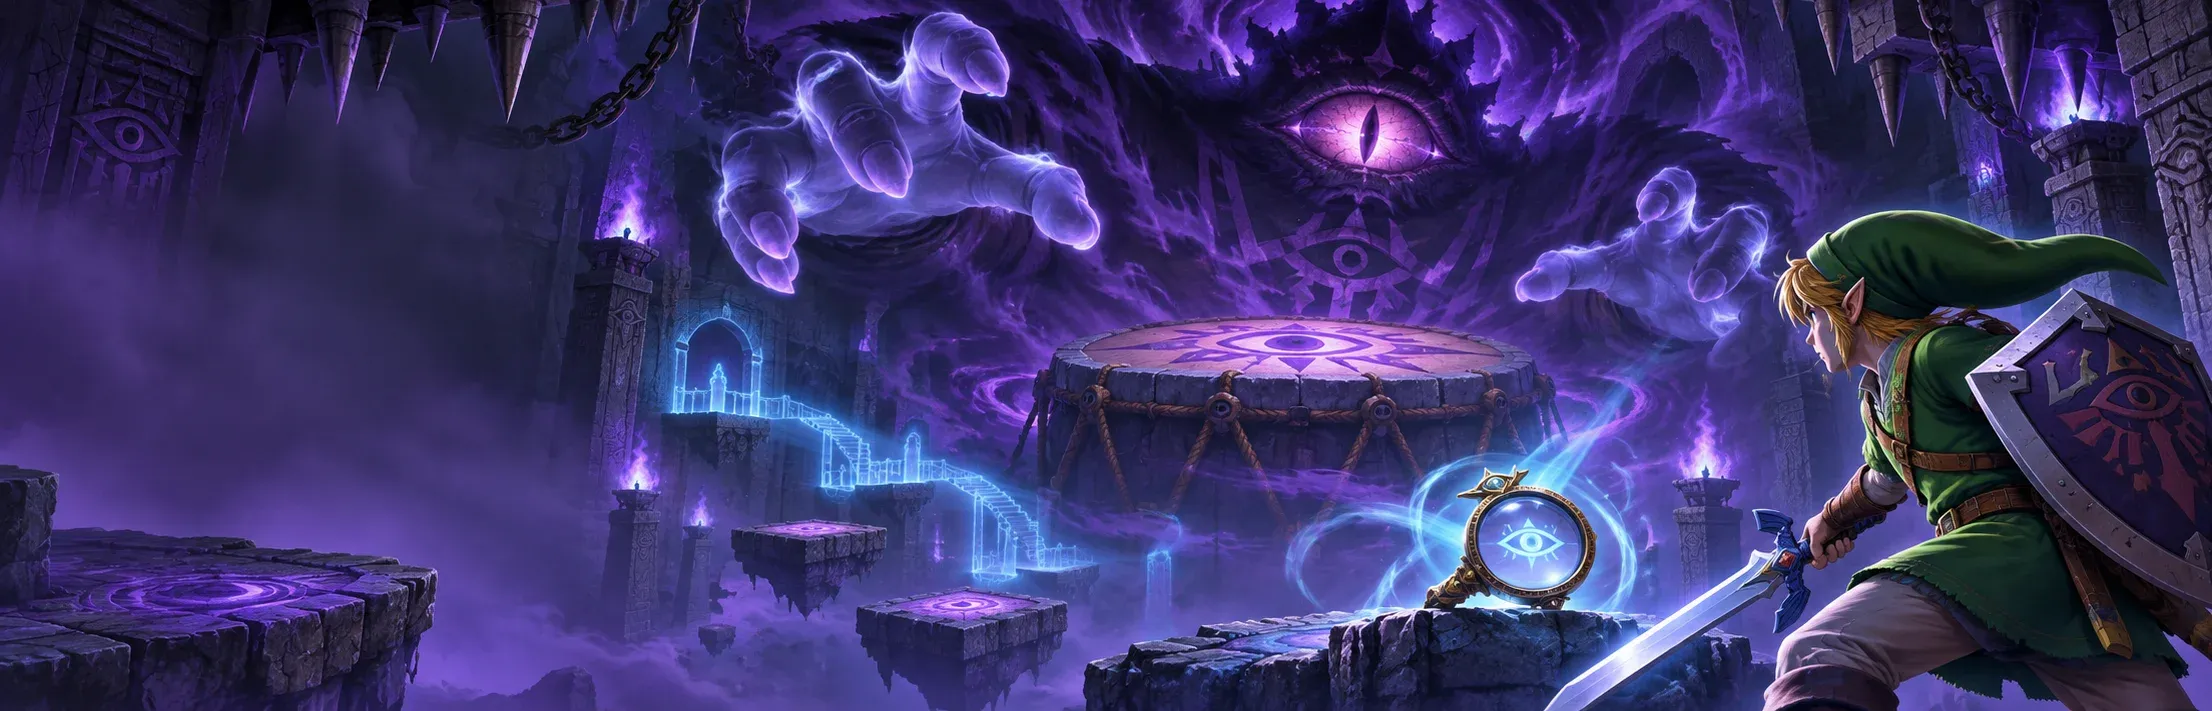
How to Unlock the Shadow Temple in Ocarina of Time
Before entering the Shadow Temple, you must complete several important story objectives.
The main requirements are learning the Nocturne of Shadow, obtaining the Lenses of Truth, and collecting Din's Fire.
Step 1: Complete the Water Temple
The recommended route begins after defeating Morpha inside the Water Temple.
Once you've obtained the Water Medallion, return to Kakariko Village as Adult Link.
An important story event occurs when you approach the village.
You'll discover that a dangerous evil spirit has escaped.
Sheik appears during the sequence and explains more about the threat.
Afterward, you'll learn the Nocturne of Shadow.
This melody transports Link to the elevated entrance area above Kakariko Graveyard.
You'll need it to reach the Shadow Temple.
Step 2: Obtain the Lens of Truth
The next required item is the Lens of Truth.
In the Switch 2 remake, this equipment is called the Lenses of Truth.
It's found inside the Bottom of the Well mini-dungeon in Kakariko Village.
You'll need to return to Young Link's time period to obtain it.
Step 3: Collect Din's Fire
You'll also need Din's Fire.
This powerful spell creates a ring of flames around Link.
The spell is obtained from the Great Fairy Fountain near the summit of Death Mountain.
In the Nintendo Switch 2 remake, the Great Fairy provides it after the required offering.
If you haven't already collected Din's Fire, return to Death Mountain and visit the fountain.
You'll use it to open the temple entrance and solve a dangerous puzzle later inside.
Step 4: Prepare Your Equipment
Before entering the dungeon, make sure you have the required items.
The Lens of Truth consumes magic while active, so a full Magic Meter is helpful.
Bring Bombs and enough arrows for combat encounters.
The Iron Boots are useful against the dungeon's powerful fans.
If you've learned Scarecrow's Song, you'll also be able to collect an optional Gold Skulltula.
Once you're prepared, you can begin your journey into the Shadow Temple.
How to Get the Lens of Truth – Bottom of the Well
The Lens of Truth is essential for navigating the Shadow Temple's hidden passages.
Without it, invisible platforms and false walls are extremely difficult to identify.
Fortunately, you can obtain it before entering the temple.
Step 1: Learn the Song of Storms
Travel to Kakariko Village as Adult Link.
Enter the windmill.
Speak with Guru-Guru, the man playing music inside.
He teaches you the Song of Storms.
This song becomes important because of its connection to the village's well.
Step 2: Return to Young Link
Travel to the Temple of Time.
Approach the Master Sword pedestal.
Place the sword back into its position to return to Young Link's era.
Now travel back to Kakariko Village.
Enter the windmill again.
Step 3: Drain the Village Well
Stand near Guru-Guru and play the Song of Storms.
The windmill begins spinning faster.
The water level inside the nearby well drops.
This reveals an underground entrance.
Leave the windmill and approach the well.
Climb down to enter the Bottom of the Well.
Step 4: Find the Hidden Passage
Inside the mini-dungeon, you'll encounter a Skulltula near the entrance.
Defeat it.
Continue toward the wall ahead.
Although the wall appears solid, it's actually an illusion.
Walk through it.
You'll enter the main underground area.
The Bottom of the Well contains several false walls, hidden pits, and dangerous enemies.
Your immediate objective is draining the water inside the mini-dungeon.
Step 5: Play Zelda's Lullaby
Follow the passage toward the northern section.
Look for a fountain-like structure with a Royal Family symbol nearby.
Stand on the marked area.
Play Zelda's Lullaby.
The mechanism activates, draining the water from several channels and pools.
This reveals a new passage leading toward Dead Hand.
Step 6: Reach the Dead Hand Chamber
Return to the drained water passage.
Look for the opening that was previously submerged.
Crawl through it.
Follow the corridor toward the room containing a small treasure chest.
As you approach, the floor gives way.
Link falls into a chamber containing several strange hands emerging from the ground.
The Dead Hand encounter begins.
Step 7: Defeat Dead Hand
Dead Hand is a disturbing creature that uses arms protruding from the floor to grab Link.
The main body only becomes vulnerable during certain moments.
You can destroy a nearby hand or allow one to grab Link to trigger the creature's appearance.
When Dead Hand approaches, watch for its head to lower.
Attack with the Kokiri Sword while it's vulnerable.
Move away before the creature recovers.
Repeat until Dead Hand is defeated.
Din's Fire can also help destroy multiple hands if you've already obtained the spell.
Step 8: Collect the Lenses of Truth
After defeating Dead Hand, a treasure chest appears.
Open it.
You'll obtain the Lenses of Truth.
Equip them to reveal false walls, invisible objects, hidden chests, and concealed hazards.
They consume magic while active, so turn them off when you no longer need them.
You now have the most important item for exploring the Shadow Temple.
How to Reach the Shadow Temple Entrance
After obtaining the Lenses of Truth, return to the Temple of Time.
Become Adult Link again by drawing the Master Sword.
Now play the Nocturne of Shadow.
Link is transported to the elevated area above Kakariko Graveyard.
Follow the stairs downward.
You'll reach a circular platform surrounded by what appears to be empty space.
However, there's a hidden puzzle here.
Reveal the Invisible Torches
Activate the Lenses of Truth.
Several torches become visible around the circular platform.
They're positioned in a ring.
You must light them to open the temple entrance.
Use Din's Fire
Stand near the center of the platform.
Equip Din's Fire.
Activate the spell.
A large wave of flames expands outward, lighting the torches simultaneously.
The sealed entrance opens.
Continue through the doorway.
You'll encounter a gap shortly after entering.
Use the Hookshot to cross toward the opposite ledge.
Continue forward.
The Shadow Temple has officially begun.
Shadow Temple Walkthrough – Invisible Walls and Dungeon Map
Your first objective is collecting the Dungeon Map and finding the Hover Boots.
You'll encounter several false walls almost immediately.
The Lenses of Truth are essential here.
Find the Bird Statue Chamber
After crossing the first gap, continue until you reach a large chamber containing a bird statue.
Several skull-like pillars surround it.
This room contains an important puzzle.
However, you'll need the Hover Boots before completing the entire sequence.
For now, explore the hidden passages nearby.
Reveal the First Fake Wall
Equip the Lenses of Truth.
Look along the left-hand wall near the corner of the room.
One section is an illusion.
Walk through the fake wall.
You'll enter a maze-like passage containing additional invisible walls.
Follow the Hidden Passage
Continue through the maze.
Use the Lenses of Truth to identify which walls are real.
Follow the available western and northern routes.
You'll eventually reach a room where the doors lock behind you.
Several enemies appear.
Defeat them to unlock the treasure chest.
Collect the Dungeon Map
After clearing the room, open the chest.
You'll receive the Dungeon Map.
The map shows the Shadow Temple's underground floors and connected passages.
It's especially useful because the dungeon contains numerous hidden rooms.
Now return to the invisible-wall maze.
Your next objective is finding Dead Hand.
How to Get the Hover Boots in the Shadow Temple
The Hover Boots are the main dungeon item.
They allow Adult Link to move briefly through the air after stepping off a ledge.
You'll need them to cross the temple's large gaps and reach otherwise inaccessible platforms.
Hover Boots location: First basement level, inside the Dead Hand mini-boss room beyond the invisible-wall maze.
Step 1: Explore the Western Hidden Passage
After collecting the Dungeon Map, return to the maze.
Continue toward the western side.
Use the Lenses of Truth to locate another hidden doorway.
Follow the passage until you reach a corridor with an unstable floor.
Part of the floor collapses as Link crosses.
Continue toward the next room.
Step 2: Enter the Dead Hand Chamber
The next chamber contains another Dead Hand encounter.
This version behaves similarly to the enemy encountered inside the Bottom of the Well.
You'll need to force it to reveal its main body.
Watch the floor for suspicious movement.
Use the Lenses of Truth to help identify hidden activity.
Step 3: Defeat Dead Hand
Destroy one of the hands or trigger the enemy's appearance.
Once Dead Hand emerges, wait for its head to lower.
Attack with the Master Sword.
Move away when it prepares to retreat.
Repeat the process until it's defeated.
You can also use Din's Fire against the hands if you want to create an opening quickly.
Step 4: Open the Hover Boots Chest
After defeating Dead Hand, a treasure chest appears.
Open it.
You'll obtain the Hover Boots.
These boots are essential for completing the rest of the Shadow Temple.
How Do the Hover Boots Work?
The Hover Boots allow Link to continue moving briefly after leaving a platform.
They don't provide unlimited flight.
Instead, they give you a short window to cross a gap before gravity pulls Link downward.
They're useful for reaching distant ledges and navigating invisible platform puzzles.
However, the Hover Boots also reduce traction.
Link slides more easily while wearing them.
Important: Switch back to regular boots when you aren't crossing gaps. The reduced traction can make combat and narrow-platform movement more difficult.
Bird Statue Puzzle – How to Find the Real Skull of Truth
After obtaining the Hover Boots, return to the bird statue chamber near the entrance.
You'll now be able to solve the puzzle completely.
The room contains a large bird statue surrounded by skull-like pillars.
One of the pillars is different from the others.
Your objective is identifying the correct one.
Step 1: Activate the Lenses of Truth
Stand near the center of the chamber.
Equip the Lenses of Truth.
Look carefully at the skull pillars surrounding the bird statue.
Most of them are illusions.
Only one represents the correct target.
Step 2: Identify the Real Skull
Rotate the camera and examine the pillars.
The Lenses of Truth reveal which skull is genuine.
Remember its position.
This is the direction the bird statue must face.
Step 3: Rotate the Bird Statue
Approach the large bird statue.
Find the handle used to rotate it.
Push the handle until the statue points toward the correct skull.
When the statue is properly aligned, the mechanism activates.
A door opens on the opposite side of the chamber.
Step 4: Cross the Large Gap
The opened door is separated from Link by a large chasm.
Equip the Hover Boots.
Stand near the edge.
Move toward the opposite platform.
The Hover Boots allow Link to float briefly across the gap.
Reach the far ledge and enter the doorway.
Puzzle solution: Use the Lenses of Truth to find the real skull, rotate the bird statue toward it, and cross the gap with the Hover Boots.
You've now opened the main route into the lower Shadow Temple.
Shadow Temple Second Basement – Compass and First Small Key
After leaving the bird statue chamber, follow the descending passage into the second basement.
You'll reach a room containing a Beamos and three blocked passages.
Two are hidden behind false walls.
The third requires explosives.
Defeat the Beamos
The Beamos is a mechanical enemy that attacks using a rotating eye.
Use a Bomb to destroy it.
Avoid standing directly in its line of sight.
Once the enemy is defeated, you can examine the surrounding walls safely.
Find the Compass Room
Activate the Lenses of Truth.
Look toward the southern passage.
A hidden opening becomes visible.
Enter it.
Inside, you'll encounter two Gibdos.
These mummy-like enemies can freeze Link in place with their gaze.
Use the Sun's Song if you've learned it to stun them temporarily.
Alternatively, approach carefully and attack with the Master Sword.
After defeating both Gibdos, a treasure chest appears.
Open it to obtain the Compass.
The Compass helps identify treasure chests and the boss chamber.
Find the Spinning Blade Room
Return to the Beamos room.
Use the Lenses of Truth to identify the northern hidden passage.
Enter it.
You'll reach a chamber containing spinning blades and several Silver Rupees.
The Silver Rupees are part of a puzzle.
Collecting all of them opens a gate.
How to Solve the Silver Rupee Puzzle
There are five Silver Rupees inside the chamber.
Two are positioned near the spinning blades.
Others are located around the room's alcoves and raised platforms.
Use the Hookshot to reach the elevated collectible.
Move carefully between the blades.
Don't rush directly through the center.
After collecting all five Silver Rupees, the gate opens.
Collect Small Key Number One
Enter the newly opened section.
Find the treasure chest.
Open it to collect Small Key #1.
Key progress: 1 of 5 Small Keys collected.
Return to the Beamos room.
You can now open the eastern route and continue deeper into the temple.
Shadow Temple Guillotine Corridor – How to Survive
The next section contains several huge guillotines.
These dangerous blades repeatedly fall from the ceiling.
You'll need careful timing to move through the passage.
Open the Eastern Passage
Return to the Beamos room.
Look toward the eastern wall.
You'll notice a section that can be destroyed.
Use a Bomb to break the obstacle.
Follow the newly opened corridor.
Several Skulltulas guard the route.
Defeat them before moving deeper.
Cross the First Guillotine
You'll reach the first falling blade.
Stop before entering its path.
Watch its timing.
Wait until the guillotine rises.
Move forward quickly and cross beneath it.
Don't stop directly under the blade.
Continue Through the Trap Corridor
Several more guillotines appear along the route.
Some are positioned beside gaps or narrow walkways.
Move one obstacle at a time.
Use the normal boots when you need better traction.
Switch to the Hover Boots for gaps that require additional distance.
Defeat the Stalfos
At the end of the initial passage, you'll encounter a Stalfos.
Target it and raise your shield.
Wait for the enemy to attack.
Dodge or block, then counter with the Master Sword.
Avoid fighting too close to the platform's edges.
Once the Stalfos is defeated, examine the surrounding area.
Several hidden routes become accessible from here.
Invisible Blade Room – First Gold Skulltula
Before continuing along the moving platforms, explore the hidden passage near the Stalfos arena.
This room contains one of the Shadow Temple's five Gold Skulltulas.
Reveal the Invisible Platforms
Activate the Lenses of Truth.
Look toward the eastern side of the large cavern.
You'll notice platforms that cannot normally be seen.
Equip the Hover Boots.
Cross the platforms carefully.
Continue toward the doorway at the far end.
Enter the Invisible Blade Room
Inside, you'll find a spinning blade trap.
However, the blades are invisible without the Lenses of Truth.
Keep the Lenses active while navigating the room.
Several enemies also guard the area.
Defeat the Keese and Like Like before searching for treasure.
Collect Gold Skulltula Number One
After clearing the enemies, find the newly accessible passage.
A Gold Skulltula is hidden inside.
Defeat it and collect the token.
The room also contains optional Rupee chests, including an invisible chest revealed by the Lenses of Truth.
Once finished, return to the Stalfos arena.
Moving Platform Puzzle – Collect the Silver Rupees
Your next objective is crossing the large cavern and collecting another set of Silver Rupees.
You'll need the Hover Boots and careful timing.
Cross the Moving Platforms
Return to the Stalfos arena.
Look toward the western side.
Several platforms move through the air.
Jump onto the nearest platform.
Wait until it reaches a suitable position, then move to the next.
Be careful not to fall into the chasm.
Find the Beamos Platform
Continue toward the northern side of the cavern.
You'll reach an area containing a Beamos and rotating spike traps.
Destroy the Beamos with a Bomb.
This makes the Silver Rupee puzzle safer.
Collect Every Silver Rupee
Several Silver Rupees are positioned around the platform.
Some are near the rotating spikes.
Others require jumping from moving platforms at specific heights.
Use the Hover Boots to reach distant collectibles.
Watch the platform movement and avoid rushing.
Once you've collected all five Silver Rupees, a nearby gate opens.
Continue through the doorway.
The next puzzle involves enormous spikes falling from the ceiling.
Falling Spike Puzzle – The Stone Umbrella Solution
The falling spike room is one of the Shadow Temple's most memorable challenges.
Several giant spike traps repeatedly descend from the ceiling.
You must use a movable block to protect Link.
The puzzle's clue refers to a stone umbrella.
Step 1: Reveal the Hidden Stone Block
Enter the chamber and activate the Lenses of Truth.
Look toward the right-hand wall.
You'll notice a hidden movable block.
Approach it.
Pull the block away from the wall.
Step 2: Position the Block Beneath the Spikes
Move the block toward the first falling spike trap.
The block acts as a protective barrier.
Instead of crushing Link, the spikes strike the block.
Continue moving the block along the available path.
Step 3: Move Between the Spike Traps
The block must pass beneath multiple falling traps.
Don't push it recklessly.
Move it into a safe position beneath the first trap.
Then work around the block and pull it from the opposite side when necessary.
This helps prevent Link from becoming trapped beneath the spikes.
Step 4: Climb Onto the Block
Once the block reaches its final position, climb onto it.
You'll now be high enough to reach the upper ledge.
Move across the top of the spike traps when it's safe.
Step 5: Collect Small Key Number Two
Reach the elevated section containing a floor switch.
Activate the switch.
A treasure chest becomes available.
Open it to obtain Small Key #2.
Key progress: 2 of 5 Small Keys collected.
Collect Gold Skulltula Number Two
Before leaving the room, explore the upper corners.
A Gold Skulltula is hidden near one of the elevated ledges.
Defeat it and collect the token.
You should now have two Shadow Temple Gold Skulltulas.
Return to the large cavern.
Hidden Platforms and Gibdo Room – Reach the Giant Skull Puzzle
Your next objective is reaching a locked door on the northern side of the cavern.
You'll need to use invisible platforms and solve another Silver Rupee puzzle.
Find the Invisible Northern Route
Return to the area containing the moving platforms.
Activate the Lenses of Truth.
Look toward the northern side.
You'll discover a hidden route leading toward a locked door.
Equip the Hover Boots.
Cross the invisible platforms carefully.
Use Small Key #2 to open the door.
Enter the Gibdo Chamber
The next room contains Gibdos and several Silver Rupees.
Some of the collectibles are positioned above the floor.
Others are located behind invisible hazards.
Use the Lenses of Truth to reveal hidden platforms and traps.
Defeat the Gibdos
Before collecting every Silver Rupee, defeat the enemies.
Use the Sun's Song if you've learned it.
Otherwise, approach carefully and attack with the Master Sword.
Avoid standing directly in front of a Gibdo for too long.
Collect the Silver Rupees
Explore the room.
Use the Hookshot to reach raised collectibles.
Look for invisible Hookshot targets and platforms.
Some Silver Rupees require you to climb onto ledges before jumping toward them.
After collecting every Silver Rupee, a nearby door opens.
Continue toward the giant skull chamber.
Giant Skull Puzzle – How to Get the Third Small Key
The next room contains an enormous skull-shaped structure.
A clue explains that a dark orb must be placed inside a dark skull.
The solution involves Bombs.
Step 1: Climb the Side Stairs
Enter the skull chamber.
Look for staircases leading toward the upper ledges.
Climb one of them.
Position Link above the giant skull.
Step 2: Throw a Bomb Into the Skull
Equip a Bomb.
Aim toward the skull's opening.
Throw the Bomb inside.
The explosion activates the mechanism.
A Small Key becomes accessible.
Step 3: Collect Small Key Number Three
Approach the reward.
Pick up Small Key #3.
Key progress: 3 of 5 Small Keys collected.
Step 4: Return to the Gibdo Room
Before leaving, defeat the Keese if they prevent the door from opening.
Return to the previous chamber.
Use the Lenses of Truth to locate the hidden Hookshot route.
Cross toward the next locked doorway.
Use Small Key #3 to continue.
The next major area is the Hall of Fans.
Hall of Fans – Iron Boots and Hidden Wind Paths
The Hall of Fans contains powerful air currents, moving spike traps, and invisible passages.
The fans can push Link into dangerous obstacles or across gaps.
You'll need to switch between the Iron Boots and Hover Boots.
Why the Iron Boots Are Important
The Iron Boots make Link heavier.
This helps him resist strong wind currents.
Equip them before crossing passages with active fans.
Without them, the wind can push Link backward or off narrow platforms.
Cross the First Fan Corridor
Enter the hallway.
You'll encounter moving spike traps and a large Skulltula.
Use the Iron Boots to resist the wind.
Move carefully around the obstacles.
Defeat the Skulltula when you have a clear opening.
Find Gold Skulltula Number Three
Near one of the gaps in the fan corridor, look down toward the lower wall.
A Gold Skulltula is positioned inside the pit.
Use the Hookshot to defeat it.
Collect the token.
Then use the nearby Hookshot target to cross the gap safely.
Continue Through the Wind Passage
Move toward the next chamber.
Several fans blow across a central walkway.
Keep the Iron Boots equipped.
Watch their activation pattern and proceed carefully.
At the end, you'll reach a room containing ReDeads.
Defeat the ReDeads
ReDeads can freeze Link with their gaze.
Use the Sun's Song to stun them if available.
Otherwise, approach from a safe angle and defeat them with the Master Sword.
After clearing the room, search for hidden treasure using the Lenses of Truth.
The remake includes an optional Business Scrub Seed reward in this area.
Find the Hidden Wind Shortcut
Return to the previous fan corridor.
Look toward the section with a fan positioned opposite an apparently solid wall.
Activate the Lenses of Truth.
The wall is actually an illusion.
Equip the Hover Boots.
Use the wind to help carry Link across the gap.
Move through the fake wall.
You'll reach another hidden chamber.
Puzzle solution: Use Iron Boots to resist unwanted wind, then switch to Hover Boots when you need the fan to push Link across a gap.
How to Get Small Key Number Four – Hidden Fan Room
After crossing the hidden wind passage, you'll enter another chamber containing enemies and concealed treasure.
This room holds the fourth Small Key.
Clear the Room
Defeat the enemies guarding the chamber.
Watch for ReDeads or Gibdos that can immobilize Link.
Use the Lenses of Truth to examine the walls and alcoves.
Some rewards are hidden.
Search for the Key Chest
The fourth Small Key is found in this section.
Check the newly revealed chests and suspicious obstacles.
In the remake, the key route involves the chamber beyond the hidden fan passage, with a concealed reward that may require clearing enemies and inspecting a bombable obstruction.
Use the Lenses of Truth to identify the correct chest.
Collect Small Key Number Four
Open the key chest.
You'll receive Small Key #4.
Key progress: 4 of 5 Small Keys collected.
Use the nearby locked door to continue.
You'll eventually reach a lift leading toward the Shadow Temple's lowest floor.
A ghostly ship awaits.
Ghost Ship Puzzle – How to Reach the Final Basement
The Ghost Ship, sometimes called the Ferry of the Dead, is one of the most memorable parts of the Shadow Temple.
It carries Link across an enormous underground chasm.
However, you'll need to activate it and survive an enemy encounter during the journey.
Step 1: Reach the Ghost Ship Dock
After leaving the fan section, take the lift downward.
You'll arrive at a foggy underground dock.
A large ship waits nearby.
Its deck is elevated above the surrounding floor.
Look for a movable block near the left side of the chamber.
Step 2: Push the Block Into Position
Move the block toward the ledge beside the ship.
Position it so Link can climb onto the dock.
The block also creates a useful shortcut connecting this area to an earlier section of the dungeon.
Step 3: Collect the Fourth Gold Skulltula
Before activating the ship, check the elevated ledge near the dock.
This area contains another Gold Skulltula.
You'll need Scarecrow's Song and the Longshot to reach it through the intended route.
Play Scarecrow's Song to summon Pierre.
Target Pierre with the Longshot.
Pull Link toward the upper platform.
Find the Gold Skulltula and collect its token.
Optional: If you haven't learned Scarecrow's Song, you can return later for this collectible.
Step 4: Board the Ghost Ship
Climb onto the ship's deck.
Look for the Triforce symbol.
Stand near it.
Equip the Ocarina.
Play Zelda's Lullaby.
The ghost ship begins moving.
Step 5: Defeat the Stalfos
During the journey, two Stalfos appear on the deck.
Use targeting to keep them in view.
Avoid fighting near the edge of the ship.
Block their attacks, then counter with the Master Sword.
If both enemies approach together, focus on creating space before attacking.
Step 6: Jump Off Before the Ship Sinks
Eventually, the ship approaches the opposite side of the chasm.
You'll notice the end of the route.
Jump toward the nearby platform.
Don't remain on the ship after it reaches its destination.
The ferry eventually sinks.
Important: The Ghost Ship is a one-way progression sequence. Jump to the destination platform before the ship disappears beneath the darkness.
How to Create the Bridge After the Ghost Ship
After leaving the ferry, you'll reach an area separated by a huge gap.
The route toward the boss is blocked.
Fortunately, a large stone tower can be used to create a bridge.
Find the Cracked Tower
Look across the chasm.
You'll notice a tall stone pillar or tower with a cracked base.
The structure is positioned so it can fall across the gap.
Destroy the Base
Equip a Bomb.
Aim toward the cracked section near the bottom of the tower.
Throw the Bomb.
The explosion causes the tower to collapse.
The fallen structure creates a bridge across the chasm.
Don't Cross Immediately
Although the bridge now leads toward the boss route, you still need the Boss Key.
Explore the nearby doorway first.
A spiderweb blocks the entrance.
Use Din's Fire or Fire Arrows to burn it.
Enter the newly opened passage.
You'll reach the Shadow Temple's final maze.
Invisible Wall Maze – Find the Last Small Key
The final maze contains several hidden walls and dangerous Floormasters.
The Lenses of Truth reveal which walls are solid and which can be crossed.
You must collect the fifth Small Key before accessing the Boss Key chamber.
Enter the Invisible Wall Maze
After burning the spiderweb, enter the room.
Activate the Lenses of Truth.
Look around the chamber.
You'll notice that several visible walls are actually illusions.
Others are completely hidden.
Use the Lenses of Truth to navigate between the connected rooms.
Find the Southern Floormaster Room
Explore the southern side of the maze.
Enter the chamber containing a Floormaster.
The enemy may be invisible until you activate the Lenses of Truth.
Keep the equipment active while searching.
How to Defeat the Floormaster
The Floormaster is a large hand-shaped enemy.
It moves toward Link and attacks when close.
Target it and use the Master Sword to deal damage.
After taking enough damage, it splits into smaller hands.
Defeat the smaller hands quickly.
Don't allow them to regroup or surround Link.
Once every hand is defeated, a treasure chest appears.
Collect Small Key Number Five
Open the chest.
You'll receive Small Key #5.
Key progress: 5 of 5 Small Keys collected.
You now have every Small Key in the Shadow Temple.
However, the Boss Key is still waiting in the northern room.
Fifth Gold Skulltula – Giant Skull Room
Before collecting the Boss Key, visit the western room connected to the invisible-wall maze.
This chamber contains several large skull-shaped structures.
You can throw Bombs into them to reveal hidden rewards.
Enter the Western Skull Room
Return to the central section of the maze.
Use the Lenses of Truth to locate the western passage.
Enter the room.
You'll find multiple giant skulls positioned below an elevated walkway.
Throw Bombs Into the Skulls
Climb toward the upper ledge.
Equip Bombs.
Drop them into the skull openings.
The explosions reveal rewards, including Rupees and other useful items.
Continue checking the skulls until you've revealed the hidden collectible.
Collect Gold Skulltula Number Five
One of the skulls hides a Gold Skulltula.
Defeat it and collect its token.
You now have all five Shadow Temple Gold Skulltulas, provided you also collected the Scarecrow-related token near the Ghost Ship.
Completion progress: 5 of 5 Gold Skulltulas collected.
Return to the invisible-wall maze.
It's time to obtain the Boss Key.
Shadow Temple Boss Key – Closing Spike Wall Puzzle
The Boss Key is located in the northern section of the final maze.
The room contains a dangerous trap involving two walls covered with spikes.
When you enter, the walls begin moving toward Link.
You'll need to react quickly.
Step 1: Enter the Northern Room
Return to the central maze.
Use Small Key #5 to open the required passage.
Enter the northern chamber.
Two large wooden spike walls begin closing in from opposite directions.
Don't attempt to escape by running through them.
You need to destroy the walls.
Step 2: Use Din's Fire
Stand between the approaching walls.
Equip Din's Fire.
Activate the spell.
The expanding flames burn the wooden barriers, preventing them from crushing Link.
You can also use Fire Arrows if you've collected them.
However, Din's Fire is especially convenient because it covers a wide area.
Puzzle solution: Use Din's Fire to burn both closing spike walls.
Step 3: Defeat the Gibdos
After destroying the walls, several Gibdos remain inside the room.
Defeat them with the Master Sword.
Use the Sun's Song if you need a safer opening.
Once the enemies are defeated, the Boss Key chest becomes available.
Step 4: Collect the Boss Key
Approach the large ornate chest.
Open it.
You'll obtain the Boss Key.
This key opens the entrance to Bongo Bongo's chamber.
The room also contains an additional chest with magic recovery supplies.
Collect them if your Magic Meter is low.
You'll need the Lenses of Truth during the final boss fight.
Boss Key acquired!
All Five Shadow Temple Small Key Locations
If you're missing a Small Key, check these locations before proceeding.
Small Key #1 – Spinning Blade Room
Location: Second basement, northern room near the Beamos.
Collect the five Silver Rupees while avoiding the spinning blades.
The gate opens, revealing the Small Key chest.
Small Key #2 – Falling Spike Room
Location: Third basement, beyond the moving platform and Silver Rupee section.
Use the Lenses of Truth to reveal the movable block.
Push it beneath the falling spike traps.
Climb onto the block, activate the floor switch, and open the chest.
Small Key #3 – Giant Skull Puzzle
Location: Third basement, skull chamber beyond the Gibdo and Silver Rupee room.
Climb the side stairs.
Throw a Bomb into the large black skull.
Collect the revealed Small Key.
Small Key #4 – Hall of Fans Hidden Room
Location: Third basement, beyond the invisible passage reached using wind and Hover Boots.
Cross the fan corridor.
Enter the hidden room.
Defeat the enemies and inspect the concealed treasure to collect the key.
Small Key #5 – Floormaster Maze
Location: Fourth basement, southern room of the invisible-wall maze.
Defeat the invisible Floormaster and its smaller hands.
Open the chest to collect the final Small Key.
Important: Small Keys are consumed when you unlock doors. Having none remaining in your inventory doesn't mean you've missed all five.
All Five Shadow Temple Gold Skulltula Locations
The Shadow Temple contains five Gold Skulltulas in the Nintendo Switch 2 remake.
Here's a quick checklist for collecting them.
Gold Skulltula #1 – Invisible Spinning Blade Room
Location: Third basement, hidden room east of the Stalfos platform.
Use the Lenses of Truth to reveal the invisible platforms.
Cross with the Hover Boots.
Defeat the enemies guarding the hidden chamber.
Collect the Gold Skulltula token.
Gold Skulltula #2 – Falling Spike Trap Room
Location: Third basement, upper ledge in the stone umbrella puzzle.
Move the hidden block beneath the falling spikes.
Climb onto it.
Reach the upper corner containing the Gold Skulltula.
Defeat it and collect the token.
Gold Skulltula #3 – Hall of Fans Pit
Location: Third basement, pit in the fan corridor.
Use the Iron Boots to resist the wind.
Look down into the pit.
Defeat the Gold Skulltula with the Hookshot.
Collect the token before crossing the gap.
Gold Skulltula #4 – Ghost Ship Dock
Location: Fourth basement, elevated platform near the ferry.
Play Scarecrow's Song to summon Pierre.
Use the Longshot to reach the hidden ledge.
Defeat the Gold Skulltula and collect its token.
Gold Skulltula #5 – Giant Skull Room
Location: Fourth basement, western side room of the final maze.
Climb to the upper walkway.
Throw Bombs into the giant skulls.
Reveal the hidden Gold Skulltula and collect the token.
Completion tip: The Ghost Ship collectible is the easiest one to miss if you haven't prepared Scarecrow's Song.
You can return for it later.
How to Reach Bongo Bongo's Boss Chamber
After collecting the Boss Key, return through the invisible-wall maze.
Travel back toward the area where the Ghost Ship dropped you off.
The fallen stone tower now forms a bridge across the gap.
Cross the Fallen Tower
Approach the bridge.
Move carefully across it.
Avoid rushing near the edges.
Continue toward the doorway leading to the final puzzle.
Reveal the Invisible Platforms
Enter the chamber.
Activate the Lenses of Truth.
Several invisible platforms appear over the chasm.
Without the Lenses, the room seems almost impossible to cross.
Equip the Hover Boots
Switch to the Hover Boots.
Stand near the edge of the first platform.
Move toward the next visible ledge.
Continue across the platforms.
Remember that the Hover Boots only provide a short period of movement through the air.
Wait until you're properly positioned before crossing each gap.
Unlock the Boss Door
After reaching the far ledge, approach the large door.
Use the Boss Key.
The entrance opens.
Continue into the chamber.
You'll notice a large hole in the floor.
Drop through it.
The final boss encounter begins.
Bongo Bongo Boss Fight – How to Defeat the Shadow Temple Boss
Boss: Phantom Shadow Beast – Bongo Bongo
Location: Shadow Temple, deepest chamber
Required equipment: Lenses of Truth
Recommended weapons: Fairy Bow and Master Sword
Useful equipment: Hover Boots, Magic Potions, and additional Hearts
Boss reward: Heart Container
Story reward: Shadow Medallion
Bongo Bongo is one of the most unusual bosses in Ocarina of Time.
The creature resembles a giant shadowy figure with an invisible central body and enormous hands.
The battle takes place on a massive drum suspended above a dangerous void.
Bongo Bongo strikes the drum with its hands, causing Link to bounce around.
Your objective is to stun the hands and attack its hidden eye.
The Nintendo Switch 2 remake introduces additional timing and defensive behavior, making the encounter more challenging than simply repeating the original strategy.
Bongo Bongo Phase One – Survive the Drum Attacks
When the battle begins, Bongo Bongo's enormous hands strike the arena.
The drum vibrates, making it difficult to maintain a stable position.
Step 1: Activate the Lenses of Truth
Equip the Lenses of Truth.
They reveal the boss's central body and hidden eye.
You'll need them throughout the encounter.
However, the equipment consumes magic while active.
If your Magic Meter is low, avoid keeping them on during periods when the boss isn't vulnerable.
Step 2: Watch the Hands
Bongo Bongo attacks using two giant hands.
The hands strike the drum, sweep across the arena, and attempt to hit Link.
Keep moving.
Avoid standing directly beneath a hand as it prepares to strike.
During the remake encounter, the hands can be protected by a purple aura.
Wait for the protective effect to disappear before attempting your main attack.
Step 3: Stun the First Hand
Equip the Fairy Bow.
Target a vulnerable hand.
Fire an arrow when the protective aura is gone.
A successful hit stuns the hand.
You can now prepare to attack the second hand.
Step 4: Stun the Second Hand
Move toward the opposite side of the arena.
Target the other hand.
Shoot it with the Fairy Bow.
Once both hands are disabled, the boss's central body becomes easier to attack.
This creates your main damage opportunity.
Boss tip: Don't waste arrows attacking hands that are still protected. Wait until the purple aura disappears.
Bongo Bongo Phase Two – Reveal and Shoot the Hidden Eye
After stunning the hands, Bongo Bongo's central body moves toward Link.
This is your opportunity to expose its main weakness.
Step 1: Keep the Boss in View
Activate the Lenses of Truth if you turned them off.
Look toward the center of the arena.
You'll see Bongo Bongo's invisible body and its vulnerable red eye.
Step 2: Target the Red Eye
Equip the Fairy Bow.
Aim toward the exposed eye.
The boss may charge toward Link, so you need to react quickly.
Fire an arrow into the eye.
A successful hit stuns Bongo Bongo.
Step 3: Attack With the Master Sword
Once the boss is stunned, approach quickly.
Attack the exposed eye with the Master Sword.
Deal as much damage as possible before Bongo Bongo recovers.
A strong sword attack can help maximize damage during the opening.
Step 4: Retreat and Prepare Again
After recovering, Bongo Bongo returns to attacking with its hands.
Move away from the center if necessary.
Avoid the incoming strikes.
Repeat the stun-and-attack process.
How to Survive Bongo Bongo's Strongest Attacks
Bongo Bongo becomes more aggressive as the battle continues.
Understanding its attack patterns is essential for staying alive.
Avoid the Hand Slams
Watch the position of both hands.
When one rises above Link, move sideways.
Don't remain directly beneath it.
The drum's bouncing movement can make dodging difficult, so avoid standing too close to the arena's edge.
Avoid the Charging Body
After the hands are stunned, Bongo Bongo may charge toward Link.
Activate the Lenses of Truth to identify its position.
Shoot the red eye before it reaches you.
If you can't line up the attack in time, focus on avoiding the charge.
Manage Your Magic
The Lenses of Truth consume magic.
You don't need to keep them active when simply avoiding the hands.
Turn them on when you need to reveal the central eye.
Bring a Magic Potion if you're worried about running out.
Use the Fairy Bow Carefully
Arrows are important for stunning the hands and eye.
Don't waste them by repeatedly firing at protected targets.
Wait for the vulnerable moments.
This is particularly important in the remake because Bongo Bongo's defenses change throughout the encounter.
Repeat Until Bongo Bongo Is Defeated
Continue following the main strategy:
Avoid the hand attacks.
Wait for their protection to disappear.
Stun the hands with the Fairy Bow.
Activate the Lenses of Truth.
Shoot Bongo Bongo's exposed red eye.
Attack with the Master Sword.
Retreat and repeat.
After enough successful damage phases, Bongo Bongo is defeated.
Congratulations! You've defeated Bongo Bongo and completed the Shadow Temple.
What Rewards Do You Get for Defeating Bongo Bongo?
After defeating Bongo Bongo, you'll receive two important rewards.
Collect the Heart Container
A Heart Container appears inside the arena.
Pick it up before leaving.
It permanently increases Link's maximum health.
This additional health helps during the remaining temples and final battles.
Receive the Shadow Medallion
Enter the blue warp portal.
Link is transported to the Chamber of Sages.
Impa is revealed as the Sage of Shadow.
She rewards Link with the Shadow Medallion.
The evil spirit threatening Kakariko Village has been defeated.
Complete the Shadow Temple Storyline
After the cutscene, you'll return to Hyrule.
The Shadow Temple is complete, and another major Sage has awakened.
Main story progress: Shadow Temple completed and Shadow Medallion obtained.
Common Shadow Temple Problems and Solutions
The Shadow Temple contains many misleading rooms and concealed passages.
If you're stuck, check the following solutions.
Why Can't I Reach the Shadow Temple?
You need the Nocturne of Shadow.
Complete the required story progression, then return to Kakariko Village after the Water Temple.
Sheik teaches you the song during the related story event.
Why Is the Shadow Temple Entrance Closed?
The entrance requires Din's Fire.
Activate the Lenses of Truth to reveal the invisible torches.
Stand near the center and cast Din's Fire to light them.
Where Do I Get the Lens of Truth?
The Lenses of Truth are obtained from Dead Hand inside the Bottom of the Well.
You must enter the mini-dungeon as Young Link after draining the village well with the Song of Storms.
Why Can't I See the Hidden Platforms?
Activate the Lenses of Truth.
They reveal invisible floors, concealed Hookshot targets, and fake walls.
Where Are the Hover Boots?
The Hover Boots are obtained after defeating Dead Hand in the Shadow Temple's first basement.
Follow the western hidden passage from the invisible-wall maze.
Why Do the Hover Boots Make Link Slide?
The Hover Boots reduce traction.
They're designed for crossing gaps rather than precise normal movement.
Switch back to regular boots whenever you don't need the hovering effect.
How Do I Solve the Bird Statue Puzzle?
Use the Lenses of Truth to identify the genuine skull pillar.
Rotate the bird statue toward it.
Then cross the gap using the Hover Boots.
How Do I Solve the Falling Spike Puzzle?
Reveal the hidden stone block with the Lenses of Truth.
Push it beneath the falling spikes.
Use it as a protective barrier while moving through the room.
How Do I Get Past the Strong Fans?
Equip the Iron Boots to resist their wind.
When a fan needs to push you across a gap, use the Hover Boots instead.
How Do I Activate the Ghost Ship?
Board the ferry.
Stand near the Triforce symbol.
Play Zelda's Lullaby.
The ship begins moving.
Why Does the Ghost Ship Disappear?
The ship sinks when it reaches the end of its route.
Jump onto the destination platform before it disappears.
How Do I Create the Bridge?
Use a Bomb to destroy the cracked stone tower near the ferry's destination.
The tower falls across the gap, creating a bridge.
Where Is the Shadow Temple Boss Key?
The Boss Key is located in the northern room of the final invisible-wall maze.
Burn the closing wooden spike walls using Din's Fire or Fire Arrows.
Defeat the Gibdos to reveal the Boss Key chest.
Why Can't I Damage Bongo Bongo?
You must attack during its vulnerable moments.
Stun the hands when their protective aura disappears.
Then activate the Lenses of Truth and shoot its exposed red eye.
Attack the stunned boss with the Master Sword.
What to Do After Completing the Shadow Temple
After collecting the Shadow Medallion, your next recommended destination is Gerudo Valley.
This begins the route toward the Spirit Temple.
However, you may also want to finish collecting optional equipment and missed collectibles before continuing.
Travel to Gerudo Valley
Leave Kakariko Village and return to Hyrule Field.
Travel west toward Gerudo Valley.
You'll eventually reach the entrance leading toward Gerudo Fortress.
The route contains several obstacles and requires careful exploration.
Rescue the Carpenters
Inside Gerudo Fortress, several carpenters have been imprisoned.
You'll need to rescue all four.
Defeat the Gerudo guards protecting the prison cells.
After freeing the carpenters, you'll receive the Gerudo Membership Card.
This allows you to move more freely through the fortress.
Prepare for the Desert
Your next objective involves crossing the desert toward the Spirit Temple.
You'll need the Longshot and Lenses of Truth to solve several traversal challenges.
The Hover Boots can also help with certain difficult gaps.
Eventually, you'll reach the Desert Colossus and learn the Requiem of Spirit.
Complete Any Missing Shadow Temple Collectibles
Before leaving the region entirely, check whether you've collected all five Shadow Temple Gold Skulltulas.
The Ghost Ship ledge is especially easy to miss.
If you didn't have Scarecrow's Song, remember to return after unlocking it.
Continue the Main Story
For the full story route, read our Ocarina of Time Switch 2 Complete Walkthrough.
You can also follow the Ocarina of Time Dungeon Order Guide to prepare for the remaining temples and final challenges.
Shadow Temple FAQ
Is the Shadow Temple the Fourth Adult Link Temple?
Yes. The Shadow Temple is the recommended fourth major Adult Link temple, following the Forest, Fire, and Water Temples.
The Spirit Temple is the recommended next main dungeon.
Where Is the Shadow Temple Located?
The Shadow Temple is located beneath Kakariko Graveyard.
Its entrance is accessible through an elevated area reached using the Nocturne of Shadow.
How Do You Unlock the Shadow Temple?
Learn the Nocturne of Shadow, obtain the Lenses of Truth from the Bottom of the Well, and collect Din's Fire.
Use Din's Fire to light the invisible torches near the entrance.
What Is the Main Item in the Shadow Temple?
The Hover Boots are the main dungeon item.
They allow Link to move briefly through the air when crossing gaps.
Is the Lens of Truth Required?
The Lenses of Truth are the intended equipment for revealing the dungeon's invisible walls, hidden platforms, and concealed hazards.
They're especially important for the Bongo Bongo encounter.
How Many Small Keys Are in the Shadow Temple?
There are five Small Keys in the Nintendo Switch 2 remake.
They're obtained through Silver Rupee puzzles, hidden treasure rooms, the giant skull puzzle, and a Floormaster encounter.
Where Is the Dungeon Map?
The Dungeon Map is located near the beginning of the temple.
Use the Lenses of Truth to navigate the invisible-wall maze and defeat the enemies guarding its chest.
Where Is the Compass?
The Compass is found in the southern hidden room on the second basement level.
Defeat the two Gibdos to obtain it.
How Many Gold Skulltulas Are in the Shadow Temple?
There are five Gold Skulltulas.
They're hidden in the invisible blade room, falling spike room, Hall of Fans, Ghost Ship dock, and giant skull chamber.
Do You Need Scarecrow's Song?
Not for completing the main dungeon.
However, Scarecrow's Song is required for collecting the Gold Skulltula on the elevated ledge near the Ghost Ship.
What Are the Iron Boots Used For?
The Iron Boots help Link resist the powerful air currents produced by the fans.
They're useful in the Hall of Fans section.
What Is the Ghost Ship Puzzle Solution?
Board the ferry and play Zelda's Lullaby near the Triforce symbol.
Defeat the Stalfos during the journey.
Jump onto the destination platform before the ship sinks.
Where Is the Boss Key?
The Boss Key is located in the final invisible-wall maze.
Use Din's Fire or Fire Arrows to destroy the closing spike walls in the northern room.
How Do You Defeat Bongo Bongo?
Stun its hands with the Fairy Bow when they're vulnerable.
Activate the Lenses of Truth to reveal its central eye.
Shoot the eye to stun Bongo Bongo, then attack with the Master Sword.
Do the Lenses of Truth Use Magic?
Yes.
The Lenses of Truth consume magic while active.
Turn them off when you don't need to reveal hidden objects.
What Do You Get for Defeating Bongo Bongo?
You receive a Heart Container after the boss battle.
Impa also rewards Link with the Shadow Medallion in the Chamber of Sages.
Can You Return to the Shadow Temple Later?
Yes.
You can revisit the Shadow Temple to collect missed treasure and Gold Skulltulas.
The Nocturne of Shadow provides convenient access to the entrance area.
What Dungeon Comes After the Shadow Temple?
The recommended next dungeon is the Spirit Temple in the Desert Colossus.
You'll need to travel through Gerudo Valley, Gerudo Fortress, and the desert to reach it.
Is the Shadow Temple Different in the Switch 2 Remake?
The Nintendo Switch 2 remake preserves the Shadow Temple's main objectives, including the Hover Boots, hidden paths, Ghost Ship, and Bongo Bongo.