Forest Temple Dungeon Overview
The Forest Temple is located at the end of the Sacred Forest Meadow, beyond the Lost Woods.
You'll enter as Adult Link after obtaining the Master Sword and Hookshot.
The dungeon is built around a large central chamber containing four extinguished torches.
Four Poe Sisters have stolen their flames.
Defeating the sisters restores the torches and activates the elevator leading toward Phantom Ganon.
Dungeon information:
Location: Sacred Forest Meadow
Playable character: Adult Link
Required equipment: Hookshot and Master Sword
Required song: Song of Time for an internal puzzle
Useful song: Minuet of Forest
Main dungeon item: Fairy Bow
Other important items: Dungeon Map, Compass, and Boss Key
Small Keys: Five
Gold Skulltulas: Five
Poe Sisters: Joelle, Beth, Amy, and Meg
Final boss: Evil Spirit from Beyond – Phantom Ganon
Boss reward: Heart Container
Story reward: Forest Medallion
The Forest Temple contains several interconnected floors.
Some rooms change orientation when you activate eye switches, while others require you to revisit earlier locations after obtaining the Fairy Bow.
Important: Unlike the Great Deku Tree, Dodongo's Cavern, and Jabu-Jabu's Belly, the Forest Temple requires both Small Keys and a Boss Key.
Collecting them in the correct order makes the dungeon much easier to navigate.
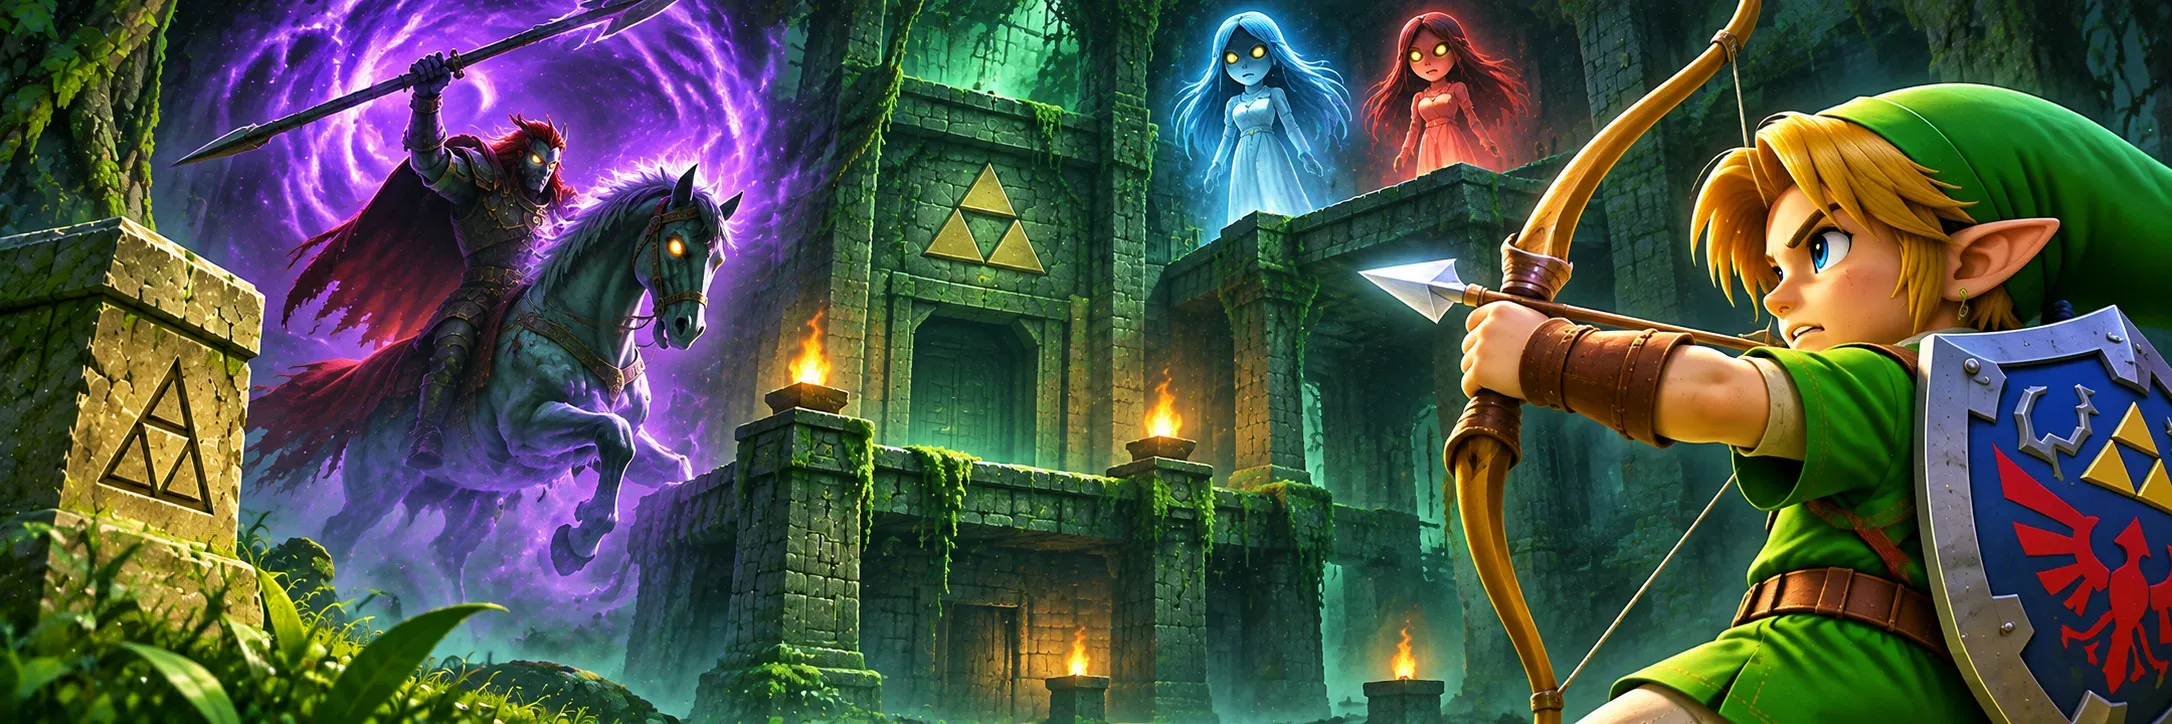
How to Unlock the Forest Temple in Ocarina of Time
Before entering the Forest Temple, you must complete the Young Link Spiritual Stone quests, obtain the Master Sword, and find the Hookshot.
The temple entrance is positioned too high for Link to reach normally.
Step 1: Become Adult Link
Complete the three main Child Link dungeons:
Great Deku Tree – Kokiri's Emerald.
Dodongo's Cavern – Goron's Ruby.
Lord Jabu-Jabu's Belly – Zora's Sapphire.
After collecting all three Spiritual Stones, return to Hyrule Castle.
Retrieve the Ocarina of Time after the story cutscene and learn the Song of Time.
Travel to the Temple of Time.
Play the Song of Time to open the Door of Time.
Approach the Master Sword and draw it.
Link awakens seven years later, beginning his adventure as Adult Link.
Step 2: Travel to Kakariko Graveyard
After becoming Adult Link, travel to Kakariko Village.
Enter the Graveyard.
Look for Dampé's grave, marked by a distinctive tombstone.
Move the tombstone and enter the underground passage.
You'll encounter Dampé's ghost.
He challenges Link to follow him through a series of corridors.
Step 3: Obtain the Hookshot
Follow Dampé through the underground maze.
Keep moving so you don't lose sight of him.
At the end of the challenge, Dampé rewards Link with the Hookshot.
This item allows you to grab certain distant targets and pull yourself toward them.
It's required for entering the Forest Temple.
You can also use it to defeat smaller enemies and collect distant objects.
Step 4: Return to the Sacred Forest Meadow
Leave Kakariko Village and travel toward Kokiri Forest.
Enter the Lost Woods.
Follow the familiar route toward the Sacred Forest Meadow.
The forest has changed since Link's childhood.
You'll encounter stronger enemies, including Moblins, along the path.
Use cover and careful movement to avoid their attacks.
Continue toward the temple entrance.
Step 5: Learn the Minuet of Forest
Near the end of the Sacred Forest Meadow, Sheik appears.
He teaches Link the Minuet of Forest.
This song allows you to return to the Sacred Forest Meadow quickly.
It becomes particularly useful if you leave the dungeon to collect supplies or complete optional activities.
Step 6: Enter the Forest Temple
Approach the elevated temple entrance.
Look above the doorway.
You'll notice a target suitable for the Hookshot.
Equip the Hookshot and aim toward the target.
Fire to pull Link toward the upper ledge.
Move forward and enter the Forest Temple.
Your first Adult Link temple begins here.
Forest Temple Walkthrough – Entrance and First Small Key
The entrance chamber contains trees, vines, and two Wolfos.
Before entering the main temple, you should collect your first Small Key.
This is easy to miss if you immediately run toward the main doorway.
Defeat the Two Wolfos
When you enter, two Wolfos appear.
These enemies attack with their claws and can move quickly around Link.
Use targeting to keep them in front of you.
Watch their movements and avoid attacking while they're defending themselves.
Wait until a Wolfos exposes its back or finishes an attack.
Then counter with the Master Sword.
Once both are defeated, explore the chamber.
Find Gold Skulltula Number One
Look toward the vine-covered wall on the right side of the entrance area.
A Gold Skulltula is hidden near the upper section.
Use the Hookshot to defeat it and collect its token.
You can also climb the nearby vines to reach the upper branches.
How to Get Small Key Number One
Climb the vines on the right side of the room.
Reach the tree branches above.
Follow the upper path toward the opposite ledge.
Use the Hookshot to help reach the treasure chest if necessary.
Open the chest to obtain Small Key #1.
This is the first of five Small Keys found throughout the Forest Temple.
Return to the lower floor and proceed toward the main doorway.
Use the key where required to enter the next section.
Key progress: 1 of 5 Small Keys found.
Main Forest Temple Chamber – The Four Poe Sisters
After passing through the entrance corridor, you'll reach the temple's central chamber.
Four torches surround a large elevator platform.
However, the flames are stolen by four mysterious ghosts.
These are the Poe Sisters.
Each sister escapes into a different part of the temple.
Your main objective is finding and defeating them.
What Do the Four Poe Sisters Do?
Each Poe Sister carries a colored flame.
The sisters are:
Joelle: Red Poe Sister.
Beth: Blue Poe Sister.
Amy: Green Poe Sister.
Meg: Purple Poe Sister.
Defeating each sister restores one flame to the central chamber.
Once all four flames return, the elevator activates.
However, you cannot defeat every Poe immediately.
You'll first need the Fairy Bow, which is hidden deeper inside the dungeon.
Collect Gold Skulltula Number Two
Before leaving the central chamber, examine the wall near the main staircase.
You'll find another Gold Skulltula.
Use the Hookshot to defeat it and collect the token.
Now you're ready to search for additional Small Keys.
How to Get Small Key Number Two – Stalfos Room
Your next objective is defeating two Stalfos in a room connected to the central chamber.
Stalfos are skeletal warriors that use swords and shields.
They're significantly more dangerous than many earlier enemies.
Enter the Northern Passage
From the central chamber, head through the door on the far side.
You'll pass through a corridor containing a Blue Bubble.
Use the Hookshot or a carefully timed attack to disable the enemy.
Continue into the next room.
Two Stalfos appear, and the doors lock.
How to Defeat the Stalfos
Target one Stalfos at a time.
These enemies can block sword attacks and perform powerful jumping strikes.
Avoid attacking repeatedly while their shields are raised.
Instead, let them approach.
Dodge their attacks and counter when they become vulnerable.
The Master Sword is effective, particularly when you can attack after a Stalfos misses a jumping strike.
Keep moving to avoid being surrounded.
Once both Stalfos are defeated, a treasure chest appears.
Collect the Second Small Key
Open the chest to obtain Small Key #2.
Return to the main chamber.
You'll now have another key needed for the western section of the temple.
Key progress: 2 of 5 Small Keys found.
Song of Time Block Puzzle – Unlock the West Courtyard
Your next destination is the courtyard connected to the northwest section of the central chamber.
However, a large blue block prevents access.
You must use the Song of Time to move it.
Find the Blue Time Block
Return to the central chamber.
Look toward the northwest doorway.
You'll notice a large blue block marked with the familiar symbol associated with time.
Stand near it.
Equip the Ocarina of Time.
Play the Song of Time
Play the Song of Time.
The block disappears or changes position, revealing the blocked passage.
Enter the newly accessible doorway.
You'll arrive in the West Courtyard.
This area contains trees, climbable vines, balconies, and a well filled with water.
Clear the Skullwalltulas
Look toward the vine-covered wall in the northeastern part of the courtyard.
Several Skullwalltulas are crawling across it.
Use the Hookshot to defeat them.
Once the wall is clear, climb the vines to reach the upper balcony.
Reach the Opposite Balcony
From the upper ledge, look across the courtyard.
You'll notice another balcony with a Hookshot target.
Aim carefully and use the Hookshot to pull Link across.
Avoid falling into the courtyard below.
Continue toward the nearby floor switch.
Drain the Courtyard Well
Step onto the switch.
The water level inside the well drops.
This reveals a passage that was previously underwater.
The switch permanently opens the way through the well for this puzzle.
Your next objective is collecting the third Small Key.
How to Get Small Key Number Three – Drained Well
After lowering the water level, return toward the well.
Drop into the opening.
You'll discover an underground passage connecting the two courtyards.
Explore the Well Passage
Move through the tunnel.
Look for a treasure chest near the far end.
Open it to collect Small Key #3.
You now have another key needed to explore the upper floors.
Key progress: 3 of 5 Small Keys found.
Climb Into the East Courtyard
Continue through the well passage.
Use the ladder or climbing route to reach the opposite courtyard.
You'll emerge in the East Courtyard.
This area resembles the West Courtyard but contains different platforms and treasure.
Find the Dungeon Map
Look for a large treasure chest positioned on an elevated platform.
Use the Hookshot to reach the ledge.
Open the chest to obtain the Dungeon Map.
The map reveals the Forest Temple's floors and connected rooms.
It's particularly useful because several passages twist or change their orientation later.
Collect Gold Skulltula Number Three
Before leaving the courtyard section, search the walls of the West Courtyard.
The third Gold Skulltula is attached to the southern wall of the courtyard area.
Use the Hookshot to defeat it and retrieve the token when you're within range.
You can return through the nearby connecting route if you passed it earlier.
Once you've collected the Dungeon Map and your Small Key, return to the central chamber.
Forest Temple Stone Block Puzzle – Reach the Upper Floors
Your next destination is the western section of the temple.
This area contains one of the Forest Temple's most important puzzles.
You'll need to move several large stone blocks to reach the upper floors.
Enter the Western Locked Door
Return to the central chamber.
Look for the locked door on the western side.
Use a Small Key to open it.
Continue through the corridor.
You'll encounter Blue Bubbles and may notice a moving shadow following Link.
That shadow warns you about a Wallmaster.
How to Avoid Wallmasters
Wallmasters are giant hands that fall from the ceiling.
If one grabs Link, it can return him to an earlier section of the temple.
Watch for the shadow that appears beneath Link.
When the shadow grows larger, move quickly.
After the Wallmaster lands, attack it before it can grab you.
You can also avoid it and continue toward the puzzle.
Find the First Stone Block
Climb the nearby ladder.
You'll enter a chamber containing a large movable block and arrows marked on the floor.
The arrows indicate the direction you should push the blocks.
Approach the first block.
Pull it away from the wall if needed, then push it along the marked path.
Continue until it drops into a lower recess.
This creates a step that Link can climb.
Move the Second Stone Block
Return toward the original block position.
Find the nearby ladder leading toward another section of the room.
Climb up.
You'll discover a second movable block.
Push it forward until it stops.
Return to the lower route and climb onto the first block.
Reach the opposite side of the second block.
Push it into its final position.
Once it drops into the correct recess, the path upward becomes accessible.
Climb Toward the Twisted Corridor
Use the repositioned blocks to reach the upper platform.
Climb the ladder leading toward the next floor.
You'll encounter two Blue Bubbles near the top.
Defeat or avoid them.
Before continuing, look for a floor switch nearby.
Activate it to unlock a shortcut elevator.
This allows you to travel between the upper section and the lower floor without repeating the entire stone block puzzle.
Puzzle tip: Follow the arrows on the floor. If a block seems impossible to move into position, look for another route that lets Link push it from the opposite side.
Twisted Corridor Puzzle – Reach the Fairy Bow
After completing the block puzzle, you'll encounter one of the most famous features of the Forest Temple.
The twisted corridor appears to rotate the room itself.
You must navigate it to reach the Fairy Bow.
Enter the Twisted Corridor
Use the required Small Key to open the door at the top of the block puzzle section.
Walk into the corridor.
You'll notice that the hallway twists in an unusual direction.
Continue toward the room at the end.
The chamber beyond appears tilted, with the floor and walls positioned at strange angles.
Follow the available walkway.
Reach the Haunted Staircase
Continue through the next doorway.
You'll enter a staircase room decorated with paintings.
One of the Poe Sisters appears inside the portraits.
You cannot fully resolve her puzzle yet.
Continue down the staircase and enter the next room.
A dangerous Stalfos encounter awaits.
Where Is the Fairy Bow in the Forest Temple?
The Fairy Bow is found in the upper-floor Stalfos arena after crossing the twisted corridor and haunted staircase.
It's the main dungeon item and is required for defeating the Poe Sisters.
Enter the Stalfos Arena
After leaving the staircase, enter the large combat chamber.
Several Stalfos appear.
The arena contains a dangerous central pit.
In the Switch 2 remake, the pit contains a harmful substance that you should avoid.
Stay on the safe platforms and keep your distance from the edges.
Defeat the First Stalfos
Target the first Stalfos.
Avoid its jumping attacks.
Counter with the Master Sword when it becomes vulnerable.
Once defeated, prepare for the next encounter.
Defeat the Remaining Stalfos
Two additional Stalfos enter the arena.
You'll need to defeat them to finish the encounter.
Focus on one enemy while keeping the second in view.
Use defensive movement to avoid becoming surrounded.
After defeating all three Stalfos, a treasure chest appears.
Collect the Fairy Bow
Open the chest to obtain the Fairy Bow.
This weapon allows Adult Link to fire arrows.
You'll use it to activate switches, defeat enemies, solve puzzles, and damage certain bosses.
Most importantly, you can now attack the Poe Sisters hiding inside paintings.
Important: The Fairy Bow is essential for completing the Forest Temple. Make sure it's equipped before returning to the haunted staircases.
Poe Sister One – How to Defeat Joelle
Joelle is the red Poe Sister.
You'll encounter her in the staircase room connected to the Fairy Bow arena.
Find the Red Poe Paintings
Return to the red staircase.
Look at the paintings hanging along the walls.
Joelle appears inside them.
However, she may disappear when Link looks directly at her.
The goal is to destroy the paintings containing her image.
Shoot the Three Paintings
Equip the Fairy Bow.
Position Link where you can see the paintings clearly.
Wait for Joelle to appear inside one.
Fire an arrow at the painting.
Repeat for the remaining portraits.
After destroying all three paintings, Joelle emerges into the room.
Defeat Joelle
Joelle floats around the staircase and occasionally becomes invisible.
Avoid chasing her while she's hidden.
Turn away briefly and wait for her to appear.
When she becomes visible, turn back, target her, and fire an arrow.
In the remake, her spinning charge leaves her dizzy and vulnerable for a short time.
Use that opening to attack.
Repeat until Joelle is defeated.
Collect Small Key Number Four
After defeating Joelle, one of the stolen flames returns to the central chamber.
A treasure chest appears.
Open it to obtain Small Key #4.
Key progress: 4 of 5 Small Keys found.
You have now defeated the first Poe Sister.
How to Get the Forest Temple Boss Key
Before completing the remaining Poe Sisters, you should collect the Boss Key.
The Boss Key is hidden inside a room connected to the twisted corridor.
You'll need to change the corridor's orientation.
Return to the Block Puzzle Area
Travel back toward the room containing the large movable stone blocks.
Reach the upper level where you originally entered the twisted corridor.
Look above the doorway.
You'll notice an eye-shaped switch.
Shoot the Eye Switch
Equip the Fairy Bow.
Aim at the switch above the doorway.
Fire an arrow.
The mechanism activates and changes the orientation of the corridor.
The twisted hallway straightens.
This also changes the room at the end.
Enter the Straightened Corridor
Walk through the corrected hallway.
The next room now has a different orientation.
A large treasure chest is positioned below.
Drop toward the floor.
Watch for the Wallmaster that may appear nearby.
Open the Boss Key Chest
Approach the ornate treasure chest.
Open it to collect the Boss Key.
You now have the key needed to unlock Phantom Ganon's chamber later in the dungeon.
However, the boss entrance remains inaccessible until the Poe Sisters have been defeated.
Drop Into the Lower Passage
Look for a hole leading down from the Boss Key room.
Drop through it.
You'll reach a lower passage connected to the courtyard area.
This route leads toward another important Small Key.
How to Get Small Key Number Five – Floormaster Room
The fifth and final Small Key is obtained by defeating a Floormaster.
This enemy resembles a Wallmaster but behaves differently.
Find the Floormaster Room
After dropping from the Boss Key chamber, clear the nearby enemies and exit toward the upper courtyard ledge.
You'll find two nearby doors.
Enter the room containing the Floormaster.
The doors lock, starting the encounter.
How to Defeat the Floormaster
The Floormaster is a large floating hand that moves toward Link.
Target it and attack when it becomes vulnerable.
After taking enough damage, the enemy splits into three smaller hands.
You must defeat all three.
If the smaller hands survive long enough, they can interfere with your progress.
Use quick sword attacks or a charged spin attack to eliminate them.
Once every hand is defeated, the doors unlock.
Collect Small Key Number Five
A treasure chest appears.
Open it to obtain Small Key #5.
Key progress: 5 of 5 Small Keys found.
You have now collected every Small Key in the Forest Temple.
Remember that some keys have already been used to open locked doors.
The total refers to the number found throughout the dungeon, not the number that should remain in your inventory.
Poe Sister Two – How to Defeat Beth
Beth is the blue Poe Sister.
Her puzzle is similar to Joelle's, but she becomes more aggressive during the fight.
Return to the Fairy Bow Arena
Return through the temple toward the room where you obtained the Fairy Bow.
If you've activated the shortcut elevator in the block puzzle section, use it to save time.
You'll need to restore the twisted corridor to the correct orientation if you changed it earlier.
Use the eye switch above the entrance when necessary.
Continue toward the Fairy Bow arena.
Unlock the Blue Staircase
Use the required Small Key to open the locked doorway leading toward the blue staircase.
Enter the room.
You'll notice several paintings along the walls.
Beth appears inside them.
Destroy Beth's Paintings
Equip the Fairy Bow.
Wait until Beth appears in a painting.
Shoot it.
Repeat until all the required paintings are destroyed.
Beth emerges into the staircase.
Defeat Beth
Beth attacks using spinning charges.
Keep your distance and avoid her attacks.
Wait for her to become dizzy and vulnerable.
Target her with the Fairy Bow and fire.
Repeat until she's defeated.
Collect the Compass
After defeating Beth, another stolen flame returns to the central chamber.
A large treasure chest appears.
Open it to obtain the Compass.
The Compass reveals important treasure locations and helps identify the boss chamber.
Two Poe Sisters are now defeated.
Frozen Eye Switch Puzzle – Twist the Blue Corridor
After defeating Beth, continue through the upper doorway.
You'll encounter another strangely oriented room and a corridor leading toward a locked passage.
This section contains a frozen eye switch.
You need to use fire and the Fairy Bow to activate it.
Enter the Fire Puzzle Room
Continue through the blue staircase.
Move past the Green Bubbles.
Use your remaining Small Key when you reach the locked door.
Inside, you'll find a torch mechanism controlled by a floor switch.
There's also an eye switch covered in ice.
Ordinary arrows won't activate it while the ice remains.
Activate the Torch
Step on the floor switch.
This lights the torch.
Now position Link behind the burning flame.
Look toward the frozen eye switch above the doorway.
Shoot an Arrow Through the Flame
Equip the Fairy Bow.
Aim so your arrow travels through the burning torch before reaching the frozen eye.
Fire.
The arrow catches fire and melts the ice.
Once the ice disappears, shoot the exposed eye switch again if necessary.
The mechanism activates and twists the corridor.
Puzzle solution: Light the torch, shoot an arrow through its flame to melt the ice, then activate the eye switch.
Enter the Reoriented Room
Return through the twisted blue corridor.
The room at the end has changed orientation.
Look for the newly accessible opening in the floor.
Drop through it.
You'll reach the next section of the temple.
Forest Temple Falling Ceiling Puzzle – How to Survive
The next passage contains a large ceiling that repeatedly falls toward the floor.
If you stand in the wrong location, you'll take heavy damage.
You must identify the safe areas and move between them.
Examine the Checkered Floor
Enter the long corridor.
The floor contains black and white tiles.
Above you, a massive ceiling repeatedly rises and falls.
Before moving forward, watch the ceiling's pattern.
You'll notice openings that provide safe spaces.
Move Between Safe Squares
Wait for the ceiling to rise.
Move quickly toward the nearest safe square.
Stop in the opening before the ceiling falls.
Repeat the process as you move toward the far end of the room.
Avoid standing beneath solid sections of the descending ceiling.
Avoid Hidden Skulltulas
Some parts of the corridor contain Skulltulas.
Watch for suspicious shadows or dripping effects above certain tiles.
These can indicate an enemy waiting overhead.
Avoid stopping directly beneath them.
Activate the Floor Switch
Near the far side of the corridor, you'll find a floor switch.
Step on it to unlock the exit.
The switch area also provides a safe place to wait between ceiling drops.
Collect the Optional Bomb Chest
An optional treasure chest is positioned along the route.
It contains Bombs.
You can collect it if you need additional supplies, but don't risk unnecessary damage if you're low on health.
Once you've reached the exit, continue toward the next Poe Sister.
Poe Sister Three – Amy's Block Puzzle
Amy is the green Poe Sister.
Unlike Joelle and Beth, she doesn't require you to destroy three separate paintings.
Instead, you'll need to solve a picture puzzle using movable blocks.
Find the Green Poe Painting
After passing the falling ceiling corridor, enter the next room.
A large portrait of Amy hangs on the wall.
Equip the Fairy Bow.
Shoot the painting.
The image breaks apart into several movable blocks.
Understand the Picture Puzzle
Five blocks appear in the room.
Four belong to the completed picture.
One is a decoy.
Your objective is arranging the correct blocks into a complete image of Amy.
Identify the Fake Block
Watch the blocks after the puzzle begins.
The genuine picture blocks move or animate.
The fake block remains still.
Identify the decoy and ignore it.
This is particularly important because including the wrong block prevents the image from forming correctly.
Assemble the Picture
Push the four correct blocks into position.
Match the image fragments so the picture is reconstructed.
Pay attention to the orientation of Amy's face and the surrounding image.
Once the correct blocks are assembled, Amy appears.
Defeat Amy
Amy behaves similarly to the earlier Poe Sisters.
She becomes invisible and uses spinning attacks.
Avoid her charges.
When she becomes dizzy and visible, attack with the Fairy Bow.
Repeat until she's defeated.
Another flame returns to the central chamber.
Three Poe Sisters are now defeated.
Only Meg remains.
Poe Sister Four – How to Defeat Meg
Meg is the final Poe Sister and guards the last stolen flame.
Unlike the previous sisters, she creates illusions of herself.
You must identify the real Meg before attacking.
Return Toward the Central Chamber
After defeating Amy, proceed through the next passage.
You'll encounter a painting connected to Meg.
Shoot it with the Fairy Bow to trigger the final encounter.
Continue through the corridor leading back toward the main chamber.
Meg appears near the central area.
Meg Creates Multiple Copies
When the battle begins, Meg surrounds Link with several copies of herself.
Only one is real.
Attacking the wrong copy wastes time.
You'll need to observe small visual differences.
How to Identify the Real Meg
The Switch 2 remake adds several visual clues during Meg's different attack patterns.
Watch for differences such as:
One copy carrying a flame with a different color.
One copy holding a lit torch while others hold unlit torches.
One copy having a different facial expression.
One copy moving differently from the others.
The real Meg changes between phases, so don't assume the same clue always applies.
Shoot the Real Meg
Once you've identified the correct copy, target it with the Fairy Bow.
Fire an arrow.
A successful hit damages Meg and causes the copies to disappear temporarily.
She then creates another group of illusions.
Observe the new pattern and identify the real one again.
Repeat Until Meg Is Defeated
Continue targeting the real Meg.
Avoid wasting arrows on identical-looking copies.
After enough successful hits, she is defeated.
The final stolen flame returns to the central chamber.
All four Poe Sisters are now defeated.
The four torches are restored, and the central elevator activates.
You can now access the temple's basement.
All Five Forest Temple Small Key Locations
If you're missing a Small Key, check these locations before continuing.
Small Key 1 – Entrance Tree Branches
Found in a chest above the first Wolfos chamber.
Climb the vines and follow the upper tree branches to reach it.
Small Key 2 – Northern Stalfos Room
Found after defeating two Stalfos in the room beyond the central chamber's northern passage.
Open the chest that appears after the battle.
Small Key 3 – Drained Courtyard Well
Found in the tunnel connecting the West and East Courtyards.
Activate the balcony switch to lower the well water, then enter the passage and open the chest.
Small Key 4 – Red Poe Sister Joelle
Found after defeating Joelle in the red staircase.
Shoot her paintings, defeat her physical form, and open the reward chest.
Small Key 5 – Floormaster Room
Found after defeating the Floormaster in the side room accessible after obtaining the Boss Key and dropping into the lower courtyard route.
Destroy all three smaller hands to reveal the chest.
Important: There are five Small Keys in total. If a locked door blocks your path, check whether you've missed one of these rewards.
All Five Forest Temple Gold Skulltula Locations
The Forest Temple contains five Gold Skulltulas in the Nintendo Switch 2 remake.
Most can be collected with the Hookshot.
One requires the Scarecrow's Song, making it easier to obtain during a return visit if you haven't prepared the song yet.
Gold Skulltula 1 – Entrance Vines
Location: Entrance chamber, near the upper vines.
After encountering the two Wolfos, look toward the vines on the right side.
The Gold Skulltula is positioned above.
Use the Hookshot to defeat it and collect the token.
Gold Skulltula 2 – Central Chamber Wall
Location: Main chamber with the four torches.
After witnessing the Poe Sisters steal the flames, look toward the back wall.
The Gold Skulltula is attached to the stone surface.
Use the Hookshot to collect it.
Gold Skulltula 3 – West Courtyard
Location: Courtyard containing the drainable well.
After using the Song of Time to open the courtyard passage, explore the walls.
The Gold Skulltula is positioned on the southern wall.
Use the Hookshot when you're within range.
Gold Skulltula 4 – East Courtyard Scarecrow Ledge
Location: Elevated ledge in the northeastern courtyard area.
This collectible requires the Scarecrow's Song.
Return to the courtyard section reached around the falling ceiling route.
Look for the location where Pierre can appear.
Play Scarecrow's Song to summon him.
Use the Hookshot to reach the elevated ledge and collect the token.
If you haven't unlocked Scarecrow's Song, you can return later.
Gold Skulltula 5 – Rotating Basement
Location: Southern alcove of the rotating basement room.
After defeating all four Poe Sisters, take the central elevator down.
Enter the rotating chamber.
Look for the southern side room containing a Gold Skulltula.
Defeat it and collect the token before opening the boss passage.
Completion tip: Don't worry if you're missing the Scarecrow-related token. The Forest Temple can be revisited later.
Forest Temple Basement – Rotating Room Puzzle
After defeating all four Poe Sisters, return to the central chamber.
The restored flames activate the elevator.
Step onto it to descend into the basement.
You'll reach the temple's final major puzzle.
Enter the Rotating Chamber
At the bottom of the elevator, you'll find a circular room with several walls and side passages.
Large handles or protruding stone pillars extend from the walls.
These are used to rotate the chamber.
Different passages become accessible depending on how the room is positioned.
Explore the Side Rooms
Before completing the final puzzle, examine the available side chambers.
You may find enemies, treasure chests, and the final Gold Skulltula.
One room contains a chest with additional arrows.
Collect them if you're running low.
You'll need the Fairy Bow during the Phantom Ganon fight.
Rotate the Room
Approach one of the protruding handles.
Push it to rotate the chamber.
Continue rotating until a new passage aligns with the doorway.
Enter the accessible side rooms when possible.
Some contain switches connected to the final mechanism.
Activate the Torch Switch
Find the side passage containing a floor switch.
Step on it.
This activates a torch inside the rotating chamber.
The flame is needed for the final eye-switch puzzle.
Align the Torch With the Frozen Eye Switch
Return to the rotating chamber.
Continue pushing the handles until the torch lines up with the frozen eye switch.
You'll need to position Link so an arrow can travel through the flame and strike the ice.
Melt the Ice
Equip the Fairy Bow.
Aim through the burning torch toward the frozen eye.
Fire an arrow.
The arrow catches fire and melts the ice.
Once the eye switch is exposed, shoot it again to activate the mechanism.
The final passage opens.
Puzzle solution: Rotate the chamber, activate the torch, align the torch with the frozen eye switch, shoot through the flame, and activate the eye.
Enter the Boss Passage
After completing the mechanism, continue through the opened passage.
You'll reach the doorway leading to Phantom Ganon.
Use the Boss Key collected earlier to unlock it.
Before entering, check your health and arrows.
The final battle is about to begin.
Phantom Ganon Boss Fight – How to Defeat Him
Boss: Evil Spirit from Beyond – Phantom Ganon
Location: Forest Temple boss chamber
Required weapons: Fairy Bow and Master Sword
Main weaknesses: Vulnerable painting emergence and reflected energy projectiles
Boss reward: Heart Container
Story reward: Forest Medallion
Phantom Ganon is one of the most memorable bosses in Ocarina of Time.
The battle takes place inside a circular room surrounded by paintings.
He uses illusions, magical attacks, and powerful projectiles to challenge Link.
The fight has two main phases.
Phantom Ganon Phase One – The Haunted Paintings
During the first phase, Phantom Ganon appears on horseback inside the paintings.
Several versions of the boss move through different pictures.
Only one is real.
Your goal is shooting the real Phantom Ganon as he emerges from a painting.
Step 1: Stand Near the Edge of the Arena
Move toward the edge of the circular room.
Position the camera so you can watch several paintings at once.
Avoid standing directly in the center if you're having trouble tracking the boss.
A wider view makes identifying the real Phantom Ganon easier.
Step 2: Watch the Paintings
Phantom Ganon appears on horseback and rides toward the surface of a painting.
However, some appearances are illusions.
The fake versions turn back before fully emerging.
The real Phantom Ganon continues toward the room.
Watch carefully.
Step 3: Shoot the Real Phantom Ganon
Equip the Fairy Bow.
When you identify the real Phantom Ganon, aim at him.
Fire an arrow before he exits the painting.
A successful hit damages the boss.
If you miss, he emerges and launches a magical attack.
Avoid the projectile and prepare for another attempt.
Step 4: Repeat Until the Phase Ends
Continue watching the paintings.
Identify the real Phantom Ganon and shoot him.
After several successful hits, he abandons the paintings.
The second phase begins.
Phase one tip: Focus on two or three paintings at once instead of constantly rotating the camera. Listen for audio cues if you're having trouble identifying his location.
Phantom Ganon Phase Two – Reflect the Energy Balls
During phase two, Phantom Ganon floats above the arena.
He begins attacking Link with magical energy projectiles.
Your goal is reflecting these attacks back toward him.
This phase tests your timing.
Step 1: Target Phantom Ganon
Use targeting to keep Phantom Ganon in view.
Maintain a comfortable distance.
Standing too close leaves little time to react to the incoming projectile.
Watch for his casting animation.
Step 2: Wait for the Energy Projectile
Phantom Ganon launches a glowing energy ball toward Link.
Don't run directly into it.
Prepare your sword.
As the projectile approaches, swing the Master Sword.
A correctly timed attack reflects it toward Phantom Ganon.
Step 3: Continue the Energy Exchange
Phantom Ganon may reflect the projectile back toward Link.
You'll need to strike it again.
This creates a back-and-forth exchange.
Continue reflecting the energy ball until Phantom Ganon fails to return it.
He becomes stunned and falls toward the ground.
Step 4: Attack the Stunned Boss
Run toward Phantom Ganon while he's vulnerable.
Attack with the Master Sword.
Use strong attacks when you have enough time.
Don't remain too close after he starts recovering.
Move away and prepare for the next exchange.
Step 5: Avoid the Charging Attack
As the battle continues, Phantom Ganon may use a charging attack.
Watch his movements.
When he prepares to rush toward Link, dodge to the side.
Avoid standing directly in front of him.
If he becomes vulnerable after the attack, use the opportunity to deal damage.
Step 6: Finish Phantom Ganon
Continue reflecting his magical projectiles.
Stun him and attack with the Master Sword.
Repeat until his health is depleted.
Phantom Ganon is defeated, completing the Forest Temple's final battle.
Congratulations! You've defeated Phantom Ganon.
What Rewards Do You Get for Defeating Phantom Ganon?
After the battle, two important rewards become available.
Collect the Heart Container
A Heart Container appears in the boss arena.
Pick it up before leaving.
This permanently increases Link's maximum health.
The additional health is useful for later temples, especially against stronger enemies.
Receive the Forest Medallion
Enter the blue warp portal.
Link is transported to the Chamber of Sages.
Saria reveals her role as the Sage of Forest.
She gives Link the Forest Medallion.
This is one of the major Sage rewards required for the main story.
Return to Kokiri Forest
After receiving the medallion, Link returns to the area near the Great Deku Tree.
The forest storyline advances, and you'll meet the Deku Tree Sprout.
This conversation reveals additional information about Link's past.
Main story progress: Forest Temple completed and Forest Medallion obtained.
Common Forest Temple Problems and Solutions
The Forest Temple is one of Ocarina of Time's most confusing dungeons because its rooms connect in unusual ways.
Here are solutions to common progression problems.
Why Can't I Enter the Forest Temple?
You need the Hookshot.
Complete Dampé's challenge in Kakariko Graveyard as Adult Link.
Then use the Hookshot to reach the elevated entrance in the Sacred Forest Meadow.
Where Is the First Small Key?
The first Small Key is in the entrance chamber.
Climb the vines after encountering the Wolfos, follow the tree branches, and open the chest.
How Many Small Keys Are in the Forest Temple?
There are five Small Keys.
They're found in the entrance branches, northern Stalfos room, drained well, Joelle's reward chest, and Floormaster room.
How Do I Open the Northwest Courtyard?
Find the blue Time Block near the northwest doorway in the central chamber.
Play the Song of Time to move it.
How Do I Drain the Well?
Reach the upper balcony in the West Courtyard.
Use the Hookshot to cross to the opposite balcony.
Step on the floor switch to lower the water level.
How Do I Solve the Stone Block Puzzle?
Follow the arrows painted on the floor.
Move the first block into its recess, then use the alternate ladder route to reposition the second block.
Climb the blocks to reach the upper floor.
Where Is the Fairy Bow?
The Fairy Bow is inside the large Stalfos arena beyond the twisted corridor.
Defeat the Stalfos to reveal its chest.
How Do I Defeat Joelle and Beth?
Shoot each Poe's paintings with the Fairy Bow.
When the sister emerges, turn away briefly and attack when she becomes visible or dizzy.
Where Is the Boss Key?
Shoot the eye switch above the entrance to the twisted corridor.
This straightens the hallway.
Enter the reoriented room and drop down to the large Boss Key chest.
Why Do I Keep Getting Sent Back to the Temple Entrance?
A Wallmaster may be grabbing Link.
Watch for the moving shadow on the floor and dodge when the hand falls.
How Do I Solve the Frozen Eye Switch Puzzle?
Activate the torch using the floor switch.
Fire an arrow through the flame so it melts the ice covering the eye.
Shoot the exposed switch to change the corridor's orientation.
How Do I Survive the Falling Ceiling?
Move between the safe gaps in the ceiling.
Watch for the brighter floor squares and avoid Skulltulas hiding above certain tiles.
Activate the floor switch near the far end to unlock the exit.
How Do I Solve Amy's Painting Puzzle?
Shoot the green painting to create movable blocks.
Identify the fake block that doesn't animate.
Arrange the four genuine blocks to reconstruct the picture.
How Do I Identify the Real Meg?
Watch for visual differences between the copies.
The real Meg may have a different flame color, a lit torch, or a different expression.
Shoot the real copy with the Fairy Bow.
Why Won't the Central Elevator Work?
You must defeat all four Poe Sisters.
Each sister restores one flame.
Once all four torches are lit, the elevator activates.
How Do I Open the Phantom Ganon Boss Door?
Collect the Boss Key and defeat all four Poe Sisters.
Take the central elevator to the basement and complete the rotating chamber puzzle.
What to Do After Completing the Forest Temple
After collecting the Forest Medallion, you'll have several new opportunities for exploration.
The next recommended major dungeon is the Fire Temple.
However, it's worth visiting the Temple of Time first.
Return to the Temple of Time
Travel back to the Temple of Time as Adult Link.
Sheik appears and teaches you the Prelude of Light.
This song allows you to return to the Temple of Time quickly.
You'll also gain access to the time-travel mechanic involving the Master Sword.
Travel Back to Young Link
Approach the Master Sword pedestal.
Place the sword back into its position.
Link returns to his childhood.
This allows you to complete optional quests and explore locations that require Young Link's equipment.
You can return to Adult Link by drawing the Master Sword again.
Collect Optional Items
With the Fairy Bow unlocked, you can access new activities and challenges around Hyrule.
Consider visiting Kakariko Village's Shooting Gallery for an optional quiver upgrade.
You can also revisit locations containing eye switches or distant targets that couldn't be activated earlier.
Prepare for the Fire Temple
When you're ready to continue the main story, travel toward Goron City.
You'll discover that the Gorons have disappeared.
Find the rolling Goron and complete the related quest to obtain the Goron Tunic.
This outfit protects Link against Death Mountain Crater's extreme heat.
From there, you'll continue toward the Fire Temple.
For more story progression help, visit our Ocarina of Time Switch 2 Complete Walkthrough.
You can also check the Ocarina of Time Dungeon Order Guide to prepare for the remaining Sage temples.
Forest Temple FAQ
Is the Forest Temple the First Adult Link Dungeon?
Yes. The Forest Temple is the recommended first major dungeon for Adult Link.
You'll need the Hookshot to reach its entrance.
Where Is the Forest Temple Located?
The Forest Temple is located at the end of the Sacred Forest Meadow, beyond the Lost Woods.
How Do You Unlock the Forest Temple?
Become Adult Link, obtain the Hookshot from Dampé's Graveyard challenge, and return to the Sacred Forest Meadow.
Use the Hookshot to reach the elevated entrance.
How Many Small Keys Are in the Forest Temple?
There are five Small Keys.
You'll find them through exploration, combat encounters, and Poe Sister rewards.
What Is the Main Forest Temple Item?
The Fairy Bow is the main dungeon item.
It's obtained after defeating the Stalfos in the upper-floor arena.
How Many Poe Sisters Are in the Forest Temple?
There are four Poe Sisters: Joelle, Beth, Amy, and Meg.
Each carries one of the flames stolen from the central chamber.
Which Poe Sister Gives a Small Key?
Joelle, the red Poe Sister, rewards Link with a Small Key after being defeated.
Beth rewards Link with the Compass.
Where Is the Forest Temple Boss Key?
The Boss Key is found inside the room connected to the twisted corridor.
Shoot the eye switch above the corridor entrance to straighten it and access the chest.
How Many Gold Skulltulas Are in the Forest Temple?
There are five Gold Skulltulas.
One requires the Scarecrow's Song to reach an elevated courtyard ledge.
How Do You Defeat Phantom Ganon?
During phase one, shoot the real Phantom Ganon as he emerges from the paintings.
During phase two, reflect his magical energy projectiles with the Master Sword.
Attack him when he's stunned.
Can You Use an Empty Bottle Against Phantom Ganon?
Yes. An Empty Bottle can reflect Phantom Ganon's energy projectiles.
However, using the Master Sword is the recommended strategy for most players.
What Do You Get for Beating Phantom Ganon?
You receive a Heart Container after the battle and the Forest Medallion from Saria.
Can You Leave the Forest Temple and Return Later?
Yes.
You can leave the dungeon and return with additional supplies or optional equipment.
Farore's Wind can also help reduce backtracking by creating a return point inside the dungeon.
What Dungeon Comes After the Forest Temple?
The recommended next dungeon is the Fire Temple in Death Mountain Crater.
Is the Forest Temple Different in the Switch 2 Remake?
The Switch 2 remake keeps the Forest Temple's central objectives, Poe Sisters, Fairy Bow, and Phantom Ganon.
However, some puzzles, combat encounters, and room details have been updated.
The revised frozen eye switch and final rotating basement puzzle are particularly important differences.
Final Thoughts – Defeat the Poe Sisters and Earn the Forest Medallion
The Forest Temple is one of the most atmospheric and challenging dungeons in The Legend of Zelda: Ocarina of Time.
Its haunting music, twisting corridors, hidden passages, and clever puzzles make it a major step up from Link's childhood adventures.
You'll need to explore carefully, manage your Small Keys, and understand how the Fairy Bow interacts with the environment.
The stone block puzzle introduces more complicated navigation.
The Poe Sisters challenge your observation and combat timing.
The frozen eye switches teach you to combine equipment with environmental mechanics.
And Phantom Ganon tests everything you've learned about ranged attacks, positioning, and sword combat.
Remember the essential dungeon route: Entrance Small Key → Stalfos Key → Courtyard Well Key → Dungeon Map → Block Puzzle → Fairy Bow → Joelle → Boss Key → Floormaster → Beth → Amy → Meg → Rotating Basement → Phantom Ganon.
Before leaving, make sure you've collected the Fairy Bow, Boss Key, Heart Container, and as many Gold Skulltulas as possible.
Once Phantom Ganon is defeated, Saria rewards Link with the Forest Medallion.
One of the five major Sage temples is complete.
If you need additional help with dungeon completion, challenging boss fights, or story objectives, explore Zelda Ocarina of Time Boosting on BoostRoom to check available services and completion options.
Your next major destination is Death Mountain, where the Gorons need help once again.
The Forest Temple is complete. The Poe Sisters are defeated, Phantom Ganon has fallen, and the Forest Medallion is yours.