Dodongo's Cavern Dungeon Overview
Dodongo's Cavern is located along Death Mountain Trail, below Goron City.
You'll explore it as Young Link after completing the Great Deku Tree and meeting Princess Zelda.
The dungeon focuses heavily on explosive puzzles.
Initially, you'll rely on Bomb Flowers found throughout the cavern. Later, you'll obtain the Bomb Bag, allowing you to carry your own Bombs.
Dungeon information:
Location: Death Mountain Trail
Playable character: Young Link
Required item: Goron's Bracelet
Main dungeon item: Bomb Bag
Additional items: Dungeon Map and Compass
Gold Skulltulas: Five total, with four obtainable during your first visit
Small Keys: None
Boss Key: Not required
Final boss: Infernal Dinosaur – King Dodongo
Boss reward: Heart Container
Story reward: Goron's Ruby
The dungeon contains two main floors connected through staircases, bridges, and moving platforms.
Your first objective is reaching the Bomb Bag.
After obtaining it, you'll use Bombs to open the giant stone skull's mouth and access King Dodongo's chamber.
Important: You don't need Small Keys or a Boss Key to complete Dodongo's Cavern. Every major progression obstacle can be solved through combat, explosives, switches, or movable objects.
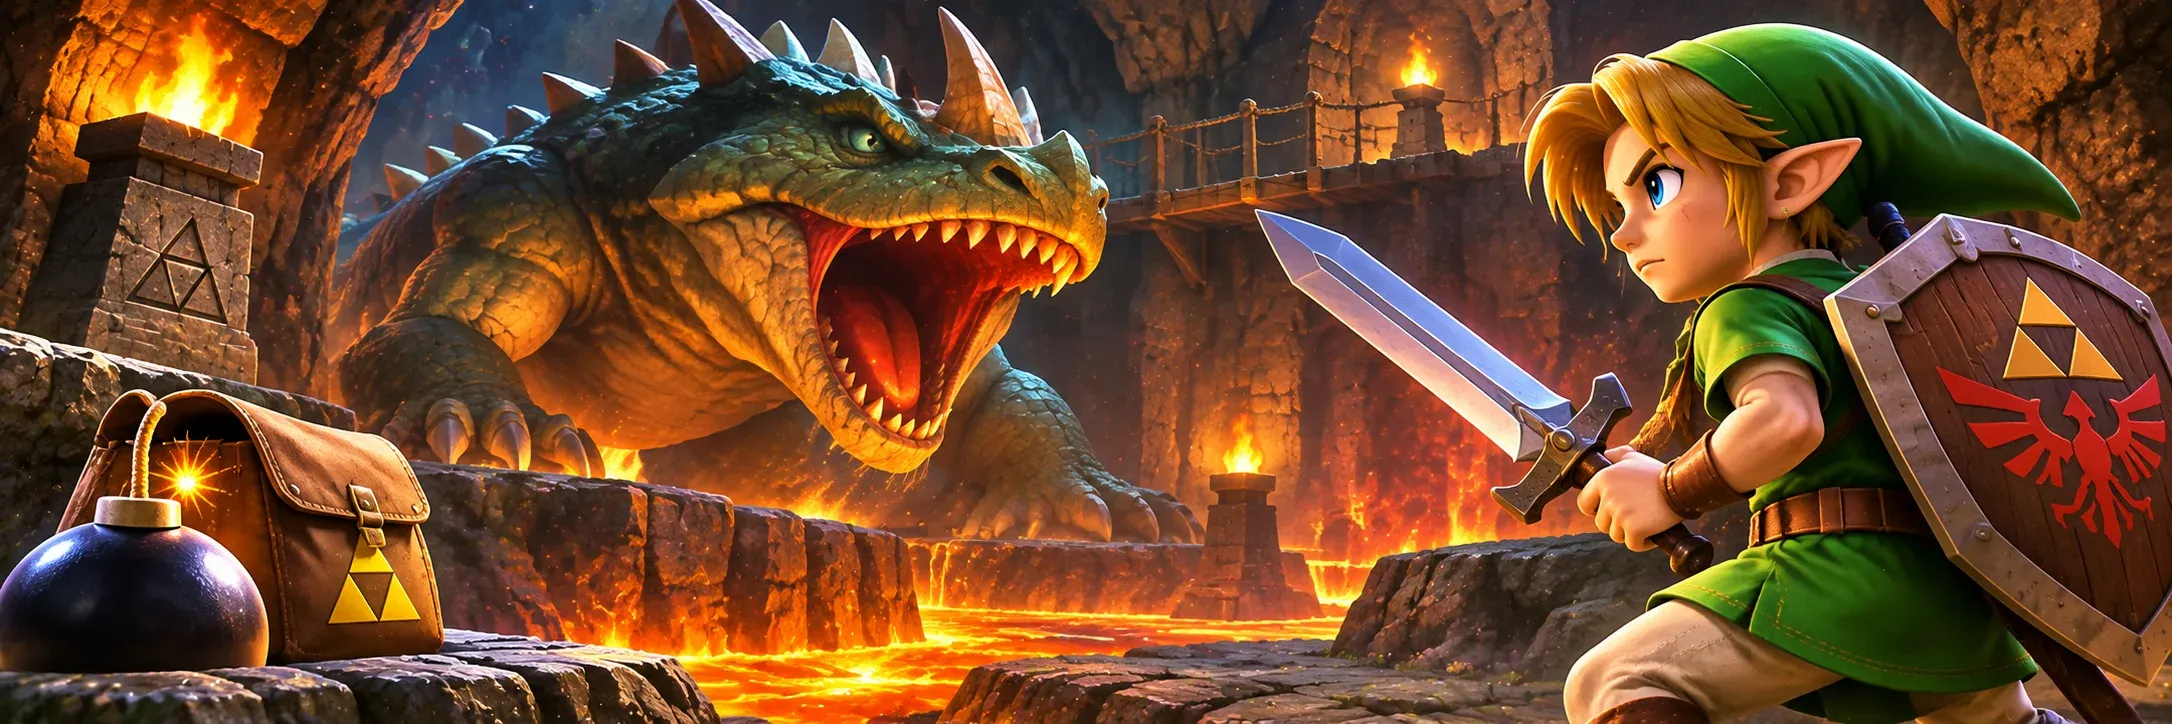
How to Unlock Dodongo's Cavern in Ocarina of Time
Before entering the dungeon, you must complete several objectives involving Princess Zelda, the Gorons, and Saria.
The most important requirement is obtaining the Goron's Bracelet.
Without it, Young Link cannot lift the Bomb Flowers needed to open the dungeon entrance.
Step 1: Get Zelda's Letter
After completing the Great Deku Tree, leave Kokiri Forest and travel to Hyrule Castle.
Find Princess Zelda inside the castle grounds.
During your conversation, she'll explain the importance of the Spiritual Stones and Ganondorf's plans.
She gives Link Zelda's Letter.
Afterward, Impa teaches you Zelda's Lullaby.
Both are important for reaching Dodongo's Cavern.
Step 2: Travel to Kakariko Village
Leave Hyrule Castle Town and cross Hyrule Field.
Head toward Kakariko Village, located near Death Mountain.
Find the guard stationed at the northern exit.
Show him Zelda's Letter.
He'll recognize the princess's message and open the gate to Death Mountain Trail.
You can now begin climbing toward Goron City.
Step 3: Enter Goron City
Follow Death Mountain Trail.
You'll encounter Red Tektites, rocky paths, and several branching routes.
Continue until you reach Goron City.
Inside, descend through the circular levels toward the lowest floor.
Find the large door marked with the Royal Family symbol.
Stand near it and play Zelda's Lullaby.
The door opens, allowing you to meet Darunia.
Step 4: Learn Saria's Song
Darunia is unhappy because the Gorons can no longer safely enter Dodongo's Cavern.
He won't immediately give Link the equipment needed to solve the problem.
Return to Kokiri Forest and enter the Lost Woods.
Follow the correct route toward the Sacred Forest Meadow.
At the end of the area, you'll meet Saria.
Speak with her to learn Saria's Song.
Remember this melody because it's required to cheer up Darunia.
Step 5: Obtain the Goron's Bracelet
Return to Goron City.
Enter Darunia's chamber and play Saria's Song.
The melody improves his mood.
As a reward, Darunia gives Link the Goron's Bracelet.
This item allows Young Link to lift Bomb Flowers.
Bomb Flowers are explosive plants that grow naturally around Death Mountain.
They're essential for opening Dodongo's Cavern and solving several puzzles inside.
Step 6: Blow Open Dodongo's Cavern
Leave Goron City through the upper entrance.
Turn toward the nearby ledge overlooking Dodongo's Cavern.
You'll notice a Bomb Flower growing behind a short fence.
Pick it up using the Goron's Bracelet.
Aim toward the large boulder blocking the cavern entrance below.
Throw the Bomb Flower.
The explosion destroys the boulder, revealing the entrance.
Travel down Death Mountain Trail and enter Dodongo's Cavern.
The second dungeon is now unlocked.
Dodongo's Cavern Walkthrough – Entrance and First Floor
When you first enter Dodongo's Cavern, you'll find a cracked stone wall blocking your path.
A Bomb Flower grows nearby.
Pick it up and throw it toward the wall.
The explosion opens the entrance to the main chamber.
Inside, you'll discover a huge lava-filled room dominated by the skull of an ancient Dodongo.
This giant skull is one of the dungeon's most important puzzles.
You won't be able to open its mouth immediately.
First, you need the Bomb Bag.
Explore the Main Lava Chamber
Move carefully across the available platforms.
Several Beamos guard the chamber.
These mechanical enemies rotate and shoot damaging beams when they detect Link.
You can destroy them with Bomb Flowers.
Pick up an explosive, wait for a clear opportunity, and throw it toward the Beamos.
Avoid standing directly in front of its eye.
You'll notice multiple passages along the eastern and western sides of the chamber.
Start by exploring the western side to obtain the Dungeon Map.
Find the Dungeon Map
From the central platform, move toward the western side.
Look for cracked walls near the side passages.
You'll find two destructible alcoves.
Use a nearby Bomb Flower to destroy the northern cracked wall.
Behind it is a large treasure chest.
Open the chest to collect the Dungeon Map.
The southern alcove contains an optional Blue Rupee chest.
Collect it if you want some additional money.
The Dungeon Map reveals the cavern's overall layout and makes it easier to understand how the two floors connect.
Once you've collected it, return toward the central chamber.
Dodongo's Cavern Baby Dodongo Puzzle
Your next objective is entering the eastern passage.
Cross toward the eastern side of the main chamber.
Use a Bomb Flower to destroy the cracked wall leading into the southeastern route.
Inside, you'll encounter Baby Dodongos.
These small reptilian enemies are dangerous because they explode shortly after being defeated.
How to Defeat Baby Dodongos
Target a Baby Dodongo and attack with your Kokiri Sword.
Once the enemy is defeated, move away immediately.
Its body will explode after a short delay.
You can also use the Fairy Slingshot to attack from a safer distance.
Beginner tip: Don't stand beside a defeated Baby Dodongo. Its delayed explosion can damage Link even after the enemy stops moving.
Use a Baby Dodongo to Break a Wall
As you move through the corridor, look for a cracked wall along the right side.
A Gold Skulltula is hidden behind it.
You can destroy the wall without carrying a Bomb Flower.
Lure a Baby Dodongo toward the cracked section.
Defeat it close to the wall and move away.
The enemy's explosion breaks the wall.
Enter the hidden passage, defeat the Gold Skulltula, and collect its token.
This is one of the dungeon's optional collectibles.
Open the Statue Switch Door
Continue to the end of the corridor.
You'll find a barred door, a floor switch, and large stone statues.
The switch only remains active while something is pressing against it.
Push or pull one of the statues onto the switch.
Once the statue is correctly positioned, the door opens.
Continue through the passage.
How to Defeat the Lizalfos in Dodongo's Cavern
The next major encounter introduces Lizalfos.
These agile reptilian warriors move quickly, dodge attacks, and fight using swords.
Unlike weaker enemies from Kokiri Forest, Lizalfos can punish careless attacks.
First Lizalfos Encounter
Enter the larger combat chamber.
Two Lizalfos will appear.
They generally take turns approaching Link.
Target the active enemy and raise your shield when it prepares to attack.
Wait for the Lizalfos to finish its strike.
Then counterattack with the Kokiri Sword.
Avoid chasing it recklessly across the arena, especially near the lava.
Repeat until both enemies are defeated.
Best Strategy Against Lizalfos
The safest strategy is to combine targeting, blocking, and short counterattacks.
Watch the enemy's movements.
If it jumps away, reposition rather than immediately rushing after it.
If it approaches with its sword raised, prepare to defend.
Attack during the opening after its strike.
Combat tip: Patience is more effective than repeatedly swinging your sword. Keep the Lizalfos in front of you and avoid fighting near the edge of the platforms.
After winning, the exit opens.
You can continue deeper into the cavern.
Dodongo's Cavern Torch Puzzle – Light Every Torch
After defeating the Lizalfos, you'll reach an area containing larger Dodongos and several unlit torches.
This section combines combat with an environmental puzzle.
Avoid the Larger Dodongos
The larger Dodongos move slowly but can breathe fire.
Their armored fronts make direct attacks difficult.
Try attacking from the side or behind when safe.
You can also use explosives to deal damage.
Don't forget that Dodongos can be dangerous when they collapse or explode.
Keep a safe distance after defeating one.
Find the Burning Torch
Look for a torch that is already lit.
Equip a Deku Stick.
Touch the stick to the flame.
You now have a temporary torch that can ignite other objects.
Light the Remaining Torches
Move through the room and light each unlit torch.
You must move quickly because a burning Deku Stick eventually disappears.
If the stick burns out, return to the original torch and light another.
Once every required torch is burning, the barred door opens.
Proceed through the doorway.
Activate the Main Chamber Switch
Continue along the passage until you return near the central lava chamber.
You'll find a floor switch.
Step on it.
This opens the previously inaccessible door leading toward the large Bomb Flower staircase room.
Return across the main chamber and enter the newly opened passage.
How to Solve the Bomb Flower Staircase Puzzle
The giant Bomb Flower staircase is one of Dodongo's Cavern's most recognizable puzzles.
You'll enter a large room containing an enormous staircase mechanism and multiple Bomb Flowers arranged in lines.
The staircase is raised and cannot be climbed normally.
You must trigger a chain reaction to lower it.
Step 1: Examine the Bomb Flower Arrangement
Look around the base of the staircase.
You'll notice two lines of Bomb Flowers positioned along the mechanism.
There's a small gap between them.
A separate Bomb Flower grows nearby.
The puzzle requires you to place an explosive in the missing position.
Step 2: Pick Up the Separate Bomb Flower
Approach the Bomb Flower growing away from the main arrangement.
Pick it up.
Move toward the gap between the two lines.
You need to position the explosive carefully.
Step 3: Place the Bomb Flower in the Gap
Place the Bomb Flower between the existing lines.
Don't throw it too far.
A correctly positioned explosion activates the Bomb Flowers on both sides.
The chain reaction causes the enormous staircase to lower.
If only one side activates, try again with more accurate placement.
Puzzle solution: Place one Bomb Flower in the gap between the two lines to trigger both sides simultaneously.
Step 4: Climb the Staircase
Once the staircase has lowered, climb upward.
The route now leads toward the dungeon's second floor.
Before continuing, you should collect the Compass from a nearby optional room.
Where to Find the Compass in Dodongo's Cavern
The Compass helps identify important treasure chests and the boss location.
You can collect it from a side room connected to the giant staircase chamber.
Find the Cracked Wall
Look toward the side of the staircase room opposite the main Bomb Flower arrangement.
You'll notice a cracked wall.
Use a Bomb Flower to destroy it.
Enter the hidden chamber.
Several stone statues stand near a treasure chest.
Defeat the Armos
One of the statues is an Armos enemy.
It comes to life when approached.
Use a Bomb Flower to damage it.
Keep your distance when it becomes unstable.
After defeating the enemy, climb toward the large chest.
Open it to collect the Compass.
You now have both the Dungeon Map and Compass.
Return to the staircase and continue toward the second floor.
Dodongo's Cavern Second Floor – Armos and Fire Keese
The second floor introduces more dangerous traps and enemies.
You'll encounter Fire Keese, Armos statues, suspended walkways, and moving spike traps.
Be especially careful if you're still using the Deku Shield.
Protect Your Shield From Fire Keese
Fire Keese are bats surrounded by flames.
They can burn Link's wooden Deku Shield.
Use the Fairy Slingshot to defeat them from a distance.
If you have a Hylian Shield, it provides useful protection against fire.
Otherwise, avoid contact and keep moving.
Important: Losing your Deku Shield can make defensive combat more difficult. Avoid approaching Fire Keese without preparing an attack.
Solve the Armos Statue Ladder Puzzle
Enter the room containing several Armos statues and a ladder.
Some statues are enemies, while one blocks the path toward the ladder.
Move the statue blocking the ladder.
Climb upward.
At the top, activate the floor switch.
This opens the next door.
Continue along the second-floor route.
Cross the Suspended Bridge
You'll eventually reach a wooden bridge overlooking the main chamber.
Look down to see the giant Dodongo skull.
The bridge is important because you'll return here after obtaining the Bomb Bag.
For now, continue toward the next room.
Avoid any Fire Keese along the path.
How to Solve the Moving Spike Trap Puzzle
The next chamber contains large spike traps moving back and forth along narrow pathways.
You'll need careful timing to pass safely.
Watch the Spike Trap Patterns
Before moving forward, look at how the traps travel.
Use the updated camera controls to examine the room.
Wait for a trap to move away from your path.
Then cross to the next safe area.
Avoid rushing through the room without checking your surroundings.
Move the Stone Block
Near the lower section of the chamber, you'll find a movable stone block.
Push or pull it toward the ladder along the wall.
Position it beneath the ladder.
Climb onto the block, then use the ladder to reach the higher platform.
Use the Bomb Flower to Destroy the Wall
From the raised area, look across the chamber.
You'll see a cracked wall blocking the next route.
A Bomb Flower grows on a nearby platform.
Jump toward the Bomb Flower.
Pick it up and aim at the cracked wall.
Throw it carefully so the explosion reaches the obstruction.
The wall breaks, revealing the next passage.
Puzzle tip: If your Bomb Flower explodes before reaching the target, adjust your timing. You need to throw it before the fuse runs out, not carry it all the way to the wall.
Continue through the opened doorway.
Dodongo's Cavern Eye Switch and Fire Barrier Puzzle
This section contains fire barriers that block your path.
To disable them, you'll need the Fairy Slingshot.
Find the First Eye Switch
Enter the passage and look above the burning barrier.
You'll notice an eye-shaped switch.
Aim your Fairy Slingshot at the eye.
Fire a Deku Seed.
The switch activates and temporarily removes the flames.
Quickly move through the passage.
Defeat the Second Lizalfos Pair
Continue until you reach another combat arena.
Two Lizalfos appear.
Use the same defensive strategy as before.
Target one enemy at a time, block its attacks, and counterattack during openings.
After defeating both enemies, a chest appears.
In the Switch 2 remake, this chest contains a Business Scrub Seed, a new item that can summon a Business Scrub.
Collect it before leaving.
Disable the Second Set of Fire Barriers
The following corridor contains two fire barriers.
Shoot the first eye switch directly ahead.
Cross the first section.
Then turn and look into the side alcove for another eye switch.
Shoot it to disable the second barrier.
Continue before the flames return.
You've now reached the route leading directly to the Bomb Bag.
Where Is the Bomb Bag in Dodongo's Cavern?
The Bomb Bag is the most important item in Dodongo's Cavern.
It permanently unlocks the ability to carry Bombs, opening new routes throughout Hyrule.
Bomb Bag location: Second floor, in the large treasure chest beyond the second Lizalfos encounter and the eye-switch fire barriers.
Step 1: Complete the Fire Barrier Passage
Use the Fairy Slingshot to activate the eye switches.
Cross both fire barriers before they reactivate.
Continue along the elevated passage.
Step 2: Find the Large Treasure Chest
You'll enter an area overlooking the moving spike trap room.
Look for a large treasure chest positioned on the upper floor.
Approach it and open it.
Inside is the Bomb Bag.
Step 3: Collect Your First Bombs
The Bomb Bag initially holds up to 20 Bombs.
It comes with Bombs already inside.
You can now select and use Bombs without needing to find Bomb Flowers.
This makes exploring much easier.
What Can You Do With the Bomb Bag?
Bombs allow you to destroy cracked walls, activate explosive mechanisms, damage certain enemies, and reveal hidden passages.
They're also required for several upcoming story objectives.
You can use Bombs to explore new locations around Death Mountain and other parts of Hyrule.
However, you'll need them immediately for the giant Dodongo skull puzzle.
Important: Don't leave Dodongo's Cavern without the Bomb Bag. It's essential for completing the dungeon's normal progression.
How to Open the Giant Dodongo Skull's Mouth
After obtaining the Bomb Bag, return toward the main chamber.
You'll now be able to solve the giant stone skull puzzle.
This is one of the dungeon's most important progression requirements.
Step 1: Activate the Second-Floor Shortcut
After collecting the Bomb Bag, use a Bomb to destroy the nearby cracked wall.
This creates a route back toward the main chamber.
Find and activate the floor switch.
A platform begins moving between the first and second floors.
This elevator makes returning to the upper floor easier.
Step 2: Return to the Bridge Above the Skull
Travel toward the wooden bridge overlooking the giant skull.
You'll notice two openings in the bridge.
These gaps are positioned above the skull's eye sockets.
The goal is to drop Bombs into both eyes.
Step 3: Bomb the First Eye
Stand near the first gap.
Equip a Bomb.
Drop it through the opening.
The Bomb should land inside the eye socket below.
When it explodes, the skull's eye glows red.
If the Bomb misses, adjust your position and try again.
Step 4: Bomb the Second Eye
Move to the other gap in the bridge.
Drop another Bomb into the second eye socket.
Once both eyes have been activated, the giant skull opens its mouth.
The entrance to the next section is revealed.
Giant skull puzzle solution: Drop one Bomb into each eye socket from the bridge above.
Step 5: Enter the Skull's Mouth
Return to the first floor.
Approach the giant skull.
Enter through its open mouth.
You'll reach the final section of Dodongo's Cavern.
King Dodongo is waiting beyond the remaining puzzles.
Final Stone Block Puzzle – How to Unlock King Dodongo's Door
After entering the giant skull's mouth, you'll reach a chamber containing a large recessed floor switch.
The switch is positioned inside a square hole.
A stone block sits on an elevated ledge nearby.
Your objective is to move the block into the recessed switch.
However, you'll first need to navigate a connected room filled with movable blocks.
Step 1: Enter the Block Puzzle Room
Follow the passage leading away from the recessed switch.
You'll enter an area containing several raised platforms, stone blocks, and dangerous enemies.
Pay attention to the position of each block.
Some are used as temporary steps.
Others need to be pushed off ledges to create new routes.
Step 2: Move the Lower Block
Find the movable block near the lower section.
Push or pull it toward a raised block.
Position it beneath the ledge so Link can climb upward.
Use the lower block as a step.
Step 3: Push the Upper Block Down
Climb onto the raised platform.
Push the higher block off its ledge.
It falls to the ground below.
This creates another movable step that you can use to reach higher areas.
Continue repositioning the blocks until you can access the upper passage.
Step 4: Reach the Final Block
Follow the elevated path toward the chamber overlooking the recessed switch.
You'll find the final stone block positioned above the opening.
Push it down from the ledge.
Return to the lower floor.
Step 5: Activate the Recessed Switch
Push the block into the square hole.
The block lands on the floor switch.
Its weight activates the mechanism and unlocks the boss door.
The final puzzle is complete.
Step 6: Open the Floor to King Dodongo
Enter the newly unlocked chamber.
Look for the cracked section of the floor.
Place a Bomb on the cracked surface.
The explosion breaks it open.
Drop through the opening to enter King Dodongo's arena.
You're now ready for the final boss.
King Dodongo Boss Fight – How to Defeat Him
Boss: Infernal Dinosaur – King Dodongo
Location: Lowest chamber of Dodongo's Cavern
Main weakness: Open mouth
Recommended item: Bombs
Damage weapon: Kokiri Sword
Boss reward: Heart Container
King Dodongo is a gigantic reptilian monster covered in thick armor.
He lives inside a circular arena surrounded by lava.
His attacks include powerful fire breath, rolling charges, and explosive hazards.
The key to winning is using Bombs at the correct moment.
Step 1: Watch King Dodongo's Attacks
When the battle begins, keep your distance.
King Dodongo moves around the arena and prepares powerful attacks.
Avoid standing directly in front of his mouth.
His fire attack can cover a large portion of the walkway.
You should also watch for his rolling attack.
Step 2: Wait for King Dodongo to Inhale
King Dodongo's main weakness appears when he opens his mouth.
Before releasing his fire attack, he takes a deep breath.
This is your opportunity.
Equip a Bomb and prepare to throw it.
Don't throw too early while his mouth is closed.
Step 3: Throw a Bomb Into His Mouth
As King Dodongo inhales, throw a Bomb directly into his open mouth.
The explosion occurs inside his body.
This stuns the boss and causes him to collapse.
His vulnerable mouth and head become accessible.
You can also use the Bomb Flowers around the arena if your carried Bomb supply runs low.
Step 4: Attack With the Kokiri Sword
Once King Dodongo is stunned, approach quickly.
Use the Kokiri Sword to deal damage while he's vulnerable.
A well-timed jump attack can be useful.
Continue attacking until he begins recovering.
Then move away to avoid his next attack.
Boss tip: Don't waste time attacking his armored body when he isn't stunned. His vulnerable opening is created by the Bomb explosion.
Step 5: Avoid the Rolling Attack
After recovering, King Dodongo curls into a ball and rolls around the arena.
This is one of his most dangerous attacks.
Move toward one of the wider corner spaces near the lava.
Position yourself so the rolling boss can pass without hitting Link.
Avoid standing directly in his path.
Don't follow him while he's rolling.
Wait until he stops and prepares another attack.
Step 6: Watch for Baby Dodongos
The Switch 2 remake may also introduce Baby Dodongos during the battle.
These enemies can distract Link while King Dodongo prepares another attack.
Defeat nearby threats when necessary.
Remember that Baby Dodongos explode after being defeated.
Move away before their explosions trigger.
Step 7: Repeat the Bomb Strategy
Continue following the same attack cycle.
Wait for King Dodongo to inhale.
Throw a Bomb into his mouth.
Attack while he's stunned.
Retreat before he recovers.
Avoid his rolling attack.
Repeat until King Dodongo has taken enough damage.
In a typical successful fight, several Bomb-and-sword openings are enough to defeat him.
Step 8: Collect the Heart Container
After King Dodongo is defeated, he collapses into the lava.
A Heart Container appears.
Collect it before leaving the arena.
This permanently increases Link's maximum health.
Then enter the blue exit portal.
Congratulations! King Dodongo has been defeated.
How to Get Goron's Ruby After King Dodongo
Once you leave the boss chamber, you'll return to Death Mountain Trail.
Darunia appears to congratulate Link.
He's grateful that you've defeated King Dodongo and restored access to the Gorons' food supply.
As a reward, he gives Link Goron's Ruby, the Spiritual Stone of Fire.
This is the second of the three Spiritual Stones required to open the Door of Time.
You should now have:
The remaining stone is Zora's Sapphire.
You'll obtain it by helping Princess Ruto and defeating Barinade inside Lord Jabu-Jabu.
Main story progress: Two of three Spiritual Stones collected.
All Five Dodongo's Cavern Gold Skulltula Locations
Dodongo's Cavern contains five Gold Skulltulas in the Switch 2 remake.
Four are accessible during your first visit as Young Link.
The fifth requires returning later as Adult Link with additional equipment.
Here's where to find them.
Gold Skulltula 1 – Baby Dodongo Corridor
Location: First floor, eastern corridor.
After entering the Baby Dodongo passage, look for a cracked wall along the right side.
Lure a Baby Dodongo close to the wall.
Defeat it and move away.
The explosion destroys the wall.
Enter the hidden area and collect the Gold Skulltula token.
Gold Skulltula 2 – Above the Bomb Flower Staircase
Location: Upper wall near the giant staircase chamber.
After lowering the Bomb Flower staircase, climb toward the upper area.
Look for a Gold Skulltula attached to the wall or climbable mesh.
Use the Fairy Slingshot to defeat it.
Reach the token using the nearby climbing route.
Gold Skulltula 3 – Dodongo Den
Location: Upper-floor side cave near the main chamber.
Once you have the Bomb Bag, explore the optional passage containing larger Dodongos.
Destroy the cracked wall leading into their chamber.
Look for the suspicious rock or obstacle hiding the Gold Skulltula.
Use a Bomb to reveal it.
Collect the token.
Gold Skulltula 4 – Final Stone Block Room
Location: First floor, hidden room near the final block puzzle.
Before entering King Dodongo's chamber, explore the cracked wall near the stone block puzzle.
Use a Bomb to open it.
Inside, you'll encounter enemies, including an Armos.
Defeat them and search the back wall.
Collect the Gold Skulltula token.
Gold Skulltula 5 – Adult Link Return Visit
Location: High ledge in the eastern Baby Dodongo corridor.
This collectible isn't normally accessible during your first visit as Young Link.
Return later as Adult Link.
You'll need the Hookshot and Scarecrow's Song.
Visit the corridor containing the Baby Dodongos.
Find the elevated ledge that Link couldn't reach during childhood.
Play Scarecrow's Song at the appropriate location to summon Pierre.
Use the Hookshot to reach the higher platform.
Defeat the Gold Skulltula and collect its token.
Completion tip: Collect the four Young Link tokens during your first visit, then return for the fifth after unlocking Adult Link's required equipment.
Important Items and Optional Rewards in Dodongo's Cavern
Besides the Bomb Bag, the cavern contains several useful collectibles and optional treasures.
Dungeon Map
Found in a large chest behind the northern cracked wall on the western side of the main chamber.
The map reveals the dungeon's overall structure.
Compass
Found in the side room connected to the giant Bomb Flower staircase chamber.
Defeat the Armos guarding the chest to obtain it.
Bomb Bag
Found on the second floor after passing the moving spike traps, Lizalfos encounter, and eye-switch fire barriers.
It initially carries 20 Bombs.
Business Scrub Seeds
The Switch 2 remake introduces Business Scrub Seeds as additional rewards.
One is obtained from the chest that appears after defeating the second Lizalfos pair.
Another can be found in an optional chest behind a cracked wall near the upper staircase route.
These seeds allow you to summon a Business Scrub.
Gold Skulltula Tokens
Collect the tokens hidden throughout the cavern.
They contribute toward the House of Skulltula rewards in Kakariko Village.
Heart Container
Appears after defeating King Dodongo.
Collecting it permanently increases Link's maximum health.
Goron's Ruby
Awarded by Darunia after you leave the completed dungeon.
This Spiritual Stone is required for the main story.
Common Dodongo's Cavern Mistakes to Avoid
Dodongo's Cavern introduces several mechanics that can be difficult for new players.
Avoid these common mistakes.
Trying to Enter Without the Goron's Bracelet
Young Link cannot lift Bomb Flowers until Darunia gives him the Goron's Bracelet.
Learn Saria's Song first, then return to Goron City.
Throwing Bomb Flowers Too Early
Bomb Flowers explode after a short delay.
If you throw one too early, it may explode before reaching the intended target.
Position yourself before picking it up.
Standing Near Defeated Baby Dodongos
Baby Dodongos explode shortly after being defeated.
Move away after attacking them.
Ignoring Fire Keese
Fire Keese can destroy the wooden Deku Shield.
Defeat them from a distance whenever possible.
Missing the Compass Room
The Compass is inside an optional side chamber near the Bomb Flower staircase.
It's easy to overlook if you're rushing toward the second floor.
Placing the Bomb Flower Incorrectly
The giant staircase puzzle requires a chain reaction.
Position the Bomb Flower directly between the two lines.
If only one side explodes, adjust your placement.
Forgetting the Second Eye Switch
The fire barrier corridor contains multiple eye switches.
After crossing the first barrier, look for the second switch in the side alcove.
Throwing Bombs at the Wrong Part of the Giant Skull
You must drop Bombs into the skull's eye sockets from the bridge above.
Throwing explosives at the front of the skull won't solve the puzzle.
Attacking King Dodongo's Armor
King Dodongo is heavily protected.
Wait until he opens his mouth, throw a Bomb inside, and attack after the explosion stuns him.
What to Do After Completing Dodongo's Cavern
After collecting Goron's Ruby, your next major destination is Zora's Domain.
However, you should consider completing a few optional activities before leaving Death Mountain.
These upgrades can make later challenges easier.
Visit the Great Fairy Fountain
Travel toward the summit of Death Mountain.
You'll encounter falling rocks and climbable walls.
Use your Fairy Slingshot to defeat Skullwalltulas blocking the climbing route.
Near the summit, look for a cracked wall.
Destroy it with a Bomb.
Enter the hidden Great Fairy Fountain.
Stand near the Royal Family symbol and play Zelda's Lullaby.
In the Switch 2 remake, the Great Fairy provides Din's Fire after the required Rupee offering.
Din's Fire is a powerful magical attack that releases a burst of flames around Link.
It also becomes important for unlocking the Shadow Temple later in the game.
Collecting it now saves unnecessary backtracking.
Upgrade Your Bomb Bag
Return to Goron City.
Find the large Goron rolling around one of the circular levels.
You can stop him with a carefully timed Bomb.
Completing this challenge rewards you with a Bigger Bomb Bag, increasing your capacity from 20 to 30 Bombs.
This upgrade is useful for players who frequently rely on explosives.
Explore Hidden Walls Around Death Mountain
Now that you can carry Bombs, search Death Mountain Trail for cracked walls and suspicious rock formations.
Some contain Gold Skulltulas, secret passages, and additional rewards.
You can also return to locations that were previously blocked by destructible obstacles.
Prepare for Zora's Domain
Your next major quest involves the Zora people and Princess Ruto.
Travel toward Zora's River from Hyrule Field.
You'll need to reach Zora's Domain, obtain the Silver Scale, find Ruto's Letter, and eventually enter Lord Jabu-Jabu's Belly.
This is where you'll find the final Spiritual Stone.
For a broader overview of Link's journey, read our Ocarina of Time Switch 2 Complete Walkthrough.
You can also use the Ocarina of Time Child Link Spiritual Stones Guide to follow the complete early-game storyline.
Dodongo's Cavern FAQ
Where Is Dodongo's Cavern in Ocarina of Time?
Dodongo's Cavern is located along Death Mountain Trail, below Goron City.
You must destroy the large boulder blocking its entrance with a Bomb Flower.
How Do You Unlock Dodongo's Cavern?
Obtain Zelda's Letter, enter Goron City, learn Saria's Song, and play it for Darunia.
He gives you the Goron's Bracelet.
Use the bracelet to lift a Bomb Flower and destroy the boulder blocking the cavern entrance.
Where Is the Bomb Bag in Dodongo's Cavern?
The Bomb Bag is inside a large chest on the second floor.
Reach it by completing the staircase puzzle, passing the moving spike traps, defeating the second Lizalfos pair, and disabling the fire barriers.
How Many Bombs Can the First Bomb Bag Hold?
The first Bomb Bag holds 20 Bombs.
You can later increase your capacity through upgrades.
How Do You Lower the Giant Staircase?
Place a Bomb Flower in the gap between the two rows of Bomb Flowers near the staircase.
The resulting chain reaction lowers the stairs.
Where Is the Compass?
The Compass is in a side room connected to the Bomb Flower staircase chamber.
Destroy the cracked wall, defeat the Armos, and open the large chest.
How Do You Open the Giant Dodongo Skull?
Return to the bridge above the skull after obtaining the Bomb Bag.
Drop one Bomb into each eye socket.
Once both eyes glow red, the skull opens its mouth.
How Do You Solve the Final Stone Block Puzzle?
Move the blocks in the connected puzzle room to access the elevated passage.
Push the final stone block down into the square floor switch.
This unlocks the boss door.
What Is King Dodongo's Weakness?
King Dodongo's weakness is his open mouth.
Throw a Bomb inside when he inhales to stun him.
Then attack with the Kokiri Sword.
How Do You Avoid King Dodongo's Rolling Attack?
Move toward the wider corners of the arena and stay out of his path.
Wait for him to stop rolling before preparing another Bomb attack.
Can You Defeat King Dodongo Without the Bomb Bag?
Bomb Flowers are available in the boss arena, so they can provide explosives if needed.
However, collecting the Bomb Bag is part of the normal dungeon progression.
How Many Gold Skulltulas Are in Dodongo's Cavern?
There are five Gold Skulltulas in the Switch 2 remake.
Four can be collected during your first visit as Young Link.
The fifth requires returning later as Adult Link with the Scarecrow's Song and Hookshot.
Does Dodongo's Cavern Have a Boss Key?
No.
You don't need a Boss Key or Small Keys to complete Dodongo's Cavern.
The final boss door is unlocked using a stone block and a floor switch.
What Do You Get for Defeating King Dodongo?
Defeating King Dodongo rewards you with a Heart Container.
After leaving the dungeon, Darunia gives Link Goron's Ruby, the Spiritual Stone of Fire.
What Dungeon Comes After Dodongo's Cavern?
The recommended next dungeon is Lord Jabu-Jabu's Belly.
Travel to Zora's Domain and complete the quest involving Princess Ruto to unlock it.
Is Dodongo's Cavern Different in the Switch 2 Remake?
The remake retains the dungeon's core mechanics, including Bomb Flowers, the giant skull puzzle, and King Dodongo.
However, several rooms, collectibles, and encounters have been revised.
It also introduces new rewards, such as Business Scrub Seeds.
Final Thoughts – Complete Dodongo's Cavern and Claim Goron's Ruby
Dodongo's Cavern is one of the most important early dungeons in The Legend of Zelda: Ocarina of Time.
It introduces explosive puzzles, stronger combat encounters, and environmental challenges that require more careful planning than the Great Deku Tree.
The Bomb Flower staircase teaches you how to trigger chain reactions.
The moving spike traps test your timing and positioning.
The giant Dodongo skull rewards careful observation.
And King Dodongo introduces a boss encounter built around exploiting a specific weakness.
The essential dungeon route is: Dungeon Map → Baby Dodongo Corridor → Lizalfos → Torch Puzzle → Compass → Bomb Flower Staircase → Second Floor → Bomb Bag → Giant Skull → Stone Block Puzzle → King Dodongo.
Make sure you collect the Bomb Bag, Heart Container, and Goron's Ruby before continuing your adventure.
If you're aiming for completion, collect the four accessible Gold Skulltulas now and remember to return for the fifth later.
For players who need additional help with a difficult dungeon, story objective, or boss encounter, explore Zelda Ocarina of Time Boosting on BoostRoom to check available services and completion options.
With King Dodongo defeated, the Gorons can safely return to their food supply.
You've earned Goron's Ruby, and only one Spiritual Stone remains.
Your next adventure takes you to Zora's Domain and the mysterious depths of Lord Jabu-Jabu's Belly.
Hyrule is waiting!