Fire Temple Dungeon Overview
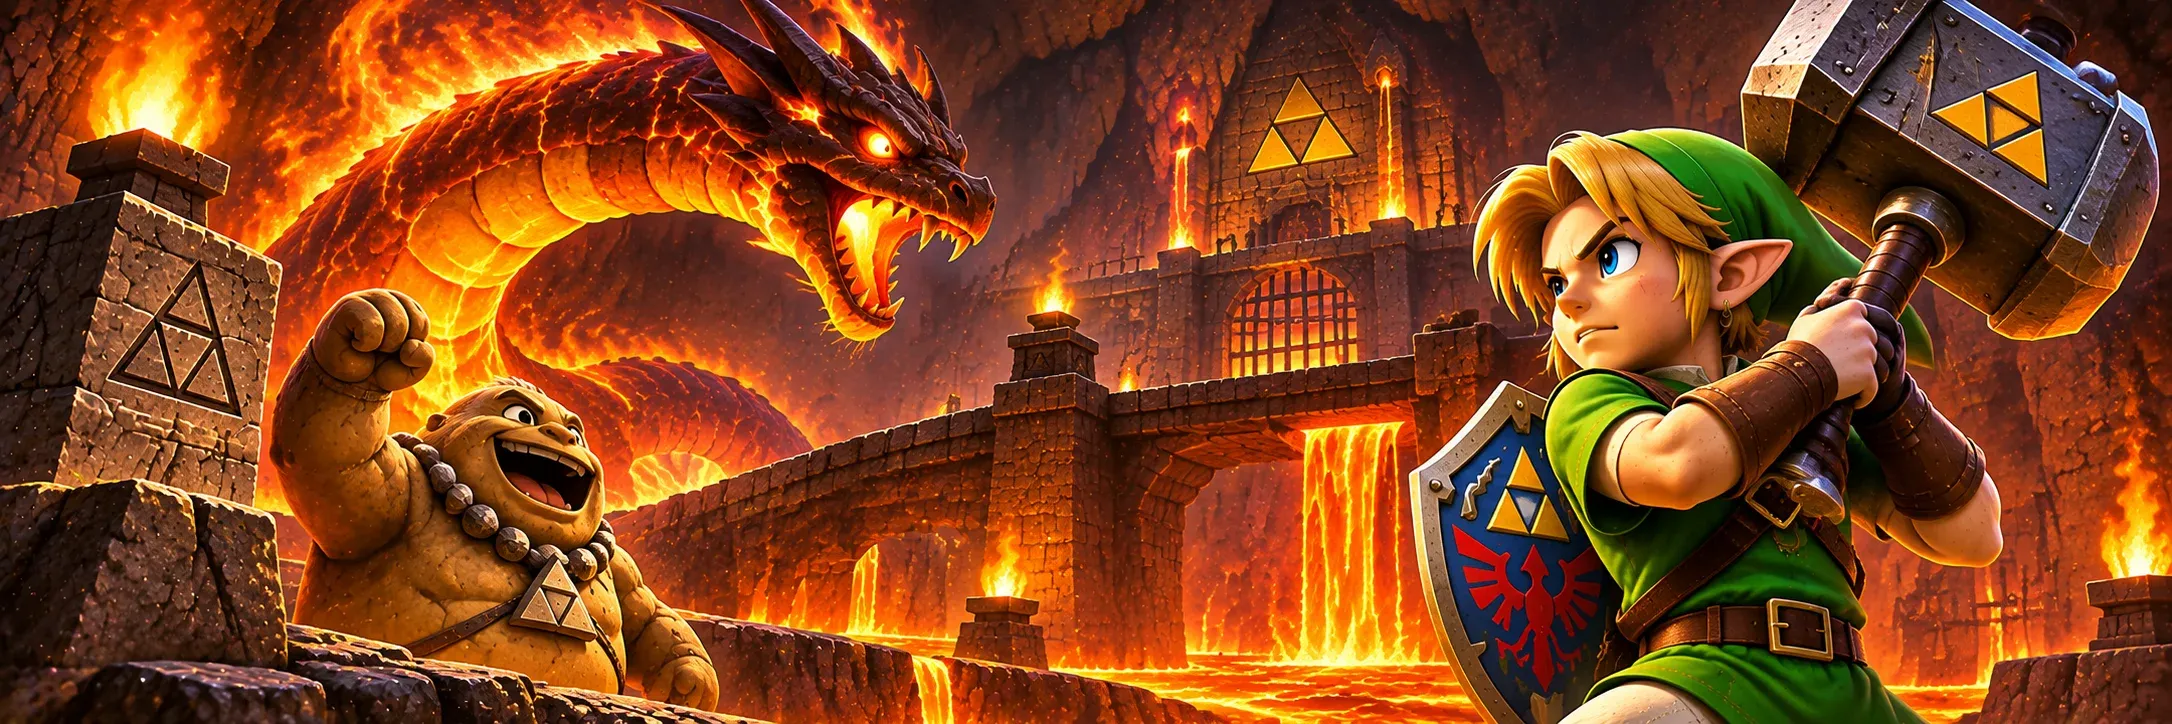
The Fire Temple is located inside Death Mountain Crater, beneath the volcanic mountain overlooking Hyrule.
It's the recommended second major temple for Adult Link, following the Forest Temple.
The dungeon is built around a massive central structure containing multiple floors, lava chambers, and interconnected puzzle rooms.
You'll gradually climb through the temple before returning toward the lower floors to access Volvagia.
Dungeon information:
Location: Death Mountain Crater
Playable character: Adult Link
Required equipment: Hookshot and access to Death Mountain Crater
Recommended equipment: Goron Tunic, Fairy Bow, Bombs, and Master Sword
Main dungeon item: Megaton Hammer
Additional items: Dungeon Map, Compass, and Boss Key
Small Keys: 8
Imprisoned Gorons: 9
Gold Skulltulas: 5
Mini-boss: Flare Dancer
Final boss: Subterranean Lava Dragon – Volvagia
Boss reward: Heart Container
Story reward: Fire Medallion
Eight imprisoned Gorons are associated with Small Key chests.
The final Goron rescue provides access to the Boss Key.
Important: You must obtain the Megaton Hammer before finishing the Fire Temple. It's required for several late-dungeon mechanisms and is the main weapon used to expose Volvagia's weakness.
How to Unlock the Fire Temple in Ocarina of Time
Before entering the Fire Temple, you'll need to reach Death Mountain Crater as Adult Link.
The recommended route begins after completing the Forest Temple and obtaining the Fairy Bow.
However, the essential requirements are reaching the crater and having the equipment needed to cross its dangerous passages.
Step 1: Travel to Goron City as Adult Link
After completing the Forest Temple, leave the Sacred Forest Meadow and travel toward Kakariko Village.
From there, follow Death Mountain Trail toward Goron City.
When you enter the settlement, you'll discover that nearly all the Gorons have disappeared.
The once-busy city is almost empty.
However, one young Goron remains.
He's rolling around one of the circular floors.
You need to stop him.
Step 2: Stop the Rolling Goron
Descend to the level where the young Goron is rolling.
Watch his movement pattern.
He repeatedly circles the settlement.
Your objective is to detonate a Bomb close enough to stop him.
You can use Bombs from your inventory or nearby Bomb Flowers.
Place a Bomb ahead of his route.
Time the explosion so it goes off as he approaches.
If you miss, wait for him to complete another circle and try again.
Beginner tip: The rolling Goron slows near the Bomb Flowers along his route. This provides a useful opportunity to time your explosion.
Once the Bomb hits, speak with him.
Step 3: Obtain the Goron Tunic
The young Goron introduces himself as Link, the son of Darunia.
He explains that Ganondorf has imprisoned the Gorons and revived Volvagia.
Darunia has entered the Fire Temple to confront the dragon.
Continue speaking with the young Goron until he gives you the Goron Tunic.
This red outfit protects Link from the extreme heat of Death Mountain Crater.
Equip it before continuing.
Without suitable protection, Link cannot safely explore the volcanic environment for long.
Step 4: Open the Hidden Passage in Darunia's Room
Descend to the lowest level of Goron City.
Enter Darunia's chamber.
Look for the large stone statue blocking part of the wall.
Pull the statue away from its position.
A hidden passage appears behind it.
Enter the passage to reach Death Mountain Crater.
Step 5: Cross Death Mountain Crater
Once inside the crater, move carefully across the available platforms.
The environment contains lava, steep drops, and narrow walkways.
Use the Hookshot to cross gaps where appropriate.
Continue toward the large bridge.
Sheik appears and teaches Link the Bolero of Fire.
This song allows you to return quickly to Death Mountain Crater.
It's particularly useful if you leave the temple and want to come back.
Step 6: Enter the Fire Temple
After learning the Bolero of Fire, continue along the crater route.
Find the passage descending toward the temple entrance.
Follow it downward.
Enter the Fire Temple.
The Fire Temple is now unlocked.
Fire Temple Walkthrough – Entrance and Darunia
When you first enter the Fire Temple, you'll arrive in a large entrance hall.
Several doorways lead deeper into the dungeon.
One of them eventually leads toward Volvagia, but the route is blocked.
Before progressing, you must begin rescuing the imprisoned Gorons.
Meet Darunia
From the entrance hall, head up the stairs.
Enter the western doorway.
You'll arrive in a large lava-filled chamber containing the route toward the boss.
Darunia appears.
He explains that Volvagia has returned and that the Gorons are being held prisoner.
Darunia moves toward the boss chamber to confront the dragon.
Link must find another way to reach him.
The central pillar above the boss entrance plays an important role in the dungeon.
You'll eventually need the Megaton Hammer to lower it.
Rescue the First Goron
After Darunia leaves, explore the lava chamber.
Look for a series of platforms along the southern or left-hand side.
Jump across carefully.
You'll find an imprisoned Goron behind a barred door.
A floor switch is positioned nearby.
Step on the switch to open the prison.
Speak with the Goron.
He provides useful information about the temple and its mechanisms.
Behind him is a small treasure chest.
Open it to obtain Small Key #1.
Progress: 1 of 9 Gorons rescued.
Return to the entrance hall.
Large Lava Room – Rescue Two More Gorons
With your first Small Key, you can open the locked eastern door in the entrance hall.
This leads into a huge lava-filled chamber.
A rope bridge crosses the middle, while smaller platforms connect several side passages.
You'll need to rescue two additional Gorons here.
Explore the Northern Lava Platforms
After entering, don't cross the central rope bridge immediately.
Instead, head toward the northern side of the room.
Jump across the available platforms.
Watch for Red Bubbles and Fire Keese.
These enemies can knock Link into the lava if you aren't careful.
Continue toward the northern doorway.
Inside, you'll find another imprisoned Goron.
Activate the nearby floor switch.
The prison door opens.
Speak with the Goron and open the chest to obtain Small Key #2.
Progress: 2 of 9 Gorons rescued.
Optional: Solve the Song of Time Block Puzzle
Before leaving the northern section, look toward the elevated northeastern ledge.
You'll notice a blue Time Block.
Use the nearby rising lava platform to reach the appropriate height.
Stand near the block and play the Song of Time.
The block moves, revealing a hidden passage.
Enter the room.
Inside, you'll encounter flying floor tiles and a Like Like.
Use your shield to defend against the tiles.
Defeat the Like Like from a safe distance using the Fairy Bow.
Be careful because Like Likes can steal important equipment.
After clearing the room, collect the Gold Skulltula token hidden inside.
This is the first of five Gold Skulltulas in the Fire Temple.
Rescue the Third Goron
Return to the large lava chamber.
Travel toward the southern end.
Look for a suspicious cracked wall near the platforms.
Use a Bomb to destroy it.
Enter the hidden passage.
You'll discover another imprisoned Goron.
Activate the floor switch to open the cell.
Speak with him and collect Small Key #3 from the chest.
Progress: 3 of 9 Gorons rescued.
Return to the central rope bridge.
Your next objective is reaching the upper floors.
How to Solve the Rising Fire Pillar Puzzle
Cross the main rope bridge toward the eastern side of the large lava chamber.
Use a Small Key to open the locked door.
You'll enter a tall room containing a massive column of fire.
The flame periodically rises through the center.
You must use the fire itself as an elevator.
Step 1: Enter the Fire Pillar Room
Follow the passage around the flame.
Avoid touching the central fire column.
Continue toward the locked door and open it with a Small Key.
You'll find a climbable chain-link wall.
Step 2: Climb the Chain Wall
Climb toward the upper platform.
At the top, you'll discover a large movable stone block.
The block is positioned above the flame column.
You need to drop it onto the fire.
Step 3: Push the Stone Block Down
Approach the block.
Push it off the ledge.
It falls onto the central fire column below.
When the flames rise, they lift the block upward.
This creates a temporary elevator.
Step 4: Ride the Block Upward
Return toward the lower platform.
Jump onto the stone block while the flames are low enough.
Wait for the column to erupt.
The rising flames push the block upward.
Ride it toward the second floor.
Jump onto the upper ledge when it reaches the correct height.
Puzzle solution: Push the stone block onto the fire column and use it as an elevator to reach the second floor.
Second Floor – Torch Slugs and Fire Barrier Puzzle
After using the fire pillar elevator, you'll reach an area containing Torch Slugs and several elevated platforms.
Your objective is reaching a higher passage blocked by a wall of fire.
Defeat the Torch Slugs
Torch Slugs crawl around the chamber.
Their burning bodies can damage Link on contact.
Attack from a safe distance with the Fairy Bow.
Once their flames are weakened, finish them with the Master Sword.
Avoid standing too close when they move toward you.
Find the Movable Block
Explore the raised platforms.
You'll eventually find a stone block hidden around a corner.
Pull it away from its original position.
Move it toward the ledge near the fire barrier.
You need to use the block as a step.
Activate the Crystal Switch
Look for a crystal switch controlling the nearby flames.
The switch can be activated with a projectile.
Use the Fairy Bow, Hookshot, or another suitable item.
When the switch activates, the fire barrier temporarily disappears.
Climb Toward the Third Floor
Position the movable block beneath the raised ledge.
Climb onto it.
Activate the crystal switch again if necessary.
Quickly move across the area before the flames return.
Continue climbing the available platforms.
You'll eventually reach the third floor.
Important: If you're stuck here, check whether the block is positioned close enough to the ledge. The block and crystal switch must be used together.
Fire Temple Rolling Boulder Maze – Dungeon Map Location
The third floor contains a large maze filled with rolling boulders.
This is one of the Fire Temple's most confusing areas.
The maze contains hidden walls, imprisoned Gorons, treasure chests, and routes toward the upper floors.
Your first priority is obtaining the Dungeon Map.
How to Navigate the Rolling Boulders
When you enter, stop briefly and observe the area.
Several large boulders roll through the passages.
Their movement follows consistent routes.
Watch the timing before crossing.
Use the side alcoves to avoid collisions.
Don't rush around corners without checking for approaching boulders.
Where to Find the Dungeon Map
From the maze entrance, head toward the southern side.
Follow the outer passages until you reach an alcove containing a large treasure chest.
Open it to obtain the Dungeon Map.
The map shows the temple's multi-floor layout.
This is particularly useful because the rolling boulder maze connects several different routes.
Find the Second Gold Skulltula
Return toward the northeastern part of the maze.
Look for a suspicious cracked wall.
Use a Bomb to destroy it.
Enter the small hidden alcove.
Inside, you'll find a Gold Skulltula.
Defeat it with the Hookshot and collect the token.
Rescue the Fourth Goron
Continue exploring the northern side of the boulder maze.
Find a doorway leading toward another prison cell.
Inside, activate the nearby floor switch.
The barred door opens.
Speak with the Goron and collect Small Key #4.
Progress: 4 of 9 Gorons rescued.
You're now ready to continue toward the Compass and upper maze.
Where to Find the Compass in the Fire Temple
Return to the central section of the rolling boulder maze.
Look for a locked door along the western outer wall.
Use a Small Key to open it.
You'll enter a room containing narrow walkways suspended above lava.
Find the Eye Switch
Near the entrance, look toward the right wall.
You'll notice an eye-shaped switch.
Equip the Fairy Bow.
Shoot the eye.
This opens a nearby side passage.
Collect the Compass
Enter the newly accessible room.
You'll find a large treasure chest.
Open it to collect the Compass.
The Compass helps you locate treasure chests and identify the boss chamber.
After collecting it, return to the narrow walkway room.
Continue forward toward the fire-wall obstacle.
How to Escape the Moving Wall of Fire
The next challenge involves a wall of flames that follows Link through a long passage.
Several narrow walkways are suspended above lava.
You need to reach the far side without being caught by the fire.
Step 1: Start Crossing the Walkways
Move forward across the metal and stone platforms.
A large wall of fire begins moving behind Link.
Don't stop to fight every enemy.
Your priority is reaching the far side.
Step 2: Move Quickly Between Platforms
Use the available paths to cross the room.
The remake's movement controls can help you navigate the gaps.
Watch for Red Bubbles and other enemies that may interfere with your movement.
Keep moving forward.
Step 3: Reach the Far Ledge
Continue toward the far end of the chamber.
Climb the stairs.
You'll find a movable stone block.
Push it off the ledge.
The block falls into the lower maze area.
This creates a shortcut connecting the upper and lower sections.
Step 4: Access the Upper Boulder Maze
Jump toward the nearby platforms.
You now have access to the upper section of the rolling boulder maze.
This area contains two more imprisoned Gorons.
Puzzle tip: If the moving wall of fire catches you repeatedly, focus on the shortest path between platforms and avoid stopping for optional enemies or collectibles.
Upper Boulder Maze – Rescue Two More Gorons
The upper section of the rolling boulder maze contains several hidden routes.
You'll need to use Bombs and floor switches to rescue two additional Gorons.
Rescue the Fifth Goron
From the upper walkway, look for a platform with a cracked floor.
Move toward it.
Place a Bomb on the cracked surface.
The explosion reveals a hole.
Climb or drop carefully into the opening.
You'll reach a lower room containing Torch Slugs and an imprisoned Goron.
Defeat the enemies.
Activate the floor switch.
The prison door opens.
Speak with the Goron and collect Small Key #5.
Progress: 5 of 9 Gorons rescued.
Return to the upper level.
Rescue the Sixth Goron
Continue toward the southwestern section of the upper boulder maze.
You'll find another floor switch.
Activate it.
A nearby prison opens.
Travel toward the cell and speak with the rescued Goron.
Open the chest containing Small Key #6.
Progress: 6 of 9 Gorons rescued.
You now have the keys needed to continue through the fire-wall passages.
Before leaving, consider collecting two optional Gold Skulltulas.
Optional Scarecrow's Song Puzzle – Two Gold Skulltulas
The Fire Temple contains a hidden area that requires Scarecrow's Song.
This route is optional and doesn't need to be completed to defeat Volvagia.
However, it contains two Gold Skulltulas and additional treasure.
How to Unlock Scarecrow's Song
If you haven't learned Scarecrow's Song, you'll need to complete the related Lake Hylia activity involving Bonooru.
The melody is established through an interaction during Young Link's adventure and can be used later as Adult Link.
Once the song is available, return to the Fire Temple.
Summon Pierre in the Upper Boulder Maze
Return toward the entrance connecting the upper boulder maze to the moving fire-wall room.
Look upward.
You should notice a location where Pierre can appear.
Play Scarecrow's Song.
Pierre appears on the elevated ledge.
Equip the Hookshot.
Target Pierre to reach the higher platform.
Ride the Hidden Elevator
From the ledge, use the Hookshot to reach another platform.
This platform rises toward the upper floors.
You'll enter a hidden section containing climbable chain-link walls.
Climb upward.
Before entering the next room, look behind the climbable section.
You'll find the third Gold Skulltula.
Use the Hookshot to defeat it and collect its token.
Collect the Fourth Gold Skulltula
Continue to the upper room.
You'll reach a circular chamber near the fifth floor.
Look along the walls above the lava.
Another Gold Skulltula is positioned here.
Use the Hookshot to collect it.
This area also contains a timed switch connected to several Hookshot targets.
Activate the switch and quickly use the targets to reach additional treasure chests.
You can obtain extra Rupees as optional rewards.
Completion tip: If you don't have Scarecrow's Song, skip this area and return later. It's not required for the Fire Temple's main objective.
Fire Temple Fire Maze – How to Get Through the Flame Walls
After collecting the available Small Keys, return toward the western locked door connected to the fire-wall chamber.
Use a Small Key to enter the Fire Maze.
This is one of the dungeon's most challenging puzzle rooms.
Invisible flame barriers appear as Link approaches, blocking different routes.
Several doors along the walls are also traps.
Understand the Fire Maze
The Fire Maze contains narrow passages divided by invisible fire barriers.
When Link approaches certain areas, flames rise from the floor.
These barriers force you to change direction.
Some doors are fake and attack when you interact with them.
You need to find the correct passages while avoiding damage.
Follow the Outer Walls
Start by moving along the outer edges of the room.
When a fire barrier appears, move away and look for another opening.
Avoid running directly into the flames.
The dungeon map helps you identify which doors connect to real rooms.
Avoid the Fake Doors
Some doors aren't real entrances.
These False Doors can fall or slam toward Link.
Don't assume every door is safe.
You can destroy a suspected False Door with a Bomb.
However, it's usually better to identify the actual route using your map.
Rescue the Seventh Goron
From the maze entrance, work your way toward the northern side.
Find the room containing an imprisoned Goron.
Activate the floor switch to open the prison.
Speak with him.
Collect Small Key #7 from the chest.
Progress: 7 of 9 Gorons rescued.
Return to the Fire Maze.
Find the Southern Locked Passage
Now move toward the southern side of the maze.
Navigate around the fire barriers until you reach the inner locked doorway.
Use the Small Key to open it.
Continue through the passage.
You'll notice another imprisoned Goron behind bars, but you can't release him yet.
You need the Megaton Hammer first.
Weighted Floor Switch Puzzle – Disable the Fire Barrier
The next chamber contains a large flame barrier blocking your route.
To disable it, you'll need to place a movable object on a floor switch.
Find the Movable Blocks
Explore the northern section of the room.
Look for a pair of small movable blocks.
These blocks are light enough for Link to carry.
Pick up one of them.
Carry the Block to the Switch
Move carefully through the chamber.
Several fire barriers may appear as you approach.
Navigate around them.
Carry the block toward the floor switch controlling the large wall of fire.
Place the block on the switch.
Open the Final Locked Door
When the switch is pressed, the large flame barrier disappears.
Move through the newly accessible passage.
Use your remaining Small Key to open the locked door.
You'll enter a circular arena containing a powerful enemy.
It's time to face the Flare Dancer.
Flare Dancer Mini-Boss – How to Defeat It
Mini-boss: Flare Dancer
Location: Fire Temple, upper central route
Recommended equipment: Bombs, Hookshot, and Master Sword
The Flare Dancer is a strange enemy surrounded by a spinning shield of fire.
Its main body is hidden inside the flames.
You must remove the fire protection before dealing damage.
Step 1: Remove the Fire Armor
When the battle begins, the Flare Dancer spins around the arena.
Keep your distance.
Use a Bomb to disrupt its fiery protection.
A successful explosion exposes the small core hidden inside.
The Hookshot is another useful option for pulling the core out of the flames.
Step 2: Chase the Exposed Core
Once the flames disappear, the small core runs around the circular platform.
Don't chase directly behind it for too long.
Instead, move in the opposite direction around the arena.
This allows you to intercept it.
Step 3: Attack With the Master Sword
When the core approaches, attack with the Master Sword.
Deal as much damage as possible before it escapes.
After taking damage, the Flare Dancer returns to the center and creates another layer of fire.
Step 4: Repeat the Process
Continue removing the fiery armor.
Chase the exposed core.
Attack with your sword.
Repeat until the Flare Dancer is defeated.
Move away as it collapses because its final explosion can damage Link.
Step 5: Ride the Central Platform
After defeating the Flare Dancer, the central platform becomes usable.
Step onto it.
The platform rises, taking Link toward the fourth floor.
You're getting closer to the Megaton Hammer.
Where Is the Megaton Hammer in the Fire Temple?
The Megaton Hammer is inside a large treasure chest on the fifth floor, reached after defeating the first Flare Dancer and completing the upper-floor fire puzzles.
It's the most important item in the Fire Temple.
You'll need it to activate heavy switches, break special obstacles, lower the central pillar, and defeat Volvagia.
Step 1: Reach the Fourth Floor
After defeating the Flare Dancer, ride the central lift upward.
You'll arrive in a room containing a switch and a flame barrier.
The switch temporarily disables the flames.
Activate it using an Arrow or Bomb from the appropriate position.
Quickly move through the passage before the fire returns.
Continue climbing until you reach the fifth floor.
Step 2: Enter the Circular Hammer Chamber
You'll arrive in a large circular area with narrow platforms surrounding a deep opening.
A treasure chest is visible on an elevated ledge.
However, flames block the direct route.
A timed switch controls the barrier.
Step 3: Activate the Small Floor Switch
Move toward the small floor switch near the elevated path.
Step on it.
The flames surrounding the treasure chest disappear temporarily.
You now have a limited opportunity to reach it.
Step 4: Run Up the Narrow Path
Quickly follow the circular route toward the chest.
Use the inner path to reduce the distance you need to travel.
Avoid falling into the central opening.
If the flames return before you arrive, go back and activate the switch again.
Step 5: Open the Megaton Hammer Chest
Reach the chest while the barrier is disabled.
Open it.
You'll obtain the Megaton Hammer.
This legendary weapon was previously used by a Goron hero to defeat Volvagia.
Now Link can use it against the dragon.
Megaton Hammer acquired!
What Can You Do With the Megaton Hammer?
The Megaton Hammer is a heavy weapon designed for powerful strikes and environmental puzzles.
It provides several new abilities.
Break Special Obstacles
Certain stone objects and unusual rocks can only be destroyed using the Megaton Hammer.
Look for obstacles that don't react to ordinary Bombs.
Activate Heavy Switches
The Fire Temple contains large metal switches that must be struck with the Hammer.
These switches unlock doors, lower platforms, and open important shortcuts.
Damage Strong Enemies
The Hammer can deal heavy damage to certain enemies.
It's useful against Torch Slugs and other creatures encountered throughout the temple.
Expose Volvagia's Weakness
The Megaton Hammer is the key to defeating Volvagia.
You'll need to strike the dragon's head when it emerges from the arena's lava holes.
Important: After obtaining the Hammer, revisit previously blocked areas. Several late-dungeon puzzles are built around its special abilities.
Megaton Hammer Puzzles – Return to the Lower Floors
Once you've obtained the Megaton Hammer, you need to descend through the temple.
Several large switches and obstacles now become accessible.
Activate the Large Hammer Switch
Return toward the entrance of the fifth-floor chamber.
Look for a large metal switch.
Equip the Megaton Hammer.
Strike the switch.
This causes part of the platform to descend.
Follow the lowered route toward the fourth floor.
Break the Stone Obstacle
Continue into the next room.
You'll find a large stone structure blocking the passage.
Strike it with the Megaton Hammer.
The obstacle breaks or moves, revealing the path forward.
Lower the Hammer Staircase
In the following chamber, look for another heavy switch.
Hit it with the Megaton Hammer.
The mechanism lowers a staircase, allowing Link to continue downward.
Drop Toward the Third Floor
Continue through the connected rooms.
You'll encounter another large metal switch.
Activate it with the Hammer.
The platform descends again.
You eventually return to the third floor, near the Fire Maze and central pillar.
This leads toward the eighth Small Key.
Rescue the Eighth Goron – Song of Time and Hammer Switch
The eighth imprisoned Goron is located behind a puzzle involving a Time Block and a heavy switch.
You'll need both the Song of Time and Megaton Hammer.
Find the Hidden Passage
After returning to the third floor, look for a cracked rock wall.
Use the available weapon or explosive to destroy it.
Enter the hidden room.
You'll find a large blue Time Block.
Play the Song of Time
Stand near the block.
Equip the Ocarina.
Play the Song of Time.
The block moves, revealing a passage underneath.
Drop down.
Activate the Hammer Switch
In the lower chamber, you'll find a large metal switch.
Strike it using the Megaton Hammer.
The mechanism opens the nearby prison.
Collect Small Key Number Eight
Approach the freed Goron.
Speak with him.
Open the nearby chest to collect Small Key #8.
Progress: 8 of 9 Gorons rescued.
You now have all eight Small Keys from the Fire Temple.
Only the final Goron and Boss Key remain.
How to Lower the Central Pillar Above Volvagia
After rescuing the eighth Goron, continue through the connected passage.
You'll eventually reach a large circular floor mechanism.
This mechanism controls the pillar above Volvagia's chamber.
Find the Circular Hammer Panel
Look for the large metal panel embedded in the floor.
It's connected to the central pillar of the temple.
Equip the Megaton Hammer.
Strike the Panel
Hit the circular panel with the Hammer.
The mechanism activates.
The pillar begins descending through the temple.
This creates a path toward the boss entrance far below.
Follow the Pillar Downward
After activating the mechanism, follow the available route down.
You'll return toward the original boss chamber where you met Darunia.
The previously blocked route is now accessible.
However, you still need the Boss Key.
Important: Lowering the pillar doesn't automatically unlock the boss door. You must complete the final Goron rescue to obtain the Boss Key.
Fire Temple Boss Key Location – Rescue the Ninth Goron
The Boss Key is located on the first floor, behind a series of rooms that become accessible after obtaining the Megaton Hammer.
Return to the Fire Temple's entrance hall.
Step 1: Return to the Entrance
From the lowered pillar area, travel back toward the main entrance.
Look for the eastern passage blocked by a large stone structure.
You couldn't remove it earlier.
Now you can use the Megaton Hammer.
Step 2: Break the Stone Barrier
Equip the Megaton Hammer.
Strike the stone obstacle until the passage opens.
Enter the newly accessible room.
Step 3: Defeat the Torch Slugs
Several Torch Slugs guard the area.
Use the Hammer to defeat them.
Avoid their flames.
Once the enemies are cleared, continue through the next doorway.
Step 4: Survive the Flying Tile Room
The next room contains flying floor tiles and a Like Like.
Raise your shield to defend against incoming tiles.
Avoid standing directly in front of the Like Like.
Defeat it from a distance with the Fairy Bow if possible.
Look for a metal obstacle that can be broken with the Megaton Hammer.
Behind it is the fifth Gold Skulltula.
Collect the token before leaving.
Step 5: Defeat the Second Flare Dancer
Continue through the next passage.
You'll encounter another Flare Dancer.
Use the same strategy as before.
Remove its fire protection using the Megaton Hammer or an appropriate explosive.
Chase its exposed core.
Attack with the Master Sword.
Repeat until the enemy is defeated.
A small reward chest appears.
Collect the reward and continue.
Step 6: Free the Final Goron
Enter the final prison room.
Look for the heavy metal switch.
Strike it with the Megaton Hammer.
The cell opens.
Speak with the final imprisoned Goron.
He provides additional information about the dragon and Darunia.
Step 7: Collect the Boss Key
Open the large treasure chest inside the prison.
You'll receive the Boss Key.
Progress: 9 of 9 Gorons rescued.
Every imprisoned Goron has now been freed.
You have the Megaton Hammer, all eight Small Keys, and the Boss Key.
It's time to defeat Volvagia.
All Eight Fire Temple Small Key Locations
If you're missing a Small Key, review these locations.
Small Key 1 – Darunia's Lava Chamber
Found in the first imprisoned Goron's cell, reached from the western doorway near the Fire Temple entrance.
Small Key 2 – Northern Large Lava Room
Found in the northern prison chamber connected to the large rope bridge room.
Small Key 3 – Southern Bombable Wall
Found in the southern passage of the large lava room, behind a cracked wall destroyed with a Bomb.
Small Key 4 – Lower Rolling Boulder Maze
Found in the northern prison chamber of the third-floor rolling boulder maze.
Small Key 5 – Hidden Room Beneath the Upper Maze
Found after bombing the cracked floor in the upper boulder maze and descending into the lower prison room.
Small Key 6 – Southwestern Upper Boulder Maze
Found by activating the floor switch in the upper maze and freeing the nearby imprisoned Goron.
Small Key 7 – Northern Fire Maze Prison
Found inside the northern side room of the maze containing invisible walls of fire.
Small Key 8 – Hammer Switch Behind the Time Block
Found after obtaining the Megaton Hammer, moving the Time Block with the Song of Time, and striking the heavy switch to release the eighth Goron.
Key reminder: Small Keys are consumed when opening locked doors. You don't need to keep all eight in your inventory at once.
All Five Fire Temple Gold Skulltula Locations
The Fire Temple contains five Gold Skulltulas.
Most can be collected during normal progression.
However, two are found along a hidden route accessed using Scarecrow's Song.
Gold Skulltula 1 – Song of Time Passage
Location: First floor, northern side of the large lava chamber.
Reach the elevated northeastern Time Block.
Play the Song of Time.
Enter the hidden passage.
Avoid the flying floor tiles and defeat the Like Like.
Collect the Gold Skulltula token.
Gold Skulltula 2 – Rolling Boulder Maze
Location: Third floor, northeastern section of the lower boulder maze.
Look for a cracked wall.
Destroy it with a Bomb.
Enter the hidden alcove and collect the Gold Skulltula.
Gold Skulltula 3 – Scarecrow's Song Climbing Route
Location: Upper route above the rolling boulder maze.
Play Scarecrow's Song to summon Pierre.
Use the Hookshot to reach the hidden elevated platform.
Ride the platform upward.
Climb the chain-link wall.
Find the Gold Skulltula near the upper wall and collect its token.
Gold Skulltula 4 – Fifth-Floor Hidden Chamber
Location: Fifth-floor circular chamber along the Scarecrow's Song route.
Continue climbing from the previous Skulltula.
Enter the circular room near the upper lava chamber.
Look toward the wall above the lava.
Use the Hookshot to defeat the Gold Skulltula and collect its token.
Gold Skulltula 5 – Hammer-Only Entrance Passage
Location: First floor, hidden passage near the final Boss Key route.
After obtaining the Megaton Hammer, return to the entrance hall.
Break the stone barrier and continue through the rooms containing Torch Slugs and a Like Like.
Use the Hammer to remove the obstacle hiding the Gold Skulltula.
Collect the token before continuing to the second Flare Dancer encounter.
Completion tip: If you didn't unlock Scarecrow's Song before entering the Fire Temple, return later for the two related Gold Skulltulas.
Volvagia Boss Fight – How to Defeat the Fire Temple Boss
Boss: Subterranean Lava Dragon – Volvagia
Location: Fire Temple boss chamber
Required item: Megaton Hammer
Damage weapon: Master Sword
Useful equipment: Fairy Bow and Hookshot
Boss reward: Heart Container
Story reward: Fire Medallion
Volvagia is a massive fire dragon revived by Ganondorf.
The battle takes place on a large stone platform surrounded by lava.
Several holes cover the arena floor.
Volvagia emerges from these openings to attack Link.
The battle combines Hammer timing, sword attacks, and careful movement.
Volvagia Phase One – Strike the Dragon's Head
The first phase introduces Volvagia's main weakness.
Its armored head cannot be damaged effectively through ordinary sword attacks.
You must stun the dragon with the Megaton Hammer.
Step 1: Watch the Lava Holes
When the battle begins, Volvagia moves beneath the arena.
Watch the holes in the floor.
One will begin showing signs that the dragon is about to emerge.
Move toward the active hole, but don't stand directly above it.
Step 2: Wait for Volvagia to Appear
Volvagia lifts its head from the opening.
This is your opportunity.
Equip the Megaton Hammer.
Approach quickly.
Step 3: Strike Volvagia With the Megaton Hammer
Hit the dragon's head with the Hammer.
A successful strike stuns Volvagia.
The dragon's vulnerable head becomes exposed.
Move quickly because the opening doesn't last long.
Step 4: Attack With the Master Sword
Once Volvagia is stunned, attack with the Master Sword.
Deal as much damage as possible before it recovers.
A strong sword attack can help maximize damage during the opening.
Afterward, move away from the hole.
Volvagia will retreat beneath the platform.
Boss tip: The safest strategy is to stun Volvagia with the Megaton Hammer before attacking with the Master Sword.
Volvagia Phase Two – Avoid Fire Breath and Falling Rocks
After taking damage, Volvagia becomes more aggressive.
It begins flying around the arena instead of remaining inside the holes.
You'll need to survive these attacks before creating another opening.
Avoid Volvagia's Fire Breath
Volvagia flies across the arena and releases a stream of fire.
Watch its movement.
Run away from the path of the flames.
Don't stand still while attempting to aim.
You can also target the dragon with the Fairy Bow or Hookshot during suitable low-flight openings.
However, your main damage opportunities still come when it emerges from a lava hole.
Avoid the Falling Rocks
Volvagia may fly above the arena and cause rocks to fall from the ceiling.
These rocks can deal significant damage.
Watch the shadows and falling debris.
Move away from the threatened areas.
Continue running while the attack lasts.
Don't stop beneath falling rocks to prepare your next Hammer attack.
Prepare for Another Hole Attack
After completing its aerial attack, Volvagia returns beneath the arena.
Watch the lava holes again.
As the fight progresses, the dragon may briefly appear to approach several holes before emerging from a different one.
Don't commit to an attack until you identify the actual opening.
In later attack patterns, Volvagia may create multiple fake warnings before emerging on the third attempt.
Once the dragon appears, strike it with the Megaton Hammer.
Follow up with sword attacks.
Volvagia Final Phase – Finish the Dragon
As Volvagia loses health, its attacks become more dangerous.
Continue watching for the same patterns.
Your goal is to remain patient rather than rushing into an unsafe position.
Repeat the Hammer Strategy
When Volvagia emerges from a lava hole:
Move toward the correct opening.
Strike the head with the Megaton Hammer.
Attack with the Master Sword while it's stunned.
Retreat before the dragon recovers.
Survive the Aerial Attacks
When Volvagia flies around the arena, prioritize avoiding damage.
Keep moving during its fire breath.
Watch for falling rocks.
Avoid standing near the edge of the platform.
Deliver the Final Attacks
Continue stunning Volvagia with the Hammer and attacking with the Master Sword.
After enough successful openings, the dragon's health is depleted.
Volvagia collapses and the battle ends.
Congratulations! You've defeated Volvagia and completed the Fire Temple's final boss encounter.
What Rewards Do You Get for Defeating Volvagia?
After defeating Volvagia, you'll receive two important rewards.
Collect the Heart Container
A Heart Container appears inside the boss chamber.
Pick it up before leaving.
This permanently increases Link's maximum health.
The additional health will help during later dungeons, including the Water Temple.
Receive the Fire Medallion
Enter the blue warp portal.
Link is transported to the Chamber of Sages.
Darunia is revealed as the Sage of Fire.
He rewards Link with the Fire Medallion.
The Gorons are free, and the danger threatening Death Mountain has been removed.
Death Mountain Returns to Normal
After Volvagia is defeated, the volcanic activity around Death Mountain changes.
The threatening cloud above the mountain clears.
Link returns to Death Mountain Crater, where additional exploration opportunities become available.
Main story progress: Fire Temple completed and Fire Medallion obtained.
What to Do After Completing the Fire Temple
After collecting the Fire Medallion, you can continue the main story toward Zora's Domain.
However, the Megaton Hammer unlocks several useful optional activities.
Visit the Great Fairy Fountain in Death Mountain Crater
After returning to Death Mountain Crater, travel back toward the bridge leading to Goron City.
Look for a cave entrance blocked by large rocks.
Use the Megaton Hammer to destroy the obstruction.
Enter the Great Fairy Fountain.
Play Zelda's Lullaby at the appropriate symbol.
The Great Fairy offers a Magic Meter upgrade.
In the Switch 2 remake, this upgrade requires a Rupee offering.
It doubles the amount of magic Link can carry.
This becomes especially useful when using magical spells and equipment during later temples.
Explore Previously Blocked Areas
The Megaton Hammer can destroy certain obstacles that ordinary weapons cannot break.
Consider revisiting Death Mountain Trail, Goron City, and other previously explored locations.
You may discover hidden passages, collectibles, or optional rewards.
Prepare for the Ice Cavern
The next recommended destination is Zora's Domain.
As Adult Link, you'll discover that the area has frozen.
Continue toward Zora's Fountain and enter the Ice Cavern.
There, you'll obtain the Iron Boots and learn the Serenade of Water.
These are important for reaching the Water Temple.
For more progression help, read the Ocarina of Time Switch 2 Complete Walkthrough.
You can also follow the Ocarina of Time Dungeon Order Guide to prepare for the remaining Sage temples.
Common Fire Temple Problems and Solutions
The Fire Temple contains several puzzles that can prevent progression if you miss an important switch or imprisoned Goron.
Here are the most common problems.
Why Can't I Enter the Fire Temple?
You need to reach Death Mountain Crater as Adult Link.
Visit Goron City, stop the rolling Goron, obtain the Goron Tunic, and move the statue inside Darunia's room.
Follow the hidden passage into the crater.
Why Am I Taking Heat Damage?
You may not have the Goron Tunic equipped.
The outfit protects Link against extreme heat.
Equip it before exploring the crater and temple.
How Do I Free the Imprisoned Gorons?
Most prison cells are opened by nearby floor switches.
Some require solving additional puzzles or reaching the switch from another room.
The final cells require the Megaton Hammer.
Why Am I Missing a Small Key?
Check whether you've skipped a Goron prison.
Every Small Key in the Fire Temple is associated with one of the eight relevant rescue chests.
Revisit the rolling boulder maze and Fire Maze if you're missing one.
How Do I Ride the Fire Pillar Elevator?
Push the large stone block onto the rising fire column.
Stand on it and wait for the fire to lift it upward.
Jump onto the upper platform.
Where Is the Dungeon Map?
The Dungeon Map is in the southern section of the third-floor rolling boulder maze.
Where Is the Compass?
The Compass is behind an eye-switch door connected to the narrow walkway chamber west of the rolling boulder maze.
Shoot the eye with the Fairy Bow to open the passage.
How Do I Cross the Moving Fire Wall?
Keep moving through the narrow platforms.
Avoid stopping to fight unnecessary enemies.
Reach the far end and push the stone block down to create the shortcut.
How Do I Disable the Invisible Fire Barriers?
Some fire barriers are controlled by floor switches.
Others require careful navigation around the maze.
Use movable blocks to keep certain switches pressed.
Where Is the Megaton Hammer?
The Megaton Hammer is on the fifth floor.
Defeat the first Flare Dancer, ascend through the upper temple, and complete the timed flame barrier puzzle to reach the large chest.
How Do I Open the Final Goron Cell?
Return to the entrance after obtaining the Megaton Hammer.
Break the stone barrier and complete the nearby rooms.
Strike the final Hammer switch to open the prison and obtain the Boss Key.
How Do I Lower the Pillar Above Volvagia?
After obtaining the Megaton Hammer, descend through the Hammer puzzles.
Find the large circular panel connected to the central pillar.
Strike it to lower the structure toward the boss entrance.
How Do I Defeat Volvagia?
Wait for the dragon to emerge from a lava hole.
Strike its head with the Megaton Hammer.
Attack with the Master Sword while it's stunned.
Avoid fire breath and falling rocks during the aerial phases.
Fire Temple FAQ
Is the Fire Temple the Second Adult Link Temple?
Yes. The Fire Temple is the recommended second major Adult Link temple after the Forest Temple.
The game allows some flexibility in later dungeon progression.
Where Is the Fire Temple Located?
The Fire Temple is located inside Death Mountain Crater.
You can reach it through the hidden passage in Darunia's chamber in Goron City.
How Do You Get the Goron Tunic?
Stop the young Goron rolling around Goron City using a Bomb.
Speak with him and complete the conversation to receive the Goron Tunic.
How Many Gorons Must You Rescue?
There are nine imprisoned Gorons in the Fire Temple.
Eight are associated with Small Key chests.
The ninth provides access to the Boss Key.
How Many Small Keys Are in the Fire Temple?
There are eight Small Keys.
You'll obtain them by rescuing Gorons throughout the temple.
Does the Fire Temple Have a Boss Key?
Yes.
The Boss Key is found inside the final Goron prison near the entrance, behind a series of rooms unlocked after obtaining the Megaton Hammer.
Where Is the Megaton Hammer?
The Megaton Hammer is found in a large chest on the fifth floor.
You'll reach it after defeating the first Flare Dancer and completing the timed fire barrier puzzle.
What Is the Megaton Hammer Used For?
The Megaton Hammer breaks certain stone obstacles, activates heavy metal switches, damages enemies, and exposes Volvagia's weakness.
How Many Gold Skulltulas Are in the Fire Temple?
There are five Gold Skulltulas.
Two are connected to a hidden route accessed using Scarecrow's Song.
Do You Need Scarecrow's Song to Complete the Fire Temple?
No.
Scarecrow's Song is optional.
However, it allows you to reach two Gold Skulltulas and additional treasure in the upper sections of the temple.
How Do You Defeat the Flare Dancer?
Use a Bomb or Hookshot to remove its fiery protection.
Chase the exposed core and attack with the Master Sword.
Repeat until it's defeated.
What Is Volvagia's Weakness?
Volvagia's weakness is its head when it emerges from the lava holes.
Strike it with the Megaton Hammer to stun the dragon.
Then attack with the Master Sword.
Can You Damage Volvagia With the Fairy Bow?
Yes. The Fairy Bow can damage Volvagia during certain aerial openings.
However, using the Megaton Hammer when it emerges from a hole is the most reliable strategy.
What Do You Get for Defeating Volvagia?
You receive a Heart Container after the boss fight.
Darunia also awards the Fire Medallion during the Chamber of Sages sequence.
Can You Return to the Fire Temple Later?
Yes.
You can revisit the dungeon for missed collectibles or optional treasure.
The Bolero of Fire provides convenient access to Death Mountain Crater.
What Dungeon Comes After the Fire Temple?
The next recommended area is the Ice Cavern.
You'll obtain the Iron Boots there before proceeding toward the Water Temple.
Is the Fire Temple Different in the Switch 2 Remake?
The Switch 2 remake preserves the core Fire Temple storyline, Goron rescues, Megaton Hammer, and Volvagia encounter.
However, several puzzles, enemies, and room interactions have been updated.
The timed flame barriers, upper-floor routes, and Hammer puzzles are particularly important to follow using an updated walkthrough.
Final Thoughts – Rescue the Gorons and Defeat Volvagia
The Fire Temple is one of the most challenging and rewarding dungeons in The Legend of Zelda: Ocarina of Time.
It combines dangerous volcanic environments, complicated puzzle routes, powerful enemies, and a memorable boss encounter.
Rescuing the Gorons introduces the importance of carefully exploring every room.
The rising fire pillar teaches you to use environmental hazards as puzzle mechanisms.
The rolling boulder maze tests your navigation.
The Fire Maze challenges your timing and observation.
And the Megaton Hammer gives Link the strength needed to overcome the temple's final obstacles.
Remember the essential route: Goron Tunic → First Three Gorons → Fire Pillar Elevator → Rolling Boulder Maze → Dungeon Map → Compass → Upper Maze Rescues → Fire Maze → Flare Dancer → Megaton Hammer → Final Goron Rescues → Boss Key → Volvagia.
Before leaving, make sure you've collected the Megaton Hammer, Heart Container, Fire Medallion, and any Gold Skulltulas you're pursuing.
Once Volvagia is defeated, the Gorons are freed and Death Mountain is no longer under the dragon's threat.
If you need additional help with difficult temples, boss encounters, or story objectives, explore Zelda Ocarina of Time Boosting on BoostRoom to check available services and completion options.
Your next destination is Zora's Domain, where a mysterious frozen landscape leads toward the Ice Cavern and Water Temple.
The Fire Temple is complete. All nine Gorons are rescued, Volvagia has fallen, and the Fire Medallion is yours.
The Hero of Time's journey continues!