What Are Gold Skulltulas in Ocarina of Time?
Gold Skulltulas are rare golden spiders hidden throughout the world.
Unlike ordinary Skulltulas, they drop a special collectible token when defeated.
You can collect these tokens to break the curse affecting the family living inside the House of Skulltula.
Many Gold Skulltulas are attached to walls, trees, ceilings, and wooden objects.
Others hide inside soft soil or behind destructible barriers.
Some appear only at night.
You'll often recognize their location by a distinctive scratching sound.
How to Collect a Gold Skulltula Token
First, locate the golden spider.
Defeat it using your sword, Slingshot, Boomerang, Hookshot, or another suitable weapon.
The enemy disappears, leaving behind a golden token.
You must physically collect the token for it to count.
Defeating the spider alone isn't enough.
If the token is too high to reach, use the Boomerang, Hookshot, or Longshot to retrieve it.
Are Gold Skulltulas Required to Complete the Story?
No.
You can finish the main storyline without collecting all 100.
However, collecting them unlocks useful upgrades, including a Piece of Heart needed for maximum health completion.
The 100-token goal is part of a full collectible completion run.
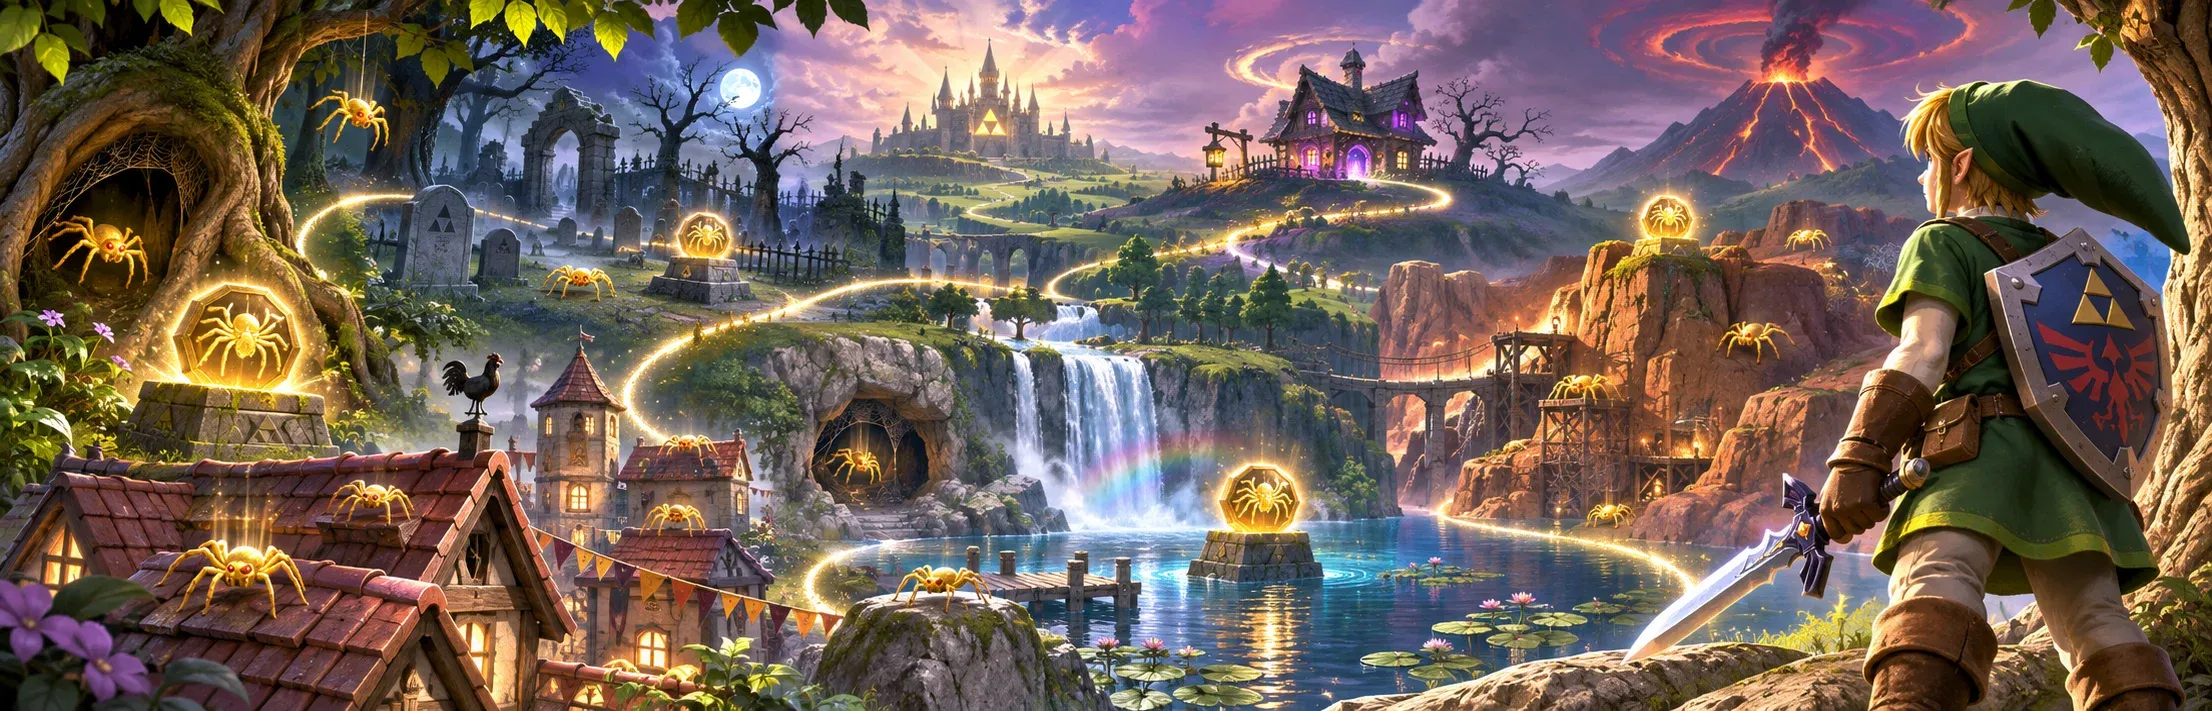
All Gold Skulltula Rewards – House of Skulltula
The House of Skulltula is located in Kakariko Village.
Inside, you'll discover a wealthy family transformed into spider-like creatures by a curse.
As you collect Gold Skulltula Tokens, family members return to normal.
Speak with them at the required milestones to claim their rewards.
10 Gold Skulltulas – Adult's Wallet
Collect 10 tokens and return to the House of Skulltula.
You'll receive the Adult's Wallet.
In the Switch 2 remake, it increases Link's Rupee capacity to 500.
This is particularly useful for buying Magic Beans, Bombchus, and other expensive items.
20 Gold Skulltulas – Echo Gem
Collect 20 tokens.
Return to Kakariko Village and claim the Echo Gem.
This new item replaces the Stone of Agony from the original game.
The Echo Gem detects nearby Gold Skulltulas through visual and audio feedback.
When equipped, it produces a green glow and chime as Link approaches a hidden spider.
The signal becomes stronger as you get closer.
Recommended priority: Collect your first 20 Gold Skulltulas as early as possible. The Echo Gem makes hunting down the remaining 80 much easier.
30 Gold Skulltulas – Giant's Wallet
Collect 30 tokens to unlock the Giant's Wallet.
In the remake, this wallet holds up to 1,000 Rupees.
It's useful for expensive equipment, minigames, and optional upgrades.
40 Gold Skulltulas – Bombchus
At 40 tokens, you'll receive 20 Bombchus.
These mobile explosives travel across floors and can climb walls.
They're useful for certain puzzles and combat encounters.
50 Gold Skulltulas – Piece of Heart
Collect 50 tokens and speak with the corresponding family member.
You'll receive a Piece of Heart.
Every four Pieces of Heart combine into one additional Heart Container.
This reward is required if you're collecting all 36 Pieces of Heart and aiming for maximum health.
100 Gold Skulltulas – Repeatable Gold Rupees
After collecting every token, return to the House of Skulltula.
The family is fully freed from the curse.
Speak with the final family member to receive a Gold Rupee worth 200 Rupees.
You can return and receive this reward repeatedly.
The reward provides a repeatable source of Rupees, subject to your wallet's capacity.
All six House of Skulltula reward milestones are now complete.
Best Equipment for Collecting All 100 Gold Skulltulas
Before beginning your collection, it's worth preparing several important items.
Bottled Bugs
Bugs are required for revealing Gold Skulltulas hidden inside soft soil.
Catch Bugs using an Empty Bottle.
Release them directly onto the appropriate soil patch.
The hidden spider emerges.
Boomerang
The Boomerang is particularly useful as Child Link.
It can defeat distant spiders and retrieve tokens that are otherwise difficult to reach.
You obtain it inside Lord Jabu-Jabu's Belly.
Hookshot and Longshot
These are essential for Adult Link's collection routes.
The Hookshot reaches high walls and platforms.
The Longshot has greater range and is required for several late-game locations.
Bombs and Megaton Hammer
Bombs reveal hidden grotto entrances, destroy cracked walls, and uncover spiders behind obstacles.
The Megaton Hammer is required for certain large boulders and special barriers.
Magic Beans
Several Gold Skulltulas require planting Magic Beans as Child Link and returning later as Adult Link.
Buy Magic Beans from the salesman at Zora's River.
Plant them in soft soil and revisit the location after travelling forward in time.
Scarecrow's Song
Scarecrow's Song summons Pierre at certain locations.
Pierre acts as a Hookshot or Longshot target, allowing Link to reach hidden ledges.
Several dungeon Gold Skulltulas require this route.
Sun's Song
Many outdoor Gold Skulltulas only appear at night.
The Sun's Song allows you to change the time of day without waiting.
It's one of the most useful songs for collectible hunting.
All 100 Gold Skulltula Locations – Complete Checklist
The following checklist numbers every Gold Skulltula from #1 to #100.
These numbers are for this guide only. The game doesn't assign individual numbers to the spiders.
The list starts with overworld collectibles and then covers the main dungeons.
Some locations require returning later with upgraded equipment.
Kokiri Forest – 3 Gold Skulltulas
#1 – Behind the Know-It-All Brothers' House
Required: Child Link, nighttime.
Travel toward the western side of Kokiri Forest.
Find the Know-It-All Brothers' house.
Go around the building and inspect the exterior wall after dark.
Defeat the Gold Skulltula and collect the token.
#2 – Soft Soil Behind the Kokiri Shop
Required: Child Link, Bottled Bugs.
Travel behind the Kokiri Shop.
Look for the patch of soft soil.
Release a bottled Bug directly onto the soil.
A Gold Skulltula emerges.
Defeat it and collect the token.
#3 – House of the Twins
Required: Adult Link, nighttime, Hookshot.
Return to Kokiri Forest as Adult Link.
Travel toward the southeastern house belonging to the Twins.
Look high on the rear wall after dark.
Use the Hookshot to defeat the spider and retrieve its token.
Kokiri Forest: 3 of 3 collected.
Lost Woods and Sacred Forest Meadow – 4 Gold Skulltulas
#4 – Lost Woods Soil Near Skull Kid
Required: Child Link, Bottled Bugs.
Enter the Lost Woods.
Take the first left passage toward the Skull Kid clearing.
Continue left again to reach the nearby soft soil.
Release a Bug onto the soil.
Defeat the emerging Gold Skulltula.
#5 – Lost Woods Business Scrub Clearing
Required: Child Link, Bottled Bugs.
From the Lost Woods entrance, follow the route right, left, right, left, then left.
You'll reach a clearing containing Business Scrubs.
Look for the soft soil nearby.
Release a bottled Bug to reveal the Gold Skulltula.
#6 – Lost Woods Magic Bean Platform
Required: Adult Link, Magic Bean.
As Child Link, plant a Magic Bean in the soil from location #5.
Return to the clearing as Adult Link.
Ride the grown plant toward the elevated ledge.
Collect the Gold Skulltula waiting along the upper route.
#7 – Sacred Forest Meadow High Wall
Required: Adult Link, Hookshot; nighttime recommended.
Return to the Sacred Forest Meadow.
Navigate the Moblin maze.
Look toward the high wall on the eastern side of the upper maze route.
Use the Hookshot to defeat the Gold Skulltula and collect its token.
Lost Woods and Sacred Forest Meadow: 4 of 4 collected.
Inside the Great Deku Tree – 4 Gold Skulltulas
All four can be collected during the first dungeon visit in the Switch 2 remake.
#8 – Compass Room Wall
Required: Child Link.
Enter the chamber containing the Compass chest.
Activate the platforms needed to reach the upper section.
Look toward the wall beside the platforms.
Defeat the Gold Skulltula and collect its token.
#9 – Vines Beneath the Central Spiderweb
Required: Child Link, Fairy Slingshot.
After breaking through the large web in the central chamber, turn toward the vines leading back upward.
A Gold Skulltula is attached to them.
Shoot it with the Fairy Slingshot.
Climb to collect the token.
#10 – Basement Metal Grating
Required: Child Link, Fairy Slingshot.
Explore the basement room containing a pool and a web-covered passage.
Look toward the metal grating beside the water.
Defeat the Gold Skulltula attached to the grating.
Collect its token from the nearby platform.
#11 – Gohma Larva Room Hidden Vines
Required: Child Link, Deku Stick and Fairy Slingshot.
Enter the chamber where three Gohma Larvae descend from the ceiling.
Look for a spiderweb covering the left-hand passage.
Burn the web with a lit Deku Stick.
Enter the short tunnel.
Shoot the Gold Skulltula on the vines and climb to collect its token.
Remake difference: You don't need to return with Bombs to reach this spider.
Great Deku Tree: 4 of 4 collected.
Hyrule Field – 3 Gold Skulltulas
#12 – Lone Tree Near Kokiri Forest
Required: Child Link.
Leave Kokiri Forest and enter Hyrule Field.
Look for an isolated tree in the eastern section of the field.
Roll into its trunk.
A Gold Skulltula falls to the ground.
Defeat it and collect the token.
Remake difference: This location replaces one of the original Lon Lon Ranch collectibles.
#13 – Hidden Grotto Near Lake Hylia
Required: Either age, Bombs, Boomerang or Hookshot.
Travel toward the southern wooded area near the Lake Hylia entrance.
Look for a cracked patch of ground among the trees.
Use a Bomb to open the hidden grotto.
Drop inside.
Defeat the ordinary Skulltula guarding the chamber.
Look toward the wall for the Gold Skulltula.
Use the appropriate ranged item to retrieve its token.
#14 – Two-Timeline Marsh Grotto
Required: Child Link first, Adult Link afterward, Bombs.
Travel toward the southeastern marsh area of Hyrule Field.
Find the cracked ground and open it with a Bomb.
Enter the grotto as Child Link.
Defeat the ordinary Skulltula inside.
Later, return to the same grotto as Adult Link.
Look for the wooden crate.
Break it to reveal the Gold Skulltula.
Remake difference: You must complete the childhood interaction before collecting this Gold Skulltula as an adult.
Hyrule Field: 3 of 3 collected.
Hyrule Castle and Castle Town – 4 Gold Skulltulas
#15 – Castle Town Guard House Crate
Required: Child Link.
Enter Castle Town through the drawbridge.
Visit the Guard House near the entrance.
Look toward the back of the room containing numerous pots and crates.
Find the shaking crate.
Roll into it to reveal the Gold Skulltula.
#16 – Hyrule Castle Grounds Tree
Required: Child Link.
Sneak through the castle grounds toward Princess Zelda.
Near the area where Talon sleeps, look for the tree close to the moat and climbable vines.
Roll into its trunk.
Defeat the Gold Skulltula that falls out.
#17 – Song of Storms Grotto
Required: Child Link, Song of Storms, Bombs.
Return toward the castle grounds near the tree where Talon was sleeping.
Stand nearby and play the Song of Storms.
A hidden grotto entrance appears.
Enter it and search for the concealed passage.
Destroy the required cracked wall with a Bomb.
Find the Gold Skulltula inside and retrieve its token.
#18 – Ganon's Castle Ruins Archway
Required: Adult Link, nighttime, Hookshot.
Travel toward the ruined Hyrule Castle grounds.
Continue along the approach to Ganon's Castle.
Look toward the damaged stone archway on the right-hand side.
A Gold Skulltula is attached high above the path.
Use the Hookshot to collect it.
Important: This is outside Ganon's Castle, not inside one of the six barrier trials.
Castle region: 4 of 4 collected.
Lon Lon Ranch – 3 Gold Skulltulas
#19 – Tree Behind the Ranch Buildings
Required: Child Link.
Enter Lon Lon Ranch.
Travel toward the path near the main ranch buildings and ruined tower.
Find the tree behind the house.
Roll into its trunk.
A Gold Skulltula falls out.
#20 – Malon's House Window
Required: Child Link, nighttime, Boomerang.
Return to the ranch after dark.
Look near the window of the main ranch house, above the passage leading toward the horse pasture.
A Gold Skulltula is attached to the wall.
Use the Boomerang to defeat it and retrieve the token.
#21 – Ruined Tower and Storage Building
Required: Child Link, nighttime, Boomerang.
Travel toward the ruined tower near the edge of the ranch.
Enter the storage area and examine the walls above the crates.
You'll find a Gold Skulltula attached to the structure.
Use the Boomerang to collect it.
Remake difference: Lon Lon Ranch contains three Gold Skulltulas instead of four. The missing original collectible has been replaced by the new Hyrule Field tree location.
Lon Lon Ranch: 3 of 3 collected.
Kakariko Village and Graveyard – 8 Gold Skulltulas
#22 – House Near Death Mountain Gate
Required: Child Link, nighttime.
Travel toward the northern part of Kakariko Village.
Find the house beside the path leading to Death Mountain.
Look along its exterior wall after dark.
Defeat the Gold Skulltula and collect the token.
#23 – Village Construction Site
Required: Child Link, nighttime.
Find the unfinished building in the center of Kakariko Village.
Walk around the wooden framework and brick walls.
Look for the Gold Skulltula crawling along the structure.
Defeat it.
#24 – Watchtower Ladder
Required: Child Link, nighttime, Fairy Slingshot.
Approach the tall watchtower in Kakariko Village.
Look near the upper ladder.
A Gold Skulltula appears after dark.
Shoot it with the Fairy Slingshot.
Climb to collect the token.
#25 – Village Entrance Tree
Required: Child Link.
Near the entrance to Kakariko Village, look for the large tree beside the main path.
Roll into it.
A Gold Skulltula falls to the ground.
Defeat it and collect the token.
#26 – House of Skulltula Exterior Wall
Required: Child Link, nighttime.
Travel to the House of Skulltula.
Look along the building's exterior wall near the entrance.
A Gold Skulltula appears after dark.
Defeat it before entering to claim any available collection rewards.
#27 – Graveyard Soft Soil
Required: Child Link, Bottled Bugs.
Enter Kakariko Graveyard.
Travel toward the northern wall.
Look for the soft soil patch near the left side of the cemetery.
Release a Bug.
Defeat the hidden Gold Skulltula when it emerges.
#28 – Behind Dampé's Hut
Required: Child Link, nighttime, Boomerang.
Travel toward Dampé's hut in the Graveyard.
Look along the high rear wall.
A Gold Skulltula appears at night.
Use the Boomerang to defeat it and retrieve the token.
#29 – Above Impa's House
Required: Adult Link, nighttime, Hookshot.
Return to Kakariko Village as Adult Link.
Climb toward the roof of Impa's house.
Look toward the wall or cliffside above the rooftop.
Use the Hookshot to collect the Gold Skulltula.
Kakariko region: 8 of 8 collected.
Death Mountain Trail – 4 Gold Skulltulas
#30 – Soft Soil Near Dodongo's Cavern
Required: Child Link, Bottled Bugs.
Travel to Dodongo's Cavern.
Find the soft soil near the entrance.
Release a Bug onto it.
Defeat the emerging Gold Skulltula.
#31 – Bombable Mountain Wall
Required: Child or Adult Link, Bombs.
Travel along Death Mountain Trail.
Look for a cracked wall on the right side of the route leading upward from Kakariko Village.
Place a Bomb near the crack.
Enter or inspect the revealed opening.
Defeat the Gold Skulltula inside.
#32 – Large Boulder Near Death Mountain Summit
Required: Adult Link, Megaton Hammer.
Travel toward the summit of Death Mountain Trail.
Look for a large boulder near the path leading down from the crater entrance.
Strike it with the Megaton Hammer.
The Gold Skulltula is revealed.
#33 – Boulder Near Goron City
Required: Adult Link, Megaton Hammer.
Return toward Goron City's entrance.
Look for another large boulder positioned beside the mountain trail.
Destroy it with the Megaton Hammer.
Collect the hidden Gold Skulltula.
Death Mountain Trail: 4 of 4 collected.
Death Mountain Crater – 2 Gold Skulltulas
#34 – Wooden Crate Near the Crater Entrance
Required: Child Link.
Enter Death Mountain Crater from the summit.
Look near the entrance for several wooden crates.
Roll into the suspicious crate.
A Gold Skulltula emerges.
Defeat it quickly.
Important: Child Link cannot remain in the crater's extreme heat indefinitely. Collect the token and leave promptly.
#35 – Soft Soil Near the Fire Temple
Required: Child Link, Bolero of Fire, Bottled Bugs.
Learn the Bolero of Fire as Adult Link.
Return to childhood.
Play the song to warp directly to Death Mountain Crater.
Look for the soft soil near the Fire Temple entrance.
Release a Bug onto it.
Defeat the emerging Gold Skulltula.
Leave the crater before the heat becomes dangerous.
Death Mountain Crater: 2 of 2 collected.
Goron City – 2 Gold Skulltulas
#36 – Crate in the Boulder Maze
Required: Child Link, Bombs.
Enter Goron City.
Find the upper-floor route containing numerous boulders.
Use Bombs to clear the obstacles.
Continue toward the storage area at the back.
Look for a wooden crate near the treasure chests.
Roll into it to reveal the Gold Skulltula.
#37 – Above the Central Hanging Platform
Required: Adult Link, Hookshot.
Return to Goron City as Adult Link.
Look toward the suspended platform hanging near the center of the settlement.
A Gold Skulltula is hidden behind or above the structure.
Use the Hookshot to retrieve the token.
Goron City: 2 of 2 collected.
Dodongo's Cavern – 5 Gold Skulltulas
#38 – Baby Dodongo Corridor Hidden Wall
Required: Child Link, Bombs.
Enter the southeastern corridor containing Baby Dodongos.
Look for a cracked wall on the right.
Destroy it using a Bomb or a Baby Dodongo explosion.
Enter the revealed chamber.
Defeat the Gold Skulltula inside.
#39 – Giant Staircase Grating
Required: Child Link, Fairy Slingshot.
After lowering the enormous staircase using Bomb Flowers, climb toward the upper section.
Look at the metal grating near the room's exit.
A Gold Skulltula is attached to it.
Shoot it with the Fairy Slingshot and collect the token.
#40 – Room With Two Dodongos
Required: Child Link, Bombs.
Explore the northern chamber containing two Dodongos.
Look for a cracked wall near the middle of the room.
Use a Bomb to open the hidden area.
Defeat the Gold Skulltula inside.
#41 – Passage Beyond the Giant Dodongo Skull
Required: Child Link, Bombs.
After opening the mouth of the enormous Dodongo skull, enter the next section.
Find the cracked wall along the passage.
Bomb it.
Defeat the Armos and Baby Dodongos guarding the hidden collectible.
Collect the Gold Skulltula Token.
#42 – High Ledge in the Baby Dodongo Corridor
Required: Adult Link, Hookshot, Scarecrow's Song.
Return to Dodongo's Cavern as Adult Link.
Travel back to the southeastern Baby Dodongo corridor.
Look toward the high ledge.
Play Scarecrow's Song to summon Pierre.
Use the Hookshot to reach the elevated platform.
Collect the Gold Skulltula.
Dodongo's Cavern: 5 of 5 collected.
Zora's River – 4 Gold Skulltulas
#43 – Soft Soil Near the Magic Bean Seller
Required: Child Link, Bottled Bugs.
Travel to Zora's River.
Find the Magic Bean seller near the entrance.
Look for the patch of soft soil beside him.
Release a bottled Bug onto it.
A Gold Skulltula emerges.
Remake difference: This spider has moved from its original location in the tree near the river entrance.
#44 – Rock Near Zora's Domain Waterfall
Required: Child Link, nighttime; Boomerang recommended.
Follow Zora's River toward the final waterfall.
Look for the rocks near the lower riverbank.
A Gold Skulltula appears after dark.
Use the Boomerang if you can't reach its token directly.
#45 – Magic Bean Ledge
Required: Adult Link, nighttime, Magic Bean, Hookshot.
As Child Link, plant a Magic Bean beside the Magic Bean seller.
Return as Adult Link.
Ride the plant toward the elevated route.
Look for the Gold Skulltula on the nearby wall or ledge.
Use the Hookshot to retrieve it.
#46 – Cliff Near Zora's Domain Entrance
Required: Adult Link, nighttime, Hookshot.
Travel toward the upper part of Zora's River.
Near the stairs and final bridge leading to Zora's Domain, look toward the western cliff.
The Gold Skulltula is attached high above the path.
Use the Hookshot to collect the token.
Zora's River: 4 of 4 collected.
Zora's Domain – 1 Gold Skulltula
#47 – Frozen Diving Waterfall
Required: Adult Link, nighttime, Hookshot.
Return to Zora's Domain after it freezes.
Travel toward the waterfall used for the diving minigame.
Look along the wall to the left of the frozen waterfall.
A Gold Skulltula appears after dark.
Use the Hookshot to defeat it and retrieve the token.
Zora's Domain: 1 of 1 collected.
Zora's Fountain – 3 Gold Skulltulas
#48 – Tree Near Lord Jabu-Jabu
Required: Child Link.
Enter Zora's Fountain.
Travel toward the southeastern corner near the trees and large silver boulder.
Roll into the appropriate tree.
A Gold Skulltula falls out.
Defeat it and collect the token.
#49 – Slanted Ruin Above the Water
Required: Child Link, nighttime, Boomerang.
Explore the southwestern side of Zora's Fountain.
Look for the slanted stone ruin near the water.
Climb onto the structure.
At night, a Gold Skulltula appears near the upper wall.
Use the Boomerang to collect it.
#50 – Hidden Cave Beneath the Silver Boulder
Required: Adult Link, Silver Gauntlets, Lenses of Truth.
Return to Zora's Fountain as Adult Link.
Travel toward the southeastern section.
Find the large silver boulder.
Lift it using the Silver Gauntlets.
Enter the revealed cave.
Use the Lenses of Truth to identify the hidden route.
Climb the vines and examine the nearby ceiling and walls.
Defeat the Gold Skulltula and collect its token.
Zora's Fountain: 3 of 3 collected.
Lord Jabu-Jabu's Belly – 4 Gold Skulltulas
#51 – Dungeon Map Room Vines
Required: Child Link, Fairy Slingshot.
Enter the room containing the Dungeon Map chest.
Look toward the vine-covered wall opposite the chest.
A Gold Skulltula is attached above the lower floor.
Shoot it with the Fairy Slingshot.
Climb the vines and collect the token.
#52 – Basement Wall Beneath Ruto's Room
Required: Child Link, Boomerang.
After defeating the three colored tentacles, return to the large room containing several holes.
Drop through the newly opened passage.
Look toward the wall of the lower chamber.
Use the Boomerang to collect the Gold Skulltula.
#53 – Adjacent Basement Passage
Required: Child Link, Boomerang.
Continue through the nearby passage beneath Ruto's room.
Look along the wall and ceiling for another Gold Skulltula.
Use the Boomerang to defeat it and retrieve the token.
#54 – Vine-Covered Pillar Near Barinade
Required: Child Link, Boomerang.
After defeating Big Octo, continue toward the boss chamber.
Look for the tall pillar covered in vines.
A Gold Skulltula is attached near the upper section.
Use the Boomerang to collect it.
Jabu-Jabu's Belly: 4 of 4 collected.
Lake Hylia – 5 Gold Skulltulas
#55 – Soft Soil Beside the Lakeside Laboratory
Required: Child Link, Bottled Bugs.
Travel to Lake Hylia.
Find the soft soil beside the Lakeside Laboratory.
Release a Bug onto it.
Defeat the Gold Skulltula when it emerges.
#56 – Southwestern Hidden Crawlspace
Required: Child Link.
Travel toward the southwestern edge of Lake Hylia.
Look for a small cave opening in the cliffside near the water.
Crawl through the opening.
Defeat the Gold Skulltula inside.
Remake difference: This spider replaces the collectible that originally appeared on the small island monument.
#57 – Lakeside Laboratory Exterior Wall
Required: Child Link, nighttime, Boomerang.
Travel toward the Lakeside Laboratory after dark.
Stand near the bridge and look toward the building's side wall.
A Gold Skulltula is attached to it.
Use the Boomerang to defeat it and retrieve its token.
#58 – Tree Near the Lake's Central Island
Required: Adult Link, nighttime, Longshot.
Return to Lake Hylia with the Longshot.
Find the tall tree near the central island and warp destination.
Use the Longshot to reach the upper part of the tree.
Look for the Gold Skulltula near its top.
Collect the token.
#59 – Underwater Laboratory Crate
Required: Adult Link, Iron Boots, Hookshot.
Enter the Lakeside Laboratory.
Jump into the deep water tank.
Equip the Iron Boots.
Sink toward the bottom.
Find the wooden crate.
Break it to reveal the Gold Skulltula.
Use the Hookshot to retrieve the token.
Lake Hylia: 5 of 5 collected.
Gerudo Valley – 4 Gold Skulltulas
#60 – Under the First Wooden Bridge
Required: Child Link, nighttime, Boomerang.
Enter Gerudo Valley.
Look beneath the first wooden bridge along the route.
A Gold Skulltula appears on the wall after dark.
Use the Boomerang to defeat it and retrieve the token.
#61 – Soft Soil Beneath the Main Bridge
Required: Child Link, Bottled Bugs, Cucco.
Pick up a Cucco near the main bridge.
Glide toward the lower riverbank beneath the crossing.
Find the soft soil near the cow and crate.
Release a bottled Bug to reveal the Gold Skulltula.
#62 – Behind the Carpenter's Tent
Required: Adult Link, nighttime.
Cross the broken bridge using Epona or the Longshot.
Travel toward the carpenter's tent on the far side.
Look behind the tent after dark.
The Gold Skulltula is attached to the nearby wall.
#63 – Large Stone Arch
Required: Adult Link, nighttime, Hookshot or Longshot.
Near the carpenter's tent, look toward the large natural stone arch.
A Gold Skulltula appears high on the rock after dark.
Use the Hookshot or Longshot to retrieve it.
Gerudo Valley: 4 of 4 collected.
Gerudo Fortress – 2 Gold Skulltulas
#64 – Eastern Fortress Wall
Required: Adult Link, nighttime, Longshot.
Enter Gerudo Fortress.
Explore the eastern rooftops and upper walls.
Look for a Gold Skulltula positioned high along the structure.
Use the Longshot to collect it.
#65 – Horseback Archery Range Target
Required: Adult Link, nighttime, Gerudo access, Longshot.
After rescuing the four carpenters, visit the Horseback Archery Range.
Travel toward the far end.
Look behind or above the large northern target.
A Gold Skulltula appears after dark.
Use the Longshot to retrieve the token.
Gerudo Fortress: 2 of 2 collected.
Mirage Desert – 1 Gold Skulltula
#66 – Underground Ruined Shelter
Required: Adult Link, Gerudo access.
Enter the Mirage Desert through Gerudo Fortress.
Follow the markers toward the ruined stone shelter.
Enter the structure.
Climb down the ladder into the basement.
Look along the wall for the Gold Skulltula.
Defeat it and collect the token.
Mirage Desert: 1 of 1 collected.
Desert Colossus – 3 Gold Skulltulas
#67 – Soft Soil Beside the Spirit Temple
Required: Child Link, Requiem of Spirit, Bottled Bugs.
Learn the Requiem of Spirit as Adult Link.
Return to childhood.
Warp to the Desert Colossus.
Find the soft soil beside the Spirit Temple entrance.
Release a Bug to reveal the Gold Skulltula.
#68 – Desert Colossus Magic Bean Platform
Required: Adult Link, nighttime, Magic Bean.
Plant a Magic Bean in the Spirit Temple soil patch as Child Link.
Return as Adult Link.
Ride the grown plant toward the elevated rock formation.
Look for the Gold Skulltula after dark.
Defeat it and collect the token.
#69 – Northern Cliff Near the Spirit Temple
Required: Adult Link, nighttime, Longshot.
Explore the northern or northwestern cliff near the Spirit Temple.
Look for the area where Guays fly overhead.
A Gold Skulltula is attached to the high rock wall.
Use the Longshot to retrieve it.
Desert Colossus: 3 of 3 collected.
Forest Temple – 5 Gold Skulltulas
#70 – Entrance Vines
Required: Adult Link, Hookshot.
Immediately after entering the Forest Temple, look toward the vines on the right.
A Gold Skulltula is attached near the upper section.
Use the Hookshot to defeat it and collect the token.
#71 – Main Hall Wall
Required: Adult Link, Hookshot.
Enter the main chamber where the four Poe Sisters steal the flames.
Look toward the upper wall near the northern side.
A Gold Skulltula is attached to the stone.
Use the Hookshot to retrieve it.
#72 – Courtyard Ledge Near the Boss Key Route
Required: Adult Link, Hookshot.
After collecting the Boss Key, follow the passage leading toward the lower courtyard route.
Look toward the upper wall beside the exit and pools.
A Gold Skulltula is positioned on the wall.
Use the Hookshot to collect it.
#73 – Hidden Scarecrow Balcony
Required: Adult Link, Scarecrow's Song, Hookshot.
Return toward the courtyard connected to the blue corridor.
Look for the elevated ledge above the doorway.
Play Scarecrow's Song to summon Pierre.
Use the Hookshot to reach the balcony and collect the Gold Skulltula.
#74 – Rotating Basement Alcove
Required: Adult Link, Hookshot.
After defeating all four Poe Sisters, ride the central elevator to the basement.
Enter the rotating chamber.
Look for an alcove on the southern side.
Rotate the room until the passage becomes accessible.
Collect the Gold Skulltula inside.
Forest Temple: 5 of 5 collected.
Fire Temple – 5 Gold Skulltulas
#75 – Song of Time Hidden Passage
Required: Adult Link, Song of Time, Hookshot.
Explore the large lava room connected to the Fire Temple's entrance.
Reach the elevated Time Block.
Play the Song of Time.
Enter the newly revealed passage.
Clear the Flying Tiles and Like Like.
Collect the Gold Skulltula inside.
#76 – Rolling Boulder Maze Wall
Required: Adult Link, Bombs.
Reach the rolling boulder maze on the third floor.
Look for the cracked wall along its northern side.
Destroy the wall using a Bomb.
Enter the hidden chamber and collect the Gold Skulltula.
#77 – Scarecrow Platform Above the Boulder Maze
Required: Adult Link, Scarecrow's Song, Hookshot.
Return to the upper section of the boulder maze.
Play Scarecrow's Song to summon Pierre on the high ledge.
Use the Hookshot to reach the hidden lift.
Ride upward and collect the Gold Skulltula near the climbing wall.
#78 – Upper Lava Chamber Wall
Required: Adult Link, Hookshot.
Continue through the upper room reached by the Scarecrow route.
Look along the right-hand wall above the lava.
A Gold Skulltula is attached to the surface.
Use the Hookshot to retrieve it.
#79 – Entrance Passage Hammer Obstacle
Required: Adult Link, Megaton Hammer.
Return to the Fire Temple entrance after obtaining the Megaton Hammer.
Break the stone statue blocking the passage.
Continue through the connected rooms.
Find the rock concealing the Gold Skulltula.
Strike it with the Megaton Hammer to reveal the token.
Fire Temple: 5 of 5 collected.
Ice Cavern – 3 Gold Skulltulas
#80 – Rotating Ice Blade Room
Required: Adult Link, Hookshot.
Enter the large chamber containing a rotating ice blade.
Avoid the blade while searching the walls.
Look toward the southwestern side.
Use the Hookshot to collect the Gold Skulltula.
#81 – Compass Room Wall
Required: Adult Link, Blue Fire, Hookshot.
Enter the chamber containing the Compass chest.
After collecting the Compass, turn around and inspect the nearby wall.
The Gold Skulltula is positioned above the floor.
Use the Hookshot to retrieve the token.
#82 – Sliding Ice Block Puzzle Room
Required: Adult Link, Hookshot.
Reach the large room containing the sliding ice block puzzle.
Before moving the block, look above the entrance doorway.
A Gold Skulltula is attached high on the wall.
Use the Hookshot to collect it.
Ice Cavern: 3 of 3 collected.
Water Temple – 5 Gold Skulltulas
#83 – Central Pillar Basement Passage
Required: Adult Link, Iron Boots, Hookshot.
Enter the central pillar room.
Raise the water to the middle level.
A floating block lifts from the floor, exposing an underwater passage.
Equip the Iron Boots and enter.
Follow the tunnel, activate the required switch, and reach the hidden chamber.
Collect the Gold Skulltula.
#84 – Whirlpool River Wall
Required: Adult Link, Iron Boots, Longshot.
After defeating Dark Link and obtaining the Longshot, enter the underground river.
Use the Iron Boots to navigate the whirlpools.
Look along the wall near the second major whirlpool.
Use the Longshot to collect the Gold Skulltula.
#85 – High Wall Inside the Central Pillar
Required: Adult Link, Longshot.
Return to the central pillar containing the middle-water Triforce crest.
Look upward toward the high northern wall.
A Gold Skulltula is positioned above the regular Hookshot's range.
Use the Longshot to collect it.
#86 – Rolling Boulder Waterfall
Required: Adult Link, Longshot.
Travel toward the Water Temple Boss Key route.
Enter the corridor containing rolling boulders.
Look behind the waterfall near the boulder's entrance.
The Gold Skulltula is hidden on the wall.
Use the Longshot to collect the token while avoiding the boulders.
#87 – Bombable Wall in the Eastern Passage
Required: Adult Link, Iron Boots, Bombs.
Raise the water to the middle setting.
Enter the blue-lit eastern room.
Follow the underwater route and surface near the cracked wall.
Place a Bomb to reveal the hidden chamber.
Collect the Gold Skulltula inside.
Remake difference: This location replaces the Gold Skulltula previously found in the original moving-platform room.
Water Temple: 5 of 5 collected.
Bottom of the Well – 3 Gold Skulltulas
#88 – Eastern Like Like Room
Required: Child Link, Boomerang, Lenses of Truth recommended.
Enter the Bottom of the Well.
Follow the northeastern passage.
Reach the chamber containing a Like Like.
Defeat the enemy.
Look along the wall for the Gold Skulltula.
Use the Boomerang to retrieve it.
#89 – Western Locked Chamber
Required: Child Link, Small Key, Boomerang.
Explore the main basement and collect a Small Key.
Return to the western locked door.
Open it.
Continue toward the chamber containing a Deku Baba.
Look for the Gold Skulltula along the rear wall.
Use the Boomerang to collect it.
#90 – Eastern Hidden Passage
Required: Child Link, Small Key, Lenses of Truth, Boomerang.
Find the eastern locked door.
Use a Small Key to open it.
Activate the Lenses of Truth.
Follow the hidden walkway to the far end.
Look toward the upper wall.
Use the Boomerang to defeat the Gold Skulltula and retrieve its token.
Bottom of the Well: 3 of 3 collected.
Shadow Temple – 5 Gold Skulltulas
#91 – Invisible Blade Chamber
Required: Adult Link, Lenses of Truth, Hookshot.
After the guillotine corridor, use the Lenses of Truth to reveal the eastern platforms.
Cross the gap using the Hover Boots.
Enter the side room containing the invisible spinning blade.
Look along the wall near the two treasure chests.
Collect the Gold Skulltula.
#92 – Falling Spike Puzzle Room
Required: Adult Link, Hookshot or Longshot.
Enter the room where giant spikes fall from the ceiling.
Move the hidden block beneath the traps to protect Link.
Climb onto the upper platforms.
Look toward the wall above the spike mechanisms.
Use the Hookshot or Longshot to collect the token.
#93 – Hall of Fans Corridor
Required: Adult Link, Iron Boots, Longshot.
Travel through the powerful fan corridor.
Equip the Iron Boots to resist the wind.
Near the gap, look down toward the wall below the walkway.
A Gold Skulltula is attached between the platforms.
Use the Longshot to retrieve the token.
#94 – Scarecrow Platform Near the Ghost Ship
Required: Adult Link, Scarecrow's Song, Longshot.
Reach the Ghost Ship dock.
Move the block near the elevated platform.
Play Scarecrow's Song to summon Pierre.
Use the Longshot to reach the high ledge.
Collect the Gold Skulltula.
#95 – Three Giant Skull Pots
Required: Adult Link, Bombs, Lenses of Truth.
After the Ghost Ship sequence, enter the hidden final maze.
Find the room containing three large skull-shaped pots.
Climb to the upper walkway.
Throw Bombs into the pots.
Reveal the Gold Skulltula hidden among them and collect the token.
Shadow Temple: 5 of 5 collected.
Spirit Temple – 5 Gold Skulltulas
#96 – Metal Grating in the Child Link Section
Required: Child Link, Boomerang.
Enter the child-sized passage after speaking with Nabooru.
Follow the right-hand route toward the fenced chamber.
Look along the metal grating.
A Gold Skulltula is attached to the structure.
Use the Boomerang to collect it.
#97 – Behind the Giant Statue
Required: Child Link.
Reach the large central chamber containing the enormous stone statue.
Explore the northeastern side near the statue's base.
Look behind the structure for the Gold Skulltula.
Defeat it and collect the token.
#98 – Upper Corridor Before Iron Knuckle
Required: Child Link, Boomerang.
Continue toward the Child Link Iron Knuckle encounter.
After completing the upper puzzle rooms, enter the next corridor.
Turn around and look above the doorway.
A Gold Skulltula is attached to the upper wall.
Use the Boomerang to retrieve its token.
#99 – Adult Link Rolling Boulder Room
Required: Adult Link, Silver Gauntlets, Song of Time.
Enter the Adult Link section of the Spirit Temple.
Reach the rolling boulder chamber.
Look for the blue Time Block inside an alcove.
Play the Song of Time to move the block.
A hidden passage or wall section becomes accessible.
Collect the Gold Skulltula.
#100 – Scarecrow Platform Above the Giant Statue
Required: Adult Link, Scarecrow's Song, Longshot.
Return to the large central statue chamber.
Climb toward the upper staircase.
Look across toward the northwestern ledge.
Play Scarecrow's Song to summon Pierre.
Use the Longshot to reach the platform.
Find and collect the final Gold Skulltula.
Spirit Temple: 5 of 5 collected.
Congratulations! All 100 Gold Skulltula locations have been covered.
Gold Skulltula Completion Summary – All Regions
Use this final regional checklist to verify your progress.
Overworld – 56 Gold Skulltulas
Kokiri Forest: 3
Lost Woods and Sacred Forest Meadow: 4
Hyrule Field: 3
Hyrule Castle and Castle Town: 4
Lon Lon Ranch: 3
Kakariko Village and Graveyard: 8
Death Mountain Trail: 4
Death Mountain Crater: 2
Goron City: 2
Zora's River: 4
Zora's Domain: 1
Zora's Fountain: 3
Lake Hylia: 5
Gerudo Valley: 4
Gerudo Fortress: 2
Mirage Desert: 1
Desert Colossus: 3
Overworld total: 56 Gold Skulltulas.
Dungeons and Mini-Dungeons – 44 Gold Skulltulas
Dungeon total: 44 Gold Skulltulas.
Grand total: 100 of 100 Gold Skulltulas.
What Changed in the Nintendo Switch 2 Remake?
The remake retains 100 Gold Skulltulas, but several notable locations and requirements have changed.
Knowing these differences can save you time when following older walkthroughs.
Zora's River Tree Relocation
In the original game, one Gold Skulltula was obtained from a tree near the Zora's River entrance.
In the remake, that spider is found in the soft soil beside the Magic Bean seller.
Use a bottled Bug to reveal it.
Lake Hylia Monument Relocation
The original Gold Skulltula found on the small island monument is no longer in that location.
Instead, explore the southwestern shore.
Find the hidden crawlspace and collect the spider inside.
Hyrule Field Gains a Gold Skulltula
The remake adds a collectible to the isolated tree near Kokiri Forest.
Roll into the tree as Child Link to reveal it.
Lon Lon Ranch now has three Gold Skulltulas instead of four.
New Two-Timeline Grotto
One Hyrule Field grotto requires visiting as both versions of Link.
First, defeat the ordinary Skulltula inside as Child Link.
Later, return as Adult Link and break the wooden crate containing the golden spider.
Great Deku Tree Gohma Larva Room Change
The Gold Skulltula in the Gohma Larva room can now be collected on your first visit.
Burn the spiderweb covering the left passage and climb the vines.
You no longer need to return later with Bombs.
Water Temple Relocation
One Water Temple Gold Skulltula has moved into the blue-lit eastern passage.
Raise the water to the middle level and destroy the cracked wall.
This replaces an older moving-platform location.
Echo Gem Replaces the Stone of Agony
The 20-token reward is now the Echo Gem.
Instead of indicating hidden grottos through controller vibration, it provides direct feedback when Link approaches nearby Gold Skulltulas.
Improved Collection Tracking
The remake displays region-based Gold Skulltula progress on the world map.
It also provides additional hints, including faint golden webbing at some locations where a nighttime spider will appear.
These changes make the full collection challenge more manageable.
Best Order to Collect All 100 Gold Skulltulas
Collecting all 100 spiders in a single cleanup session can be frustrating.
A more efficient approach is collecting them alongside the main storyline.
Early Child Link – Aim for 20 Tokens
Start by exploring Kokiri Forest, the Great Deku Tree, Hyrule Field, Castle Town, Kakariko Village, and Death Mountain.
Bring Bottled Bugs for soil patches.
Collect nighttime spiders whenever you're visiting a new settlement.
After completing Dodongo's Cavern and Lord Jabu-Jabu's Belly, you should have plenty of opportunities to reach the first 20-token milestone.
Return to the House of Skulltula and claim the Echo Gem.
This makes later searching easier.
Middle Game – Complete Dungeon Collections
As you progress through the Forest, Fire, and Water Temples, collect every accessible Gold Skulltula before defeating each boss.
If a collectible requires equipment you don't have yet, mark it for a return visit.
The Hookshot and Longshot are particularly useful for dungeon cleanup.
Late Game – Finish the Desert and Shadow Temple
After unlocking Gerudo Fortress, explore the valley, fortress walls, Mirage Desert, and Desert Colossus.
Collect the Spirit Temple's five tokens across both time periods.
Finish the Bottom of the Well and Shadow Temple collectibles if you haven't already.
Final Cleanup – Return to Earlier Areas
By the end of the main story, you'll have access to almost every important item.
Use the world map to identify unfinished regions.
Return to childhood for missed soft-soil spiders.
Visit nighttime locations using the Sun's Song.
Revisit the Scarecrow's Song platforms.
Check the late-game Zora's Fountain cave.
Finish the special Hyrule Field grotto requiring two time periods.
Recommended strategy: Use the regional map counts and the Echo Gem together rather than searching all 100 locations again.
How to Find Your Last Missing Gold Skulltulas
Reaching 99 of 100 can be more frustrating than collecting the first 90.
Fortunately, the remake includes features that make tracking the final tokens easier.
Check the World Map
Open the world map and inspect the collectible progress for each region.
Look for any area without its completion indicator.
Some regions display separate progress for Child Link and Adult Link.
If an area appears incomplete, check both eras.
Equip the Echo Gem
If you have at least 20 Gold Skulltula Tokens, return to Kakariko Village and obtain the Echo Gem.
Equip it while exploring the incomplete region.
Watch for the green glow and listen for the chime.
Move toward the strongest signal.
Visit Outdoor Locations at Night
Many overworld Gold Skulltulas only appear after sunset.
If the Echo Gem reacts but you cannot see a spider, try returning at night.
Use the Sun's Song to change the time quickly.
Check Every Soft Soil Patch
Soft-soil Gold Skulltulas are easy to overlook because nothing may appear until you release a Bug.
Bring Bottled Bugs and revisit incomplete soil locations.
Remember the relocated Zora's River soil spider.
Revisit Scarecrow Locations
Several important Gold Skulltulas require summoning Pierre.
Check the Sacred Forest Meadow, Dodongo's Cavern, Forest Temple, Fire Temple, Shadow Temple, and Spirit Temple routes.
If you never completed the Scarecrow's Song quest, that may explain several missing tokens.
Check the Two-Timeline Grotto
One of the most commonly missed remake collectibles is the southeastern Hyrule Field grotto.
You must visit as Child Link and defeat an ordinary Skulltula before the Gold Skulltula appears during adulthood.
Check the Zora's Fountain Silver Boulder Cave
The hidden cave requires late-game strength equipment and the Lenses of Truth.
Because it looks like an ordinary boulder, it's easy to ignore during earlier visits.
Gold Skulltula FAQ
How Many Gold Skulltulas Are in Ocarina of Time?
There are 100 Gold Skulltulas in the Nintendo Switch 2 remake, the same total as the original Nintendo 64 game.
How Many Are in the Overworld?
There are 56 Gold Skulltulas across Hyrule's towns, fields, rivers, forests, and desert regions.
How Many Are Inside Dungeons?
There are 44 Gold Skulltulas across the main dungeons and mini-dungeons.
Where Do You Claim Gold Skulltula Rewards?
Visit the House of Skulltula in Kakariko Village.
Speak with the family members after reaching the required token milestones.
What Do You Get for 10 Gold Skulltulas?
The Adult's Wallet, which holds up to 500 Rupees in the Switch 2 remake.
What Do You Get for 20 Gold Skulltulas?
The Echo Gem.
It helps locate nearby Gold Skulltulas using visual and audio signals.
What Do You Get for 30 Gold Skulltulas?
The Giant's Wallet, which holds up to 1,000 Rupees.
What Do You Get for 40 Gold Skulltulas?
A set of 20 Bombchus.
What Do You Get for 50 Gold Skulltulas?
A Piece of Heart.
This reward counts toward collecting all 36 Pieces of Heart.
What Do You Get for 100 Gold Skulltulas?
A repeatable reward of 200 Rupees from the fully restored family.
Are Any Gold Skulltulas Permanently Missable?
No.
You can revisit earlier locations and dungeons to collect missed tokens.
Some require changing between Child Link and Adult Link.
Do Gold Skulltulas Only Appear at Night?
No.
Many overworld spiders appear only at night, but others are available at any time.
Dungeon Gold Skulltulas are generally independent of the day-night cycle.
Can You Collect All 100 as Child Link?
No.
Several Gold Skulltulas require Adult Link equipment, including the Hookshot, Longshot, Megaton Hammer, and Silver Gauntlets.
Can You Collect All 100 as Adult Link?
No.
Several Gold Skulltulas require Child Link, especially those hidden beneath soft soil.
Are Bottled Bugs Required?
Yes, for the intended collection of the soft-soil Gold Skulltulas.
Release Bugs onto the relevant soil patches to reveal them.
What Does the Echo Gem Do?
The Echo Gem reacts to nearby Gold Skulltulas.
It provides a green visual signal and an audible chime.
Its feedback becomes stronger as Link approaches a spider.
Does the Echo Gem Work During the Day?
It can help identify locations associated with nighttime Gold Skulltulas even when the spider hasn't appeared yet.
Return at night to collect the token.
Do You Need Scarecrow's Song?
Yes, for several intended collection routes.
Scarecrow's Song creates Hookshot targets that let Link reach otherwise inaccessible ledges.
How Many Gold Skulltulas Are in the Great Deku Tree?
Four.
All four are accessible during the initial Child Link visit in the remake.
How Many Are in Dodongo's Cavern?
Five.
One requires returning as Adult Link with Scarecrow's Song and the Hookshot.
How Many Are in Jabu-Jabu's Belly?
Four.
All four can be collected during the Child Link dungeon route.
How Many Are in the Forest Temple?
Five.
One requires Scarecrow's Song to reach an elevated balcony.
How Many Are in the Fire Temple?
Five.
Two are reached through the hidden Scarecrow route.
How Many Are in the Water Temple?
Five.
Several require the Longshot, and one has been moved in the remake.
How Many Are in the Shadow Temple?
Five.