Ganon's Castle Dungeon Overview
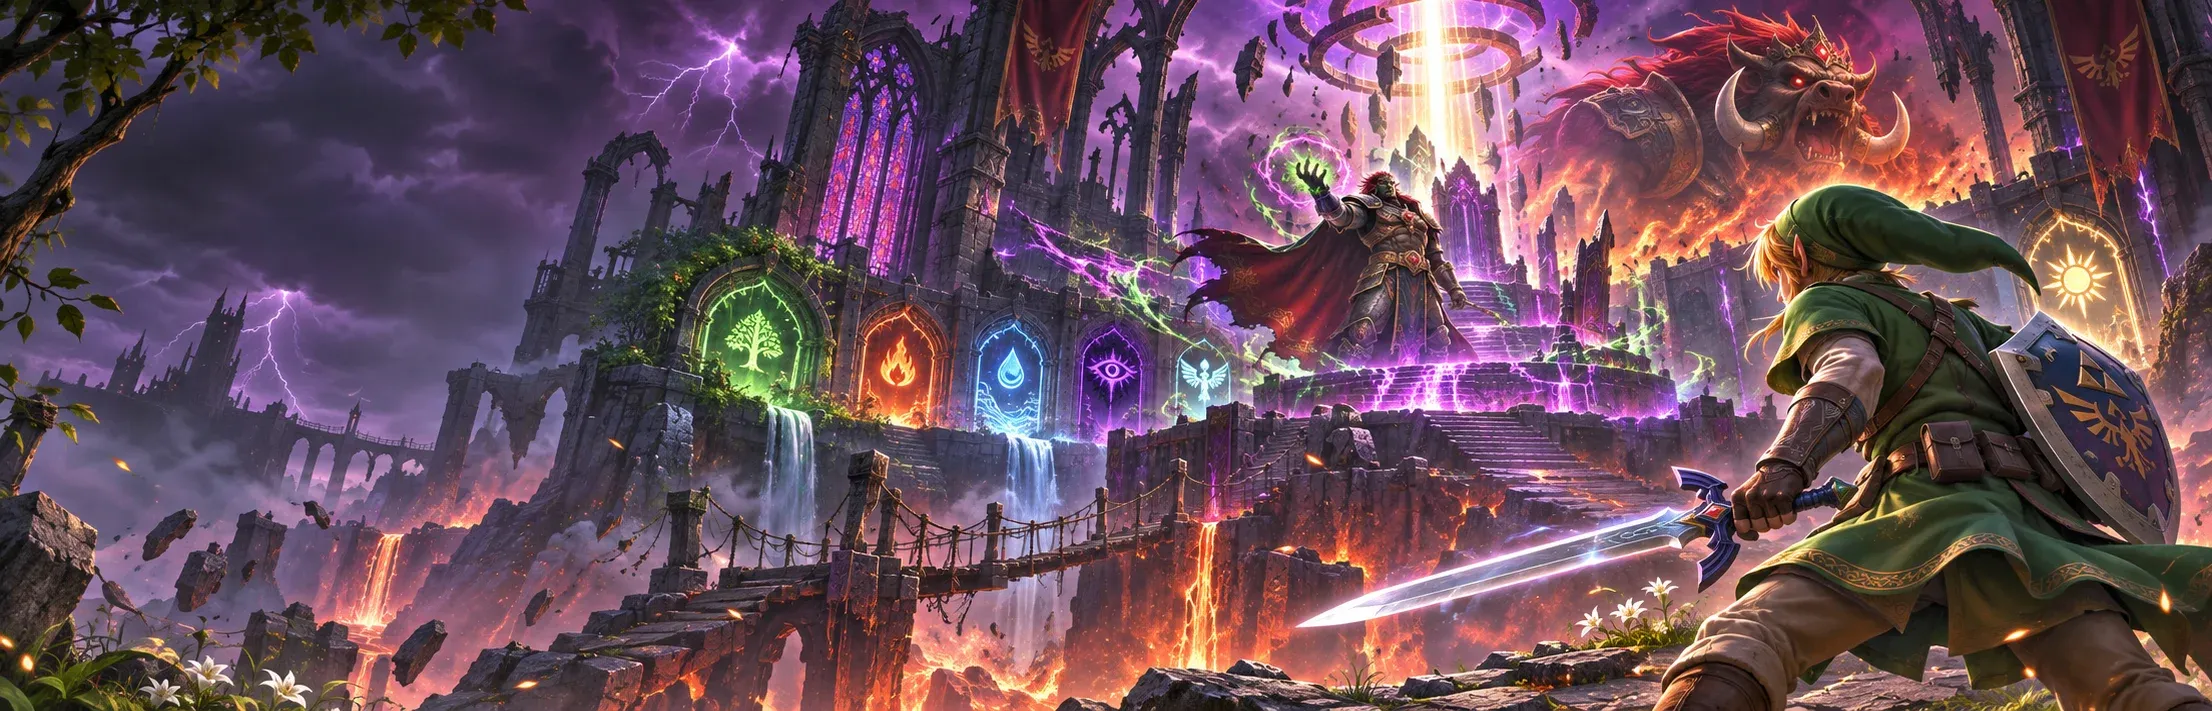
Ganon's Castle stands where Hyrule Castle once overlooked the kingdom.
You'll enter it as Adult Link after completing the main Sage questline.
The dungeon has three major sections.
First, you must destroy six magical barriers surrounding the central tower.
Next, you'll climb the tower and defeat several powerful enemies before confronting Ganondorf.
Finally, you'll escape the collapsing castle and face Ganon in the ultimate battle.
Dungeon information:
Location: Ruins of Hyrule Castle
Playable character: Adult Link
Required progression: All five Adult Link Sage temples completed
Essential equipment: Master Sword, Fairy Bow, Light Arrows, and major dungeon items
Required barriers: Forest, Fire, Water, Shadow, Spirit, and Light
Major castle item: Golden Gauntlets
Other important items: Boss Key and one Small Key in the Light trial
Optional upgrade: Great Fairy's defensive blessing
Main enemies: Dinolfos, Stalfos, Iron Knuckles, Beamos, and Like Likes
First final boss: Ganondorf
Second final boss: Ganon
Main reward: Completion of the story
Unlike the earlier Sage temples, Ganon's Castle doesn't contain a traditional main dungeon item such as the Fairy Bow or Longshot.
Instead, it tests almost everything you've collected.
Important: The six trials can be approached in different orders, but completing the Shadow Barrier first is recommended because it provides the Golden Gauntlets.
How to Unlock Ganon's Castle in Ocarina of Time
Before entering Ganon's Castle, you must finish the main Sage storyline.
The castle won't become accessible simply because you've reached the ruins of Hyrule Castle.
Step 1: Complete the Five Adult Link Temples
Your first requirement is awakening the five major Sages.
Complete these temples:
Forest Temple: Defeat Phantom Ganon and awaken Saria.
Fire Temple: Defeat Volvagia and awaken Darunia.
Water Temple: Defeat Morpha and awaken Ruto.
Shadow Temple: Defeat Bongo Bongo and awaken Impa.
Spirit Temple: Defeat Twinrova and awaken Nabooru.
You'll receive the corresponding Medallions after each temple.
The Light Medallion is obtained earlier in Adult Link's adventure through Rauru.
Once the Sage questline is complete, you're ready to continue the final story sequence.
Step 2: Return to the Temple of Time
Play the Prelude of Light to travel to the Temple of Time.
Enter the main chamber.
An important story cutscene begins.
You'll learn more about Sheik, Princess Zelda, the Triforce, and Ganondorf's plans.
The story reveals Zelda's true identity and explains why the Sages are necessary to defeat Ganondorf.
Step 3: Obtain the Light Arrows
During the Temple of Time sequence, Zelda gives Link the Light Arrows.
These magical arrows are essential for the final dungeon.
You'll use them to destroy the six magical barriers and stun Ganondorf during the final battle.
Make sure you have enough magic and arrows before leaving.
The Light Arrows consume both resources.
Step 4: Travel to Ganon's Castle
Leave the Temple of Time.
Travel through the ruined Castle Town area toward the former Hyrule Castle grounds.
You'll see Ganon's Castle surrounded by a dangerous moat.
Approach the gap.
The Sages create a magical bridge allowing Link to cross.
Walk across the bridge and enter the castle.
Ganon's Castle is now unlocked.
Best Equipment to Bring Into Ganon's Castle
Ganon's Castle is the final test of Link's abilities.
You should have most of the important dungeon equipment before entering.
Required and Important Weapons
Master Sword: Your main weapon for the Ganondorf and Ganon fights.
Fairy Bow: Required for shooting switches and using magical arrows.
Light Arrows: Essential for destroying the barriers and stunning the final bosses.
Longshot: Used for reaching distant platforms and targets.
Megaton Hammer: Required for heavy switches and useful during the final Ganon encounter.
Mirror Shield: Required for reflecting light in the Spirit Barrier.
Important Equipment
Hover Boots: Useful for crossing gaps and avoiding sinking platforms.
Lenses of Truth: Reveal invisible platforms, hidden enemies, and secret passages.
Goron Tunic: Protects Link from extreme heat during the Fire Barrier.
Golden Gauntlets: Obtained inside Ganon's Castle and required for specific trials.
Recommended Optional Supplies
Bring several Bottles containing Fairies or healing potions.
A Green Potion is particularly useful because the Light Arrows consume magic.
You should also consider collecting the Biggoron Sword before entering.
It's an optional weapon, but it provides another way to damage Ganon while the Master Sword is temporarily unavailable.
Beginner recommendation: Collect the Golden Gauntlets and Great Fairy's defensive upgrade before attempting the final tower.
Ganon's Castle – How the Six Barrier Trials Work
After entering the castle, you'll reach a large central chamber.
Six colored doorways surround a powerful magical barrier.
The barrier protects the route leading toward Ganondorf's tower.
Each doorway connects to a separate trial associated with a Sage.
The six trials are:
Shadow Barrier: Impa.
Spirit Barrier: Nabooru.
Light Barrier: Rauru.
Fire Barrier: Darunia.
Water Barrier: Ruto.
Forest Barrier: Saria.
Each trial contains a series of challenges.
At the end, you'll find a magical orb maintaining part of the barrier.
How to Destroy a Barrier
Complete the trial's puzzles.
Reach the final chamber.
Equip the Fairy Bow and select the Light Arrows.
Aim at the glowing barrier orb.
Fire a Light Arrow.
The orb shatters, and the corresponding Sage removes part of the magical protection.
You'll return to the central chamber.
Repeat for all six barriers.
Recommended Barrier Order
For the Switch 2 remake, we recommend:
Shadow Barrier – Obtain the Golden Gauntlets.
Spirit Barrier – Solve the Silver Rupee, Bombchu, and light puzzles.
Light Barrier – Find the hidden Small Key.
Fire Barrier – Cross the lava platforms.
Water Barrier – Solve the Blue Fire and ice block puzzles.
Forest Barrier – Complete the torch and fan puzzles.
Only the Shadow-first recommendation is especially important.
Once you have the Golden Gauntlets, you can complete the remaining trials in a different order.
Shadow Barrier Walkthrough – Golden Gauntlets Location
The Shadow Barrier is the best trial to complete first.
It contains invisible platforms, dangerous gaps, and the Golden Gauntlets.
You'll need the Fairy Bow, Fire Arrows, Hover Boots, and Lenses of Truth.
Step 1: Enter the Shadow Trial
From the central chamber, find the doorway marked with the Shadow symbol.
Enter.
You'll arrive in a large room containing several platforms suspended over a dangerous drop.
Some platforms aren't initially visible.
Step 2: Light the Distant Torch
Look toward the right side of the room.
You'll notice an unlit torch.
Equip the Fairy Bow and select Fire Arrows.
Shoot the torch.
The flame activates a mechanism, revealing additional platforms.
You can also use an ordinary arrow shot through an existing flame when the angle allows.
Step 3: Cross the Platforms
Move toward the newly accessible platforms.
Use the Hover Boots when crossing larger gaps.
You'll encounter a Like Like along the route.
Defeat it before continuing.
The Like Like can interfere with your movement and potentially steal equipment.
Step 4: Activate the Lower Switch
Continue toward the platform containing a massive stone block.
Look down and to the side for a floor switch.
Use the Hover Boots to reach it.
Step on the switch.
A treasure chest appears on a nearby platform.
This chest contains the Golden Gauntlets.
Step 5: Collect the Golden Gauntlets
Use the Hookshot or Longshot to return to the chest platform.
Open the chest.
You'll obtain the Golden Gauntlets.
These powerful gloves allow Link to lift enormous stone obstacles that couldn't be moved with the Silver Gauntlets.
Step 6: Move the Giant Stone Block
Return to the massive block.
With the Golden Gauntlets, Link can lift it.
Move the obstacle out of the way.
This reveals the next switch.
Activate it to open the route forward.
Step 7: Reveal the Invisible Exit
Activate the Lenses of Truth.
An invisible platform becomes visible near the end of the room.
Equip the Hover Boots.
Cross toward the exit.
Enter the final chamber.
Step 8: Destroy the Shadow Barrier
Equip the Light Arrows.
Aim at the magical orb.
Fire.
The Shadow Barrier is destroyed, and Impa's power removes one part of the protection surrounding Ganondorf's tower.
Shadow Barrier completed. Golden Gauntlets acquired.
Optional: Great Fairy of Courage – Defensive Upgrade
After obtaining the Golden Gauntlets, you can unlock one of the most useful upgrades in the game.
The Great Fairy of Courage provides a defensive blessing that reduces the damage Link receives.
This is particularly valuable before the final boss battles.
Where to Find the Great Fairy Fountain
Leave Ganon's Castle.
Cross the magical bridge toward the castle grounds.
Look for the dead-end path near the castle entrance.
A giant stone block prevents access.
Approach it with the Golden Gauntlets.
Lift the block and remove it.
Enter the newly revealed passage.
How to Obtain the Defensive Upgrade
Inside, you'll find a Great Fairy Fountain.
Approach the fountain and activate it using the required song.
In the Switch 2 remake, the defensive blessing requires 500 Rupees.
After completing the offering, the Great Fairy grants her protection.
The upgrade halves incoming damage.
It's especially useful when facing Ganondorf and Ganon.
Recommendation: If you can afford the upgrade, collect it now rather than waiting until after the barrier trials.
Spirit Barrier Walkthrough – Silver Rupees and Mirror Shield
The Spirit Barrier tests several abilities obtained during the Spirit Temple.
You'll need the Hookshot or Longshot, Bombchus, Mirror Shield, and Light Arrows.
Step 1: Enter the Spirit Trial
Return to the main chamber.
Find the Spirit Barrier doorway.
Enter.
The first room contains Armos statues, moving spikes, a Beamos, and several Silver Rupees.
Your objective is collecting every Silver Rupee.
Step 2: Destroy the Beamos
The Beamos stands near the center of the room.
Use a Bomb to destroy it.
This makes the room safer to explore.
Step 3: Collect the Silver Rupees
Five Silver Rupees are scattered around the chamber.
Some are near the moving spike traps.
One is positioned high above the floor.
Use the Hookshot on the ceiling target to reach the elevated collectible.
For the others, move carefully between the spikes.
You can reposition certain Armos statues to change your access to the room.
Once every Silver Rupee is collected, the exit opens.
Step 4: Solve the Bombchu Switch Puzzle
The next room contains a wall with a small opening near the top.
Several switches are located beyond it.
Ordinary arrows cannot easily reach the required switch.
Equip a Bombchu.
Position Link so the Bombchu travels toward the narrow opening.
Release it.
The explosive moves through the gap and activates the switch on the other side.
The next door opens.
Step 5: Reveal the Sunlight
Continue into the chamber containing several sun symbols.
Look toward the ceiling.
A Fire Arrow can activate the mechanism and allow sunlight into the room.
Equip the Fairy Bow and shoot the appropriate ceiling target.
The room becomes illuminated.
Step 6: Reflect Light With the Mirror Shield
Stand inside the beam of sunlight.
Equip the Mirror Shield.
Raise the shield and direct the reflected beam toward the correct sun symbol.
For the Switch 2 remake's route, use the sun symbol to the left of the entrance.
The incorrect symbols can summon Wallmasters.
Keep the light focused until the mechanism activates.
Step 7: Destroy the Spirit Barrier
Enter the final room.
Equip a Light Arrow.
Shoot the barrier orb.
Nabooru's power removes another part of the castle's protection.
Spirit Barrier completed.
Light Barrier Walkthrough – Hidden Small Key and Lenses of Truth
The Light Barrier is one of the most deceptive castle trials.
You'll encounter hidden enemies, fake treasure chests, an invisible Small Key chest, and a Silver Rupee puzzle.
You'll need the Golden Gauntlets to reach its entrance.
Step 1: Remove the Giant Stone Obstacle
Return to the main chamber.
Find the Light Barrier route.
A massive stone block obstructs the passage.
Use the Golden Gauntlets to move it.
Enter the trial.
Step 2: Reveal the Hidden Enemies
The first room contains several treasure chests.
However, some are traps.
Activate the Lenses of Truth.
You'll reveal hidden enemies, including a Skulltula and Keese.
Defeat them before opening the safe chests.
Several contain Rupees.
Others are traps and should be avoided.
After clearing the enemies, the next passage becomes available.
Step 3: Find the Hidden Small Key
The next room contains a Triforce symbol.
Play Zelda's Lullaby.
In the Switch 2 remake, doing this produces a small reward rather than directly opening the door.
Activate the Lenses of Truth.
Look toward the left side of the room.
An invisible treasure chest becomes visible.
Open it to obtain the trial's Small Key.
This key is required to continue.
Step 4: Solve the Rolling Boulder Puzzle
Enter the next chamber.
You'll find several rolling boulders and five Silver Rupees.
Start by looking toward the ceiling.
Use the Hookshot to reach the central target and collect the elevated Silver Rupee.
Continue searching the alcoves around the room.
Move in the direction of the boulders' movement where possible to reduce the chance of collision.
Collect all five Silver Rupees.
The exit opens.
Step 5: Reveal the Final Passage
Continue toward the final section.
Activate the Lenses of Truth.
The correct path becomes visible.
Be careful because a Wallmaster can appear while you're inspecting the room.
Keep moving and avoid standing beneath its shadow.
Step 6: Destroy the Light Barrier
Reach the magical orb.
Equip a Light Arrow.
Fire at the barrier.
Rauru's power removes another section of the central protection.
Light Barrier completed.
Fire Barrier Walkthrough – Lava Platforms and Silver Rupees
The Fire Barrier contains extremely hot lava, moving platforms, and several Silver Rupees.
You'll need the Goron Tunic, Hover Boots, Golden Gauntlets, and Longshot.
Step 1: Equip the Goron Tunic
Enter the Fire Barrier doorway.
Before moving into the lava chamber, equip the Goron Tunic.
This protects Link from extreme heat.
Without it, the environment can cause additional danger.
Step 2: Equip the Hover Boots
Many platforms inside the trial slowly sink when Link stands on them.
The Hover Boots help reduce pressure on certain platforms and make crossing gaps easier.
Equip them before moving forward.
Step 3: Collect the First Silver Rupee
From the starting platform, look toward the lower-right side.
You'll see a Silver Rupee on a platform that begins sinking when stepped on.
Jump toward it.
Collect the Rupee quickly.
Return to the main platform before it sinks too far.
Step 4: Navigate the Flame Traps
Move toward the left side of the chamber.
Several rotating flamethrowers guard the next Silver Rupee.
Watch their movement.
Wait for the flames to rotate away.
Cross toward the collectible and return to safety.
Step 5: Lift the Massive Block
Continue toward the giant stone block.
Use the Golden Gauntlets to lift it.
One Silver Rupee is hidden beneath the block.
Collect it.
The block also becomes useful for reaching other sections after you've moved it.
Step 6: Collect the Remaining Silver Rupees
Continue across the platforms.
One Silver Rupee is located near a Torch Slug.
Defeat or avoid the enemy before collecting it.
Another is positioned across the lava near the relocated stone block.
Use the block as a stepping point.
Once all five Silver Rupees have been collected, the exit becomes accessible.
Step 7: Use the Longshot to Reach the Exit
Look toward the doorway on the far side.
A Longshot target is positioned near it.
Aim and fire to pull Link across.
Enter the final chamber.
Step 8: Destroy the Fire Barrier
Equip the Light Arrows.
Shoot the magical orb.
Darunia's power removes another part of the central barrier.
Fire Barrier completed.
Water Barrier Walkthrough – Blue Fire and Ice Block Puzzle
The Water Barrier contains frozen enemies, red ice, sliding blocks, and a timed puzzle.
You'll need an Empty Bottle, Blue Fire, Megaton Hammer, and Light Arrows.
Step 1: Enter the Frozen Chamber
Return to the main hub.
Enter the Water Barrier doorway.
The first room contains Freezards and several ice formations.
Use Fire Arrows to defeat the Freezards.
Destroy the enemies to open the next route.
Step 2: Collect Blue Fire
Look for the source of Blue Fire inside the chamber.
Equip an Empty Bottle.
Approach the flame and collect it.
You'll need Blue Fire to melt the red ice in the next section.
Important: Don't leave the first room without Blue Fire. Ordinary fire attacks won't replace it for the required red ice puzzle.
Step 3: Enter the Timed Ice Puzzle Room
The next room contains movable ice blocks, fixed obstacles, and a hole in the floor.
A timer begins when the puzzle starts.
Your objective is positioning the blocks to create a route toward the elevated passage.
Step 4: Move the First Ice Block
Find the block farther from the raised exit.
Push it toward the nearby rock.
Use the obstacle to stop its movement and line it up with the hole in the floor.
Push the block into the opening.
This fills the hole and creates a stable path for the second block.
Step 5: Move the Second Ice Block
Approach the remaining block.
Push it across the newly filled gap.
Use the fixed obstacles to control where it stops.
Continue sliding it until it reaches the area beneath the raised ledge.
Step 6: Melt the Red Ice
Climb onto the positioned block.
Reach the ledge containing the red ice.
Use the bottled Blue Fire to melt it.
This reveals the switch needed to unlock the exit.
Step 7: Activate the Heavy Switch
Equip the Megaton Hammer.
Strike the exposed rusty switch.
The mechanism opens the door.
Move toward the exit before the timer becomes a problem.
Step 8: Destroy the Water Barrier
Enter the final chamber.
Equip the Light Arrows.
Shoot the barrier orb.
Ruto's power removes another part of the magical protection.
Water Barrier completed.
Forest Barrier Walkthrough – Torch Puzzle and Powerful Fans
The Forest Barrier combines combat, fire puzzles, strong wind currents, and Silver Rupees.
You'll need Din's Fire, Fire Arrows, Hover Boots, Hookshot, and the Song of Time.
Step 1: Defeat the Wolfos
Enter the Forest Barrier trial.
A Wolfos appears.
Target it and wait for an opening.
Attack its vulnerable side or back with the Master Sword.
Once defeated, a chest containing additional arrows appears.
Collect them if necessary.
Step 2: Light the Circle of Torches
The room contains several unlit torches arranged around the floor.
Stand near the center.
Equip Din's Fire.
Activate the spell.
The flames light the surrounding torches simultaneously.
Step 3: Light the Final Elevated Torch
One torch remains above the doorway.
Din's Fire won't reach it from the main floor.
Equip the Fairy Bow and select Fire Arrows.
Shoot the elevated torch.
The final torch activates, opening the next passage.
Step 4: Enter the Fan Chamber
The next room contains powerful fans and several platforms suspended above a dangerous drop.
You must collect five Silver Rupees.
The fans can help push Link across gaps, but they can also knock him off narrow platforms.
Step 5: Use the Hover Boots
Equip the Hover Boots.
Wait for the fans to activate when you need their airflow.
Use the additional movement distance to reach the nearby platforms.
Avoid standing directly in front of a fan when you aren't prepared to move.
Step 6: Play the Song of Time
One Silver Rupee is positioned near the left side of the room.
Play the Song of Time at the appropriate location.
A Time Block appears.
Use it to reach the collectible more safely.
This is easier than relying entirely on fan timing.
Step 7: Collect the Remaining Silver Rupees
Destroy the Beamos near the central section.
This makes crossing the room safer.
Continue toward the side platforms.
One Silver Rupee requires activating a switch that reveals a Hookshot target.
Use the Hookshot to reach the elevated position and collect it.
Gather all five Silver Rupees.
Step 8: Destroy the Forest Barrier
Once the exit opens, enter the final chamber.
Use a Light Arrow to destroy the magical orb.
Saria's power removes the final section of the barrier surrounding the central tower.
Forest Barrier completed. All six barriers destroyed!
What Happens After Destroying All Six Barriers?
After completing every trial, return to the central chamber.
The six magical seals have disappeared.
The central barrier is gone, revealing the entrance to Ganondorf's tower.
You've completed the trial section of Ganon's Castle.
Before continuing, make sure you're prepared for the final boss encounters.
Refill Your Health
Return to the hidden Fairy room beneath the entrance bridge if necessary.
Activate the Lenses of Truth to reveal the secret passage.
Collect Fairies in Empty Bottles for emergency healing.
Refill Your Magic
Light Arrows consume magic.
Bring a Green Potion if you have room.
You don't want to run out during Ganondorf's energy projectile battle.
Save Your Progress
Save your game before entering the final tower.
Once you reach the last boss door, you'll be entering the game's final battle sequence.
Check the Great Fairy Upgrade
If you haven't collected the Golden Gauntlets defensive blessing, now is the ideal opportunity.
Leave the castle briefly and visit the Great Fairy Fountain.
Then return and continue toward the central tower.
Ganon's Tower Walkthrough – Final Enemy Encounters
After removing the six barriers, enter the central tower.
This section is more straightforward than the barrier trials.
However, it contains several difficult combat encounters.
You'll need to defeat powerful enemies to unlock the upper floors.
Climb the First Staircase
Enter the tower.
Follow the stairs upward.
You'll encounter several pots along the walls.
Break them for additional arrows, hearts, and other supplies.
Continue toward the next chamber.
Solve the Fire Arrow Stairwell Puzzle
In the Switch 2 remake, a narrow stairwell contains torches that must be lit.
Equip Fire Arrows.
Move up the staircase and shoot the required torches.
Continue until the upper doorway becomes accessible.
Defeat the Two Dinolfos
Enter the first combat arena.
Two Dinolfos appear.
These enemies are stronger and more aggressive than ordinary Lizalfos.
Target one at a time.
Use your shield to defend against sword attacks.
Dodge when a Dinolfos prepares a jumping strike.
Counterattack during the recovery animation.
After defeating both enemies, the door opens.
Continue upward.
Defeat the Two Stalfos
The next combat arena contains two Stalfos.
They use swords and shields, making reckless attacks ineffective.
Keep moving so they cannot surround Link.
Target one enemy.
Block or dodge its attacks.
Counter when the Stalfos lowers its guard.
After both are defeated, the next staircase opens.
Defeat the Two Iron Knuckles
The final major combat arena contains two Iron Knuckles.
These heavily armored warriors carry enormous axes.
Their attacks deal significant damage.
Try to separate them so you aren't fighting both simultaneously at close range.
Wait for an Iron Knuckle to swing.
Avoid the attack.
Move forward and strike during its recovery animation.
Bombs and other powerful attacks can help.
Repeat until both Iron Knuckles are defeated.
Where Is the Ganon's Castle Boss Key?
The Boss Key appears after defeating the two Iron Knuckles inside the tower's final major combat arena.
Collect the Boss Key
After the second Iron Knuckle is defeated, a large ornate treasure chest appears.
Approach it.
Open the chest to obtain the Boss Key.
This is the only traditional Boss Key needed for the final tower.
Continue Toward Ganondorf
Leave the arena.
Follow the stairs upward.
Break the pots along the route to replenish your arrows and other supplies.
Eventually, you'll reach a large door decorated with a Triforce symbol.
Approach the door.
Use the Boss Key to open it.
You're about to face Ganondorf.
Ganondorf Boss Fight – How to Defeat the King of Evil
Boss: Great King of Evil – Ganondorf
Location: Top of Ganon's Tower
Required equipment: Master Sword, Fairy Bow, and Light Arrows
Main weakness: Reflected magical projectiles and Light Arrows
Ganondorf is the first of the game's two final boss encounters.
He fights using powerful dark magic and launches energy projectiles toward Link.
The battle resembles Phantom Ganon's second phase from the Forest Temple, but the arena and later attacks are more dangerous.
In the Switch 2 remake, the floor can also collapse during the fight, creating additional movement challenges.
Step 1: Watch the Opening Cutscene
When you enter the chamber, Ganondorf is playing an organ.
Princess Zelda is imprisoned inside a magical crystal.
Ganondorf speaks to Link and explains his desire to obtain the remaining pieces of the Triforce.
The battle begins.
Step 2: Move Toward the Outer Platforms
Ganondorf floats near the center of the arena.
Standing directly beneath him isn't a good strategy.
Move toward the outer edge.
This gives you more time to react to incoming projectiles.
Keep the Master Sword equipped.
Step 3: Wait for the Energy Projectile
Ganondorf prepares a powerful magical attack.
A glowing energy ball travels toward Link.
Wait until it approaches.
Swing the Master Sword to reflect the projectile.
A correctly timed strike sends it back toward Ganondorf.
Step 4: Continue the Energy Exchange
Ganondorf may return the projectile.
Strike it again.
Continue reflecting it until Ganondorf fails to return the attack.
The energy hits him, leaving him vulnerable.
Boss tip: As the exchange continues, the projectile can travel faster. Prepare to swing earlier during longer volleys.
Step 5: Stun Ganondorf With a Light Arrow
When Ganondorf is temporarily stunned, equip the Fairy Bow and select Light Arrows.
Aim at him.
Fire.
A successful hit causes Ganondorf to fall toward the arena floor.
This creates your main opportunity to deal damage.
Step 6: Attack With the Master Sword
Run toward Ganondorf while he's down.
Attack with the Master Sword.
Deal as much damage as possible before he recovers.
Then move away.
Prepare for another energy projectile exchange.
Step 7: Avoid the Collapsing Floor
As the battle continues, Ganondorf damages the arena.
Sections of the floor collapse or sink, creating gaps and uneven platforms.
Avoid standing on unstable sections.
Use the safer outer ledges when possible.
You may need to climb the remaining platforms or use the Longshot to reposition.
Step 8: Avoid the Additional Energy Attacks
Ganondorf may launch several projectiles instead of a single energy ball.
Keep moving and watch their pattern.
Don't attempt to reflect every projectile if you don't have a clear angle.
Focus on surviving until the next suitable opening.
Step 9: Repeat the Main Strategy
Continue following the same cycle:
Wait for Ganondorf's energy ball.
Reflect it using the Master Sword.
Win the projectile exchange.
Shoot Ganondorf with a Light Arrow.
Approach and attack with the Master Sword.
Retreat and prepare for the next attack.
Repeat until Ganondorf is defeated.
Ganondorf has fallen!
However, the adventure isn't over.
Escape Ganon's Castle With Princess Zelda
After defeating Ganondorf, Princess Zelda is freed.
The castle begins collapsing.
You must follow Zelda through the dangerous passages before the entire structure falls apart.
This sequence focuses on movement, combat, and quick reactions.
Step 1: Follow Princess Zelda
After the cutscene, Zelda begins leading Link toward the exit.
Stay close to her.
She opens magical barriers that would otherwise block your route.
Don't run too far ahead.
Wait when she stops to activate a mechanism.
Step 2: Avoid Falling Debris
Several corridors contain burning rubble and collapsing obstacles.
Follow Zelda's path.
Move around falling debris.
Avoid standing near unstable sections of the floor.
Keep moving toward the next doorway.
Step 3: Defeat the Stalfos
During the escape, you'll reach a room where two Stalfos appear.
The exit is temporarily blocked.
Defeat both enemies.
Use your shield to defend against their attacks.
Counter with the Master Sword during openings.
Once the enemies are defeated, Zelda can continue opening the route.
Step 4: Cross the Broken Bridge
The next area contains a broken bridge over a dangerous drop.
Look across the gap.
A Longshot target is positioned on the opposite side.
Equip the Longshot.
Aim at the target.
Pull yourself across.
Continue following Zelda.
Step 5: Break the Rubble With the Megaton Hammer
In the Switch 2 remake, a later passage is blocked by a pile of rubble.
Equip the Megaton Hammer.
Strike the obstruction to destroy it.
Move quickly because Zelda is holding back the approaching enemies.
Continue through the newly opened route.
Step 6: Defeat the ReDeads
Near the final bridge, several ReDeads block the passage.
Zelda uses her magic to help restrain them.
Take advantage of the opening.
Defeat the enemies with the Master Sword.
Continue toward the castle exit.
Step 7: Escape the Castle
Follow Zelda through the last passage.
An important cutscene begins when you reach the outside.
Ganon's Castle collapses behind Link and Zelda.
For a moment, it appears that Ganondorf has been defeated permanently.
However, a powerful evil presence remains beneath the ruins.
The true final battle is about to begin.
Ganon Final Boss Fight – How to Defeat the Beast
Final boss: Ganon
Location: Ruins of Ganon's Castle
Required equipment: Master Sword and Light Arrows
Useful equipment: Megaton Hammer, Biggoron Sword, Hylian Shield, and healing supplies
Main weaknesses: Tail crystal, glowing body targets, and final exposed eye
Ganon is Ganondorf's monstrous final form.
He transforms into a gigantic beast wielding enormous weapons.
This fight is more dangerous than the previous encounter because Link temporarily loses access to the Master Sword.
You'll need to survive Ganon's attacks, expose his weak points, recover the legendary weapon, and deliver the final blow.
Ganon Phase One – Fight Without the Master Sword
At the beginning of the battle, Ganon knocks the Master Sword away.
It lands beyond a barrier of fire.
You cannot immediately retrieve it.
You'll need another weapon to damage Ganon.
Step 1: Equip Another Weapon
Open the equipment menu.
If you've completed the Biggoron Sword quest, equip it.
Otherwise, use the Megaton Hammer.
Both are useful during the opening phase.
The Biggoron Sword deals powerful damage, but it requires both hands.
This means you won't be able to use your shield normally while attacking with it.
Step 2: Watch Ganon's Weapon Attacks
Ganon swings two enormous blades.
These attacks cover a wide area.
Don't stand directly in front of him.
Watch for his weapons becoming temporarily stuck after a heavy strike.
This creates an opening.
Step 3: Move Behind Ganon
Ganon's main early weakness is located on his tail.
Wait until he finishes an attack.
Move toward his side and circle behind him.
Avoid approaching too early.
If he begins another attack, retreat immediately.
Step 4: Attack the Tail Crystal
Look for the glowing crystal near Ganon's tail.
Use the Megaton Hammer or Biggoron Sword to damage it.
You can also use Light Arrows to create additional openings.
After attacking, move away before Ganon recovers.
Step 5: Repeat Until the Crystal Breaks
Continue waiting for openings.
Move behind Ganon.
Attack the tail crystal.
After enough damage, the crystal shatters.
This ends the first phase.
Princess Zelda helps Link recover the Master Sword.
First phase completed. The Master Sword is available again.
Ganon Phase Two – Recover the Master Sword and Attack
Once Zelda returns the Master Sword, the battle becomes more aggressive.
Ganon gains new attack patterns and begins using additional magical attacks.
You'll need to combine Light Arrows, sword attacks, and careful defensive movement.
Step 1: Equip the Master Sword
Retrieve and equip the Master Sword.
Make sure you have enough magic for Light Arrows.
Keep the Hylian Shield available for protection.
Step 2: Watch the Glowing Weak Points
During the second phase, glowing targets appear on Ganon's body.
These indicate vulnerable areas.
Use the Light Arrows when you have a clear opportunity.
A successful hit damages or staggers Ganon.
Step 3: Attack While He's Vulnerable
When Ganon becomes stunned, approach.
Strike with the Master Sword.
Don't remain directly in front of him after he begins recovering.
Move away and prepare for his next attack.
Step 4: Avoid the Magical Hazards
Ganon's attacks can create red lightning and dangerous areas on the ground.
Watch for visual warnings.
Move away from the targeted sections before the attacks land.
Avoid standing still while trying to line up an arrow shot.
Step 5: Continue Dealing Damage
Repeat the process.
Watch for vulnerable areas.
Fire Light Arrows.
Attack with the Master Sword when Ganon staggers.
Keep moving between damage opportunities.
Eventually, Zelda provides additional help as the battle approaches its conclusion.
Ganon Final Phase – Shoot the Forehead Eye
In the Switch 2 remake, Ganon's final phase introduces an exposed magical eye on his forehead.
This creates the last major damage opportunity.
Step 1: Watch Zelda's Intervention
As Ganon becomes weaker, Zelda uses her magic.
A powerful light reveals a vulnerable eye on the creature's forehead.
The final phase begins.
Step 2: Target the Eye
Equip Light Arrows.
Aim toward the exposed eye.
Fire when you have a clear shot.
Don't waste arrows while Ganon's head is moving out of your view.
Step 3: Avoid the Red Lightning
Ganon continues using powerful magical attacks.
Red lightning strikes the arena.
Move away from the marked danger zones.
Keep enough distance to aim safely.
Step 4: Stun Ganon
Continue shooting the exposed eye with Light Arrows.
After enough successful hits, Ganon becomes stunned and drops his weapons.
This is your final opportunity.
Step 5: Deliver the Final Blow
Approach Ganon while he's vulnerable.
Equip the Master Sword.
Attack during the opening.
Follow the final story sequence to finish the encounter.
Ganon is defeated!
Link has completed the final battle, and the Sages can finally seal Ganondorf's evil power.
What Happens After Defeating Ganon?
After the final blow, the story concludes through a series of important cutscenes.
Princess Zelda and the Sages combine their power to seal Ganondorf away.
The threat to Hyrule is finally defeated.
Link's long journey through the kingdom reaches its conclusion.
Watch the Ending
The ending explores the consequences of Link's journey and the changes to Hyrule.
It also brings the story back to the Temple of Time and Link's childhood.
Watch the complete credits and final scenes to experience the full conclusion.
Can You Continue Playing After Defeating Ganon?
You can reload your existing save to continue exploring Hyrule.
However, defeating Ganon doesn't unlock a separate post-game world where the castle remains permanently cleared.
Your save returns you to the relevant point before the final sequence.
This allows you to revisit side quests and collectibles that you haven't completed.
Important: Save before the final boss door so you can easily return to optional activities afterward.
All Six Ganon's Castle Barrier Solutions – Quick Checklist
If you're stuck or missing one of the barriers, use this checklist.
Shadow Barrier
Main requirement: Hover Boots, Lenses of Truth, and Fire Arrows.
Light the distant torch.
Cross the platforms.
Activate the switch and collect the Golden Gauntlets.
Lift the giant block and reveal the invisible exit.
Destroy the barrier using a Light Arrow.
Spirit Barrier
Main requirement: Bombchus and Mirror Shield.
Collect the Silver Rupees.
Use a Bombchu to activate the hidden switch.
Reveal the sunlight.
Reflect it toward the correct sun symbol.
Destroy the barrier using a Light Arrow.
Light Barrier
Main requirement: Golden Gauntlets and Lenses of Truth.
Move the giant entrance block.
Reveal the hidden enemies.
Find the invisible Small Key chest.
Complete the rolling boulder Silver Rupee puzzle.
Destroy the barrier using a Light Arrow.
Fire Barrier
Main requirement: Goron Tunic, Golden Gauntlets, Hover Boots, and Longshot.
Cross the lava platforms.
Collect five Silver Rupees.
Move the enormous stone block.
Use the Longshot to reach the exit.
Destroy the barrier using a Light Arrow.
Water Barrier
Main requirement: Empty Bottle, Blue Fire, and Megaton Hammer.
Defeat the Freezards.
Collect Blue Fire.
Solve the timed ice block puzzle.
Melt the red ice.
Activate the heavy switch.
Destroy the barrier using a Light Arrow.
Forest Barrier
Main requirement: Din's Fire, Fire Arrows, Hover Boots, and Song of Time.
Defeat the Wolfos.
Light the torches.
Cross the fan chamber.
Collect the Silver Rupees.
Destroy the barrier using a Light Arrow.
Once every barrier is destroyed, the central tower becomes accessible.
Common Ganon's Castle Problems and Solutions
Ganon's Castle uses almost every major mechanic introduced earlier in the adventure.
Here are solutions to common problems.
Why Can't I Enter Ganon's Castle?
You must finish the main Sage questline and obtain the Light Arrows.
Return to the Temple of Time after completing the required temples.
Then approach the castle to trigger the magical bridge.
Why Is the Central Tower Still Protected?
You must complete all six barrier trials.
Each trial ends with a magical orb that must be destroyed using a Light Arrow.
Check whether one of the six Sage barriers remains active.
Where Are the Golden Gauntlets?
The Golden Gauntlets are inside the Shadow Barrier trial.
Activate the switch near the lower platform to reveal their chest.
Why Can't I Enter the Light Barrier?
You need the Golden Gauntlets to move the massive stone block.
Complete the Shadow Barrier first.
Why Am I Taking Heat Damage in the Fire Barrier?
Equip the Goron Tunic.
It provides protection against the extreme heat.
How Do I Solve the Spirit Barrier Bombchu Puzzle?
Release a Bombchu so it travels through the small opening above the wall.
It must reach the switch on the opposite side.
Why Can't I Find the Light Barrier Small Key?
Activate the Lenses of Truth in the room containing the Triforce symbol.
The Small Key chest is invisible and located toward the left side.
How Do I Melt the Water Barrier's Red Ice?
Use Blue Fire collected in an Empty Bottle from the previous room.
Ordinary fire attacks won't substitute for the required Blue Fire.
Where Is the Final Great Fairy Fountain?
Leave Ganon's Castle with the Golden Gauntlets.
Remove the giant stone block near the outside path.
Enter the passage to reach the Great Fairy of Courage.
Where Is the Boss Key?
The Boss Key appears after defeating the two Iron Knuckles near the top of Ganon's Tower.
Open the large chest that appears after the battle.
Why Can't I Damage Ganondorf?
First, reflect his energy projectile using the Master Sword.
Then shoot him with a Light Arrow while he's vulnerable.
Attack with the Master Sword when he falls.
Why Can't I Use the Master Sword Against Ganon?
Ganon knocks it away at the beginning of the final battle.
Use the Megaton Hammer or Biggoron Sword until Zelda helps return the Master Sword.
What Is Ganon's Main Weakness?
During the opening phase, attack the crystal on his tail.
Later, use Light Arrows against his glowing weak points and exposed forehead eye.
The Master Sword is required for the decisive final strikes.
Ganon's Castle FAQ
Is Ganon's Castle the Final Dungeon in Ocarina of Time?
Yes. Ganon's Castle is the final main story dungeon.
After clearing the six barriers, you'll climb the tower, fight Ganondorf, escape with Zelda, and defeat Ganon.
How Many Trials Are in Ganon's Castle?
There are six trials: Forest, Fire, Water, Shadow, Spirit, and Light.
Every trial must be completed to unlock the central tower.
Which Ganon's Castle Barrier Should You Complete First?
The Shadow Barrier is recommended first.
It contains the Golden Gauntlets, which are required for the Fire and Light Barrier routes.
What Are the Golden Gauntlets Used For?
The Golden Gauntlets allow Adult Link to lift enormous stone blocks.
They're required for certain castle trials and the final Great Fairy Fountain.
Are the Golden Gauntlets Stronger Than the Silver Gauntlets?
Yes.
The Golden Gauntlets provide a greater strength upgrade.
They allow Link to move obstacles that the Silver Gauntlets cannot.
Are Light Arrows Required?
Yes.
Light Arrows are required to destroy the six magical barriers and are essential for the intended final boss strategies.
Where Do You Get Light Arrows?
Princess Zelda gives Link the Light Arrows during the Temple of Time story sequence after the Sage questline.
Does Ganon's Castle Have Small Keys?
The Switch 2 remake includes a Small Key in the Light Barrier trial.
Find it inside an invisible chest revealed by the Lenses of Truth.
Does Ganon's Castle Have a Boss Key?
Yes.
The Boss Key appears in a chest after defeating the two Iron Knuckles near the top of the central tower.
Are There Gold Skulltulas in Ganon's Castle?
No. The castle doesn't contain Gold Skulltula tokens as part of its normal collectible checklist.
Focus on the Golden Gauntlets, optional defensive upgrade, and final story progression.
Can You Leave Ganon's Castle Before Fighting Ganondorf?
Yes.
You can leave the castle to collect supplies, finish side quests, or obtain optional upgrades before entering the final boss door.
How Do You Defeat Ganondorf?
Reflect his energy balls with the Master Sword.
Shoot him with a Light Arrow when he's stunned.
Attack with the Master Sword after he falls to the ground.
Repeat until he's defeated.
How Do You Escape the Collapsing Castle?
Follow Zelda.
Defeat the enemies blocking the route.
Use the Longshot to cross the broken bridge and the Megaton Hammer to destroy the rubble.
How Do You Defeat Ganon Without the Master Sword?
Use the Megaton Hammer or Biggoron Sword to damage the tail crystal during the opening phase.
The Master Sword becomes available again later.
How Do You Finish the Ganon Boss Fight?
Recover the Master Sword.
Use Light Arrows against Ganon's exposed weak points.
During the final phase, target the forehead eye and attack with the Master Sword when Ganon becomes vulnerable.
Should You Obtain the Great Fairy's Defensive Upgrade?
It's strongly recommended.
The blessing reduces incoming damage and makes the final battles easier.
In the Switch 2 remake, it requires a 500-Rupee offering.
What Happens After Beating Ganon?
The main story ends with the Sages sealing Ganondorf away.
You can reload your save to continue exploring Hyrule and finish optional objectives.
Is Ganon's Castle Different in the Switch 2 Remake?
Yes.
The Switch 2 remake retains the six barrier trials, tower climb, Ganondorf battle, and Ganon finale.
However, several puzzles and encounters have been revised, including parts of the Light Barrier, tower climb, castle escape, and final boss phases.
Final Thoughts – Defeat Ganondorf and Save Hyrule
Ganon's Castle is the ultimate challenge in The Legend of Zelda: Ocarina of Time.
It brings together the equipment, puzzle mechanics, combat skills, and story progression you've experienced throughout Link's adventure.
The six barrier trials test your mastery of the temples.
The Golden Gauntlets give Link the strength to overcome the castle's final obstacles.
The tower climb challenges you with some of the strongest enemies in Hyrule.
Ganondorf tests your timing and accuracy with magical attacks.
And the final battle against Ganon requires everything you've learned about movement, combat, equipment, and positioning.
Remember the essential route: Temple of Time → Light Arrows → Ganon's Castle → Shadow Barrier → Golden Gauntlets → Five Remaining Barriers → Central Tower → Boss Key → Ganondorf → Castle Escape → Ganon.
Before entering the final boss door, make sure you've collected enough healing supplies, magic, and arrows.
The Great Fairy's defensive blessing is also worth obtaining if you want an easier time surviving the final encounters.
If you're still completing earlier dungeons or optional objectives, read the Ocarina of Time Dungeon Order Guide or follow the Ocarina of Time Switch 2 Complete Walkthrough.
For assistance with a specific dungeon, boss fight, or story milestone, you can explore Zelda Ocarina of Time Boosting on BoostRoom to check service details and current availability.
Once Ganondorf and Ganon are defeated, the Sages can finally seal away the evil threatening Hyrule.
Zelda is free, the kingdom is saved, and Link's journey reaches its conclusion.
GANON'S CASTLE COMPLETED!
All six barriers are destroyed. Ganondorf has fallen. Ganon is defeated. Hyrule is saved.
The Hero of Time has fulfilled his destiny.