How Many Bosses Are in Ocarina of Time?
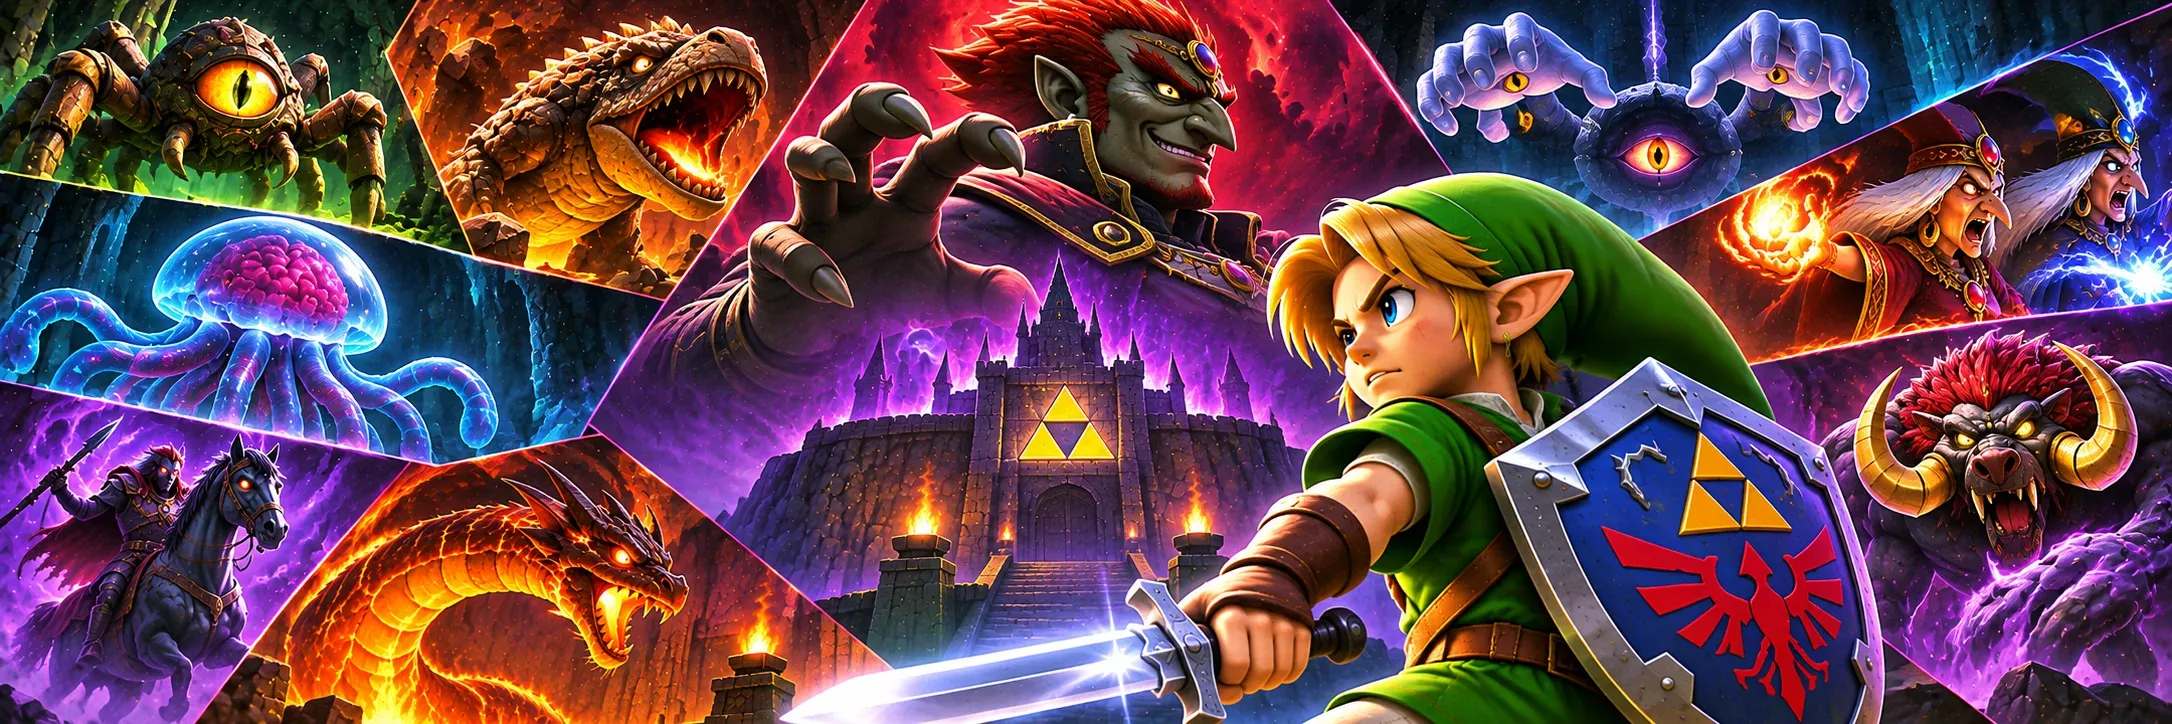
Ocarina of Time features 10 major story boss encounters, including Ganondorf and Ganon as separate final battles.
Eight bosses guard the main story dungeons. The final two encounters take place during the conclusion of Ganon's Castle.
The recommended main boss order is:
Queen Gohma – Great Deku Tree
King Dodongo – Dodongo's Cavern
Barinade – Lord Jabu-Jabu's Belly
Phantom Ganon – Forest Temple
Volvagia – Fire Temple
Morpha – Water Temple
Bongo Bongo – Shadow Temple
Twinrova – Spirit Temple
Ganondorf – Ganon's Castle
Ganon – Final battle
You'll fight the first three as Child Link.
The remaining major bosses are fought as Adult Link.
In addition to these encounters, several dungeons contain mini-bosses, including Big Octo, Dark Link, Dead Hand, Flare Dancer, Iron Knuckle, and the Forest Temple's Poe Sisters.
Important: Each boss has a particular weakness. Learning that weakness is usually more valuable than attacking repeatedly.
Boss 1: Queen Gohma – Great Deku Tree
Full name: Parasitic Armored Arachnid – Queen Gohma
Location: Inside the Great Deku Tree
Playable character: Child Link
Recommended weapons: Fairy Slingshot and Kokiri Sword
Weakness: Giant exposed eye
Rewards: Heart Container and Kokiri's Emerald
Queen Gohma is the first major boss in Ocarina of Time.
She's a giant spider-like creature responsible for the curse affecting the Great Deku Tree.
Although she looks intimidating, her attacks are designed to teach players the importance of targeting a weak point.
How to Start the Queen Gohma Fight
After solving the Great Deku Tree's basement puzzles, enter the final chamber.
Look toward the ceiling.
You'll see Queen Gohma moving above Link.
The encounter begins when she notices you and drops into the arena.
Equip the Fairy Slingshot before approaching.
Queen Gohma's Main Weakness
Queen Gohma's weakness is her large central eye.
It becomes vulnerable when it changes color.
During her ground attacks, watch for the eye to glow red.
Shoot it with the Fairy Slingshot.
A successful hit stuns her, creating an opening for sword attacks.
How to Defeat Queen Gohma
Target Queen Gohma and wait for her to expose her eye.
When it turns red, shoot it with a Deku Seed.
Approach while she's stunned.
Attack the eye with your Kokiri Sword.
After recovering, Queen Gohma may climb onto the ceiling.
Watch for her eye to turn green.
Shoot it before she releases her eggs.
A successful hit knocks her down and creates another damage opportunity.
Repeat until she's defeated.
Queen Gohma Boss Tips
Don't attack her armored body. Focus on stunning the eye first.
Keep your Fairy Slingshot ready when she climbs the ceiling.
Destroy any eggs that fall before they hatch into Gohma Larvae.
If you're struggling with targeting, stay at a moderate distance so you can see her entire body.
Winning strategy: Stun the exposed eye with the Slingshot, attack with the Kokiri Sword, and interrupt her ceiling phase whenever possible.
Boss 2: King Dodongo – Dodongo's Cavern
Full name: Infernal Dinosaur – King Dodongo
Location: Dodongo's Cavern
Playable character: Child Link
Recommended weapons: Bombs and Kokiri Sword
Weakness: Open mouth during inhalation
Rewards: Heart Container and Goron's Ruby
King Dodongo is a massive armored dinosaur that lives beneath Death Mountain.
His thick skin makes ordinary sword attacks ineffective until you stun him.
The battle takes place in a circular arena surrounded by lava.
King Dodongo's Main Attacks
King Dodongo primarily uses fire breath and rolling attacks.
When preparing to breathe fire, he opens his mouth and inhales.
This is your opportunity to attack.
After taking damage, he may curl into a ball and roll around the arena.
Getting caught in his path can deal significant damage.
How to Defeat King Dodongo
Equip a Bomb.
Wait until King Dodongo opens his mouth and begins inhaling.
Throw the Bomb directly inside.
The explosion stuns him and causes him to collapse.
Approach quickly.
Attack with your Kokiri Sword.
When he recovers, move toward one of the wider outer corners of the arena.
Wait for his rolling attack to pass.
Then prepare another Bomb.
Continue until King Dodongo is defeated.
King Dodongo Boss Tips
Use targeting to make throwing Bombs into his mouth easier.
If you run out of carried Bombs, use the Bomb Flowers around the arena.
Don't waste Bombs by throwing them while his mouth is closed.
Avoid standing directly in front of him when he's preparing to breathe fire.
In the Switch 2 remake, Baby Dodongos may also appear during the encounter.
Defeat them carefully because they explode after being killed.
Winning strategy: Throw a Bomb into his open mouth, attack while he's stunned, and avoid the rolling attack by staying near a safe outer corner.
Boss 3: Barinade – Lord Jabu-Jabu's Belly
Full name: Bio-Electric Anemone – Barinade
Location: Lord Jabu-Jabu's Belly
Playable character: Child Link
Recommended weapons: Boomerang and Kokiri Sword
Weakness: Tentacle connections and exposed central body
Rewards: Heart Container and Zora's Sapphire
Barinade is the parasite responsible for making Lord Jabu-Jabu sick.
Unlike Queen Gohma or King Dodongo, Barinade requires several different attack phases.
You'll need the Boomerang throughout the encounter.
Phase One: Disconnect the Ceiling Tentacles
At the beginning, Barinade hangs from the ceiling.
Three large tentacles connect the boss to the chamber.
Target each connection using the Boomerang.
Throw the weapon and sever the tentacles one at a time.
Keep moving to avoid electrical attacks.
After the connections are destroyed, Barinade descends toward the floor.
Phase Two: Remove the Electrical Protection
Barinade becomes surrounded by electrically charged jellyfish.
These enemies rotate around the boss, making direct attacks dangerous.
Stay outside their movement path.
Wait for openings when the jellyfish become vulnerable.
Use the Boomerang to stun or destroy them.
Avoid attacking electrically charged enemies with your sword.
Phase Three: Attack the Central Body
After removing the defensive jellyfish, Barinade's central body becomes exposed.
Target it with the Boomerang.
A successful hit stuns the boss.
Run forward and attack with the Kokiri Sword.
Move away when Barinade recovers.
Repeat the sequence until the boss is defeated.
Barinade Boss Tips
Keep moving during every phase.
Don't run into the electrical ring while trying to reach the center.
Use the Boomerang to interrupt dangerous attacks rather than relying only on sword combat.
Save your sword attacks for moments when the boss is stunned.
Winning strategy: Remove the ceiling tentacles, destroy the electrical defenses, and stun the central body with the Boomerang before attacking.
Boss 4: Phantom Ganon – Forest Temple
Full name: Evil Spirit from Beyond – Phantom Ganon
Location: Forest Temple
Playable character: Adult Link
Recommended weapons: Fairy Bow and Master Sword
Weakness: Real form emerging from paintings and reflected magical projectiles
Rewards: Heart Container and Forest Medallion
Phantom Ganon is one of Ocarina of Time's most memorable bosses.
The battle introduces two important mechanics: identifying the real enemy among illusions and reflecting magical attacks.
Both skills become useful during the final Ganondorf encounter.
Phase One: Identify the Real Phantom Ganon
The fight takes place inside a circular room surrounded by paintings.
Phantom Ganon appears on horseback inside the portraits.
Several images may appear at once.
However, only one is real.
The fake versions turn back before fully leaving their paintings.
The real Phantom Ganon continues into the arena.
How to Damage Phantom Ganon's First Phase
Stand near the outer edge of the room.
Position the camera so you can watch several paintings.
Equip the Fairy Bow.
Wait for the real Phantom Ganon to approach.
Fire an arrow as he emerges from the painting.
A successful hit damages the boss.
Repeat until the first phase ends.
Phase Two: Reflect the Energy Balls
Phantom Ganon abandons his horse and begins floating above the arena.
He launches magical energy projectiles toward Link.
Wait for an energy ball to approach.
Swing the Master Sword to reflect it.
Phantom Ganon may return the projectile.
Reflect it again.
Continue until the energy hits Phantom Ganon.
He falls to the ground, creating an opening.
Approach and attack with your sword.
Avoid the Charging Attack
During the second phase, Phantom Ganon may rush toward Link.
Target the boss and dodge sideways.
If he lands nearby, use the opening to attack.
Phantom Ganon Boss Tips
Use sound cues to help identify the correct painting.
Stay far enough away to react to magical projectiles.
Swing slightly earlier during longer energy exchanges.
Don't chase Phantom Ganon while he's flying.
Wait until a reflected projectile stuns him.
Winning strategy: Shoot the real Phantom Ganon during the painting phase, then reflect his magical projectiles and attack when he falls.
Boss 5: Volvagia – Fire Temple
Full name: Subterranean Lava Dragon – Volvagia
Location: Fire Temple
Playable character: Adult Link
Recommended weapons: Megaton Hammer, Master Sword, and Fairy Bow
Weakness: Head when emerging from lava holes
Rewards: Heart Container and Fire Medallion
Volvagia is a powerful fire dragon revived by Ganondorf.
The battle takes place on a large stone platform surrounded by lava.
Several holes are positioned across the arena.
Volvagia moves between them and attacks from below.
Volvagia's Main Weakness
Volvagia's head becomes vulnerable when the dragon emerges from a lava hole.
The Megaton Hammer is the main tool for stunning it.
Ordinary sword attacks aren't the best way to begin a damage cycle.
How to Defeat Volvagia
Watch the holes around the arena.
Look for signs that Volvagia is about to emerge.
Move toward the correct opening.
When the dragon exposes its head, strike it with the Megaton Hammer.
A successful hit stuns Volvagia.
Follow up with the Master Sword.
Move away when the dragon retreats.
Repeat until the next attack phase.
Avoid Volvagia's Fire Breath
After taking damage, Volvagia may fly around the arena and breathe fire.
Keep moving.
Run away from the direction of the flames.
You can sometimes damage the dragon with the Fairy Bow or Hookshot while it flies close to the platform.
However, prioritize survival over unnecessary ranged attacks.
Avoid the Falling Rocks
Volvagia also flies high above the arena and causes rocks to fall.
Watch for the falling debris.
Move continuously rather than standing beneath the attack.
Try travelling toward the opposite side of the platform if the rocks are concentrated in one area.
Watch for Fake Hole Openings
As the fight progresses, Volvagia may appear to approach multiple holes before actually emerging.
Wait until the dragon clearly commits to one opening.
Then move in with the Megaton Hammer.
Volvagia Boss Tips
Don't stand directly over a hole before Volvagia appears.
Keep the Megaton Hammer ready during ground phases.
Avoid chasing the dragon while it's flying high above the arena.
Use sword attacks only after creating a safe opening.
Winning strategy: Strike Volvagia's exposed head with the Megaton Hammer, attack while stunned, and keep moving during the aerial phases.
Boss 6: Morpha – Water Temple
Full name: Giant Aquatic Amoeba – Morpha
Location: Water Temple
Playable character: Adult Link
Recommended weapons: Longshot and Master Sword
Weakness: Colored nucleus inside the water tentacles
Rewards: Heart Container and Water Medallion
Morpha is an unusual boss that controls giant tentacles made from water.
Its real body is a small nucleus that moves through the tentacles.
The fight requires precise targeting and careful positioning.
Morpha's Main Attacks
Morpha creates tentacles from the water surrounding the arena.
The tentacles attempt to grab Link.
If caught, he can be lifted and thrown.
As the battle progresses, additional tentacles may appear.
This makes the arena increasingly dangerous.
How to Defeat Morpha
Keep your distance from the water.
Watch for the nucleus moving through a tentacle.
Target it with the Longshot.
A successful hit pulls the nucleus out of the water.
Immediately approach and attack with the Master Sword.
When the nucleus returns to the water, retreat.
Wait for another opportunity.
Repeat until Morpha is defeated.
Use the Outer Edge for Safety
If you're struggling with the tentacles, move toward the outer edge of the boss chamber.
This provides a clearer view of the arena.
You can also use the walls to reduce the directions from which tentacles can approach.
However, don't remain too close to the water.
Morpha Boss Tips
Not every tentacle contains the nucleus.
Track the colored core rather than randomly attacking water.
Aim the Longshot when the nucleus is clearly exposed.
Don't rush directly toward the tentacles.
Use the Longshot's range to create safe damage opportunities.
Winning strategy: Track the nucleus, pull it out with the Longshot, attack with the Master Sword, and retreat before the tentacles recover.
Boss 7: Bongo Bongo – Shadow Temple
Full name: Phantom Shadow Beast – Bongo Bongo
Location: Shadow Temple
Playable character: Adult Link
Recommended equipment: Fairy Bow, Lenses of Truth, Master Sword, and Hover Boots
Weakness: Hidden central eye
Rewards: Heart Container and Shadow Medallion
Bongo Bongo is one of the strangest bosses in Ocarina of Time.
The creature attacks using two giant hands while its central body remains invisible.
The arena is a massive drum suspended above a dangerous void.
You'll need to reveal the boss's true body and attack its hidden eye.
Phase One: Avoid the Giant Hands
Bongo Bongo begins by striking the drum.
The impacts cause Link to bounce.
The boss then attacks with one or both hands.
Keep moving to avoid the strikes.
In the Switch 2 remake, a purple aura can protect the hands temporarily.
Wait for the protection to disappear before attacking.
Phase Two: Stun the Hands
Equip the Fairy Bow.
Target a vulnerable hand.
Shoot it to interrupt the attack.
If both hands are active, stun the second hand as well.
This creates an opening for reaching the central body.
Phase Three: Reveal the Hidden Eye
Activate the Lenses of Truth.
Bongo Bongo's central body and red eye become visible.
Watch for the boss to move toward Link.
Aim at the eye using the Fairy Bow.
A successful hit stuns the boss.
Phase Four: Attack With the Master Sword
Approach while Bongo Bongo is stunned.
Attack the exposed eye with the Master Sword.
Move away before the boss recovers.
Repeat the sequence until Bongo Bongo is defeated.
Bongo Bongo Boss Tips
Use the Hover Boots if the bouncing drum makes aiming difficult.
Keep enough distance to see both hands.
Don't waste arrows on protected targets.
Activate the Lenses of Truth when you need to reveal the eye.
Bring additional magic if your Magic Meter is small.
Winning strategy: Avoid the hand attacks, stun the hands with the Fairy Bow, reveal the hidden eye with the Lenses of Truth, and attack while the boss is stunned.
Boss 8: Twinrova – Spirit Temple
Full name: Sorceress Sisters – Twinrova
Location: Spirit Temple
Playable character: Adult Link
Recommended equipment: Mirror Shield and Master Sword
Weakness: Opposing elemental magic and reflected stored energy
Rewards: Heart Container and Spirit Medallion
Twinrova is a battle against two powerful witches: Kotake and Koume.
One controls ice magic.
The other controls fire.
During the first phase, the witches fight separately.
During the second phase, they combine into a stronger opponent.
The Mirror Shield is essential throughout the battle.
Phase One: Reflect Fire Toward the Ice Witch
Watch the witches as they fly above the arena.
When Koume launches a fire beam, raise the Mirror Shield.
Catch the attack and direct the reflected fire toward Kotake.
The ice witch is vulnerable to fire.
A successful reflection damages her.
Reflect Ice Toward the Fire Witch
When Kotake launches an ice beam, raise the Mirror Shield.
Reflect the beam toward Koume.
The fire witch is vulnerable to ice.
Continue reflecting the opposing elements.
After enough successful hits, the witches combine into Twinrova.
Phase Two: Absorb Three Matching Elements
Twinrova now attacks with both fire and ice.
Raise the Mirror Shield when an elemental attack approaches.
The shield absorbs the energy.
You must collect three attacks of the same element.
For example, three fire attacks will charge the shield with fire.
Three ice attacks will charge it with ice.
Avoid absorbing the opposite element during the sequence.
Mixing elements interrupts the charge and can damage Link.
Release the Stored Energy
After the third matching attack, the Mirror Shield releases its stored energy toward Twinrova.
The attack stuns her.
Approach quickly.
Attack with the Master Sword.
Continue until she recovers.
Repeat the elemental charge sequence until Twinrova is defeated.
Twinrova Boss Tips
Keep both witches in view during the first phase.
Don't reflect fire toward the fire witch or ice toward the ice witch.
Watch the element carefully during the combined phase.
Avoid an attack if it doesn't match the element you're currently charging.
Save sword attacks for the stun windows.
Winning strategy: Reflect each witch's attack toward the opposite witch, then absorb three matching elemental attacks and punish Twinrova while stunned.
Boss 9: Ganondorf – Ganon's Castle
Full name: Great King of Evil – Ganondorf
Location: Top of Ganon's Tower
Playable character: Adult Link
Recommended equipment: Master Sword, Fairy Bow, Light Arrows, and Longshot
Weakness: Reflected magic followed by Light Arrows
Main outcome: Defeat Ganondorf and begin the castle escape
Ganondorf is the first of the two final bosses.
After completing the six barriers inside Ganon's Castle, you'll climb the central tower and confront him.
The battle takes place in a large arena that becomes increasingly dangerous as the fight continues.
Phase One: Reflect Ganondorf's Energy Ball
Ganondorf launches a magical projectile toward Link.
Wait for the energy ball to approach.
Swing the Master Sword.
A correctly timed strike reflects the energy toward Ganondorf.
He may return the projectile.
Continue the exchange until it hits him.
Shoot Ganondorf With a Light Arrow
When the reflected energy hits Ganondorf, he becomes vulnerable.
Equip the Fairy Bow and select Light Arrows.
Aim at him.
Fire to stun him further.
He falls toward the arena floor.
Attack With the Master Sword
Move toward Ganondorf while he's down.
Attack with the Master Sword.
Deal as much damage as possible during the opening.
Move away before he recovers.
Repeat the process.
Phase Two: Avoid the Stronger Attacks
As the battle continues, Ganondorf becomes more aggressive.
He may launch multiple magical projectiles instead of one.
Use a Spin Attack to help reflect or counter groups of projectiles during appropriate openings.
The arena also becomes more dangerous as sections of the floor are damaged.
Stay near stable platforms and watch your footing.
Use the Longshot When Necessary
If the floor collapses between you and Ganondorf, look for an available climbing or Hookshot target.
Use the Longshot to reposition.
Don't waste the stun window trying to jump an unsafe gap.
Ganondorf Boss Tips
Keep enough distance to react to energy balls.
The projectile can travel faster during longer exchanges.
Use Light Arrows immediately after winning the exchange.
Carry extra magic because Light Arrows consume it.
Don't attack Ganondorf directly while he's floating and protected.
Winning strategy: Reflect his magical energy, stun him with Light Arrows, attack with the Master Sword, and repeat until he's defeated.
Boss 10: Ganon – Final Boss Fight
Full name: Ganon
Location: Ruins of Ganon's Castle
Playable character: Adult Link
Recommended equipment: Master Sword, Light Arrows, Megaton Hammer, Biggoron Sword, and Hylian Shield
Weakness: Tail, glowing body targets, and exposed forehead eye
Main reward: Main story completion
After defeating Ganondorf and escaping the collapsing castle with Princess Zelda, Link faces one final challenge.
Ganondorf transforms into Ganon, an enormous monster armed with powerful weapons.
This is the ultimate boss battle in Ocarina of Time.
The Switch 2 remake expands the encounter with additional weaknesses and attack patterns.
Phase One: Fight Without the Master Sword
At the beginning of the battle, Ganon knocks the Master Sword away.
It's temporarily inaccessible.
You'll need another weapon.
The Megaton Hammer is a reliable option.
If you've completed the Biggoron Sword quest, that weapon is also effective.
Avoid Ganon's Giant Weapons
Ganon attacks using two enormous blades.
Don't stand directly in front of him.
Watch for his heavy attacks.
Sometimes a weapon becomes temporarily stuck in the ground after a strike.
This creates an opening to move behind him.
Attack the Tail Crystal
Ganon's early weak point is located on his tail.
Wait for him to finish an attack.
Move around his side.
Approach from behind and strike the glowing crystal.
Use the Megaton Hammer or Biggoron Sword.
Then move away before he recovers.
Repeat until the crystal breaks.
Phase Two: Recover the Master Sword
After dealing enough damage, Princess Zelda helps Link recover the Master Sword.
Equip it immediately.
The next phase introduces additional glowing weak points on Ganon's body.
Watch his attacks and look for opportunities to stun him.
Use Light Arrows when a vulnerable target is exposed.
Then move in with the Master Sword.
Avoid the Magical Attacks
Ganon may create dangerous magical effects across the arena.
Watch for visual warnings.
Move away from threatened areas.
Don't stand still while aiming at a distant weak point.
Final Phase: Shoot the Forehead Eye
In the Switch 2 remake, the final phase reveals a vulnerable eye on Ganon's forehead.
Princess Zelda helps create the opening.
Equip Light Arrows.
Aim at the exposed eye.
Fire when Ganon is vulnerable.
Avoid his attacks while waiting for another opportunity.
After enough successful hits, Ganon becomes stunned and drops his weapons.
Deliver the Final Blow
Approach Ganon during the final opening.
Equip the Master Sword.
Attack to complete the final battle.
The Sages can now seal Ganondorf away.
Ganon defeated. Hyrule is saved!
Ganon Boss Tips
Don't attempt to use the Master Sword during the phase when it's unavailable.
Use the Megaton Hammer or Biggoron Sword against the tail crystal.
Stay out of Ganon's frontal attack range.
Save enough arrows and magic for the final phases.
Use the Master Sword when it's time to deliver the decisive attacks.
Winning strategy: Damage the tail crystal with an alternative weapon, recover the Master Sword, target the glowing weak points with Light Arrows, and finish Ganon when he's stunned.
Every Important Mini-Boss in Ocarina of Time
The 10 major bosses aren't the only powerful enemies you'll encounter.
Several mini-bosses guard important dungeon items, Small Keys, and story progression.
These encounters often require more skill than ordinary enemies.
Here's how to defeat the most important mini-bosses in Ocarina of Time.
Big Octo – Lord Jabu-Jabu's Belly
Location: Lord Jabu-Jabu's Belly
Recommended weapon: Boomerang
Weakness: Exposed back
Big Octo appears after Princess Ruto retrieves Zora's Sapphire.
The creature moves around a circular arena.
Its vulnerable area is located on its back.
How to Beat Big Octo
Keep moving around the circular platform.
Try to approach from behind.
Throw the Boomerang at Big Octo.
A successful hit stuns the enemy.
Attack its exposed back with the Kokiri Sword.
If it changes direction, reposition and repeat.
Winning strategy: Stun Big Octo with the Boomerang from behind and attack its exposed weak point.
Dark Link – Water Temple
Location: Water Temple
Recommended equipment: Master Sword, Din's Fire, and Megaton Hammer
Weakness: Openings created by varied attacks and defensive timing
Dark Link is one of the most famous mini-bosses in the entire Zelda series.
He resembles Link and copies many of his moves.
The battle takes place in a mysterious room containing shallow water and a lone tree.
How to Beat Dark Link
Don't repeatedly use ordinary sword thrusts.
Dark Link can counter or copy them.
Instead, watch his movements.
Wait until he finishes an attack.
Counter with your own weapon.
Din's Fire can create useful damage opportunities.
The Megaton Hammer is another option if you're having trouble with sword exchanges.
During later phases, Dark Link becomes more aggressive.
Use blocking, dodging, and carefully timed attacks.
Winning strategy: Avoid repeating predictable sword attacks, use Din's Fire for easier openings, and punish Dark Link after he commits to an attack.
Dead Hand – Bottom of the Well and Shadow Temple
Locations: Bottom of the Well and Shadow Temple
Recommended weapons: Kokiri Sword or Master Sword
Weakness: Exposed head when emerging from the ground
Dead Hand is a disturbing enemy that uses arms extending from the ground.
The hands attempt to grab Link.
The main body emerges when its trap is triggered.
How to Beat Dead Hand
Approach a nearby hand carefully.
Trigger the enemy's appearance.
When Dead Hand rises from the ground, move away from its initial attack.
Wait for it to lower its head.
Attack with your sword.
Retreat when it begins recovering.
Repeat until it's defeated.
Winning strategy: Force Dead Hand to emerge, avoid its grab, and attack the lowered head.
Flare Dancer – Fire Temple
Location: Fire Temple
Recommended weapons: Bombs, Hookshot, and Master Sword
Weakness: Small core hidden inside its fiery armor
The Flare Dancer is surrounded by spinning flames.
Ordinary sword attacks are ineffective while the fiery protection remains active.
How to Beat Flare Dancer
Use a Bomb or Hookshot to disrupt its fiery armor.
A small core emerges.
The core runs around the circular arena.
Move in the opposite direction to intercept it.
Attack with the Master Sword.
When it creates another layer of fire, repeat.
Winning strategy: Remove the flames, intercept the running core, and attack before its protection returns.
Iron Knuckle – Spirit Temple and Ganon's Castle
Locations: Spirit Temple and Ganon's Castle
Recommended weapons: Master Sword, Bombs, and Bombchus
Weakness: Slow recovery after heavy axe attacks
Iron Knuckles are heavily armored warriors with enormous axes.
They can deal significant damage with a single attack.
You'll encounter several throughout the late game.
How to Beat Iron Knuckle
Approach carefully.
Wait for the Iron Knuckle to prepare an axe attack.
Dodge sideways or move backward.
After the axe strikes, approach.
Attack with your sword during the recovery window.
Move away before the next swing.
Bombs can provide additional damage at a safer distance.
As the armor breaks, the Iron Knuckle may become faster.
Be prepared to adjust your timing.
Winning strategy: Dodge the heavy axe attack, strike during recovery, and never remain in front of the enemy for too long.
Poe Sisters – Forest Temple
Location: Forest Temple
Recommended weapon: Fairy Bow
Weakness: Visible form after solving each sister's illusion puzzle
The Forest Temple contains four Poe Sisters: Joelle, Beth, Amy, and Meg.
Each steals a flame from the central chamber.
Defeating all four activates the route toward Phantom Ganon.
Joelle and Beth
Both sisters hide inside paintings.
Shoot their portraits using the Fairy Bow.
When they emerge, wait until they're visible or recovering from an attack.
Shoot them again to deal damage.
Amy
Amy hides behind a movable picture puzzle.
Shoot the painting to create blocks.
Reconstruct the image using the correct blocks.
When Amy appears, avoid her attacks and shoot her with the Fairy Bow.
Meg
Meg creates several copies of herself.
Only one is real.
Look for differences between the copies, such as their movements, torch effects, or appearance.
Shoot the real Meg.
Repeat until she's defeated.
Winning strategy: Solve each sister's illusion puzzle, reveal her true form, and attack with the Fairy Bow.
Stalfos, Lizalfos, and Wolfos – Mini-Boss-Style Encounters
Not every dangerous enemy has an individual boss title.
Some dungeon rooms lock the doors and force Link to defeat powerful enemies.
These include Stalfos, Lizalfos, Wolfos, and White Wolfos.
How to Defeat Stalfos
Use targeting.
Wait for a Stalfos to attack.
Block or dodge.
Counter with the Master Sword.
Avoid fighting near pits or lava.
How to Defeat Lizalfos
Lizalfos move quickly and often dodge direct attacks.
Target them and wait for a safe opening.
Avoid chasing them across dangerous terrain.
Use short sword combinations after they finish attacking.
How to Defeat Wolfos
Wolfos are most vulnerable when their backs are exposed.
Wait for an attack.
Move around them.
Strike during the opening.
White Wolfos use similar combat mechanics but may require more patience.
Combat tip: Defensive timing is often more important than attacking quickly.
How to Prepare for Every Boss Fight
Even if you understand each boss's weakness, poor preparation can make a fight much harder.
Before entering a major boss chamber, check your equipment and supplies.
Bring Enough Hearts
Heart Containers permanently increase Link's maximum health.
Collect the Heart Container after every major boss.
You can also find Pieces of Heart throughout Hyrule.
Every four Pieces of Heart increase your maximum health.
More health provides additional room for mistakes.
Carry Bottled Fairies
Fairies are useful during difficult boss encounters.
A bottled Fairy can revive Link after his health reaches zero.
This is particularly helpful against Iron Knuckles, Bongo Bongo, and the final bosses.
Upgrade Your Magic Meter
The Great Fairy Fountain in Death Mountain Crater provides an upgrade that increases Link's magic capacity.
This is useful for players who rely on Din's Fire, the Lenses of Truth, and Light Arrows.
Obtain the Great Fairy's Defensive Blessing
After collecting the Golden Gauntlets in Ganon's Castle, you can access the Great Fairy of Courage.
Her blessing reduces incoming damage.
In the Switch 2 remake, the upgrade requires a 500-Rupee offering.
It's one of the most useful optional upgrades before the final boss encounters.
Prepare Multiple Weapons
Different bosses require different equipment.
The Megaton Hammer is essential for Volvagia.
The Longshot is the main weapon for Morpha.
The Mirror Shield is required for Twinrova.
The Fairy Bow and Light Arrows are important for Ganondorf and Ganon.
Always check your equipment before entering a boss room.
Save Before Difficult Encounters
Save your progress before a challenging fight.
If you lose, you'll have a convenient point to restart from.
This is particularly useful when learning unfamiliar attack patterns.
Which Boss Is the Hardest in Ocarina of Time?
Boss difficulty depends on your equipment, experience, and combat style.
However, several encounters are more complicated than others.
Bongo Bongo – Best Test of Timing
Bongo Bongo requires you to track two independent hands, reveal an invisible body, and land accurate ranged attacks.
The moving drum adds another layer of difficulty.
Players who struggle with aiming may find this encounter especially challenging.
Dark Link – Best Test of Sword Combat
Dark Link punishes predictable attacks.
The fight rewards defensive timing and changing your strategy.
It can be particularly difficult if you try to defeat him using ordinary sword thrusts alone.
Twinrova – Best Test of Puzzle Mechanics
Twinrova requires careful control of the Mirror Shield.
During the second phase, you must absorb matching elemental attacks while avoiding the opposite element.
Mistakes can interrupt your progress and cause damage.
Ganondorf – Best Test of Reaction Timing
Ganondorf's magical projectile exchanges require precise sword timing.
The later attack patterns also make positioning more important.
Ganon – Most Demanding Final Encounter
Ganon combines powerful melee attacks, multiple weak points, weapon changes, and the final Light Arrow sequence.
It's a fitting conclusion to Link's adventure.
Beginner recommendation: If you're struggling with a boss, focus on learning one attack pattern at a time rather than trying to deal damage immediately.
Can You Replay Bosses in the Switch 2 Remake?
Yes. The Nintendo Switch 2 remake introduces the Hall of Fallen Foes, a new feature that allows players to revisit defeated bosses and review enemies encountered throughout the adventure.
This is especially useful if you want to practice a difficult encounter or challenge yourself after finishing a dungeon.
How to Unlock the Hall of Fallen Foes
First, complete the Forest Temple as Adult Link.
Afterward, return to the Temple of Time and gain the ability to travel back to Child Link.
Travel toward Kakariko Village as Child Link.
Kaepora Gaebora explains how the Hall of Fallen Foes works.
Where to Find the Hall of Fallen Foes
Visit a suitable sleeping location, such as the Grand Lodge in southern Kakariko Village.
Look for a bed glowing green.
Approach the bed and choose the option to sleep and dream.
You'll enter the Hall of Fallen Foes.
How Boss Rematches Work
Inside the hall, you can review information about enemies you've encountered.
Bosses appear around the outside of the hall.
You can challenge them again through the available rematch system.
This lets you practice boss mechanics without repeating an entire dungeon.
Items and resources used during the rematches are restored when you return to the main adventure.
Useful tip: Practice difficult encounters like Dark Link, Twinrova, and Ganondorf when they're available in the hall. Repeating their attack patterns is a good way to improve your timing.
Ocarina of Time Boss Fight FAQ
How Many Main Bosses Are in Ocarina of Time?
There are 10 major story boss encounters when Ganondorf and Ganon are counted separately.
The game also contains numerous mini-bosses and mandatory combat encounters.
Who Is the First Boss in Ocarina of Time?
Queen Gohma is the first major boss.
You'll encounter her inside the Great Deku Tree.
Her weakness is her exposed eye.
Who Is the Second Boss?
King Dodongo is the second major boss.
He's found inside Dodongo's Cavern.
Throw a Bomb into his open mouth to stun him.
Who Is the Third Boss?
Barinade is the third major boss.
You'll fight it inside Lord Jabu-Jabu's Belly.
Use the Boomerang to remove its defenses and expose its central body.
Who Is the First Adult Link Boss?
Phantom Ganon is the recommended first major Adult Link boss.
You'll fight him inside the Forest Temple.
What Is the Main Item for Every Dungeon Boss?
Each major dungeon introduces equipment that is important for defeating its boss.
Examples include the Fairy Slingshot for Queen Gohma, Bomb Bag for King Dodongo, Boomerang for Barinade, Fairy Bow for Phantom Ganon, Megaton Hammer for Volvagia, Longshot for Morpha, Hover Boots and Lenses of Truth for Bongo Bongo, and Mirror Shield for Twinrova.
How Do You Beat Dark Link?
Avoid repeating ordinary sword attacks.
Use varied moves and counter after Dark Link attacks.
Din's Fire and the Megaton Hammer can also create useful openings.
What Is Volvagia's Weakness?
Volvagia's weakness is its exposed head.
Strike it with the Megaton Hammer when it emerges from a lava hole.
How Do You Defeat Morpha?
Use the Longshot to pull Morpha's nucleus out of its water tentacle.
Then attack the nucleus with the Master Sword.
What Is Bongo Bongo's Weakness?
Bongo Bongo's weakness is the red eye on its invisible central body.
Stun its hands, reveal the eye with the Lenses of Truth, and attack.
How Do You Defeat Twinrova?
During the first phase, reflect each witch's elemental attacks toward the other witch.
During the second phase, absorb three attacks of the same element using the Mirror Shield.
Attack while Twinrova is stunned.
Can You Defeat Ganondorf Without Light Arrows?
Light Arrows are required for the intended final boss strategy.
You'll receive them from Princess Zelda before entering Ganon's Castle.
What Is Ganon's Weakness?
During the opening phase, Ganon's weak point is on his tail.
Later, additional glowing weak points and an exposed forehead eye become vulnerable.
Use Light Arrows and the Master Sword to complete the final phases.
Can You Fight Ganon Without the Master Sword?
You temporarily lose the Master Sword during the opening phase.
Use the Megaton Hammer or Biggoron Sword until Zelda helps return it.
What Is the Hardest Boss in Ocarina of Time?
Difficulty varies by player.
Dark Link, Bongo Bongo, Twinrova, Ganondorf, and Ganon are among the more demanding encounters because of their timing and mechanics.
Do Bosses Respawn After Defeat?
Major story bosses don't normally respawn inside their dungeons after completion.
However, the Switch 2 remake's Hall of Fallen Foes allows boss rematches.
How Do You Unlock Boss Rematches?
Complete the Forest Temple and unlock time travel between Adult and Child Link.
Visit the Hall of Fallen Foes through an eligible bed.
Can You Complete Every Boss in a Different Order?
The three Child Link bosses follow the normal Spiritual Stone progression.
Some Adult Link temples allow flexibility once you have the required equipment.
Ganondorf and Ganon remain the final story encounters.
What Happens After Defeating Ganon?
The main story concludes.
You can reload your save to continue exploring Hyrule and completing optional activities.
Final Thoughts – Master Every Boss Fight in Ocarina of Time
The bosses in The Legend of Zelda: Ocarina of Time are more than obstacles between Link and the next dungeon.
Each major encounter teaches a new skill.
Queen Gohma introduces weak-point targeting.
King Dodongo teaches you to use explosives at the correct moment.
Barinade rewards careful use of the Boomerang.
Phantom Ganon tests your ability to identify illusions and reflect magical attacks.
Volvagia challenges your positioning and timing.
Morpha requires precision with the Longshot.
Bongo Bongo combines invisible targets with dangerous movement.
Twinrova introduces elemental reflection puzzles.
And the final battles against Ganondorf and Ganon bring everything together.
The most important rule is simple: identify the boss's weakness before attacking.
Don't waste time hitting protected enemies.
Wait for the correct animation.
Use the dungeon item designed for the encounter.
Move away before the boss recovers.
And always keep enough health, magic, and equipment for the next phase.
For a complete overview of the journey, read our Ocarina of Time Dungeon Order Guide.
If you're still progressing through the main story, use the Ocarina of Time Switch 2 Complete Walkthrough.
For players looking for assistance with difficult dungeons, boss encounters, or specific completion objectives, explore Zelda Ocarina of Time Boosting on BoostRoom to check available service information.
From the Great Deku Tree to the final confrontation beneath Ganon's Castle, every victory brings Link closer to saving Hyrule.
All 10 major bosses defeated. Every dungeon cleared. Ganondorf and Ganon overcome.
The Hero of Time has completed his journey!