What Is a FOB in WARDOGS?
A Forward Operating Base Is a Player-Built Logistics and Construction Hub
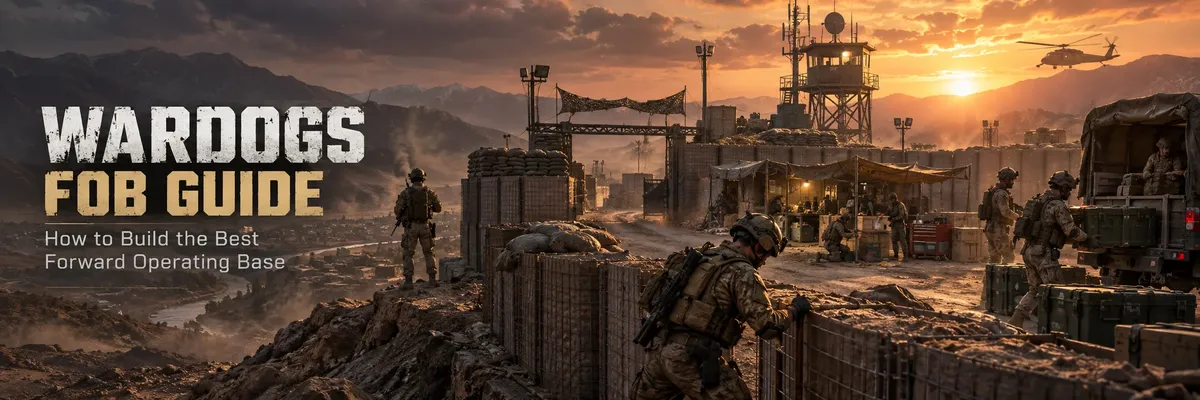
The FOB is the foundation of player construction in WARDOGS. Once deployed, it creates the area where your faction can build larger structures and provides shared storage for resources and equipment. It can support fortifications, vehicle servicing, mortars, anti-air systems, drills, and other infrastructure, but the base itself does not automatically function as a normal infantry respawn point.
The current Season 1 vendor description identifies three basic FOB functions:
It allows larger structures to be built.
It can hold items and resources.
It provides a radius in which players can construct.
That means a FOB should be understood as the brain of a forward base.
Everything else depends on it.
Walls exist because the FOB creates a build area.
Heavy weapons exist because resources are stored there.
Repair and refuel systems exist because the base supports them.
A drill can influence the Hot Zone because the logistics network keeps it operating.
But one common misunderstanding needs to be corrected immediately.
A FOB is not automatically your faction's forward respawn point.
Current Season 1 guides consistently separate the FOB from the armored forward-deployment vehicle. The FOB provides construction and logistics; the separate spawn APC provides forward spawning once the appropriate match conditions are met.
That distinction is extremely important when choosing what to protect.
How Much Does a WARDOGS FOB Cost?
The Standard Season 1 FOB Price Is $7,500
WARDOGS Season 1 significantly increased the financial commitment required to establish a Forward Operating Base. The current standard price is $7,500, meaning a single FOB represents most of a fresh player's $10,000 opening cash before construction supplies, vehicles, specialist tools, or personal equipment are considered.
Current Season 1 vendor tracking lists the FOB at $7,500.
Older guides can show:
$2,500.
$3,750.
Or even free.
Those values come from older builds, discounts, or outdated data.
Current guides note that some new accounts may temporarily see a lower vendor figure because of a beginner discount, but players planning a normal Season 1 budget should treat $7,500 as the real standard cost.
That price changes how FOBs should be used.
Do not buy one simply because:
You are Support.
Nobody else has placed one yet.
You found a cool hill.
You want building XP.
Ask instead:
Can this position create enough strategic value to justify $7,500?
If the answer is unclear, wait.
The Most Important FOB Rule: Placement Comes First
A Bad Location Cannot Be Fixed by Adding More Walls
The strength of a FOB is determined more by terrain, objective relevance, access, and logistics than by the total number of structures built around it. A small base on useful ground can influence the entire match, while a huge fortress in an irrelevant corner simply consumes money, supplies, and manpower.
Before placing the FOB, evaluate the area.
Can infantry reach the active Control Zone from here?
Can trucks reach the site?
Can helicopters approach without being completely exposed?
Is there enough room to unload supplies?
Can armored vehicles turn around?
Is the base visible from several distant ridges?
Is there natural terrain protecting one side?
Can enemy mortars easily range the entire compound?
Will this position still matter if the Hot Zone moves?
Can the base support a tower?
Can it help defend the forward spawn vehicle?
These questions matter much more than:
“How big can I make the wall?”
Current FOB guides repeatedly emphasize that placement determines whether the base becomes useful or irrelevant.
Build Near the Objective, Not Necessarily Inside It
The Best FOB Is Close Enough to Influence the Fight but Far Enough Away That It Does Not Die With the First Infantry Push
Placing the FOB directly in the center of the hottest fighting can shorten travel, but it also exposes your entire logistics investment to grenades, launchers, artillery, infiltrators, and vehicles. A slightly offset location with good routes into the Control Zone is often stronger than dropping the base directly where everyone is already shooting.
Think of the FOB as a support position.
It should feed the battle.
Not necessarily sit inside the most dangerous ten meters of it.
Excellent FOB positions often include:
Terrain just behind an active front.
A ridge with protected vehicle access.
A tower area your team controls.
A chokepoint overlooking a major road.
A location on the edge of the Control Zone with room for expansion.
A position that allows the Hot Zone to be pulled toward prepared ground.
The goal is reducing reinforcement distance without making the FOB the easiest target on the map.
Tower FOBs vs Terrain FOBs
Towers Offer Strategic Objective Value, but Good Terrain Can Be More Defensible
Building around a tower can give your faction high ground and direct access to the tower-code objective system, making it easier to combine tower control with later Hot Zone influence. However, a tower location is not automatically superior to a ridgeline, chokepoint, sheltered valley, or other terrain feature that is easier to supply and defend.
Current tower guides describe towers as important because capturing them reveals code digits that eventually allow the Hot Zone to be pulled toward a chosen tower.
That makes tower FOBs strategically attractive.
But obvious positions have obvious weaknesses.
Everyone knows where the tower is.
Enemy Recon watches it.
Enemy mortars can calculate its location.
Helicopters know where the fight will develop.
Ground assaults have a predictable destination.
A terrain FOB may be harder for enemies to anticipate.
The best choice depends on what your team is trying to accomplish.
If you want to shape Hot Zone control around tower mechanics, a tower FOB makes sense.
If you mainly need:
Vehicle servicing.
Artillery support.
Anti-air coverage.
A protected logistics hub.
Then terrain may matter more than the tower.
What You Need to Build a FOB
The FOB Box Starts the Base, but Supplies and Hammers Turn It Into Something Useful
Deploying the FOB gives you a construction radius and shared storage, but a functioning base requires construction resources and the appropriate hammer tier. The base itself is only the foundation; without Build Supplies and builders, it remains little more than an expensive logistics terminal.
Current Season 1 guides track the FOB item at approximately:
6.5 kg.
A 2×3 inventory footprint.
$7,500 standard price.
One useful detail is that current guides report the FOB containing basic construction tools after deployment, including Small and Medium Hammer access, meaning a fresh builder does not necessarily need to separately purchase every basic hammer before placing the first wall.
The Large Hammer is different.
Advanced infrastructure requires deeper Support progression.
Small, Medium, and Large Hammers
The Large Hammer Is the Point Where FOB Building Becomes Full Strategic Base Construction
Basic hammers let you establish walls, gates, and normal defensive pieces. The Large Hammer unlocks the structures that transform a FOB from a protected supply box into a major battlefield asset, including advanced emplacements and drill-related infrastructure. Season 1 moved the Large Hammer to Support level 8 and raised its permanent unlock cost dramatically.
Current Season 1 figures include:
Medium Hammer permanent unlock: $25,000.
Large Hammer permanent unlock: $75,000.
Large Hammer requirement: Support level 8.
Large Hammer repeated vendor price: approximately $2,400.
Older guides placing the Large Hammer at Support 7 are outdated.
The official Season 1 changelog moved it to 8.
This creates a natural distinction.
Before Support 8:
Build useful defenses.
At Support 8:
You gain access to the systems that can make the FOB strategically dominant.
The Four FOB Supply Types
A Strong Base Needs the Correct Resource, Not Simply “More Supplies”
WARDOGS separates FOB resources into four main supply categories. Build Supplies create structures, Ammo Supplies feed weapon emplacements, Fuel supports fuel-dependent systems and vehicles, while Mechanical Supplies support repairs and vehicle infrastructure. Understanding what your FOB is actually missing prevents wasted logistics runs.
Current FOB guides identify four resource families:
Build Supplies.
Ammo Supplies.
Fuel Supplies.
Mechanical Supplies.
Each serves a different role.
Build Supplies make the base physically exist.
Ammo Supplies keep weapons firing.
Fuel keeps fuel-dependent infrastructure and vehicles operational.
Mechanical Supplies keep repair systems functioning.
This is why saying:
“Bring supplies.”
is often not useful enough.
Instead say:
“We need build supplies.”
“Mortars are low on ammo.”
“Drill needs fuel.”
“Vehicle station needs mechanical.”
Specific logistics are faster logistics.
Build Supplies
Build Supplies Are the Foundation of Every Physical Structure
Walls, gates, defensive positions, emplacements, and other buildables consume construction resources. A new FOB should therefore arrive with enough Build Supplies to create immediate protection rather than waiting exposed for the first logistics truck.
Current guides track loose Build Supplies at around $10 per unit, although exact structure costs can continue changing through Early Access.
The key principle is simple.
Do not place:
FOB first.
Then think about supplies.
The FOB is most vulnerable immediately after deployment.
You need enough resources to establish the core defenses quickly.
Bring the first construction supply with you.
Then establish larger logistics.
Ammo Supplies
Mortars and Anti-Air Become Decorative Structures Without Ammunition
Heavy defensive weapons consume Ammo Supplies. A base can have the perfect mortar position and the strongest anti-air emplacement available, but once ammunition runs out those expensive structures stop influencing the battle.
Current FOB defense guides specifically identify mortars and anti-air as systems dependent on Ammo Supplies.
This creates an important operational rule.
If your faction is actively using mortars:
Ammo demand rises.
If enemy helicopters are constantly attacking:
Ammo demand rises.
Heavy weapon construction should therefore trigger a logistics plan.
Do not build three ammunition-hungry systems when nobody is available to resupply them.
Fuel Supplies
Fuel Keeps Vehicles and Hot Zone Control Systems Operational
Fuel supports vehicle activity and fuel-dependent FOB systems. Once a base begins using drill infrastructure to influence the Hot Zone, fuel stops being a convenience and becomes a strategic resource because running out can remove one of the FOB's biggest reasons for existing.
Current construction guides connect Fuel Supplies to drill and vehicle systems.
This means enemy logistics attacks can be extremely effective.
They do not always need to destroy your entire FOB.
If they interrupt the fuel chain, they can weaken the Hot Zone control loop.
A great FOB defense therefore protects:
The walls.
The heavy weapons.
And the supply route behind them.
Mechanical Supplies
Mechanical Supplies Turn the FOB Into a Vehicle Recovery Position
A FOB positioned near ground-vehicle or helicopter activity becomes much stronger when it can support repair infrastructure. Mechanical Supplies let the base preserve expensive vehicles instead of forcing crews to abandon damaged assets or purchase replacements.
Current Season 1 guides connect Mechanical Supplies to vehicle repair systems.
This can save enormous amounts of team money.
Repairing:
Humvee.
Truck.
Armored transport.
Tank.
Helicopter.
can preserve equipment worth far more than the supplies used to repair it.
A vehicle-oriented FOB should therefore treat Mechanical Supplies as a serious priority.
Supplies Must Actually Be Unloaded
A Crate Sitting Beside the FOB Is Not the Same as Resources Stored Inside It
One of the most common logistics mistakes is successfully delivering cargo to the base and then leaving without transferring it into the FOB. Current guides explicitly warn that supplies must be unloaded or deposited into the FOB's resource storage before builders and supported systems can use them.
Current FOB construction sources repeatedly emphasize this point.
Driver arrives.
Drops pallet.
Leaves.
Builders open construction.
Nothing useful appears.
Why?
Because the supplies are still cargo.
Complete the delivery.
Unload.
Check the FOB supply level.
Then leave.
A logistics run is not finished when the truck arrives.
It is finished when the resource counter changes.
Build the Core Before the Perimeter
Protect the FOB Itself Before Constructing a Giant Outer Wall
A common builder mistake is immediately creating the largest possible perimeter. That feels impressive, but if the FOB core, supply storage, heavy weapons, or internal routes remain exposed, the base can still collapse quickly. Build outward only after the essential infrastructure is protected.
The best early priority is the core.
Protect:
FOB terminal.
Supply unloading area.
Main entrance.
Key internal route.
Heavy weapon foundation.
Forward deployment vehicle if parked nearby.
Then expand.
Current construction guides specifically warn against fortifying outward while leaving the central FOB exposed.
This is good base-building logic in almost every game.
Smaller functional defense first.
Bigger perimeter later.
Keep the FOB Compact
Bigger Bases Require More Walls, More Supplies, More Defenders, and More Time
A large base is not automatically harder to attack. Every extra meter of perimeter creates another area that must be constructed, watched, repaired, and defended. A compact FOB with controlled access is often significantly stronger than a massive compound with empty sections nobody watches.
Ask before adding another wall:
What does this protect?
Does infantry need this space?
Does a vehicle need to move here?
Is this wall blocking a dangerous sightline?
Does this expansion create another entrance?
If the answer is:
“It makes the base bigger.”
that is not enough.
Build for functionality.
Not land ownership.
Use Terrain as Part of the Wall
Natural Cover Is Free Construction
Rock faces, steep slopes, buildings, terrain folds, and other obstacles can reduce the amount of artificial perimeter your team needs to build. Using terrain intelligently saves Build Supplies and reduces the number of directions defenders must watch.
Imagine two FOBs.
FOB A sits in the center of a flat field.
It needs walls on every side.
FOB B sits against a steep rocky slope.
One entire direction is naturally difficult to attack.
FOB B has effectively received free fortification.
This is why placement matters more than construction quantity.
The terrain is part of your build.
Design Entrances Instead of Leaving Holes
Every FOB Needs Controlled Access for Infantry and Vehicles
A completely sealed base cannot function, while an open base cannot be defended. The best design creates deliberate entrances that friendly players understand and enemy players are forced to approach through predictable directions.
You need:
Infantry entry.
Vehicle entry.
Supply delivery.
Emergency exit.
But you do not necessarily need:
Five giant open gates.
Current construction guides warn that smaller doors may automatically close after a period while large gates often require manual attention.
An open gate can destroy an otherwise excellent FOB.
One enemy walks in.
Reaches your logistics core.
Attacks the operator.
Breaches internal defenses.
All because nobody closed the entrance.
Treat gates as part of the defense.
Not decoration.
Do Not Trap Friendly Vehicles
Vehicle Flow Should Be Planned Before the Walls Go Up
A FOB designed only for infantry can become a nightmare once trucks, Humvees, tanks, and supply vehicles arrive. Leave enough space for vehicles to enter, turn, repair, unload, and exit without reversing through a maze of barriers.
Think about:
Turning radius.
Gate width.
Repair station access.
Supply unloading.
Parking.
Tank movement.
Helicopter drop area if relevant.
Do this before surrounding the base with walls.
If a truck cannot unload without blocking the only entrance, your layout has failed.
If the tank cannot turn around, your layout has failed.
If the spawn APC is clearly visible through the front gate, your layout has failed.
The best bases feel easy for friendly players to use.
Protect the Forward Spawn Vehicle
The FOB Does Not Create Forward Spawns by Itself, but It Can Be the Best Place to Hide the Vehicle That Does
Current Season 1 guides identify the armored forward-deployment APC as the actual mobile spawn asset rather than the FOB core. Once available, parking that vehicle inside or near a well-defended FOB can dramatically shorten reinforcement travel while protecting the deployment system from enemy infantry and vehicles.
Current live guides describe the spawn APC becoming relevant once the match reaches the required score state and being usable as a mobile forward spawn when deployed correctly.
The enemy can also disable its spawning function by attacking exposed equipment such as its antenna rather than always destroying the whole vehicle.
So conceal it.
Do not park it:
In the gate.
On top of a hill.
Beside the outer wall.
In direct mortar view.
Put it somewhere defenders can reach quickly but attackers cannot easily see.
A strong FOB protects the reinforcement system.
Mortars
Mortars Give the FOB Offensive Reach Beyond Its Own Perimeter
A FOB does not have to wait for enemies to reach its walls. Mortars let Support players attack enemy bases, infrastructure, drills, spawn vehicles, and concentrated positions at range, turning the base into an offensive asset as well as a defensive one.
Current Season 1 FOB defense guides identify mortars as one of the key Large Hammer emplacements.
Mortars are especially useful against:
Enemy FOBs.
Drills.
Heavy weapons.
Concentrated defenders.
Forward spawn assets.
Known infantry staging areas.
Enemy artillery.
The strongest mortar target is not always the largest group of infantry.
Sometimes destroying the enemy's anti-air or drill changes the entire strategic balance.
Do Not Cluster Mortars and Drills
Artillery Punishes Builders Who Put Every Valuable Structure in One Small Area
Expensive emplacements should be separated enough that one enemy mortar or artillery strike cannot damage several of them simultaneously. A beautifully organized row of drills or weapon systems can become the perfect enemy target.
Current FOB defense guides specifically warn against tightly clustering high-value structures.
Space them.
Not so far apart that nobody can defend them.
But enough that:
One shell does not delete everything.
One helicopter pass cannot hit all systems.
One infiltrator cannot destroy half the base immediately.
Good base design includes damage separation.
Anti-Air
A FOB Without Air Defense Can Become an Easy Target Once Pilots Learn Where It Is
Helicopters can bypass walls, approach from directions ground defenders are not watching, and attack valuable infrastructure. Anti-air gives the FOB control over the airspace above it and can make the surrounding region significantly safer for infantry, logistics, and friendly vehicles.
Current FOB sources identify dedicated anti-air systems including missile-based defenses and heavier close-in weapon systems.
Do not automatically build every AA option.
Ask:
Are helicopters active?
Is your FOB already being attacked from the air?
Does your team have ammunition supply?
Can somebody operate the weapon?
If enemy air is absent, those Build and Ammo Supplies might be more useful elsewhere.
If enemy attack helicopters are dominating:
Anti-air becomes a priority.
Finish Heavy Weapons Quickly
Half-Built Structures Are Much Easier to Destroy
An unfinished mortar, anti-air system, or other expensive emplacement creates risk without delivering its intended benefit. Current FOB attack guides specifically recommend targeting incomplete structures because they are significantly easier to destroy than fully completed versions.
That means builders should avoid:
Placing six structures.
Building each to 20%.
Then returning later.
Finish important assets.
Especially:
Anti-air.
Mortars.
Drills.
Repair systems.
An unfinished AA emplacement does not protect you from the helicopter currently approaching.
Complete one system.
Then move to the next.
Repair and Refuel Infrastructure
Vehicle Servicing Can Make a FOB More Valuable Than Another Wall
A strategically located repair and refuel position allows expensive ground vehicles and helicopters to return to the battle instead of being abandoned or replaced. For vehicle-heavy factions, maintaining these systems can produce more value than adding another layer of perimeter fortification.
Current FOB guides list vehicle repair and refueling among the important advanced base functions.
Consider a tank.
If the tank survives but becomes heavily damaged:
Without servicing:
It retreats.
Gets abandoned.
Or dies in the next fight.
With repair access:
It recovers.
Returns.
Continues protecting the objective.
That can preserve enormous economic and combat value.
Build for the team you actually have.
If your faction is using armor heavily, service infrastructure deserves priority.
Drill Rigs and Hot Zone Control
The Drill Can Turn the FOB Into the Center of the Match
One of the strongest advanced uses of a FOB is deploying drill infrastructure that influences the Hot Zone. Instead of repeatedly chasing the highest-value objective around the Control Zone, a prepared faction can attempt to pull that objective toward its own fortified position.
Current FOB guides consistently connect drills with Hot Zone influence.
That changes the purpose of your FOB.
Before drill:
Support position.
After drill:
Potential objective magnet.
Now the enemy has a reason to attack.
And you already have:
Walls.
Medics.
Ammo.
Anti-air.
Mortars.
Vehicle servicing.
Supplies.
Defensive positions.
This is the concept behind a Super FOB.
The Super FOB Strategy
A Super FOB Brings the Objective to the Fortress Instead of Sending the Fortress to the Objective
The Super FOB approach creates a heavily developed base near strategically valuable objective territory and uses multiple spaced drill systems to pull the Hot Zone toward the defended compound. When the enemy is poorly coordinated, this can create an extremely difficult position to remove. It is powerful, but not unbeatable.
Current guides describe Super FOBs built near the edge of the Control Zone with multiple drills, mortars, and anti-air supporting the position.
The strategy works because:
Hot Zone comes to you.
Your players defend prepared cover.
Your logistics are nearby.
Vehicles can repair.
Medics work from protected areas.
Mortars attack enemy staging positions.
Anti-air reduces helicopter pressure.
But there are counters.
Super FOBs Can Be Destroyed
Artillery, Mortars, Air Power, Tower Control, and Supply Disruption Can Break Even a Strong Base
Do not build a giant FOB and assume the match is solved. Organized opponents can attack its heavy weapons, destroy drills, contest tower objectives, interrupt supply routes, shell the base from range, or coordinate aircraft once anti-air is weakened. A static fortress becomes predictable if the enemy has enough time to plan around it.
Current Super FOB guides specifically identify artillery, mortars, coordinated aircraft, and tower counterplay as effective answers.
This is why the strongest FOB needs more than walls.
It needs:
Supply security.
Counter-battery fire.
Recon.
Infantry patrols.
Air defense.
Repair.
Mobility.
A fortress without information can still be surprised.
Defend the Supply Route
The Road Behind the FOB Can Be More Important Than the Wall in Front of It
A FOB consuming ammunition, fuel, construction materials, and mechanical resources is dependent on logistics. If enemies repeatedly destroy the trucks or helicopters bringing those resources, your expensive base can become unable to repair, shoot, build, or maintain objective-control systems even while its perimeter remains intact.
Protect:
Bridges.
Road chokepoints.
Landing areas.
Truck approaches.
Supply unloading positions.
Watch for enemy Recon.
One enemy sniper repeatedly killing Drivers can damage your base more effectively than shooting the wall.
A FOB is a network.
Not a single object.
Use Recon Around the FOB
Information Gives the Base Time to Prepare Before the Attack Arrives
Recon is extremely valuable around a FOB because enemy assaults usually require movement toward a known position. Spotting helicopters, armored vehicles, infantry groups, and enemy artillery preparations lets defenders choose the correct response before those threats reach the perimeter.
Recon should watch:
Main road.
Secondary road.
Ridgeline.
Helicopter route.
Enemy tower.
Known mortar position.
Vehicle staging.
Do not waste Recon by having every sniper stare at the same doorway.
Early warning is one of the strongest FOB defenses.
Keep Medics Protected Inside the Defense
A Defended Medic Can Restore the Same Position Several Times
FOB fights create concentrated casualties. If the Medic survives behind the first defensive line, downed defenders can be returned to the fight without leaving the compound or relying entirely on forward spawning. That makes protected revive positions extremely valuable during long sieges.
Do not put the Medic:
On the outer wall.
At the front gate.
On top of the highest tower.
Keep them:
Close.
Covered.
With smoke available.
A fortified FOB is one of the best environments for Medic value because casualties occur near predictable cover.
Do Not Build Only for Support XP
Random Structures Can Level Support While Making the Base Worse
Construction generates progression, but filling every empty space with unnecessary objects burns Build Supplies, creates visual clutter, blocks friendly movement, and consumes time that could be spent completing critical defenses. The best FOB builder earns progression by constructing things the team actually needs.
Current construction guides specifically warn against structure spam for XP.
Build:
Walls that block sightlines.
Entrances that control movement.
Mortars that have targets.
AA that has aircraft to fight.
Drills when Hot Zone influence matters.
Repair stations when vehicles are active.
Do not build:
Random structures because hammer swing = XP.
A useful base can generate plenty of progression naturally.
Building Can Earn Cash and Support XP
FOB Construction Rewards the Builder While Also Helping the Team
Construction is one of the rare WARDOGS activities where role progression, economy, and team value naturally overlap. Current community guides describe completed structures and hammer interactions as rewarding Support progression and cash, making proper FOB building useful even for players who are not strong infantry fighters.
The exact payout per hammer action is community-tracked and can change.
The durable lesson is:
Building useful infrastructure advances Support.
You do not need to abandon the base in search of random kills just to progress.
Stay useful.
Build for Repairability
Defenders Need Space to Reach and Rebuild Damaged Sections
A wall packed directly against another structure may create excellent initial density but become difficult to repair once damaged. Leave enough internal movement space for builders to reach walls, heavy weapons, gates, and critical infrastructure during combat.
Ask:
Can I reach the outside-facing wall from inside?
Can I repair the gate?
Can a builder reach the mortar?
Can Support move between drills?
Can a Medic move through this corridor?
A base should be defendable after the first attack.
Not only beautiful before it.
Create Internal Layers
One Broken Gate Should Not Expose the Entire Base
The strongest FOB designs use depth. An outer entrance slows attackers, internal cover gives defenders another position, and valuable infrastructure sits behind additional protection. If the first wall is the only wall that matters, one successful breach can end the entire base.
Think:
Outer approach.
Gate.
Defensive position.
Internal core.
Critical infrastructure.
You do not need multiple complete circles of walls.
Strategic internal barriers are often enough.
The enemy should not be able to:
Open one gate.
See the FOB terminal.
See the spawn APC.
See the drill.
See the mortar operator.
all from the same angle.
Break those sightlines.
Hide Important Structures From Long-Range Fire
A Wall Is Not Useful if the Enemy Can See the Valuable Equipment Above It From Two Kilometers Away
Mortars, drills, anti-air systems, spawn assets, and logistics points are high-value targets. Use terrain, walls, elevation differences, and structure placement to make them difficult to observe directly from likely enemy Recon and vehicle positions.
This is where base layout becomes three-dimensional.
Not only:
Can infantry walk through?
Also:
What can an enemy sniper see?
What can a tank see?
Where will mortar observers ping?
What can a helicopter identify from above?
Use structures to hide each other.
Do not build every important system in a perfect open line.
Spread High-Value Assets
One Explosion Should Not End the FOB
Clustering the drill, mortar, anti-air, spawn vehicle, and repair systems around the central box makes logistics convenient but creates one enormous high-value target. Separate the systems enough that a successful strike damages part of the base rather than destroying its entire strategic function.
This is especially important once enemy artillery becomes active.
Current FOB defense guidance repeatedly emphasizes spacing.
Spread.
But maintain defense.
The goal is not random distance.
It is controlled separation.
Know When to Abandon a FOB
A Base Is an Investment, Not a Permanent Obligation
One of the hardest decisions is leaving a position after investing thousands of dollars and large amounts of time into it. But if the objective has moved, logistics are impossible, the enemy has ranged the base perfectly, or your faction needs bodies elsewhere, defending an obsolete fortress can become a bigger strategic loss than abandoning it.
This is especially important in WARDOGS because objectives can create pressure in different parts of the Control Zone.
Do not fall into sunk-cost thinking.
“We spent $50,000 here” does not mean:
“We must stay here forever.”
Ask:
Does this base still influence the match?
If yes:
Defend.
If no:
Move the mobile assets.
Save the vehicles.
Save the players.
Leave the walls.
A FOB is supposed to help win.
Not become the entire reason your faction loses elsewhere.
Best FOB Layout Philosophy
Build a Functional Strongpoint Rather Than Trying to Copy One Universal Blueprint
WARDOGS terrain changes from position to position, so there is no single perfect FOB shape. The strongest layout is the one that uses local terrain, protects the core, controls a small number of entrances, allows friendly logistics to function, separates expensive systems, and creates useful firing positions toward likely enemy approaches.
A good FOB should feel organized.
The front side handles combat.
The protected side handles logistics.
The core is difficult to reach.
Heavy weapons have useful arcs.
Vehicle servicing is accessible.
Supply trucks can unload.
Spawn vehicle is concealed.
Medics have protected working space.
Builders can repair.
There is at least one way out when the main entrance becomes dangerous.
That is much more important than whether the wall forms:
Circle.
Square.
Triangle.
Fortress shape.
Terrain should decide the geometry.
A Strong FOB Should Support Every Major Role
The Best Bases Multiply the Value of the Entire Team
A well-designed FOB is not only a Support playground. It gives Assault safer staging positions, Medic protected revive areas, Recon observation points, Driver a logistics destination, Pilot a supply or support destination, and vehicle crews a place to repair and resupply.
Assault:
Defends approaches.
Medic:
Keeps defenders alive.
Recon:
Provides early warning.
Support:
Builds and operates infrastructure.
Driver:
Keeps supplies moving.
Pilot:
Moves cargo and people rapidly.
A FOB becomes powerful when all of those systems connect.
That is why a coordinated medium-sized FOB can outperform a giant one built by a single player.
Common WARDOGS FOB Mistakes
Building in an Irrelevant Location
If the base cannot influence the Control Zone, Hot Zone, tower network, vehicle routes, or major logistics, it probably does not justify the investment.
Objective first.
Architecture second.
Building the Perimeter Before Protecting the Core
Outer walls look impressive, but losing the FOB terminal or central infrastructure makes the perimeter irrelevant.
Core first.
Expand afterward.
Forgetting to Unload Supplies
Cargo beside the base is not necessarily usable supply.
Deposit it properly.
Check the storage.
Leaving the Main Gate Open
One open entrance can defeat thousands of dollars of walls.
Close it.
Watch it.
Blocking Friendly Vehicles
A fortress that traps trucks and tanks damages its own team.
Design vehicle flow.
Clustering Drills and Heavy Weapons
One artillery strike should not destroy your entire investment.
Separate high-value targets.
Building Anti-Air With No Ammo Supply
An empty weapon is expensive decoration.
Match construction to logistics.
Building Mortars Without Operators
A system nobody uses creates no value.
Coordinate before spending.
Ignoring Enemy Mortars
Walls do not stop indirect fire from slowly dismantling the base.
Counter-battery.
Move operators.
Repair.
Attack the enemy artillery.
Treating the FOB as a Spawn Point
The FOB itself is not the current normal forward spawn system.
Protect the separate deployment APC when it becomes available.
Building Only for Support XP
Random structures can consume the resources needed for actual defenses.
Level Support by being useful.
Refusing to Leave a Dead Base
An irrelevant fortress can consume an entire faction's attention while the enemy wins elsewhere.
Know when the strategic value is gone.
WARDOGS FOB FAQ
How Much Does a FOB Cost?
The current standard Season 1 price is $7,500. Some early accounts can see discounted pricing, but players should budget around the normal $7,500 vendor cost.
Does a FOB Let Players Spawn There?
Not by Itself
Current Season 1 guides distinguish the FOB from the separate forward-deployment APC. The FOB is a construction and logistics hub; the armored deployment vehicle provides the forward spawn function when available and correctly positioned.
What Supplies Does a FOB Use?
Build, Ammo, Fuel, and Mechanical Supplies
Build Supplies create structures, Ammo feeds weapon emplacements, Fuel supports vehicles and fuel-dependent systems, and Mechanical Supplies support vehicle repair infrastructure.
What Support Level Unlocks the Large Hammer?
Support Level 8
BULKHEAD officially moved the Large Hammer from Support 7 to Support 8 for Season 1. Its permanent unlock cost also increased to $75,000.
How Much Does the Large Hammer Cost?
Approximately $2,400 Per Purchase After Unlock
Current Season 1 guides track the repeated vendor price around $2,400, with a separate $75,000 permanent Support unlock requirement.
Do I Need the Large Hammer to Build a Basic FOB?
No
Basic walls, gates, doors, and normal defenses can be established before Support 8. The Large Hammer becomes important for advanced emplacements and the full strategic FOB toolkit.
Can a FOB Pull the Hot Zone?
Yes, Through Drill Infrastructure
Current Season 1 guides describe advanced FOB drill systems being used to influence or pull the Hot Zone toward the base, creating the foundation of the Super FOB strategy.
Should You Build a FOB at a Tower?
Often, but Not Always
Towers provide strategic value through the tower-code and Hot Zone systems, but terrain, vehicle access, supply routes, and defensibility can make a non-tower position stronger.
Choose the ground that supports your team's actual strategy.
What Is the Best FOB Defense?
Layered Defense With Logistics Behind It
The best defense combines terrain, controlled entrances, useful walls, infantry, Medics, Recon, anti-air when needed, mortars, vehicle support, and reliable supplies. No single structure makes a FOB safe.
What Is a Super FOB?
A Heavily Fortified FOB Built to Become the Center of Hot Zone Control
Current community strategy describes Super FOBs as highly developed positions using multiple separated drills, heavy weapons, mortars, and air defense to pull and hold the Hot Zone on prepared terrain. They are powerful but remain vulnerable to coordinated artillery, aircraft, tower play, and logistics disruption.
Final WARDOGS FOB Tips
The best WARDOGS FOB is not the FOB with the most structures.
It is the FOB where every structure has a reason to exist.
Start with placement.
Can the base influence the objective?
Can supplies reach it?
Can vehicles use it?
Can you defend the approach?
Can it support tower or Hot Zone control?
Then place the FOB.
Remember that Season 1 makes this a serious investment.
The standard FOB costs $7,500.
Support 8 unlocks the Large Hammer.
That Large Hammer requires a $75,000 permanent unlock under the official Season 1 economy changes.
Do not waste that investment.
Once the FOB is placed:
Protect the core first.
Not the largest possible perimeter.
Create controlled entrances.
Leave vehicle routes open.
Bring Build Supplies.
Unload them properly.
Then expand based on what your team needs.
Enemy helicopters attacking?
Add anti-air.
Enemy FOB shelling you?
Get mortars operating.
Vehicles constantly arriving damaged?
Build servicing infrastructure.
Need to influence the Hot Zone?
Prepare the drill and fuel chain.
Forward deployment vehicle available?
Hide it inside protected terrain or structures rather than parking it in the open.
And remember the four supply families:
Build Supplies create the base.
Ammo Supplies keep weapons firing.
Fuel keeps fuel-dependent operations alive.
Mechanical Supplies support vehicle repair.
A FOB without logistics is only a collection of walls.
A FOB with reliable logistics can become a real battlefield system.
That is the biggest difference between average builders and strong builders.
Average builders ask:
“What can I build?”
Strong builders ask:
“What does this base need next?”
Sometimes the answer is another wall.
Sometimes it is ammunition.
Sometimes it is a Driver.
Sometimes it is Recon watching the road.
Sometimes it is one Medic.
Sometimes it is abandoning the entire position because the match has moved somewhere else.
That final decision matters.
WARDOGS makes construction expensive enough that players naturally become attached to what they built.
Do not let that attachment lose the match.
If the FOB still supports:
Control Zone pressure.
Hot Zone control.
Towers.
Vehicles.
Spawn logistics.
Mortars.
Anti-air.
Then defend it.
If it no longer contributes:
Move.
Take the useful players and vehicles with you.
The walls do not need to survive forever.
They only need to create enough value while the position matters.
For advanced teams, drill infrastructure changes the equation completely.
A normal FOB supports the objective.
A drill-based FOB can potentially make the objective come toward it.
That is where WARDOGS construction becomes more than defensive building.
It becomes strategic map control.
But even the strongest Super FOB has weaknesses.
Mortars can range it.
Artillery can dismantle infrastructure.
Helicopters can exploit weak air defense.
Enemies can attack your supply line.
Tower control can change the Hot Zone fight.
And one unnoticed infiltrator can exploit a gate somebody forgot to close.
That is why there is no truly invincible WARDOGS FOB.
The goal is not invincibility.
The goal is creating a position that costs the enemy more time, resources, coordination, and lives to remove than it cost your faction to build and maintain.
That is what the best Forward Operating Base actually does.
Because WARDOGS remains in Early Access, exact structure costs, supply capacities, advanced build permissions, drill behavior, emplacement balance, and logistics values can continue changing. The official Season 1 changelog confirms changes including the Large Hammer moving to Support 8 and its permanent unlock increasing to $75,000, while many detailed FOB interactions are currently maintained through live community testing. Use current in-game values whenever a later patch conflicts with older construction guides.
Players who want help progressing Support, reaching higher hammer unlocks, building cash, or advancing other WARDOGS roles can also explore WARDOGS services through BoostRoom.



