WARDOGS looks like a massive combined-arms sandbox.
There are infantry fights.
Helicopters.
Tanks.
FOBs.
Mortars.
Snipers.
Supply trucks.
Construction.
Recon.
But every one of those systems eventually connects back to one question:
Which faction has the strongest presence inside the Control Zone when the scoring tick happens?
BULKHEAD's current developer FAQ gives the basic rule clearly.
Up to 100 players are split between three factions.
The factions fight over a Control Zone.
Every 30 seconds, the faction with the most players inside the Control Zone receives one point.
The first faction to reach 100 points wins.
That sounds simple.
In practice, it creates one of WARDOGS' deepest strategic systems because simply being inside the giant zone is only the beginning.
The smaller Hot Zone can make players count double.
Towers can influence where that Hot Zone goes.
FOBs can be built around strategic ground.
Drills can affect the Hot Zone.
Medics can restore lost objective presence.
Drivers and Pilots determine how quickly reinforcements arrive.
Recon can identify approaching enemies before they enter.
Support can create fortifications that help a team survive between score ticks.
That is what this guide will break down.
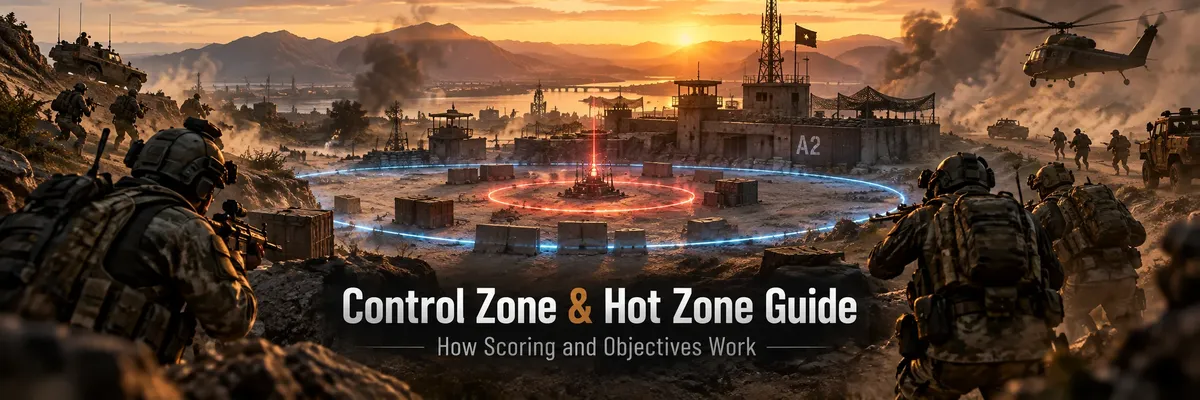
How the WARDOGS Control Zone Works
The Control Zone Is the Main Objective That Decides the Match
WARDOGS uses a three-team King-of-the-Hill-inspired mode built around one major objective area. The official description calls it a randomized 2x2 km Control Zone placed within a much larger battlefield. Your faction does not need to capture a flag or hold a single tiny point; it needs to maintain more player presence inside the broader zone than either opposing faction when scoring is evaluated.
The official WARDOGS site and Steam page describe the Control Zone as approximately 2x2 km, meaning it is enormous compared with a normal FPS capture point.
That changes how you should think about objective play.
You do not have to stand on one tiny flag pole.
You can contribute while:
Defending a building.
Holding a road.
Protecting a FOB.
Operating from a ridge.
Healing teammates.
Driving inside the zone.
Using Support equipment.
Fighting from a fortified position.
As long as you are physically inside the active Control Zone, your presence contributes to your faction's objective count according to the current scoring rules.
The zone is therefore large enough to create multiple simultaneous battles inside one objective.
One squad may be defending the north.
Another may be fighting around the Hot Zone.
A Support group may be maintaining a fortified FOB.
Recon may be watching a vehicle route.
All of them can still contribute to the same overall objective.
How WARDOGS Scoring Works
The Team With the Highest Player Count Inside the Control Zone Earns One Point Every 30 Seconds
Scoring is based on bodies inside the objective, not kills, damage, vehicle destruction, personal score, or which faction owns the strongest FOB. Every 30 seconds, WARDOGS checks which faction has the greatest player presence in the Control Zone. That faction receives one match point, and the first team reaching 100 wins.
This rule comes directly from BULKHEAD's pinned developer FAQ.
For example:
Valkyra has 18 players inside.
Manticore has 14.
Lonestar has 11.
Valkyra is the scoring faction.
If the next scoring check happens with the same numbers, Valkyra gains the next point.
Now imagine:
Valkyra has 18.
Manticore pushes five additional players into the zone.
Manticore now has 19.
The scoring advantage flips.
Nothing else needs to happen.
They do not need to capture a traditional flag first.
They need enough objective presence when the scoring check happens.
This is why transportation, revives, and survival matter so much.
One extra living player can change which faction takes the next point.
The First Team to 100 Points Wins
Kills Help Only When They Change Objective Presence or Make Objective Control Easier
WARDOGS does not end because one team has the most eliminations. The victory condition is 100 objective points. Kills matter because killing opponents reduces their ability to occupy the zone, but a kill far away from the objective may contribute much less to winning than keeping one friendly player alive inside the Control Zone.
BULKHEAD officially confirms the 100-point win condition.
Because the developer FAQ also states that scoring occurs every 30 seconds, a completely uncontested scoring run from 0 to 100 would require roughly 50 minutes of scoring ticks.
Real matches can take longer because:
Different factions take different ticks.
Objective control changes.
Players contest the zone.
Teams lose presence.
Reinforcements take time to arrive.
This is intentionally different from a short domination round.
WARDOGS is built around a sustained battlefield where the score race develops alongside the economy, vehicles, construction, and logistics.
Kills Do Not Directly Win the Match
A Player With Fewer Kills Can Contribute More to Victory Than Someone Farming Enemies Outside the Objective
The most common misunderstanding is assuming that dominating the scoreboard automatically means helping the faction win. A sniper with thirty kills outside meaningful objective pressure may contribute less to the score race than five ordinary infantry players who stay alive inside the Control Zone for several scoring checks.
This does not mean kills are irrelevant.
Kills can:
Remove enemy presence.
Break enemy pushes.
Protect your Hot Zone group.
Destroy a Medic before a revive.
Stop a Driver bringing reinforcements.
Clear an enemy FOB.
Prevent a drill position from being defended.
All of those kills directly support objective control.
But hunting random players far away simply because they are easy targets can leave your faction outnumbered where the match is actually decided.
Current community strategy guides repeatedly emphasize the same principle:
WARDOGS is a team-score game, not a kill-count game.
What Is the WARDOGS Hot Zone?
The Hot Zone Is the Smaller High-Value Objective Inside the Main Control Zone
Inside the main Control Zone is a smaller moving Hot Zone. Current live community documentation consistently reports that a player standing inside the Hot Zone counts as two players toward objective presence instead of one. That makes the Hot Zone the most efficient place on the battlefield for turning a small coordinated group into a major scoring advantage.
The main Control Zone is already valuable.
The Hot Zone increases that value.
Current Early Access guides describe the rule like this:
One normal Control Zone player = 1 player of scoring presence.
One Hot Zone player = 2 players of scoring presence.
That creates powerful objective math.
Imagine your faction has:
10 players in the Hot Zone.
Those players count as roughly 20 toward objective control under the current community-documented mechanic.
Meanwhile another faction might have:
19 players inside the normal Control Zone but none in the Hot Zone.
Your smaller group can still represent the stronger scoring presence.
That is why the Hot Zone attracts so much fighting.
Why the Hot Zone Is So Important
Hot Zone Control Gives You More Objective Weight Without Requiring More Players
The Hot Zone does not magically award two match points every scoring cycle. Instead, it makes each player standing inside it count more heavily when the game determines which faction has the greatest Control Zone presence. That distinction is important because the value comes from winning the headcount calculation, not simply standing in a special circle and automatically receiving two score points.
This is one of the most important details to understand.
Do not think:
Hot Zone = two points every 30 seconds.
Think:
Hot Zone = each person contributes roughly double to the presence calculation.
If your faction wins that calculation, the normal match score advances.
Current community objective guides consistently document this doubled presence mechanic.
That means the Hot Zone is especially powerful when your faction has fewer players available.
A coordinated squad can create more scoring value than a larger but poorly positioned enemy group.
The Hot Zone Also Rewards More Cash
BULKHEAD Officially Promotes the Hot Zone as a Double-Cash Opportunity
The Hot Zone is not only a match-scoring objective. BULKHEAD's official WARDOGS site specifically tells players they can chase the Hot Zone to earn double cash. Current community economy guides also track larger zone-occupation payouts there, though exact cash values and which actions receive bonuses can change between Early Access patches.
The official site states that players can chase the Hot Zone to earn double cash.
Current community economy tracking often lists Control Zone presence around $160 per occupation cycle and Hot Zone presence around $320, but those specific dollar values are not part of BULKHEAD's official published scoring rules and should be treated as current community observations.
This creates a very strong incentive.
The Hot Zone helps:
Your faction score.
Your personal cash growth.
Your access to fights.
Your teamplay opportunities.
That is why it can become extremely dangerous.
Everyone understands that it is valuable.
Does the Hot Zone Move?
The Smaller Hot Zone Moves Within the Objective Ecosystem, While Community Sources Disagree on Some Details About the Main Control Zone
Current Early Access sources consistently describe the Hot Zone as mobile. Community guides describe it moving or being pulled toward strategic locations, forcing players to rotate instead of treating one fortified position as permanently valuable. The main Control Zone is officially randomized per match, but current community references conflict on whether the large zone itself can shift after the match begins, so the safest live rule is to follow the actual map indicator rather than relying on a fixed assumption.
The official description confirms that Control Zone locations are randomized.
The Hot Zone is consistently described in current live community guides as moving within that objective space.
Practically, that means:
Watch the map.
Watch the Hot Zone marker.
Do not assume yesterday's strong position matters now.
Do not stay inside an abandoned fortress because you spent money building it.
The battlefield moves.
Your squad must move with it.
Turtling Can Lose the Match
A Perfect Defensive Position Has Little Value Once the Objective Is Somewhere Else
WARDOGS construction is powerful enough that teams can become emotionally attached to a FOB they invested heavily in. That can become a strategic trap. If the valuable objective pressure moves away from your position, defending an empty fortress does not replace having actual players where the scoring calculation happens.
Current community strategy guides are especially clear on this point: turtling alone does not win.
A huge FOB can have:
Walls.
Mortars.
Anti-air.
Vehicle support.
Supplies.
Repair systems.
Dozens of structures.
And still contribute very little if your entire faction sits there while another team controls the Hot Zone.
This does not mean abandon every FOB instantly.
The base may still support:
Artillery.
Airspace control.
Logistics.
Respawn-related vehicle defense.
Supply routes.
But players must understand the difference between:
supporting the objective
and
replacing the objective.
A FOB supports.
Player presence scores.
What Happens When Players Are Downed?
A Downed Player Can Stop Contributing Until Revived, Making Medics Extremely Important Near Scoring Checks
Current community testing describes downed players as no longer contributing normal active presence while incapacitated. Reviving that player restores another living body to the objective without requiring them to return from HQ, purchase another loadout, and travel back across the map.
This makes Medic one of the most important objective roles.
Imagine both factions are nearly equal.
Your team has 16 active players inside.
The enemy has 17.
Two friendly players are down.
A Medic revives both.
Suddenly your active presence becomes 18.
That can change the next scoring result without a single additional player arriving from base.
Current community Field Manual guidance emphasizes this connection between revives and zone presence.
This is why protecting Medics around the Hot Zone matters.
They are not simply restoring health.
They are restoring objective weight.
Why Survival Matters More Than Constant Aggression
Staying Alive Inside the Objective Produces Value Every Scoring Cycle
WARDOGS objective design rewards sustained presence. A player who stays alive inside the Control Zone for several scoring checks can contribute repeatedly, while somebody who gets one spectacular kill and immediately dies may spend the next several minutes buying another loadout and traveling back.
Think about objective efficiency.
Player A:
Rushes.
Gets two kills.
Dies.
Respawns far away.
Needs transport.
Player B:
Holds a useful building.
Gets one kill.
Survives.
Remains inside the zone.
Continues counting.
Helps revive teammates.
Player B may have much more strategic value.
WARDOGS does reward aggression.
But it rewards productive survival more.
Towers and the Hot Zone
Towers Provide a Strategic Way to Influence Where the Hot Zone Fight Happens
Current community documentation describes numbered towers positioned around the objective area. Capturing towers can reveal parts of a code, and completing the objective interaction can be used to influence or pull the Hot Zone toward a controlled tower. This turns towers into strategic secondary objectives because controlling one can eventually bring the highest-value scoring ground toward territory your faction has prepared.
This system is well documented by current community sources, but BULKHEAD has not published a complete official public tower specification.
Community guides commonly describe:
Multiple towers per match.
A capture console inside the tower.
Captures revealing code digits.
A completed code enabling Hot Zone influence.
The Hot Zone being pulled toward the activated location.
Exact tower counts vary between sources.
So avoid assuming:
“There are always exactly four.”
Check the map in the match you are actually playing.
The strategic concept is more important than the number.
Towers let teams influence the Hot Zone instead of merely chasing it.
Why Tower Control Matters
Moving the Hot Zone Toward Prepared Ground Can Be Stronger Than Constantly Attacking It in Enemy Territory
If your faction can influence the Hot Zone toward a position where it already has cover, supply routes, friendly vehicles, Medics, and a nearby FOB, the objective becomes much easier to defend. Instead of repeatedly attacking the Hot Zone on neutral or enemy-favored terrain, you make the enemy come toward your infrastructure.
This is where WARDOGS becomes much more strategic than simply:
Run to yellow circle.
Shoot.
Die.
A coordinated faction can prepare.
Build nearby.
Stock supplies.
Position vehicles.
Create firing lanes.
Capture towers.
Then influence where the important objective fight happens.
Community discussions describe exactly this strategic tension between rushing the Hot Zone immediately and investing first in tower/FOB infrastructure. Players disagree about how aggressively each should be prioritized, which shows that there is no universal opening strategy for every server.
The correct approach depends on:
Your faction's coordination.
Enemy pressure.
Current score.
Available logistics.
Where the Hot Zone already is.
FOB Drills and the Hot Zone
A Developed FOB Can Potentially Influence the Hot Zone Through Drill Infrastructure
Current Early Access community sources describe drill systems built around FOB infrastructure that can pull or influence the Hot Zone toward the base while supplied with fuel. This creates a powerful objective relationship: a successful FOB is no longer only defensive infrastructure—it can become the center of the scoring battle itself.
Steam discussions and current objective guides describe fuel-powered drills being used to influence Hot Zone positioning.
This creates a complete strategic loop.
Support builds the FOB.
Drivers bring supplies.
Fuel keeps systems operating.
Recon identifies incoming threats.
Anti-air protects the airspace.
Mortars pressure enemy positions.
Infantry defends the base.
The drill influences the Hot Zone.
Then the enemy must either:
Attack that fortified position.
Take other strategic objectives.
Disrupt logistics.
Destroy key infrastructure.
This is why logistics can decide matches even though supplies themselves do not add points to the scoreboard.
Do Not Treat Community Drill Numbers as Permanent
Drill Durations, Cooldowns, Build Requirements, and Exact Hot Zone Movement Rules Can Change During Early Access
The basic relationship between drills and Hot Zone control is widely reported in current live play, but specific drill durations, cooldowns, fuel consumption, and chaining strategies are community-tested rather than part of BULKHEAD's simple official game-mode description.
This matters because WARDOGS is still in Early Access.
A strategy guide may say:
Build a specific number of drills.
Use a specific amount of fuel.
Expect a specific duration.
Then a balance patch changes it.
For this reason, the most durable advice is:
Drills influence objective geography.
They require infrastructure and logistics.
They are strategically valuable.
Check current live costs and timers before planning around exact numbers.
The 20-Point Spawn Vehicle
Once a Faction Reaches 20 Points, a Forward Spawn Vehicle Can Become a Major Reinforcement Tool
Current live community reports consistently describe an armored deployment/spawn vehicle becoming available once a faction reaches 20 match points. The vehicle must be physically moved into a useful position, and its deployment capability can be disabled or destroyed by enemies, making it an important strategic asset rather than a permanent free respawn point.
This mechanic is currently community-documented rather than fully described on the main official site.
Players report:
Vehicle becomes available after the faction reaches 20 points.
Someone must drive it forward.
It can provide a forward deployment opportunity under the correct conditions.
Its exposed equipment can be damaged.
The vehicle itself can be destroyed.
The exact cooldown is less certain in community reports.
Treat any precise number cautiously.
The strategic lesson is clear:
Protect the forward deployment asset.
If your team can return to the Control Zone much faster than the enemy, you can replace losses more efficiently.
That directly affects the objective headcount.
FOBs Are Not Normal Respawn Points
Do Not Assume Building a FOB Automatically Lets Everyone Spawn There
A common beginner mistake is treating WARDOGS FOBs like Battlefield spawn beacons. Current live guides distinguish the FOB's infrastructure role from the faction's dedicated forward deployment vehicle. Building a base provides construction, supplies, defenses, repair, and strategic systems, but does not automatically function like a free universal infantry respawn point.
This makes FOB placement more strategic.
You are building:
Fortifications.
Logistics infrastructure.
Artillery capability.
Anti-air.
Repair support.
Hot Zone influence systems.
Not simply:
“new respawn point.”
Current Field Manual guidance explicitly distinguishes FOBs from the forward spawn vehicle.
Drivers Directly Affect Objective Scoring
Transport Can Add Several Bodies to the Zone Faster Than Those Players Could Arrive Individually
A Driver does not personally need to capture anything to have major objective impact. Delivering six players into the Control Zone can instantly change the faction's effective presence, especially if the enemy is only ahead by a few bodies.
Imagine:
Your faction has 12 players inside.
Enemy has 17.
A transport arrives with six players.
You now have 18.
That single vehicle trip can flip the scoring advantage.
This is why a Driver taking passengers somewhere irrelevant is wasting huge strategic potential.
Transport destination matters.
Bring people:
Into the Control Zone.
Toward the Hot Zone.
Toward a tower fight.
Toward a threatened FOB.
Not simply somewhere with enemies.
Pilots Can Change the Objective Faster Than Ground Vehicles
Helicopters Trade Safety for Speed and Direct Routing
A competent Pilot can move an entire group across terrain that would take ground vehicles much longer to navigate. That allows factions to react quickly when objective pressure changes, reinforce a Hot Zone, defend a tower, or place infantry on a flank before enemy ground transport arrives.
The advantage is speed.
The risk is concentration.
If a helicopter carrying multiple players is destroyed:
You lose the aircraft.
You lose passengers.
You lose several expensive loadouts.
And your faction loses multiple potential objective bodies at once.
A good Pilot does not simply land in the exact center of the Hot Zone.
Drop players somewhere survivable.
Let infantry cover the final distance.
Medic Is One of the Best Control Zone Roles
Every Successful Revive Can Restore Scoring Presence Without Waiting for Reinforcements
Medics are especially valuable in objective fights because a revived player immediately returns to the local battle instead of restarting from HQ. During close score races, keeping existing players alive can be faster and more effective than bringing new players from across the map.
This is why Assault players should protect Medics.
And why Medics should not be first through the doorway.
One living Medic can potentially restore:
Two players.
Three players.
Five players.
during one long objective fight.
That is much more valuable than one extra SMG rushing forward alone.
Recon Should Watch Objective Approaches
Recon Helps the Zone by Preventing Surprise Reinforcements
A Recon player can contribute to Control Zone dominance without standing in the exact center of the Hot Zone. Watching roads, helicopter approaches, tower routes, and enemy FOB directions gives teammates advance warning about where the next wave is coming from.
Recon should prioritize:
Transport trucks.
Helicopters.
Medics.
Enemy Recon.
Support players preparing launchers.
Large infantry groups.
Players approaching the Hot Zone.
FOB infrastructure.
A Recon kill or spot becomes valuable when it helps your faction maintain objective presence.
Do not disappear several kilometers away for unrelated sniper shots.
Support Turns Temporary Control Into Defensible Control
Fortifications Matter Because They Help Players Stay Alive Between Scoring Checks
The Support role does not increase the objective count directly beyond being another player in the zone, but its structures can make every friendly body much harder to remove. A fortified entrance, useful cover wall, anti-air emplacement, repair facility, or well-positioned FOB can indirectly preserve dozens of scoring ticks.
Support should build around:
Important approaches.
Hot Zone-adjacent positions.
Towers.
Supply routes.
Vehicle support areas.
Defensible Control Zone locations.
Avoid building a giant fortress only because there is empty ground available.
Objective relevance comes first.
How to Read the Score During a Match
The Match Score Tells You Who Is Winning Overall, but Current Zone Presence Tells You Who Is About to Win the Next Tick
Do not stare only at the large 100-point race. Your immediate decision should also depend on current objective presence. A faction can be ahead overall but currently losing Control Zone dominance, which means the score gap is about to begin shrinking unless players rotate.
Current community Field Manual guidance describes the HUD around the minimap as showing:
Faction scores.
Current objective player counts.
A progress indicator toward the next scoring evaluation.
This lets you make better decisions.
Your faction is ahead 70–55–48.
Great.
But if your current zone presence is:
You: 10.
Enemy: 21.
Enemy: 13.
you are currently losing the objective.
Do not think:
“We are winning, so everything is fine.”
The next score trend is already moving against you.
What to Do When Your Team Is Losing the Count
More Useful Bodies Inside the Objective Are Usually the Immediate Answer
When another faction is clearly controlling the next scoring tick, the solution is not automatically to widen your flank, build farther away, or chase enemies outside the zone. The first question should be whether enough of your team is physically participating in the objective fight.
Possible responses:
Move into the Control Zone.
Push toward the Hot Zone.
Revive downed teammates.
Transport reinforcements.
Attack enemy players currently inside.
Destroy their transport.
Disrupt their Medic line.
Attack the tower or drill supporting their Hot Zone position.
Pressure their FOB.
The correct solution depends on the situation.
But remember what actually determines the point:
presence.
Hot Zone vs Normal Control Zone
You Do Not Need Every Player Inside the Hot Zone
The Hot Zone is extremely valuable because of doubled presence, but stacking the entire faction into one tiny area can create its own weakness. Enemy artillery, grenades, vehicles, flanks, and coordinated pushes become much more dangerous when everyone is concentrated. A strong faction balances a Hot Zone anchor with surrounding control.
You still need players:
Watching approaches.
Defending nearby structures.
Protecting Medics.
Holding towers.
Running supplies.
Operating vehicles.
Attacking enemy infrastructure.
The Hot Zone is the center of gravity.
It should not become a black hole that pulls every player into one building.
When to Push the Hot Zone
Push When the Objective Gain Justifies the Risk
The Hot Zone is most valuable when your faction can actually sustain presence there. Sending one player at a time into a defended Hot Zone simply feeds enemy kills and expensive loadouts. Arrive with enough force to create a real change in the objective count.
A strong Hot Zone push combines:
Assault.
Medic.
Smoke.
Support fire.
Recon information.
Transport.
Possibly vehicles.
Do not interpret “counts double” as:
“Run there alone immediately.”
One player counting as two is still only two.
A coordinated squad of six counting as twelve is much more meaningful.
When to Defend Instead of Attack
If Your Faction Already Controls the Scoring Advantage, Survival Can Be More Valuable Than Chasing the Enemy
Many teams lose strong positions because players become bored while winning and begin pushing outward for kills. If you already hold the Hot Zone, have strong local numbers, and are receiving scoring ticks, forcing unnecessary fights can remove exactly the player presence giving you the lead.
The correct play may simply be:
Hold angles.
Repair armor.
Heal.
Rebuild cover.
Watch approaches.
Prepare for the next push.
You do not need to attack constantly.
Make the enemy remove you.
Why Three Teams Change Everything
Winning One Fight Can Immediately Expose You to the Third Faction
WARDOGS is not a normal two-team objective game. If Valkyra and Lonestar exhaust each other fighting over the Hot Zone, Manticore can arrive with fresh players and take the objective from both. Every objective fight therefore has an invisible third participant even when you cannot currently see them.
This affects strategy.
After winning a fight:
Reload.
Revive.
Heal.
Check another direction.
Look for new transport.
Watch helicopter approaches.
Do not assume the objective is safe.
The third faction may have deliberately waited for both sides to weaken each other.
Common WARDOGS Objective Mistakes
Farming Kills Outside the Control Zone
Kills that do not influence objective presence can look impressive while your faction steadily loses the match.
Fight where elimination creates scoring value.
Ignoring the Hot Zone
Normal Control Zone presence matters, but allowing another faction to hold a double-presence Hot Zone uncontested can make your larger numbers surprisingly ineffective.
Watch the smaller circle.
Running Into the Hot Zone Alone
Double presence does not make one player an army.
Push with teammates.
Staying at an Old FOB Forever
Infrastructure should support the active battle. Once the objective value moves away, a perfect fortress can become strategically irrelevant.
Know when to rotate.
Ignoring Towers
Towers can influence where future Hot Zone pressure develops. Treating them as decorative map structures can let another team shape the objective around its own defenses.
Watch tower ownership and current community mechanics.
Ignoring Enemy Logistics
Sometimes the fastest way to remove twenty enemy players from the objective is not killing those twenty players. It is destroying the transport, FOB logistics, drill fuel, or infrastructure that keeps sending them back.
Attack the system.
Forgetting Medics
A downed squad with a Medic nearby can return to full objective strength very quickly.
Finish threats when safe.
Protect your own Medic.
Overcommitting Vehicles Into the Hot Zone
A tank can dominate an approach, but driving directly into a dense objective area can expose it to launchers, mines, infantry, and multiple factions simultaneously.
Support the zone.
Do not automatically park inside its center.
Watching the Overall Score but Ignoring Current Presence
A twenty-point lead can disappear if another faction starts taking every scoring tick.
Respond to current objective conditions.
WARDOGS Control Zone FAQ
How Do You Win a WARDOGS Match?
Your faction must reach 100 points before the other two factions. BULKHEAD's official rules state that every 30 seconds the team with the greatest player presence inside the Control Zone receives one point.
How Big Is the Control Zone?
Approximately 2x2 km
BULKHEAD describes WARDOGS matches as fighting over randomized 2x2 km Control Zones within the much larger battlefield.
How Often Does WARDOGS Score Points?
Every 30 Seconds According to the Current Developer FAQ
BULKHEAD's pinned FAQ explicitly states that the faction with the most players in the Control Zone earns one point every thirty seconds.
Some community pages still show shorter beta-era or observed tick estimates. The current developer FAQ should take priority.
How Many Points Do You Need to Win?
100 Points
The first faction reaching 100 wins the match.
What Is the Hot Zone?
A Smaller High-Value Zone Inside the Control Zone
Current live community documentation describes players inside the Hot Zone as counting twice toward Control Zone presence, while BULKHEAD officially advertises the Hot Zone as a double-cash area.
Does the Hot Zone Give Two Match Points?
No—It Increases Player Presence Value
Current community guides describe one Hot Zone player as counting like two players in the scoring calculation. The normal scoring faction still wins the scoring cycle based on total effective presence.
Does the Hot Zone Give Double Cash?
Yes, According to BULKHEAD's Official Game Description
The official WARDOGS site specifically promotes the Hot Zone as a place where players can earn double cash. Exact individual payout behavior can still vary with action type and Early Access balance.
Do Kills Give Match Points?
Not Directly
Match points are awarded for objective presence, not total kills. Kills help indirectly by removing enemy players from the Control Zone and making it easier for your faction to maintain the highest presence.
Are Towers Important?
Yes
Current community documentation describes towers as secondary strategic objectives connected to controlling or influencing the Hot Zone through a code-based mechanic. Exact tower counts and some interaction details remain community-tracked rather than fully documented by BULKHEAD.
What Do FOB Drills Do?
Current Live Reports Say They Can Influence the Hot Zone
Community guides and current player reports describe fuel-supported drill infrastructure as a way to pull the Hot Zone toward a prepared FOB position. Exact timings, cooldowns, and resource requirements can change during Early Access.
Can You Spawn at a FOB?
A FOB Should Not Be Treated Like a Standard Free Respawn Beacon
Current live community guides distinguish FOB infrastructure from the dedicated faction deployment vehicle that becomes relevant later in the score race.
What Happens at 20 Points?
Current Community Reports Describe a Faction Spawn Vehicle Becoming Available
Players currently report an armored forward-deployment vehicle appearing after a faction reaches 20 points. It must be moved into a useful position and can be disrupted or destroyed by enemies. Exact deployment cooldown values are less consistently documented.
Should Everyone Rush the Hot Zone?
No
The Hot Zone is extremely valuable, but WARDOGS also rewards surrounding objective control, tower pressure, logistics, FOB infrastructure, vehicle support, Recon, and flanking. A coordinated group in the Hot Zone is far stronger than isolated players arriving one at a time.
Final WARDOGS Control Zone and Hot Zone Tips
WARDOGS becomes much easier to understand once you stop thinking of it as:
Kill enemy.
Capture flag.
Repeat.
The real match is a fight over player presence.
BULKHEAD's official rule is simple:
Every 30 seconds, the faction with the most players in the Control Zone receives one point.
First to 100 wins.
Everything else supports that rule.
Assault removes enemy presence.
Medic restores friendly presence.
Recon identifies incoming presence.
Driver delivers additional presence.
Pilot delivers it faster.
Support creates infrastructure that helps presence survive.
FOBs strengthen important territory.
Towers help influence the Hot Zone.
Drills can shape where the Hot Zone fight happens according to current live community mechanics.
And the Hot Zone can make each friendly player count more heavily in the objective calculation.
That is why the strongest WARDOGS teams are not necessarily the teams with the most individually talented shooters.
They are the teams that understand where their players need to be.
Do not chase meaningless kills.
Do not sit outside the Control Zone while assuming teammates will score for you.
Do not ignore the Hot Zone when the enemy is gaining doubled objective presence there.
Do not attack it alone.
Keep Medics alive.
Bring reinforcements with vehicles.
Watch towers and drill infrastructure.
Rotate when the valuable objective position changes.
Use FOBs to support the objective instead of replacing it.
Watch the current player count, not only the overall score.
Most importantly:
A living player standing in the right place is one of the most valuable resources your faction has.
One player may look insignificant in a 100-player match.
But when two factions are almost equal inside the Control Zone, one additional body can decide the next point.
Put that player in the Hot Zone and current community scoring rules can make their presence even more valuable.
Revive another teammate and your advantage grows again.
Deliver a squad by transport and the entire scoring calculation can flip.
That is the real objective game.
WARDOGS is still in Early Access, so exact community-tracked tower counts, Hot Zone movement behavior, drill durations, forward-deployment cooldowns, and cash payouts can change. The 30-second scoring tick, highest-Control-Zone-presence rule, randomized 2x2 km Control Zone, and 100-point victory condition are confirmed by BULKHEAD, while detailed Hot Zone/tower/drill mechanics should be checked against the current live build when future patches change them.
Players who want help progressing their account, building cash, unlocking vehicles, or advancing specific WARDOGS roles can also explore WARDOGS services through BoostRoom.



