Rainbow Six Siege Villa Rework Overview
Villa’s Operation Split Fire update is a targeted map rework rather than a complete rebuild. Most established knowledge on the first and second floors remains useful, but the basement, Garage, and nearby connections now support a completely different objective.
The former Living Room/Library Bomb site has been removed from its first-floor position. Its replacement is the basement pairing of Art Storage and Old Office. Garage is now part of the interior, its former exterior openings have been redesigned, and supporting changes improve movement and drone access around the lower floor.
Villa therefore keeps four Bomb sites:
Second Floor Aviator Room and Games Room
Second Floor Trophy Room and Statuary Room
First Floor Dining Room and Kitchen
Basement Art Storage and Old Office
The first three pairings remain familiar. Art Storage/Old Office is the genuinely new tactical problem and the main focus of this guide.
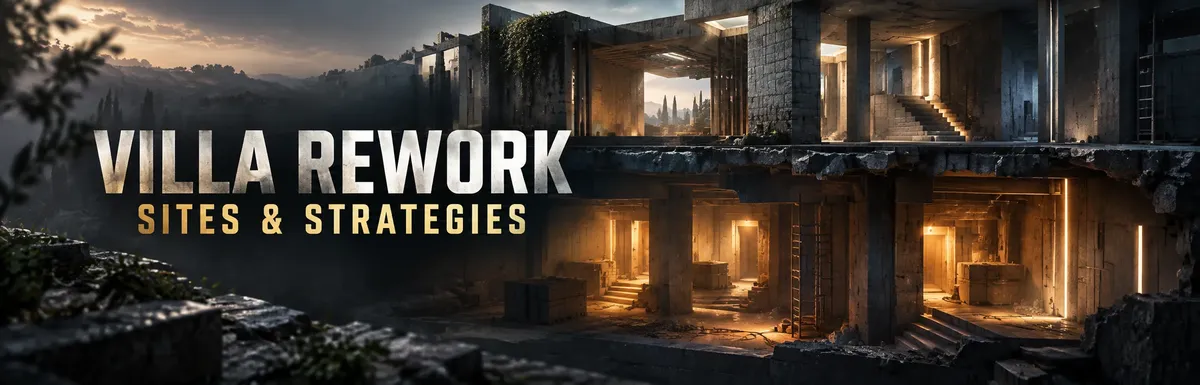
What Changed in the Villa Rework
The update gives previously underused basement space a clear purpose. Instead of treating the lower floor as a rotation route, flank path, or hiding place, both teams must now build complete strategies around it.
Living Room and Library Leave the Bomb-Site Pool
Living Room and Library still exist as rooms, but they no longer form a selectable Bomb objective. That distinction matters because the area above the basement remains strategically important even though the bombs have moved.
Attackers may need first-floor control to reach the basement hatches safely. Defenders can use those same rooms and connecting halls to protect vertical access, delay the clear, or threaten a late flank.
Old Living Room/Library reinforcement plans, anchor positions, and plant locations should not be transferred directly to the new objective. The basement has different access points, solid ceiling sections, and much tighter relationships between its bomb rooms and surrounding spaces.
Art Storage and Old Office Become the New Site
Art Storage and Old Office now form the basement Bomb site. The rooms are compact enough for close-range crossfires and area denial, but the defense cannot concentrate every player inside them.
The objective can be pressured from Garage on the east side, Wine Cellar and Crypt-side routes from the opposite direction, and two hatches from the floor above. A defense that watches only the bomb-room doors will eventually become surrounded.
The connection between Art Storage and Old Office is especially important. Defenders need a safe way to move between the two rooms, while Attackers want to cut that support and force isolated fights.
Garage Is Now an Interior Area
Garage previously functioned more like an exterior approach. It is now interior territory that Defenders can prepare, occupy, and contest.
The former large garage openings no longer provide the same access. One lane is closed with a soft wall that can be reinforced, while the other uses a wide doorway. The old soft-wall connection between Kitchen Stairs and Garage has also been changed into a door.
These adjustments create two immediate consequences:
Garage can be a powerful defensive layer, but it is not worth losing a player for no return. A Defender holding the area needs information, teammate support, and a fallback route.
The First-Floor Hatch Position Changes
The hatch previously located in Living Room has moved into the first-floor hallway. The Pantry hatch near Kitchen remains another important vertical connection.
These hatches are more valuable than normal because much of the basement ceiling is solid masonry. Attackers cannot expect broad soft-floor destruction to expose the entire site. Opening and controlling the available hatches provides the most direct vertical pressure.
Defenders must decide whether to reinforce, protect, contest, or eventually surrender each hatch. Attackers must clear the floor above before opening them; otherwise, a hard breacher can be interrupted or eliminated during the attempt.
Supporting Basement Routes Have Changed
The new objective is supported by adjusted doors, walls, routes, and drone lanes around the basement. Wine Cellar, Crypt, Garage, Kitchen Stairs, and the central lower-floor connections now matter as parts of a coordinated site attack rather than incidental map space.
Returning players should not trust old pathing automatically. Relearn which routes connect directly to the bomb rooms, where a Defender can retreat, and which angles become exposed when a door or wall is opened.
How the New Art Storage and Old Office Site Plays
The new basement site is built around three pressure zones. Understanding them makes both attacking and defending much easier.
East-Side Pressure Through Garage
Garage is the most direct lower-floor approach from the east. Attackers can challenge the wide doorway, deal with the redesigned soft-wall lane, and attempt to establish an angle toward the interior.
Defenders can reinforce the relevant wall, place denial utility, and hold Garage as an extension. The area’s depth also creates longer engagements than the compact bomb rooms provide.
An east-side attack becomes dangerous when it is the team’s only pressure. Defenders can direct cameras, traps, shields, and crossfires toward one lane. Garage works better as one part of a pinch while another Attacker controls a hatch or approaches from the western basement.
West-Side Pressure Through Wine Cellar and Crypt
Wine Cellar and Crypt-side access give Attackers alternatives to the Garage funnel. These routes can force Defenders to divide their attention and protect both ends of the lower floor.
The western approach is valuable for cutting rotations rather than simply racing toward a bomb. A player holding the correct line can prevent Garage defenders from falling back freely or stop anchors from supporting both Art Storage and Old Office.
Drone these routes before committing. The basement’s close corners and limited space make traps, shotguns, and off-angle positions especially dangerous to an unsupported entry player.
Vertical Pressure Through the Hall and Pantry Hatches
The first-floor hallway hatch and Pantry hatch form the main vertical contest. Opening a hatch can remove safe Defender positions, create sightlines into the lower floor, and make rotations more predictable.
Vertical control does not need to produce an elimination to be valuable. If a Defender leaves a protected position because an Attacker above can see it, the lower-floor entry players gain space.
The relationship also works in reverse. An open hatch can expose an Attacker to utility or a late challenge from below. Hatch players should stay supported, watch first-floor flanks, and avoid staring downward while the rest of Villa remains uncontrolled.
Best Attack Strategy for the New Villa Basement
A reliable basement attack should create pressure from at least two directions. Sending the full team through Garage or Wine Cellar allows the defense to concentrate every resource on one choke point.
Preserve Drones for the Lower Floor
The basement is now too important to enter without information. During preparation, identify the objective and save drones in positions that can later watch:
Garage and its interior extension
Wine Cellar and Crypt approaches
Art Storage and Old Office entrances
First-floor routes near the two hatches
Defender fallback paths between the outer layer and site
Do not sacrifice every drone simply to identify all five Defenders. Knowing where a shield, trap, jammer, or rotation has been placed is often more useful than an early scan.
Clear the Floor Above the Hatches
Before using a hard-breach device on either hatch, clear the nearby first-floor rooms and halls. One dedicated flank watcher should cover the return path while the hard breacher works.
The objective is not to occupy the entire upper map. Attackers need enough control to open the hatches, hold the resulting sightlines, and prevent a Defender from walking back into the area uncontested.
Because much of the basement ceiling cannot be destroyed, a lineup that brings only soft-floor destruction may struggle to create meaningful vertical pressure. At least one hatch-capable hard breacher is a safer foundation.
Treat Garage as a Clear, Not an Entrance
Reaching the Garage door does not mean the team owns Garage. Drone the room, identify the Defender’s escape route, and clear supporting utility before taking the gunfight.
If the soft-wall lane is reinforced, the team may need hard breach and electronic denial. If the defense invests heavily in Garage, Attackers can either dismantle the position methodically or use pressure elsewhere to force the player to retreat.
The key is to avoid spending most of the round fighting one extended Defender while the site remains untouched.
Build an East-West Pinch
One practical structure is to combine Garage pressure with a Wine Cellar or Crypt-side player. A third Attacker can work from an opened hatch while the remaining players cover flanks and carry the defuser.
This arrangement creates difficult defensive choices:
A Garage player risks being cut off during the fallback
An anchor moving away from hatch pressure can cross a lower-floor angle
A Defender watching the western entry may lose support from the other bomb room
Plant denial becomes harder when Attackers hold several escape routes
The team should communicate which pressure is real. A single player making noise in Garage can hold attention while the main execute develops elsewhere, but that player must remain alive long enough to punish a rotation.
Remove Defensive Shields and Choke-Point Utility
The compact basement favors Deployable Shields, traps, projectile denial, and area control. Do not repeatedly peek a protected position and hope to win through raw aim.
Use drones to locate the setup, clear anti-projectile utility, then remove the shield or force its player to leave. Explosives, vertical pressure, fire, and coordinated swings are most effective when used in the correct order.
If the team spends all its clearing utility at the first Garage position, the final Art Storage/Old Office execute can still fail. Track what remains before committing to the site.
Secure Both Bomb Rooms Before Planting
Controlling one bomb room does not guarantee a safe plant. Art Storage and Old Office can support each other through their connection and surrounding routes.
Before the planter commits, confirm:
Which bomb room is controlled
Whether the connecting route is covered
Whether the relevant hatch is open
Whether a Garage or western flank remains possible
Which Defender still has plant-denial utility
Where the planter can move after the defuser is down
Choose the plant location according to the space the team actually controls. Forcing a memorized default plant into an uncleared site gives Defenders an easy target.
Recommended Attacking Roles
A balanced lineup should cover functions rather than chase one mandatory composition:
A hard breacher capable of opening reinforced hatches or the Garage wall
An electronics counter or gadget-removal Operator
A utility clearer for shields and protected choke points
A flank-control Operator for first-floor and basement rotations
An information-focused entry or support player with surviving drones
Hibana is naturally useful when reinforced hatches are central to the plan. Nomad or Gridlock can protect long rotation routes, while dedicated gadget-clearing Operators help dismantle a Garage extension. Exact picks should still reflect bans, player comfort, and the defense shown in the previous round.
Best Defense Strategy for the New Villa Basement
The strongest starting philosophy is a layered defense. Make Attackers clear Garage, western routes, or first-floor hatch control before they can pressure Art Storage and Old Office directly.
Create Rotations Before Placing Utility
Establish the essential connection between bomb rooms and confirm how extended Defenders will return to site. A shotgun or secondary shotgun is valuable for rotations and carefully chosen lines of sight.
Avoid opening every soft surface. Each hole can help Attackers after they gain Garage or western control. Create only the rotations and crossfires the team has assigned someone to use.
Decide How Much of Garage to Hold
Garage can consume a large amount of Attacker time, but only if the position is supported. A basic extension needs:
Information on the exterior-facing entry
A protected angle or shield position
Denial for the reinforced soft-wall lane when appropriate
A teammate able to trade or cover the fallback
A clear route back toward the objective
Do not commit multiple Defenders to Garage without protecting Wine Cellar, Crypt, and the hatches. The Attackers may ignore the extension and attack the site from the opposite side.
If Garage utility is destroyed and crossfire support disappears, retreat. Preserving a Defender and forcing the Attackers to clear an empty room is often better than dying in the first layer.
Protect the Western Basement Routes
Wine Cellar and Crypt access should have information or delay utility even when Garage is the main extension. A hidden camera, sound cue, trap, or proximity-based gadget can warn the anchors before a western push reaches the site.
Avoid placing every device directly on the first doorway. Attackers will expect obvious utility. Staggering traps and denial across the route can keep producing information after the initial entry has been cleared.
Make a Plan for Both Hatches
Reinforced hatches can force Attackers to bring hard breach and spend time securing the floor above. Kaid and Mute are valuable when the strategy depends on protecting those surfaces or the reinforced Garage wall.
Hatch denial should not be treated as permanent. Attackers may clear the protecting gadget and open the hatch eventually. Every anchor should know which positions become unsafe once that happens and where to move next.
A first-floor Defender can delay the hatch clear, but this role needs an escape plan. Dying alone above site gives the Attackers the elimination and vertical control at the same time.
Keep Plant Denial for the Final Entry
Smoke, Goyo, Echo, Noor, and other denial-focused Defenders can punish a compact execute, but their utility loses value when used without information.
Use cameras and teammate calls to distinguish a real plant from entry pressure. A denial gadget that forces the planter to stop also creates a chance for another Defender to reposition or swing.
At least one denial option should remain available after the outer Garage or western layer falls. Otherwise, Attackers who reach a bomb room may plant without facing another meaningful obstacle.
Recommended Defensive Roles
A practical basement lineup should include:
Site setup for rotations and lines of sight
Reinforcement or hard-breach denial for hatches and Garage
Information covering both sides of the basement
Entry delay through traps, slowing effects, or area denial
A final plant-denial option
Kaid can protect reinforced surfaces from less obvious positions. Mute combines breach disruption with drone denial. Smoke and Echo support the final execute, while Melusi, Lesion, Fenrir, or Kapkan can make basement entries slower and more predictable.
No single Operator solves the site. The composition works when each player knows which route their utility covers and where they should fall back.
How the Rework Affects Villa’s Other Sites
The upper half of Villa has not been rebuilt, but the lower-floor changes can still influence rotations, entry choices, and site selection.
Aviator Room and Games Room
Established Study pressure, balcony control, and upper-floor clearing remain relevant. The basement update does not require teams to discard their normal Aviator/Games knowledge.
However, Attackers using the new interior Garage as an entry route should relearn the path upward. Defenders roaming below also have different cover and connections when attempting a late flank.
Trophy Room and Statuary Room
The core objective layout remains familiar. Bedroom-side control, Astronomy pressure, and upper-floor rotations still shape the round.
The updated basement mainly changes deep-roam paths. A Defender who starts below the objective cannot rely on the old Garage relationship, and Attackers checking the lower floor need to clear it as interior space.
Dining Room and Kitchen
Dining/Kitchen is the unchanged site most directly affected by the lower-floor update. Garage and the revised Kitchen Stairs connection sit close enough to influence east-side entries and flanks.
Attackers should drone the lower approach before using it to reach Kitchen. Defenders should test their old retreat routes and make sure a player moving through Garage does not become isolated behind the new doorway and wall arrangement.
Site Selection Becomes Less Predictable
Villa still has four Bomb-site pairings, but the basement now offers a purpose-built alternative to Living Room/Library. Teams have another low-floor defense with different utility requirements from Dining/Kitchen.
It is too early to treat Art Storage/Old Office as automatically stronger than every established site. Its value will depend on how well teams manage the hatches, Garage extension, and cross-map pressure rather than the novelty of the objective.
Villa Rework Tips for Solo Queue
The new site becomes much easier when players use consistent callouts and announce their responsibility before the round begins.
Keep Calls Simple
The most useful early calls are:
Garage
Wine Cellar
Crypt
Art Storage
Old Office
Hall hatch
Pantry hatch
Kitchen Stairs
Add direction and movement when possible. “One Garage falling back toward site” is more useful than repeating “Garage” after the player has already moved.
Claim One Job
On Attack, tell the team whether you are opening a hatch, clearing Garage, holding the western cutoff, watching the flank, or carrying the defuser.
On Defense, state whether you are holding Garage, watching Wine/Crypt, protecting the hatches, setting up site, or preserving plant denial. Clear ownership reduces the chance that five players watch one doorway while another route remains open.
Do Not Abandon the Team for a New Trick
New hatches and angles will produce unusual plays, but novelty does not make every position reliable. A creative rappel or off-site hold is only useful if it contributes to the team’s control and has a realistic escape or trade.
Build the basic site structure first. Add specialized tricks after the team understands how the standard Garage, western, and hatch pressures interact.
Villa Rework Mistakes to Avoid
Treating Garage Like Exterior Space
Defenders can now prepare and contest Garage as part of the building. Attackers who enter without droning can walk directly into a shield, trap, or long angle.
Sending the Entire Attack Through Garage
A one-directional Garage push lets Defenders concentrate their utility. Pair it with hatch pressure or a Wine Cellar/Crypt-side cutoff.
Ignoring the First-Floor Hatches
The basement’s solid ceiling makes the hall and Pantry hatches unusually important. Giving one team uncontested control of both can reshape the entire objective.
Opening a Hatch Without Securing Above
A hard breacher focused on a hatch is vulnerable to roamers and late flanks. Clear and hold the surrounding floor before beginning the breach.
Anchoring Every Defender Inside the Bomb Rooms
Art Storage and Old Office are compact. Five anchors surrender Garage, western access, and the hatches without forcing Attackers to spend resources.
Dying in the Garage Extension
Garage is a delay layer, not a separate objective. Fall back when the position no longer has information, utility, or teammate support.
Overinvesting in Soft-Floor Destruction
Much of the basement ceiling is not broadly destructible. Build the attack around the available hatches instead of assuming a soft breacher can expose every anchor from above.
Copying Old Living Room and Library Setups
The replacement site has different bomb rooms, approaches, and vertical relationships. Old reinforcements and plant plans do not transfer automatically.
Assuming Villa Received a Full Rework
Most of the map remains familiar. Relearning the entire building from zero wastes useful knowledge; focus practice on Basement, Garage, the two hatches, and their supporting first-floor routes.
Rainbow Six Siege Villa Rework FAQ
Is Villa Completely Reworked in Operation Split Fire?
No. Villa receives a targeted map update focused on the basement, Garage, and surrounding routes. Most first-floor and second-floor rooms remain familiar.
What Is the New Villa Bomb Site?
The new basement Bomb site is Art Storage and Old Office. It replaces Living Room and Library in the Bomb-site pool.
Is Living Room and Library Still a Bomb Site?
No. The rooms remain on Villa, but they no longer form a selectable Bomb objective after the targeted update.
How Many Bomb Sites Does Villa Have After the Rework?
Villa still has four Bomb-site pairings: Aviator/Games, Trophy/Statuary, Dining/Kitchen, and Art Storage/Old Office.
Is Villa Garage Still Outside?
No. Garage is now an interior area. Its former openings have been redesigned with a soft-wall lane and wide doorway, allowing Defenders to prepare and contest the space.
Which Villa Hatches Matter Most for the New Site?
The moved first-floor hallway hatch and the Pantry hatch near Kitchen are the main vertical connections into the redesigned basement area.
Can Attackers Destroy the Entire Basement Ceiling?
No. Much of the ceiling is solid, which limits broad vertical destruction. Attackers should prioritize control and opening of the available hatches.
What Is the Best Way to Attack Art Storage and Old Office?
Use at least two pressure directions. Combine Garage or western basement entry with hatch control, clear defensive utility, isolate the connection between bomb rooms, and plant only after the team controls the relevant rotations.
What Is the Best Way to Defend the New Villa Basement?
Build a layered defense with an outer Garage or western position, protected hatches, information on every main approach, safe rotations between bomb rooms, and plant denial reserved for the final execute.
Which Operators Are Useful on the New Villa Site?
Attackers benefit from hatch-capable hard breach, gadget removal, flank control, and surviving drones. Defenders benefit from site setup, hatch or wall denial, information, choke-point control, and late-round plant denial.
Final Thoughts on the Villa Rework
Villa’s targeted rework succeeds by giving the basement a reason to matter without erasing the map’s established identity.
Art Storage and Old Office create a compact new objective, Garage becomes a contested interior extension, and the hall and Pantry hatches provide the most important vertical pressure. The result rewards teams that attack from multiple directions and defenses that surrender space in layers rather than fighting every position to the death.
Returning players should preserve their knowledge of Villa’s upper sites while rebuilding their lower-floor habits. Learn the Garage wall and doorway, both hatch routes, the Wine Cellar and Crypt approaches, and the connection between the two bomb rooms. Once those relationships are clear, the new site becomes far easier to attack, defend, and communicate.



