Why Dying First Hurts So Much in CS2
The first death changes the round because CS2 is built around numbers, information, and map control. A 5v5 round gives your team enough players to cover lanes, trade fights, hold map control, and execute together. A 4v5 round immediately makes the game harder. Someone must cover extra space. Rotations become more stressful. The team may need to take a risk to recover the advantage.
When you die first as CT, your bombsite or map area becomes weaker. If you were the B anchor and you die early, your team may need to rotate a support player before the real hit is even confirmed. If you were the Mid player and you die without information, the enemy can use that space to split, lurk, or fake. If you were the A defender and you die alone, your teammates may be forced into a retake with less utility.
When you die first as T, the default loses power. A T-side default depends on players controlling different parts of the map. If one player dies alone at the start, the remaining players have fewer options. They may lose flank control, map pressure, utility support, or the ability to split a site. A 4v5 T round is still winnable, but the team must work harder.
The first death also affects team mentality. In ranked and solo queue, repeated early deaths make teammates nervous. They may start over-rotating, forcing fights, blaming each other, or abandoning the plan. Reducing your useless first deaths helps the whole team feel calmer.
The goal is not to hide forever. The goal is to make your early-round life valuable. If you take first contact, make sure it creates space, information, damage, a trade, or a clear advantage. If it creates nothing, it is probably a bad death.
Useful First Contact vs Useless First Death
Not every early death is bad. Some first deaths are part of a strong round plan. The difference is whether your death gives your team something.
Useful first contact creates space:
If you enter a site with a flash, force a defender to move, get traded immediately, and your team takes the site, your death may be useful. You created a foothold.
Useful first contact gives information:
If you safely spot multiple players and escape, that is even better. Information without dying is one of the strongest early-round results.
Useful first contact is tradeable:
If a teammate is close enough to trade, your fight has team value. Even if you lose the duel, the enemy may not escape.
Useful first contact follows utility:
If your smoke, flash, or in-game fire utility creates a safer fight, the risk is more reasonable.
Useless first death is isolated:
If nobody can trade you, your team gets no immediate value from your death.
Useless first death is repeated:
If you die the same way every round, the enemy is reading you.
Useless first death ignores timing:
If you peek before your flash pops or before teammates are ready, you are giving the defender the cleanest duel possible.
Useless first death gives away the plan:
If you die alone with bomb, utility, or position control, the enemy gains information and advantage.
The best question to ask before taking an early fight is: “What does my team gain if I die here?” If the answer is nothing, choose a safer option.
The Main Reasons Players Die First
Most first deaths are not random. They come from repeatable mistakes. Once you identify the reason, you can fix it.
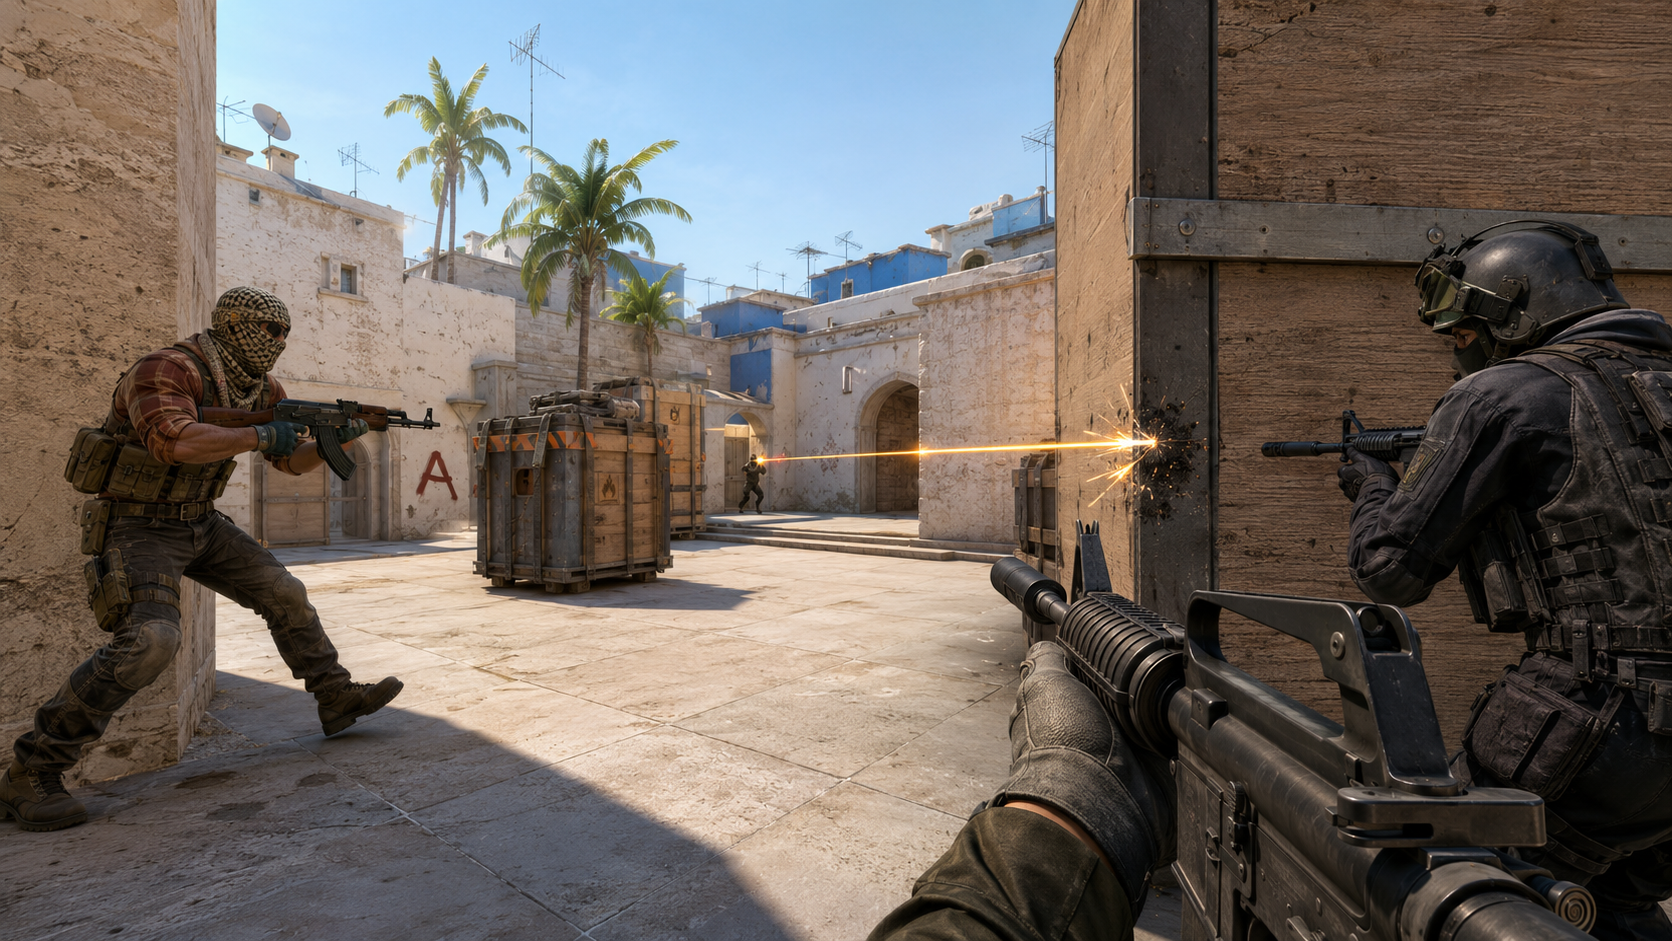
Reason 1: Peeking alone:
You take first contact with no teammate close enough to trade. Even if the fight feels winnable, the risk is high because your team gets nothing if you lose.
Reason 2: Bad crosshair placement:
Your crosshair is too low, too close to the wall, or not pre-aimed at the common position. The enemy sees you and fires before you are ready.
Reason 3: Shooting before stopping:
You move, panic, and shoot before your movement is accurate. This makes your first bullets unreliable.
Reason 4: Re-peeking after being spotted:
You show yourself, the enemy adjusts, and then you peek the same angle again. Now they are ready.
Reason 5: Fighting before utility lands:
You swing before the smoke blooms, before the flash pops, or before your teammate clears the angle.
Reason 6: Overextending after early space:
You win one fight or take one area, then push too deep alone and give the advantage back.
Reason 7: Holding exposed positions:
You stand somewhere with no fallback, no cover, and too many angles open.
Reason 8: Ignoring enemy timing:
You do not think about where opponents can be based on spawns, map control, or previous rounds.
Reason 9: Rotating from fear:
You leave your safe position too early, arrive late to another fight, and die in transition.
Reason 10: Playing tilted:
You peek because you are angry, not because the fight is good.
Fixing first deaths starts by identifying which of these mistakes you make most often.
Positioning Rule 1: Always Have a Reason to Stand There
Every position in CS2 should have a purpose. You should know what your position watches, what information it gives, what fight it creates, where you can fall back, and whether a teammate can help you. If you cannot explain why you are standing somewhere, it may be a bad position.
A good position does at least one useful thing. It controls a key route. It supports a teammate. It delays a site hit. It watches a flank. It gives early information. It creates a crossfire. It helps a retake. It protects the bomb. It gives your team time.
A bad position usually looks comfortable but gives no value. You may be hiding in a corner where you cannot help teammates. You may be standing in the open because you want a duel. You may be holding an angle that the enemy can clear easily with utility. You may be too far away to trade and too close to escape.
Before the round starts, ask yourself three questions:
What am I controlling?
Know the lane, choke point, or timing you are responsible for.
Who can help me?
Know whether a teammate can trade, flash, or rotate.
Where do I go if pressure comes?
Know your fallback before utility lands.
Positioning is not only about finding strong spots. It is about connecting your spot to the team’s round plan.
Positioning Rule 2: Stay Tradeable
Being tradeable means a teammate can respond quickly if you die. This is one of the most important concepts for stopping useless first deaths. If you are always dying where no one can trade you, you are giving the enemy free openings.
On T side, staying tradeable means moving with spacing. Do not stand directly on top of your teammate, but do not be so far away that you cannot punish the defender. If your entry player swings, you should be close enough to trade after contact. If you are the entry, make sure your team knows when you are going.
On CT side, staying tradeable means setting up crossfires or support positions. A solo CT anchor can still be useful, but if you fight early every round with nobody near you, you become predictable. A teammate flash, a second angle, or a fallback route can turn a risky fight into a smart setup.
Tradeable positioning also helps your confidence. You do not feel like every fight is a lonely duel. You know the team can recover if something goes wrong.
A simple rule: if your death cannot be traded and does not give important information, do not take that fight early.
Positioning Rule 3: Use Cover That Lets You Escape
Good cover is not only something that blocks bullets. Good cover also gives you options. You should be able to take one fight, fall back, reposition, or delay. If your position traps you after the first contact, it may be too risky for early-round play.
Many players die first because they hold “all-in” positions too often. These positions can work as surprise plays, but they are dangerous if repeated. A close corner with no escape may get one elimination sometimes, but if the enemy clears it with utility, you are gone. A wide open angle may feel powerful until multiple players swing together.
A better position lets you choose. You can spot information and leave. You can throw utility and fall back. You can take one shot and reposition. You can delay without committing your life instantly.
This is especially important for CT anchors. Your job is often to slow the hit, not to eliminate the entire attacking side alone. If you survive long enough for rotations, you have done your job.
Ask yourself: “If three players come here with utility, can I live?” If the answer is no, you need a fallback or a teammate.
Positioning Rule 4: Avoid Multi-Angle Exposure
One of the biggest positioning mistakes is exposing yourself to too many angles at once. If you peek a position where enemies can be left, right, close, deep, above, and behind cover, your aim has to solve too many problems at once. This often leads to first deaths.
Good positioning isolates fights. Instead of swinging into five possible positions, clear one angle at a time. Use cover to block other angles. Use smokes to remove deep lines of sight. Use flashes to reduce the enemy’s reaction. Move in a way that makes the fight simple.
On T side, this means clearing common positions in order. Do not rush into a site staring at the deepest angle while ignoring close corners. Do not enter through a choke while checking three positions at once. Use teammate spacing and utility.
On CT side, this means not holding positions where attackers can appear from multiple directions without warning. If your team lost Mid, Connector, Cave, Ramp, Short, or another key route, your previous position may become unsafe. Adjust before you are surrounded.
The fewer angles you are exposed to, the better your chance of surviving first contact.
Positioning Rule 5: Stop Standing Where Enemies Pre-Aim
Every map has common positions. Good players pre-aim those positions before they see you. If you stand in the same common angle every round, you make their job easy. They do not need great reaction time because their crosshair is already waiting.
This does not mean common positions are always bad. Many common positions are common because they are strong. But they must be mixed with timing, utility, off-angles, teammate support, or fallback plans. If you always hold the same box, same corner, same headshot angle, or same close position, enemies will clear you automatically.
Use variation. Hold the angle once. Fall back next round. Play anti-flash. Play a deeper angle. Play retake. Use a teammate flash. Change your timing. Let the enemy clear empty space and waste utility.
The goal is to avoid becoming predictable. If the enemy knows exactly where you are in the first 15 seconds, your positioning is helping them.
Timing Rule 1: Do Not Peek Before Your Team Is Ready
A lot of first deaths happen because one player moves before the team is prepared. This is common on T side. One player swings Ramp, Banana, Mid, Long, or B Main before the flash pops, before the smoke lands, or before teammates are close enough to trade. The defender gets a clean fight, the attacker dies, and the round becomes harder.
Timing is not only about being fast. It is about being synchronized. If your team is using utility, wait for the utility. If a teammate is flashing, wait for the pop. If the plan is to split a site, wait until both groups are close. If you are taking Mid with a teammate, do not run ahead while they are still holding spawn-side utility.
Good timing makes average aim look better. Bad timing makes good aim look useless.
A simple T-side rule: do not be the first player to see the enemy unless your teammate is ready to trade or your utility is ready to help.
Timing Rule 2: Do Not Re-Peek the Same Angle for Free
Re-peeking is one of the most common ways players die first. You peek, see an enemy, miss or take damage, hide, then peek the same angle again. The enemy is now ready. Their crosshair is placed. They may have a teammate watching. You turn a neutral situation into a predictable duel.
Re-peeking can work if you have a reason. A teammate flashes. You change elevation. You move to a different angle. You know the enemy is low. You are trading a teammate. You have no other option. But re-peeking from the exact same spot with no support is usually a bad habit.
This applies to rifles, pistols, and AWP-style in-game roles. After being spotted, reposition whenever possible. Make the enemy adjust their crosshair. Use utility. Ask for a flash. Or simply keep the information and stay alive.
The discipline to not re-peek is one of the easiest ways to reduce early deaths.
Timing Rule 3: Respect Enemy Spawns and Early Routes
Early-round timing depends on spawns and map routes. Sometimes enemies can reach a position faster than you expect. Sometimes you have a spawn that allows a strong early challenge. If you do not understand these timings, you will walk into prepared opponents.
On CT side, strong spawns can create opportunities for early information or control, but they still need a plan. A fast spawn does not mean you should take a dry duel every round. Use it with utility, teammate support, or a clear fallback.
On T side, understand when CTs can reach aggressive angles. If defenders can beat you to a choke point, do not assume the space is free. Clear carefully, use utility, and avoid running with your crosshair down.
Timing knowledge comes from experience, practice, and reviewing deaths. If you often think “how was he already there?” that is a sign you need to learn the timing for that area.
Timing Rule 4: Slow Down After Gaining Space
Many players die first not because they failed to gain space, but because they overextend after gaining it. They take Mid, get a strong position, then keep pushing alone. They win one duel, then chase another. They force a defender back, then run into the next crossfire with no support.
Space is valuable only if your team can use it. Once you gain an important area, slow down and let teammates catch up. Hold the space. Call what you control. Wait for utility. Prepare the next step.
On T side, if you take A Main, Banana, Ramp, Mid, or Long, you do not always need to keep running. Holding that space may be enough to force CTs into uncomfortable rotations.
On CT side, if you push for information and find nothing, you do not always need to go deeper. You can call the information and fall back. Going deeper may turn good information into a useless death.
The best players know when the job is done. They do not throw away good space by chasing more.
T-Side Rule: Entry Does Not Mean Blindly Running First
Entry fragging is one of the most misunderstood roles in CS2. Being first does not mean sprinting into a site with no utility and hoping to win. A good entry creates space for the team. Sometimes they get the first elimination. Sometimes they get traded. Sometimes they force a defender away and allow teammates to enter.
If you are the entry, your timing must match the team. Ask for a flash. Wait for the smoke. Clear common positions. Move in a way teammates can follow. Do not enter so early that nobody can trade you.
If you are not the entry, help the entry. Flash them. Trade them. Clear the next angle. Do not stand far behind and complain that they died first.
A good entry death is tradeable and creates space. A bad entry death is isolated and gives defenders free information.
T-Side Rule: Do Not Default Alone Without a Purpose
T-side defaults require players to spread out, but spread out does not mean isolated. If you are alone on one side of the map, your job should be clear. Maybe you are holding a push. Maybe you are keeping pressure. Maybe you are listening for information. Maybe you are setting up a late lurk. If you are alone just because you wandered there, you are at risk.
Solo default deaths are common in ranked. A player walks A Main alone, peeks a CT angle, dies, and says “one there.” That information is not worth the 4v5 if the team cannot trade or use it.
When alone, play safer. Use sound. Hold for aggression. Avoid dry peeking strong angles. If you want to take space, ask a teammate to join or flash. You can still be useful without fighting instantly.
A good lurker survives long enough to create timing. A bad lurker dies first and leaves the team weaker.
T-Side Rule: Let Utility Land Before You Fight
If your team throws utility, respect it. Do not swing before the flash pops. Do not enter before the smoke blooms. Do not run ahead of the in-game fire utility that was supposed to clear a close position. Bad timing wastes the utility and gives defenders easy fights.
Utility exists to change the duel. A flash makes an angle weaker. A smoke blocks vision. In-game fire utility forces a defender to move. An HE can punish common positions. If you fight before these tools take effect, you are choosing the hardest version of the duel.
This is one of the simplest ways to stop dying first. Wait half a second. Let the flash pop. Let the smoke form. Let teammates arrive. Then move.
Fast plays can still be fast. They just need to be timed.
T-Side Rule: Do Not Carry the Bomb Into Isolated First Contact
One of the worst first deaths is dying alone with the bomb in a dangerous area. It gives the CT side information, control, and a clear objective. Your teammates are forced to recover the bomb before they can finish the round.
If you have the bomb, be extra careful in early default positions. Do not dry peek Mid alone. Do not jump into a risky duel with no trade. Do not lurk deep with bomb unless the team has a specific plan.
The bomb carrier can still join site hits and trades, but early isolated fights with bomb are usually bad. If you want to take a risky opening duel, let someone else hold the bomb in a safer place.
Good bomb discipline prevents rounds from collapsing after one mistake.
CT-Side Rule: Your Job Is to Delay, Not Always Duel
CT players often die first because they feel they must stop the entire attack alone. This is especially common for anchors. A B anchor hears five players, panics, swings wide, and dies instantly. An A player sees utility and runs into it. A Mid player fights until they are eliminated instead of falling back.
As CT, your job is often to delay. Use utility. Call numbers. Stay alive. Fall back. Force attackers to clear you carefully. Make them spend time. Give rotators a chance to arrive.
A CT who gets one elimination and dies immediately may be useful. But a CT who survives, delays 15 seconds, uses utility, and gives perfect information may be even more valuable.
Do not measure CT impact only by early eliminations. A living defender creates pressure because attackers must still respect that position.
CT-Side Rule: Do Not Push for Information Every Round
Information is important, but predictable information pushes become free openings for the enemy. If you push the same route every round, the T side will wait for you. They will hold the angle, trade you, and take the advantage.
CT aggression works best when mixed. Push sometimes. Hold passive sometimes. Use utility sometimes. Ask for a flash sometimes. Play retake sometimes. The enemy should not know exactly when you are coming.
If you push for information, have a reason. Maybe your team needs map control. Maybe the enemy has been playing slow. Maybe you have a strong spawn and teammate support. Maybe you want to punish a known pattern. Do not push only because you are bored.
A good information play gives your team knowledge and keeps you alive. A bad information play gives the enemy a free 5v4.
CT-Side Rule: Do Not Rotate From Fear
Rotating too early gets many CT players eliminated first. You hear noise on the other side of the map, leave your position, and get caught while moving. Or the enemy fakes pressure, you rotate, and they hit the site you abandoned.
Rotate from information, not fear. Strong information includes bomb spotted, multiple enemies confirmed, heavy utility with contact, teammate dying on site, or map control clearly lost. Weak information includes one footstep, one grenade, one door sound, or a teammate guessing.
Sometimes you should rotate early, especially if the hit is confirmed. But if you rotate from every sound cue, enemies can manipulate you. Stay calm. Ask what is confirmed. Keep your position until the team has enough information.
A CT alive in the right position is better than a CT dying in transition.
CT-Side Rule: Use Fallback Positions
A fallback position is where you go after first contact or heavy pressure. Every CT setup should include one. If you fight Banana, where do you fall back? If you contest Ramp, where do you go when utility lands? If you hold Mid, what is your escape route? If you anchor B, what is your survival plan?
Fallback positions prevent panic. You do not need to decide under pressure because you already know the next step. You can throw utility, fall back, and keep the round playable.
This is especially useful in solo queue. Teammates may rotate late or communicate poorly. A fallback plan keeps you alive long enough for the round to develop.
A good fallback does not mean giving up. It means staying useful after the first contact.
Peeking Rule: Clear One Angle at a Time
Peeking is not just moving around a corner. It is angle management. When you peek badly, you expose yourself to several positions at once. When you peek well, you isolate one possible enemy position and take a cleaner fight.
Before peeking, decide what angle you are clearing. Place your crosshair where the enemy is likely to be. Move only as much as needed to see that angle. Stop properly before shooting. Then clear the next angle.
Many players wide swing without knowing what they are clearing. This can work sometimes, especially if the enemy is holding too close, but it can also expose you to multiple defenders. Good peeking mixes tight clears, shoulder peeks, jiggles, wide swings, and utility-supported swings.
Do not peek every angle the same way. Choose the peek based on the situation.
Peeking Rule: Use Jiggle Peeks for Information
A jiggle peek is a small peek used to gather information or bait a shot without fully committing. It is useful when you suspect an enemy is holding an angle and you do not want to give them a full duel.
Use jiggle peeks to check for AWP-style holds, bait shots, spot utility, or gather early information. Do not turn every jiggle into a fight. The point is often to see or bait, then return to safety.
After a successful jiggle, call the information. If you bait a shot, your team may be able to use that timing. If you spot multiple players, your team can rotate or prepare utility.
A jiggle peek is only useful if you stay disciplined. If you jiggle, spot danger, then wide swing alone anyway, you wasted the purpose.
Peeking Rule: Wide Swing With a Reason
Wide swings are useful, but they should not be automatic. A wide swing can punish an enemy holding close to the corner, break their crosshair placement, or help you entry when a teammate is ready to trade. It can also get you eliminated if you swing into multiple angles with no support.
Wide swing when you have a reason: a teammate flash, a trade setup, a known close opponent, a need to create space, or a timing advantage. Do not wide swing every angle because it feels aggressive.
If you wide swing as T side, teammates must be ready to follow. If you wide swing as CT side, know your fallback and support. A wide swing without a plan is often just overexposure.
Good peeking is not passive or aggressive. It is intentional.
Crosshair Placement: Stop Making Duels Harder
Crosshair placement is one of the biggest reasons players die first. If your crosshair is already near the enemy’s head, the duel is easier. If your crosshair is low, too close to the wall, or aimed at empty space, you must make a larger correction under pressure.
Good crosshair placement means aiming where an enemy is likely to appear before they appear. It also means adjusting for distance. If the enemy may swing wide, keep your crosshair a bit farther from the corner. If they may be close, prepare for that. If you are clearing a common position, pre-aim it.
Crosshair placement reduces reaction burden. You are not trying to react from zero. You are preparing the duel before it happens.
To improve, practice pre-aim routes on maps. Walk through common paths and place your crosshair at head level for every angle. Do this slowly first. Speed comes after accuracy.
Better crosshair placement means fewer panic fights and fewer first deaths.
Counter-Strafing: Stop Before Shooting
CS2 punishes poor movement accuracy. If you shoot while moving, your shots become less reliable. Counter-strafing helps you stop faster and shoot accurately after movement. This matters for almost every peek.
The basic idea is simple in game terms: when moving one direction, tap the opposite movement key to stop before firing. For example, if you are moving right, tap left to stop. The exact feeling takes practice, but the goal is clear: stop, then shoot.
Many first deaths happen because the player peeks, sees the enemy, panics, and fires while still moving. Even if the crosshair is close, the shot may not land cleanly. That makes the enemy’s job easier.
Practice movement shots daily. Strafe out, stop, shoot. Strafe back, stop, shoot. Add targets. Add real map angles. Do it until stopping before shooting becomes automatic.
You do not need to think about counter-strafing as a fancy mechanic. Think of it as the foundation of clean peeking.
Utility: The Safest Way to Stop Dying First
Utility helps you take fights on better terms. If you keep dying first while dry peeking, the solution may not be “aim harder.” The solution may be to use a flash, smoke, or in-game fire utility before contact.
A flash can force a defender off an angle. A smoke can block a dangerous line of sight. In-game fire utility can clear a close position. An HE can punish a common hold or slow pressure. Utility reduces the number of clean fights the enemy gets.
On T side, utility helps you enter sites and take map control. On CT side, utility helps you delay and survive. If you die with multiple unused grenades every round, you are wasting survival tools.
Use utility before the fight, not after dying. If you know an angle is dangerous, do not dry swing it five rounds in a row. Use a flash. Ask for support. Change timing.
Utility is not only for executes. It is also for staying alive.
How to Stop Dying First as an Entry Player
Entry players take risk, but good entry players take structured risk. If you are entrying, your goal is to create space with support.
Before entering, check three things:
Is my team close enough?
If you are too far ahead, you cannot be traded.
Is utility ready?
If the plan uses a flash or smoke, wait for it.
Do I know the first angles?
Pre-aim common positions before swinging.
When you enter, do not stop in the doorway and block teammates. Move with purpose. Clear the most dangerous positions. If you get the opening elimination, do not instantly overextend into the next area alone. Let the team take the space you created.
If you die, make sure the team can trade. A tradeable entry death is acceptable. A solo entry death with no follow-up is not.
Good entry players are brave, but they are not random.
How to Stop Dying First as a Lurker
Lurkers die first when they confuse patience with isolation. A good lurker creates pressure, catches rotations, holds pushes, and appears at the right time. A bad lurker walks alone into a defender and dies before the team can use the map.
As a lurker, your first job is survival. You are often far from teammates, so you must be careful about dry duels. Hold for pushes. Listen. Keep pressure. Do not reveal yourself too early unless the team plan needs it.
A lurk should connect to the round. If your team is hitting B, your A lurk might stop rotations. If your team is defaulting, your lurk might hold map control. If your team is rotating late, your lurk might cut off CT movement.
Do not carry the bomb into risky lurks. Do not take low-value early fights. Do not be so slow that your team fights 4v5 before you matter.
A good lurker is alive when the round becomes important.
How to Stop Dying First as a CT Anchor
CT anchors are often under pressure. Your team may leave you alone on a site. The enemy may hit with utility. Your job is not always to win every duel. Your job is to delay, call, survive, and make the attack uncomfortable.
As an anchor, choose positions with escape routes when possible. Save utility for real pressure. Use smokes to slow chokepoints. Use flashes to reposition. Use in-game fire utility to stop fast entries. Call numbers clearly.
Do not fight to the death instantly unless the setup demands it. If attackers use heavy utility, falling back may be smarter. If you stay alive, your team can rotate and retake. If you die instantly, the site may fall for free.
Mix your positions. If you play the same corner every round, attackers will clear you. Sometimes play close. Sometimes play deep. Sometimes play retake. Sometimes ask for support.
A great anchor does not need constant highlight plays. A great anchor makes the enemy waste time.
How to Stop Dying First as a Rotator
Rotators die first when they move without enough information. You hear pressure, leave your spot, and get caught. Or you rotate through a dangerous area without checking if the enemy controls it.
As a rotator, your job is to support the correct site at the correct time. That requires patience. Do not abandon your area after one sound cue. Ask what is confirmed. Watch the minimap. Listen to utility. Track bomb information.
When rotating, choose safer paths. Be careful of lost control zones. If Mid, Connector, Secret, Canal, Cave, or another route is lost, your rotation may be watched. Do not sprint through without awareness.
Arrive with purpose. If the site is still contested, help delay. If the site is lost, group for retake. Do not arrive alone and take a desperate duel.
Good rotators are calm. They move from information, not panic.
How to Stop Dying First in Solo Queue
Solo queue makes first deaths more common because communication and spacing are weaker. You may not know if teammates will trade you. You may not get flashes. You may not know whether they are rotating. That means you need safer habits.
Use simple calls. Say “flash me,” “trade me,” “wait,” “I’m holding push,” or “don’t rotate yet.” Keep it short. Random teammates are more likely to follow simple plans.
Stay closer to teammates when possible. Solo queue trading is often poor, so you may need to become the player who trades instead of expecting others to trade you.
Avoid complicated isolated plays. A solo push that might work in a team environment may fail in solo queue because nobody is ready to support it.
Mute toxic distractions if needed. Tilt causes early deaths. If someone makes you play worse, protect your focus.
Solo queue climbing is about consistency. Reducing useless first deaths is one of the best ways to become consistent.
How to Use the Minimap to Avoid First Deaths
The minimap helps you understand risk. Many players ignore it and die because they do not realize teammates are too far away, a route is open, or a site is unsupported.
Check the minimap before taking a fight. Are teammates near enough to trade? Is the bomb safe? Is another area lost? Is your team grouped or spread? Are you the only player holding one side?
On CT side, the minimap helps prevent over-rotation. If you see teammates already moving toward pressure, you may need to hold your area. If you see a teammate alone on a bombsite, you may need to support or prepare.
On T side, the minimap helps with spacing. If you are far ahead of the pack, slow down. If teammates are ready behind you, you can take contact with more confidence.
The minimap is not just for rotations. It is a survival tool.
How to Review Your First Deaths
To stop dying first, review your opening deaths. You do not need a full professional demo review. You need a simple question system.
After a match, look at each round where you died first and ask:
Was I tradeable?
If no teammate could trade, the fight needed a stronger reason.
Did I use utility?
If you dry peeked a known dangerous angle, utility may have solved it.
Was my crosshair ready?
If you had to flick far, your pre-aim may be weak.
Was I moving while shooting?
If yes, practice counter-strafing.
Did I re-peek?
If yes, ask whether the re-peek had a reason.
Did I give away bomb or map control?
If yes, the mistake hurt more than a normal death.
Was the timing good?
Did you fight before teammates were ready?
Did the enemy expect me?
If yes, your position or timing may be predictable.
Write down the most common reason. Do not fix everything at once. If your biggest issue is re-peeking, focus on that for a week. If it is spacing, focus on staying tradeable. If it is movement, focus on stopping before shooting.
Practice Routine to Stop Dying First
A simple practice routine can fix many first-death habits.
Five minutes: counter-strafe shots
Use bots or a practice map. Strafe, stop, shoot. Focus on accuracy after movement.
Five minutes: crosshair placement route
Load a map and clear common angles slowly. Keep crosshair at head level.
Five minutes: prefire practice
Use a prefire or angle-training map if available. Practice common entry routes.
Five minutes: utility survival
Practice one flash, smoke, or in-game fire utility that helps you take or delay a dangerous area.
Five minutes: deathmatch with a rule
Play deathmatch with one rule: no shooting before stopping. Ignore score.
Demo review: three first deaths
After ranked, review only three opening deaths and identify the cause.
This routine is short, focused, and directly connected to the problem.
Common Map Examples of First-Death Mistakes
Every map has common first-death traps. The exact positions change, but the pattern is similar.
Mirage:
Running into Mid alone without utility, peeking Palace every round as CT, or entering A Ramp before teammates are ready.
Inferno:
Taking Banana fights with no teammate support, re-peeking Mid after being spotted, or pushing Apartments alone.
Dust2:
Dry peeking Long doors, fighting Mid with no plan, or walking into B Tunnels without clearing close positions.
Nuke:
Crossing outside with no smoke or support, fighting Ramp alone every round, or rotating between upper and lower based on weak sound cues.
Ancient:
Walking into Mid alone, dying in Donut without trade support, or pushing Cave as CT with no reason.
Anubis:
Taking Canal or Mid duels alone, dying B Long with no trade, or rotating through Connector after losing control.
Overpass:
Pushing Connector every round, taking Bathrooms alone, or anchoring B in the same predictable spot.
Vertigo:
Fighting A Ramp alone, re-peeking after utility lands, or leaving B too early because A made noise.
The map changes, but the lesson stays the same: do not give away the first fight for free.
Mental Habits That Reduce First Deaths
Positioning and timing are mechanical and tactical, but mental state matters too. Tilt makes players impatient. Impatience creates first deaths.
Do not chase revenge:
If someone eliminated you last round, do not force the same duel to prove a point.
Do not peek because you are bored:
Boredom is not a strategy. Hold your role.
Do not copy a play just because it worked once:
A surprise play becomes weaker when repeated.
Do not panic when nothing happens early:
Quiet rounds are normal. Stay disciplined.
Do not force hero plays every round:
You do not need to win the match alone in the first 20 seconds.
Do not let teammates rush your timing:
If a teammate yells “go,” but no utility is ready and nobody can trade, think before moving.
Calm players die first less often because they take fewer emotional fights.
Practical Rules to Stop Dying First
Rule 1: Ask what your team gains if you die.
If the answer is nothing, do not take the fight.
Rule 2: Stay tradeable.
Early fights should have teammate support whenever possible.
Rule 3: Use utility before dangerous contact.
Do not dry peek the same strong angle every round.
Rule 4: Stop before shooting.
Counter-strafing and movement accuracy matter in every duel.
Rule 5: Pre-aim common positions.
Crosshair placement makes fights easier before they start.
Rule 6: Avoid predictable re-peeks.
If the enemy saw you, reposition or use utility.
Rule 7: Do not overextend after gaining space.
Hold the space and let teammates use it.
Rule 8: Rotate from information, not fear.
Weak sound cues should not pull you out of position.
Rule 9: Use cover with fallback options.
Do not anchor from positions that trap you instantly.
Rule 10: Review your opening deaths.
Your first deaths reveal your biggest positioning and timing mistakes.
How BoostRoom Helps You Stop Dying First
BoostRoom helps CS2 players improve by turning repeated mistakes into clear training goals. Dying first is not just an aim problem. It can come from bad spacing, poor timing, weak utility, predictable positions, movement mistakes, or tilt. BoostRoom helps players look at those habits in a more structured way.
BoostRoom helps with positioning:
Learning where to stand, when to fall back, and how to support teammates makes every role more consistent.
BoostRoom helps with timing:
Better timing means fewer dry peeks, fewer isolated entries, and more fights taken with team support.
BoostRoom helps with ranked confidence:
When you stop giving away free opening deaths, matches feel less chaotic. You survive longer and have more chances to make impact.
BoostRoom helps with solo queue discipline:
Solo queue is unpredictable, but strong fundamentals still work. Better spacing, utility, and communication help even with random teammates.
BoostRoom supports long-term improvement:
Fixing first deaths improves CT holds, T defaults, entries, lurks, retakes, and late-round decisions. It is one of the most valuable habits for ranking up.
FAQ
Why do I keep dying first in CS2?
You may be peeking alone, fighting before utility lands, using poor crosshair placement, shooting while moving, re-peeking predictable angles, overextending after gaining space, or rotating based on weak information.
Is dying first always bad in CS2?
No. Dying first can be acceptable if you create space, get traded, gather important information, or help your team take control. The problem is dying first for no value.
How do I stop dying first as T side?
Stay tradeable, wait for utility, do not carry the bomb into isolated fights, clear common angles, and avoid defaulting alone without a purpose.
How do I stop dying first as CT side?
Use fallback positions, delay with utility, avoid predictable pushes, rotate from confirmed information, and remember that your job is often to survive long enough for support.
Should I play more passive to stop dying first?
Not always. Playing smarter does not mean hiding. You should still take useful fights, but they should be supported by timing, utility, positioning, or trade potential.
What is the biggest positioning mistake in CS2?
One of the biggest mistakes is standing in positions where you are exposed to too many angles and cannot escape. Good positioning isolates fights and gives you a fallback.
How does crosshair placement help me survive?
Good crosshair placement means your aim is already close to where the enemy appears. This reduces reaction time pressure and helps you win duels before panic starts.