Primary purpose options (choose one):
- Daily hub: harvesting, crafting, quick prep, quick log-out for rested bonus
- Showcase build: screenshots, vibes, themed rooms, storytelling
- Social venue: “come hang out,” roleplay-friendly, mini-events with friends
- Hybrid: daily hub + showcase (most common and totally doable)
Secondary purpose ideas:
- A dedicated photo spot
- A trophy wall vibe (weapon/armor displays when available, achievements theme corners)
- A “seasonal swap” homestead you change for Wintersday, Halloween, etc.
Once you choose, your layout choices get easier:
- Daily hub = short paths, clear interaction zones, fast navigation
- Showcase = guided flow, stronger lighting, bigger focal points
- Social venue = open spaces, seating clusters, “activity corners”
Step 2: Understand the homestead rules that affect design (so you don’t fight the system)
Homesteads are powerful, but they’re not a blank 3D editor. A few built-in rules heavily influence practical layouts:
- Decorating mode uses specialized placement tools (Move/Rotate/Scale, local/global alignment, reset and “use last” tools, flying mode, and an X-ray option for retrieving/erasing hidden pieces).
- Some functional things are fixed to predetermined areas to keep them working properly (like resource nodes, cats, and certain interactables). That means you design around them, not instead of them.
- Collection boxes enable fast harvesting once you’ve progressed far enough in the Homesteading mastery track—this changes how you should plan your daily route.
- Decoration limits are real and expanded over time through updates, mastery, and additional unlocks—so planning a “decoration budget” matters if you want a full-map vision.
- If you have access to the newer homestead improvements, you can save and load decoration layouts (stored locally) and even share them—this encourages “template thinking,” not one permanent build forever.
Treat these rules like creative constraints. They actually help you make stronger designs.
Step 3: Learn the decorating tools that make builds look clean (the “90-minute skill upgrade”)
Most homesteads look messy for one reason: placement is slightly off. GW2’s decorating toolkit is strong—use it like a builder, not like someone dropping furniture in a rush.
The core tools you should rely on constantly:
- Move to align edges, center objects, and keep paths clean
- Rotate to make walls straight and angles consistent (use snap increments when you want clean geometry)
- Scale for proportion (small props become detail pieces; large props become structure)
- Local vs global alignment to control whether your manipulator follows world axes or the object’s axes
- Reset Scale and Rotation when something gets “drifty” or you want to return to the original proportions
- Use Last Scale and Rotation to speed up repeated builds (fences, lantern rows, symmetrical sets)
- Flying mode to place high objects, ceiling décor, balcony pieces, and layered lighting
- Toggle X-Ray Vision as your “insurance policy” for finding buried or hidden décor
Practical habit:
When you place one object and it looks perfect, immediately place the next similar objects using “use last scale/rotation” so your set stays consistent.
Step 4: Build your “daily route” first (function before beauty)
Even a showcase homestead benefits from a practical core. The daily route is the loop you’ll run when you’re not in “decorator mode.”
Daily route principle:
Your daily route should take as few turns and as little backtracking as possible.
Build a “utility spine” (a functional backbone):
- Start near where you naturally arrive/spawn into your homestead
- Keep the route open and readable (no squeezing between benches and shrubs)
- Keep interactables easy to click (don’t bury them in décor)
- Make it visually distinct (different floor texture, lantern line, or fence border) so your brain follows it
If you harvest daily:
Design your utility spine to pass close to your harvesting interaction points (especially collection boxes). Your “pretty zones” can branch off from this spine like neighborhoods.
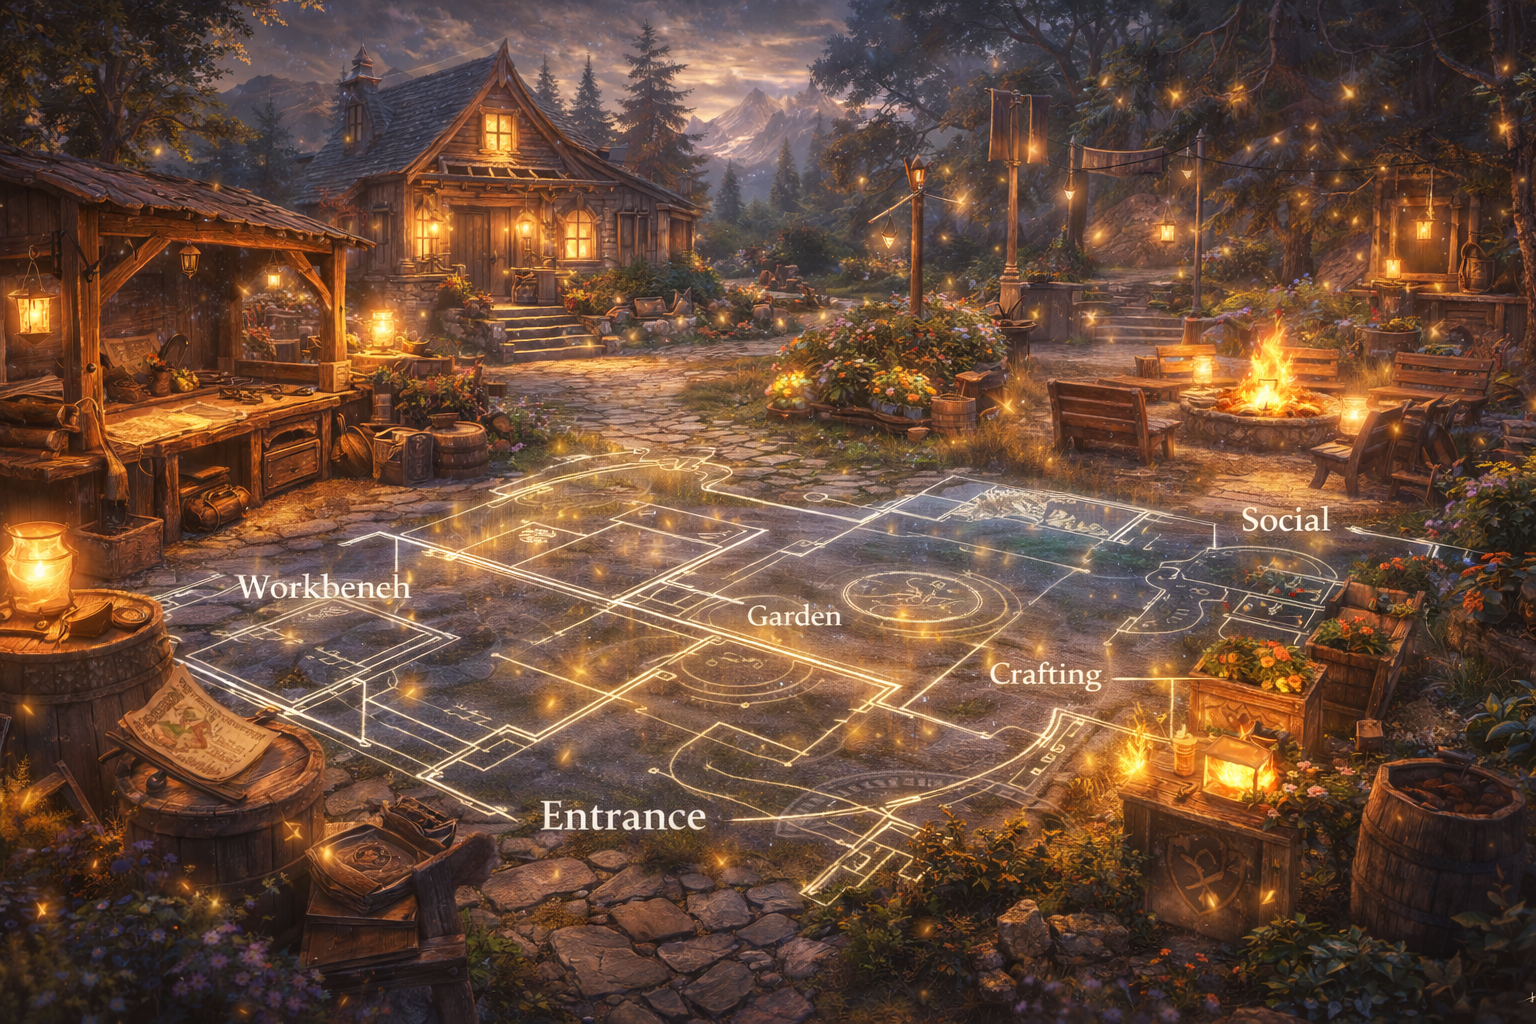
Step 5: Zone your homestead like a real place (5-zone method)
A well-designed homestead feels bigger and calmer because it’s organized. Use this simple zoning method:
Zone 1: Arrival + Orientation (the “front door”)
- A clear path that says “this is where you go”
- A small landmark (banner, statue, fountain, arch, or tree)
- A “first impression” lighting choice (warm lanterns or cool magical glow)
Zone 2: Utility Core (the daily hub)
- Harvest route
- Crafting/handiwork vibe corner (even if the actual workbench area is fixed, you can style around it)
- Storage-feel décor: crates, shelves, workshop props, tidy borders
Zone 3: Social Space (the hangout)
- Seating clusters (never just one chair—use groups)
- A focal point: firepit, stage, dining table, bar/tea corner
- Clear open floor area so people can stand together without clipping into décor
Zone 4: Showcase Moments (the “wow” shots)
- A dramatic balcony view
- A themed room (library, shrine, pirate cabin, greenhouse, arcane cave)
- A guided corridor that reveals the theme gradually
Zone 5: Quiet Corner (the “retreat”)
- Minimal noise, fewer bright lights
- Nature props, water, soft glow
- Great place for screenshots and “rested bonus” log-outs
Important: You don’t need to fill the entire map. You need a few zones that feel complete.
Step 6: Pick one theme and one accent (so your décor feels cohesive)
Theme is what makes your homestead look professional even with simple decorations.
Strong theme choices that fit GW2’s world:
- Kodan lodge / frontier cabin: warm wood, furs, carved posts, practical tools
- Arcane scholar den: bookshelves, crystals, ritual circles, cool lighting
- Ranger’s riverside camp: tents, fishing props, drying racks, natural bridges
- Pirate dockhouse: rope details, ship parts, lantern chains, cargo piles
- Ley-line spa: glowing crystals, pools, smooth stone, calming symmetry
- Festival home: swappable décor sets for Wintersday / Halloween / Lunar New Year
Pick one accent to avoid “samey”:
- Accent = a repeating motif like serpents, stars, honey/bees, nautical knots, or a single color vibe
- Use the accent sparingly: one per room, one per path segment, not everywhere
Step 7: Create 3 focal points (and stop decorating randomly)
A focal point is a place your eyes land naturally. Most homesteads feel cluttered because there’s no hierarchy.
Your three focal points:
- Arrival focal point (first 5 seconds)
- Main room focal point (most-used social/utility space)
- Signature focal point (your “this is my homestead” screenshot)
Easy focal point recipes:
- “Centered object + symmetrical lights”
- “Raised platform + stairs + banner backdrop”
- “Framed view” (archway + path leading to a vista)
Step 8: Master the “path language” (how your layout guides movement)
Paths are the difference between “pretty pile of objects” and “place.”
Path rules that always work:
- Paths should be wider than you think (players and mounts clip)
- Use edge markers (fence, stones, lanterns) so the route is readable at night
- Add corners only when you need them (too many turns feels maze-like)
- Create one main loop and two short side paths rather than a spaghetti network
Pro tip for realism:
Real places have “service areas.” Hide ugly-but-useful things (dense storage décor, tool racks, industrial props) behind a half-wall or around a corner—so the main view stays clean.
Step 9: Use verticality to make builds feel expensive (even with a small decoration budget)
Vertical layering makes a zone feel richer without needing dozens of objects.
Three-layer trick:
- Ground layer: rugs, floor texture, stones, grass clusters
- Mid layer: furniture, rails, partitions, plants, tables
- Top layer: hanging lights, banners, beams, ceiling props, canopy
Even outdoors, you can do this:
- ground = garden borders
- mid = seating and plants
- top = lantern strings, archways, tall trees
Step 10: Make lighting intentional (night should look even better than day)
Lighting is the fastest way to level up your homestead.
Lighting rules:
- Use warm light in cozy spaces (lodge, kitchen, bedroom vibe)
- Use cool/magical light in arcane spaces (caves, ley areas, shrines)
- Avoid placing bright lights at eye level everywhere—mix:
- low lights (floor lanterns)
- mid lights (wall sconces)
- high lights (hanging fixtures)
Shadow and contrast matter:
A perfect homestead has darker pockets. If everything is equally bright, nothing feels special.
Step 11: Design around harvesting and fixed interactables (without ruining your style)
Because some nodes and interactables are in predetermined areas, treat them like “infrastructure.”
How to make infrastructure look good:
- Give it a theme wrapper:
- mining zone becomes a “quarry” scene
- farm zone becomes a “greenhouse” or “orchard”
- logging zone becomes a “timber yard” or “carpenter’s row”
- Keep the click zones clear:
- place décor around the interactables, not on top
- keep sightlines open so you can target objects easily
If you use collection boxes:
You can build a stylish “harvest pavilion” around the area—an archway, a signboard, a short fence, and a lighting line—so your daily harvesting feels like visiting a designed space, not clicking random boxes.
Step 12: Use layout saves like a pro (iteration without fear)
If you have access to layout saving/loading, you get a huge creative advantage:
- Save before major changes
- Keep versioned layouts (e.g., “Lodge v1,” “Lodge v2,” “Winter,” “Halloween”)
- Maintain a minimalist daily layout and a full showcase layout and swap depending on mood
This turns your homestead into a living project instead of a one-shot build you’re scared to touch.
Design Idea Library (steal these and make them yours)
Idea 1: The Practical Artisan Yard
- Utility spine with clean paving
- Workshop corner with shelves, crates, tool props
- A small “display wall” showing your favorite theme items
- Soft warm lantern grid for a comfortable nightly look
Idea 2: The Riverfront Tea Garden
- Curved path along water
- Seating clusters facing the river
- One dramatic tree + lantern ring centerpiece
- Quiet corner for screenshots and relaxed log-outs
Idea 3: The Arcane Cave Observatory
- Darker palette, fewer objects
- Crystal clusters and cool lighting
- Circular “ritual” floor pattern
- A single bright focal object in the center for drama
Idea 4: The Pirate Dock and Smuggler’s Loft
- Cargo piles and rope details on the ground layer
- Lantern chains as your top layer
- A hidden “treasure room” behind a partition wall
- A stage-like dock corner for group screenshots
Idea 5: Seasonal Swap Homestead
- Neutral base architecture (wood + stone)
- Replaceable décor “skins”:
- Wintersday: snow, gifts, warm lights
- Halloween: candles, eerie fog vibe, darker corners
- Lunar: red/gold highlights, lantern rows
- Save each season as its own layout for fast swaps
Loot
A well-designed homestead pays you back every week—sometimes in gold/value, sometimes in time saved, and sometimes in pure enjoyment.
Faster daily routines
When your harvest points and key interactables are easy to reach, you stop wasting mental energy. Your homestead becomes a “reset space” you can do half-asleep.
Better crafting and decorating sessions
A clean workshop zone makes big decoration projects feel manageable. You can batch-craft, place, iterate, and store without constantly running in circles.
Social value
Players remember good homesteads. A strong social space becomes your casual guild meetup spot, screenshot venue, and “come chill” area that doesn’t require organizing a squad in open world.
A screenshot factory
If you build three intentional focal points, you’ll always have a fresh angle for character shots, fashion checks, or cinematic moments—without needing a new map.
Creative progression that doesn’t depend on combat skill
Homesteads are one of the best long-term projects in GW2 because they reward consistency and taste, not high APM.
Extraction
This is the practical “do it this week” plan: how to go from empty plot to a homestead that looks good and works well, without burning all your decorations on random clutter.
Extraction 1: Build the utility spine in one session
Do this first, even if your theme isn’t finalized.
- Mark your main route with a simple border (stones, small fences, lanterns)
- Ensure you can run it smoothly with mounts
- Keep interaction zones open and uncluttered
- Add one landmark at arrival so the space feels welcoming immediately
Once your spine exists, everything else becomes easy to attach.
Extraction 2: Choose your “starter palette” (10–15 decorations you repeat)
Professional builds repeat pieces. Choose a small palette you like and reuse it across zones:
- one fence style
- one lantern style
- one wood tone
- one stone tone
- two plants (one small, one tall)
- one seating set
- one table set
- one “hero” statue or centerpiece
Repetition is what creates cohesion.
Extraction 3: Place structure first, detail last (the anti-clutter rule)
Build in this order:
- Structure: walls, partitions, platforms, stairs, borders
- Lighting: primary lights, then accents
- Large props: tables, beds, shelves, big plants
- Detail props: books, bottles, tools, small clutter
If you start with detail props, you’ll constantly move them later and waste your decoration budget.
Extraction 4: Use Move/Rotate/Scale like a builder (micro-tips that instantly improve quality)
- Rotate with snap increments when building straight architecture so walls don’t “wobble.”
- Scale deliberately:
- scale down clutter pieces to create realism
- scale up a few pieces to create custom architecture (pillars, beams, platforms)
- Use local vs global alignment:
- global = clean straight lines relative to the world
- local = perfect adjustments relative to an already-angled object
- If something looks “wrong” and you can’t tell why, reset it and rebuild the alignment rather than forcing it.
Extraction 5: Make harvesting feel like part of the world
Instead of hiding your infrastructure, “theme it.”
Mining vibe options:
- quarry scene with stone borders and tool racks
- dwarven/industrial alcove with strong lighting
Farm vibe options:
- greenhouse lane with trellises and planters
- orchard rows with lantern posts
Logging vibe options:
- timber yard with stacked logs and saw tables
- ranger camp with drying racks and tents
The trick is leaving the click zones open while styling the perimeter.
Extraction 6: Plan your decoration limit like a budget (so you don’t stall mid-build)
Even with increased caps, you can still run out if you treat every zone like a maximalist diorama.
A simple budgeting method:
- 40% of your limit for the main hub + social space
- 30% for your signature showcase focal point
- 20% for paths/borders that unify the whole map
- 10% reserved for future seasonal swaps and new décor releases
This keeps your homestead expandable.
Extraction 7: Build one “signature moment” that’s unmistakably yours
Pick one signature concept and push it further than the rest:
- a dramatic bridge
- a floating crystal shrine
- a cozy loft bedroom
- a pirate dockhouse silhouette
- a ley-line spa pool scene
When visitors remember one thing, they remember your homestead.
Extraction 8: Use layout saving/loading as your creativity safety net
If you have layout tools:
- Save “Daily Minimal” and “Showcase Full”
- Save “Before Big Change”
- Save seasonal versions
This removes fear, which makes you build better.
Extraction 9: Keep your homestead usable for guests (social layout tip)
If friends visit, they’ll cluster near the main area. Design for that:
- open floor area
- seating groups nearby
- a clear “stage” or “photo line” (a wall, banner, or scenic background)
If guests get stuck in narrow corridors or fall off awkward platforms, they’ll leave quickly—even if the homestead is beautiful.
Extraction 10: A 7-day homestead build plan (repeatable)
- Day 1: utility spine + arrival landmark
- Day 2: main social space (seating + centerpiece + lighting)
- Day 3: primary themed room/area
- Day 4: connect zones with consistent borders and lights
- Day 5: quiet corner retreat + screenshot spot
- Day 6: detail pass (only after structure is locked)
- Day 7: save a layout and do a cleanup pass (remove clutter that adds nothing)
Practical Rules
- Pick one primary purpose for your homestead before decorating.
- Build your daily route first; make it short, clear, and clickable.
- Treat fixed functional areas like infrastructure—design around them cleanly.
- Zone your space: arrival, utility core, social, showcase, quiet corner.
- Reuse a small palette of decorations to create cohesion.
- Structure first, detail last—always.
- Use Rotate snapping for clean architecture; avoid “almost straight.”
- Use Scale intentionally to create custom structure and better proportions.
- If placement looks off, reset it and re-align instead of forcing it.
- Keep interactables visible and easy to target; never bury them in clutter.
- Paths should be wider than you think—mounts and groups need space.
- Build three focal points: arrival, main hub, signature moment.
- Use lighting in layers: low, mid, high—avoid uniform brightness.
- Dark pockets create contrast; contrast creates “wow.”
- Vertical layering makes builds feel expensive without using many objects.
- Make your utility spine visually distinct so your brain follows it automatically.
- Budget your decoration limit; don’t spend 80% on one unfinished zone.
- For screenshots, create one framed view with a clear background and good light.
- For social use, include an open floor area plus seating clusters.
- Save layouts before major changes so you can experiment without fear.
- Keep a “Daily Minimal” layout for fast harvesting and crafting sessions.
- Don’t chase perfect symmetry everywhere—use it only at focal points.
- Avoid micro-clutter spam; every small prop should serve theme or realism.
- If visitors feel lost, your paths and landmarks need clearer language.
- Finish one zone completely before starting three new ones halfway.
BoostRoom
Want a homestead that looks premium and stays practical—without spending weeks farming materials and second-guessing every placement? BoostRoom can help you get from “empty plot” to a finished, stylish, functional homestead faster.
With BoostRoom, you can focus on the fun parts (design, theme, showcase zones) while getting help with the grind and the setup:
- Homestead progression and mastery-oriented support so your daily routine tools unlock smoothly
- Efficient resource planning for large décor projects (so you don’t stall mid-build)
- Decoration and layout strategy: how to budget your limit, build modular sets, and iterate safely
- Practical homestead optimization for harvesting routes and daily hub convenience
- Seasonal layout planning so you can swap themes without rebuilding from scratch
If your goal is a homestead that visitors remember—and one you actually enjoy using daily—BoostRoom is the shortcut.
FAQ
How do I start decorating without feeling overwhelmed?
Start with the daily route and one main hub space. When those two feel good, add one showcase zone. Don’t try to decorate the entire map at once.
What’s the biggest mistake new homestead builders make?
Skipping zoning. They place objects everywhere without creating clear areas. The result feels cluttered and confusing even if the individual decorations are nice.
How do I make my homestead look cohesive with limited decorations?
Repeat a small palette: one fence style, one light style, one wood tone, one stone tone, a few plants, and one “hero” centerpiece. Cohesion beats variety.
How do I keep my homestead practical for daily use?
Keep interactables and harvesting areas easy to click, maintain wide paths, and build a “utility spine” that connects your key daily tasks with minimal turning and backtracking.
Why does my build look “off” even when I used nice decorations?
Usually it’s alignment and proportion. Use Move/Rotate/Scale carefully, rely on snap increments for straight structures, and reset pieces that become misaligned.
Should I decorate around harvesting areas or hide them?
Decorate around them. Treat them like infrastructure: give them a quarry/farm/timber-yard theme wrapper and keep click zones clear.
How can I make a small area feel impressive without using many objects?
Use vertical layering and lighting. A three-layer scene (ground, mid, top) with intentional light contrast can look premium with fewer total items.
