Valheim 1.0 Biome and Boss Order
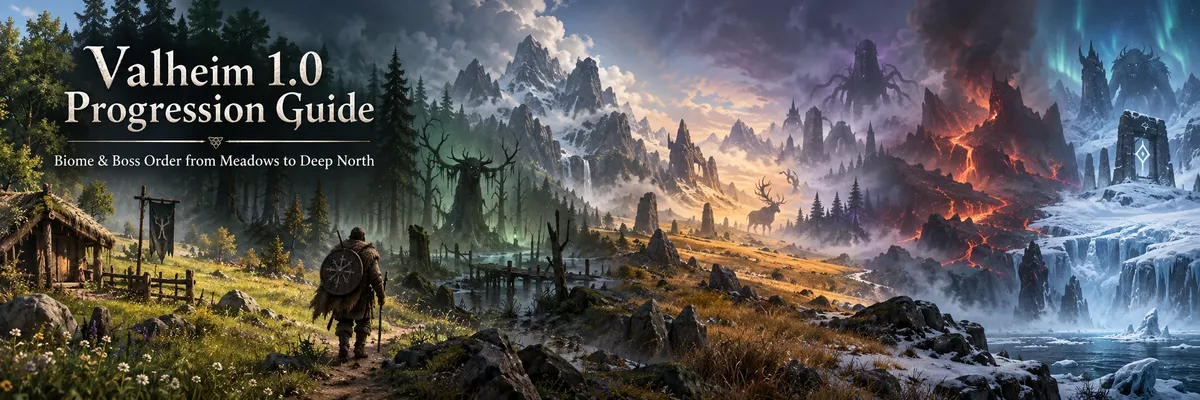
The normal progression path is:
That order is important because Valheim's bosses are more than milestones. Defeating them usually gives you something that makes the next biome's progression practical. Eikthyr provides the material for your first pickaxe, The Elder gives access to Swamp crypts, Bonemass helps uncover Silver, Moder opens advanced crafting, Yagluth enables Mistlands visibility progression, and The Queen unlocks an Artisan Table upgrade required for the Ashlands-bound Drakkar.
You do not need to completely farm every biome before moving forward. A better rule is simple: obtain the key progression resources, upgrade the equipment your build actually uses, establish good food production, defeat the boss, and make sure you can survive the beginning of the next biome without relying on luck.
Meadows Progression – Build the Foundation
The Meadows is where Valheim teaches you its basic survival loop. It looks peaceful, but the decisions you make here affect everything that follows.
Your first objective is not to build a gigantic Viking fortress. You need a functional base that allows you to repair equipment, cook food, sleep, store materials, and prepare for exploration.
What to focus on in the Meadows
Build a practical starter base before worrying about appearance. A Workbench, Bed, Fire, basic cooking setup, storage, and shelter are enough. Your base will expand naturally once metalworking and farming become available.
Collect Wood, Stone, Flint, Leather Scraps, Deer Hide, Feathers, Mushrooms, Raspberries, and any Queen Bees you discover. Hunting Boars and Deer gives you materials for your first meaningful equipment upgrades.
A bow quickly becomes one of the most useful early tools. It makes Deer hunting easier and gives you a safer way to approach dangerous enemies while exploring biome borders.
Your real Meadows progression target is Eikthyr.
Eikthyr – First Boss
Eikthyr is summoned in the Meadows by placing two Deer Trophies at his altar. Defeating him gives you three Hard Antlers, and a Hard Antler can be used to craft the Antler Pickaxe. That pickaxe is the bridge between primitive equipment and Valheim's metal progression.
The fight itself is relatively forgiving. Avoid standing still during his electrical attacks, preserve stamina for dodging, and use either a bow or reliable melee weapon.
The important reward is not simply killing your first boss. It is gaining the ability to mine ore.
Once you can mine Copper and Tin, the Black Forest stops being merely a dangerous neighboring biome and becomes your next progression zone.
When are you ready to leave the Meadows?
Move forward when you have decent early food, a bow or upgraded melee weapon, basic armor, a functional base, Eikthyr defeated, and an Antler Pickaxe.
Do not waste time trying to make your Meadows setup perfect. The Black Forest will unlock equipment that rapidly makes much of your starter gear obsolete.
Black Forest Progression – Enter the Bronze Age
The Black Forest is Valheim's first major difficulty increase. Greydwarfs become common, Trolls can destroy poorly positioned players and buildings, and Burial Chambers introduce dungeon combat.
More importantly, this is where mining, smelting, forging, portals, and Bronze equipment begin changing how you play.
Mine Copper and Tin
Copper deposits appear throughout the Black Forest, while Tin is commonly found near water. Combining processed Copper and Tin at a Forge creates Bronze. Valheim's material progression confirms Bronze as the metal produced from two Copper and one Tin.
Do not automatically craft every Bronze item.
Bronze farming can consume enormous amounts of time. Prioritize upgrades that genuinely improve progression:
A stronger pickaxe helps accelerate mining.
A Bronze Axe opens access to tougher wood types and new crafting options.
A reliable weapon and shield substantially improve dungeon survival.
Bronze armor can help, but fully upgrading an entire set is not mandatory if you are comfortable fighting.
Your objective is to become strong enough for Burial Chambers and The Elder rather than remain in the Bronze Age forever.
Explore Burial Chambers
Burial Chambers contain Surtling Cores, which are essential for early smelting and portal infrastructure.
This is also where you may find Vegvisirs that reveal The Elder's location. Ancient Seeds required for the boss can be obtained from Greydwarf Brutes and Greydwarf Nests.
You need three Ancient Seeds to summon The Elder.
The Elder – Second Boss
The Elder is a huge tree-like Forsaken that uses ranged vines, roots, and close-range attacks.
The arena itself can provide useful cover, but positioning is more important than pure damage. Avoid becoming trapped among summoned roots, keep enough stamina to relocate, and use fire effectively—the Elder is especially vulnerable to it.
Defeating The Elder rewards you with the Swamp Key.
That item is one of Valheim's clearest progression gates because it unlocks Sunken Crypts in the Swamp, where you can obtain the Scrap Iron needed to enter the Iron Age.
Common Black Forest mistake
Do not turn Bronze farming into an endless grind.
Your next biome introduces Iron, and Iron remains useful for an enormous portion of Valheim. Get enough Bronze to comfortably clear The Elder and begin surviving the Swamp, then move forward.
Swamp Progression – Iron Changes Everything
The Swamp punishes habits that worked in the first two biomes.
You are frequently Wet, stamina regeneration becomes more difficult, enemies can poison you, visibility is worse, and wandering into the wrong fight without food or Rested can end an expedition quickly.
Preparation matters far more here than raw aggression.
Use the Swamp Key and farm Iron
Take The Elder's Swamp Key into Sunken Crypts. Once a crypt has been unlocked, that particular entrance does not require the key again. Inside, Muddy Scrap Piles are a major source of Scrap Iron, which can be processed into Iron.
Iron is one of the most valuable progression resources in the entire game.
It enables better weapons, armor, tools, construction pieces, and crafting infrastructure. Unlike Bronze, this is a material worth gathering beyond the absolute minimum because later building and crafting can consume substantial amounts.
Prepare specifically for poison
Do not treat poison as an inconvenience. It is one of the Swamp's defining dangers.
Good food, Poison Resistance Mead, healing options, and disciplined stamina management make a huge difference against Blobs, Oozers, Draugr, and the biome boss.
The Rested buff also becomes increasingly important from this point forward. Entering a hostile biome without Rested means deliberately accepting worse stamina and health regeneration when you need them most.
Bonemass – Third Boss
Bonemass is summoned with 10 Withered Bones at his Swamp altar.
The encounter heavily rewards preparation. Poison protection is extremely useful, while blunt damage performs particularly well against him. Clear dangerous nearby terrain before summoning him so that random Swamp enemies do not turn the boss fight into a larger battle.
Defeating Bonemass rewards the Wishbone.
When equipped, the Wishbone detects hidden objects and is especially important for finding underground Silver veins in the Mountains.
That is your signal to head upward.
Mountains Progression – Silver and Survival in the Cold
The Mountains introduce a new problem before you even fight anything: freezing.
Entering without proper protection causes continuous cold damage, so Frost Resistance Mead is one of the safest ways to begin Mountain exploration. Eventually, Mountain equipment such as the Wolf Fur Cape can provide more convenient protection.
Do not underestimate the terrain either. Wolves can attack while you are climbing, Drakes pressure you from range, and poor stamina management near a cliff can be more dangerous than the enemies.
Use the Wishbone to find Silver
Equip the Wishbone and explore sufficiently high Mountain terrain. Its visual and audio pulses become stronger as you approach hidden deposits.
Silver requires an Iron Pickaxe or better and normally cannot be moved through a regular portal, so think about how you will transport ore before you begin mining a large deposit.
Silver unlocks excellent weapons and armor, including gear that can remain useful well beyond the Mountains.
You also want Mountain food upgrades. At this point in Valheim, entering a boss fight with outdated food becomes increasingly costly because additional maximum health and stamina directly affect how safely you can block, dodge, sprint, climb, and attack.
Moder – Fourth Boss
Moder requires three Dragon Eggs placed at her Mountain altar.
Each Dragon Egg weighs 200 and cannot travel through a normal portal, so plan your transport rather than collecting eggs blindly.
Moder alternates between aerial and ground attacks. A strong bow gives you useful damage opportunities while she is airborne, while melee builds can punish her after she lands.
Defeating Moder drops Dragon Tears. Those Tears allow you to build the Artisan Table, which is necessary for important Plains-era infrastructure such as the Blast Furnace, Windmill, and Spinning Wheel.
The game has now moved beyond simple weapon upgrades. Production infrastructure itself becomes part of progression.
Plains Progression – Black Metal, Farming and Yagluth
The Plains can look deceptively open and calm.
Then a Deathsquito appears.
Enemies here punish undergeared players extremely quickly, and Fuling villages can overwhelm you if you charge into the center without controlling the fight.
This is also where farming becomes critical to progression.
Build your Plains economy
Barley and Flax become important Plains resources.
You will want infrastructure capable of processing them, while Fulings provide Black Metal Scrap. The Blast Furnace unlocked through your post-Moder crafting progression allows Black Metal production.
Do not think only about armor.
Better food often gives a bigger practical survival improvement than one additional gear upgrade. Your ability to sustain health and stamina becomes increasingly important as boss attacks become harder to simply block through.
Collect Fuling Totems
Yagluth requires five Fuling Totems.
These can be found around Fuling settlements and outposts and can also drop from Fuling Berserkers.
Treat villages as combat encounters rather than resource nodes. Pull enemies in manageable groups when possible, remove dangerous ranged targets, and avoid fighting multiple Berserkers while surrounded.
Yagluth – Fifth Boss
Yagluth is a large skeletal Forsaken centered around devastating elemental attacks.
His meteor attack, beam, and area damage make movement and fire protection particularly important. He is resistant to Fire and highly resistant to Pierce, so relying entirely on an old bow-focused setup can make the encounter unnecessarily slow.
Defeating Yagluth gives you Torn Spirits.
A Torn Spirit is used to construct the Wisp Fountain, which produces Wisps. Wisps are fundamental for Mistlands exploration because they support the visibility tools used to push back the biome's thick mist.
This is another example of why Valheim's boss order matters: the next biome can technically be entered early, but exploring it efficiently is a very different story.
Mistlands Progression – Visibility, Eitr and The Queen
Mistlands changes the rhythm of Valheim dramatically.
Limited visibility, vertical terrain, Seekers, Gjalls, Dvergr settlements, and entirely new crafting systems make it feel less like another metal tier and more like a new phase of the game.
The Mistlands update introduced Black Cores, Black Marble, Sap, Refined Eitr, the Black Forge, Galdr Table, Eitr Refinery, magic systems, Sealbreaker Fragments, and The Queen.
Your first priority is controlling the mist
Use Wisps from your Wisp Fountain to support Mistlands exploration.
Being able to see more of the terrain improves combat, navigation, resource gathering, and your ability to avoid falling into dangerous enemy groups.
Mistlands rewards deliberate exploration rather than sprinting blindly across the landscape.
Farm Infested Mines
Infested Mines are central to progression because they can contain Black Cores and Sealbreaker Fragments.
Black Cores power important Mistlands crafting progression, including the Black Forge and Eitr-related infrastructure.
This is also where build diversity expands considerably. Refined Eitr and Mistlands crafting allow players to lean more heavily into magic or continue improving traditional melee and ranged setups.
You do not need to adopt magic simply because it exists. What matters is committing resources to a coherent build rather than crafting every expensive item just because it became available.
The Queen – Sixth Boss
The Queen resides inside an Infested Citadel. The location can be revealed through Vegvisirs found in Infested Mines, while entry requires assembling a Sealbreaker from the fragments obtained during Mistlands exploration.
Unlike many open-arena boss fights, The Queen's confined environment changes how you manage space. Her attacks, summons, and ability to rapidly close distance can punish players who burn all their stamina attacking.
Healing, poison resistance, strong food, and a reliable answer to summoned enemies are extremely valuable.
Defeating The Queen gives Majestic Carapace, which is used to build the Artisan Press.
The Artisan Press upgrades the Artisan Table and unlocks Ceramic Plates. Those plates are part of crafting the Drakkar, the ship required for proper Ashlands progression.
Your next destination is no ordinary shoreline.
Ashlands Progression – Establish a Foothold Before Fighting Fader
Ashlands is designed around sustained combat pressure.
Reaching land is only the beginning. Charred enemies, environmental hazards, lava, dangerous creatures, and large enemy groups mean a badly planned landing can collapse before you have a working portal.
Your first objective should therefore be survival infrastructure, not immediately hunting the boss.
Secure the coast and establish a portal
Once you land, create a defensible position and establish a connection home as soon as it is safe.
Ashlands progression revolves around resources such as Flametal, Grausten, Molten Cores, gemstones, Ashwood, and materials from the biome's enemies. The Stone Portal eventually becomes especially valuable because late-game logistics become much easier once heavy materials can be transported through your portal network. Current progression guides also emphasize Flametal gear and Charred Fortresses as major steps toward Fader.
Ashlands strongly rewards patience.
Running too far inland before establishing retreat points turns a single death into an equipment recovery expedition through one of the game's most hostile regions.
Raid Charred Fortresses
Charred Fortresses are a major Ashlands progression target.
Inside, you can obtain Bell Fragments. Three Bell Fragments craft one Bell at the Black Forge, and three Bells are required to summon Fader—nine fragments in total.
Fortresses should be approached as endgame combat objectives, not casual loot stops. Upgrade your gear, bring strong food and consumables, and secure nearby portal infrastructure before repeatedly attacking them.
Fader – Seventh Boss
Fader is summoned at the Emerald Flame using three Bells.
The fight heavily emphasizes positioning. Fader uses melee attacks, flame breath, meteors, fissures, walls of fire, and other area-denial effects. He is immune to Fire and Spirit damage and resistant to Pierce, while Blunt, Slash, Frost, Lightning, and Poison deal normal damage.
Trying to maintain nonstop damage is a common mistake.
The safer approach is to preserve enough stamina to escape dangerous ground effects, attack during clean openings, and avoid getting trapped by overlapping hazards.
Defeating Fader provides Fader Relics and completes the Ashlands boss progression. In Valheim 1.0, Fader's drop now connects directly into the Deep North progression chain through the Eternal Pyre and Ember system described in current post-launch Deep North guides.
Now the final biome begins.
Deep North Progression – Valheim 1.0 Endgame
The Deep North is the defining new progression content of Valheim 1.0.
Iron Gate officially describes it as the new biome added with full release, accompanied by new weapons, armor, crafting materials, food, creatures, locations, mechanics, and crafting structures.
Unlike several earlier biomes, however, you do not simply find a new ore, craft a stronger weapon, locate a boss altar, and finish.
The Deep North uses a more involved progression chain based on Embers, Winding Tunnels, Frostcores, Bloodgold, moulds, Intricate Keys, Mörkhalla, Jotun Invasions, and Malicious Blood.
Prepare before sailing north
Your first expedition should begin with strong Ashlands-tier equipment, top-quality food, healing supplies, ranged options, building materials, and everything needed for a portal.
One unusually important preparation step is the Eternal Pyre. Current 1.0 Deep North documentation confirms that Fader's drop is used to build it and that the Pyre attracts Embers. Those Embers later become important for Deep North resource processing.
Valheim 1.0 also introduced permanent inventory expansion. Current post-launch documentation identifies Wider Pockets, available after Moder, and Deeper Pockets, available after The Queen. They are optional, but the additional slots are extremely helpful in a biome filled with new crafting resources, moulds, dungeon loot, food ingredients, and progression items.
Find Winding Tunnels
Winding Tunnels are one of your first major Deep North dungeon objectives.
They contain important progression materials including Frostcores and moulds, with Intricate Key moulds eventually becoming essential for the next dungeon tier.
Do not leave useful moulds behind simply because you cannot immediately process them.
Deep North progression is interconnected, and materials that look optional during your first expedition may become the exact gate blocking your next upgrade.
Begin Bloodgold progression
Bloodgold is not simply mined as a normal ore vein.
Current 1.0 guides describe a chain involving Gammeltrolls, their petrified remains, Ember Charges, and processing the resulting Petrified Tissue into Bloodgold.
This is where that earlier Eternal Pyre preparation begins paying off.
The larger lesson is important: do not approach the Deep North like the Black Forest or Mountains. Its crafting resources unlock through several connected mechanics, so farming the correct progression material is often more valuable than simply killing every creature you encounter.
Craft Intricate Keys and enter Mörkhalla
Your next major objective is the Intricate Key.
Post-launch Valheim 1.0 progression documentation identifies a full endgame requirement of three Intricate Keys. Each ultimately consumes a key mould and Bloodgold, meaning players should plan their farming around more than one dungeon run.
Each key opens a Mörkhalla dungeon.
Inside Mörkhalla, your critical target is Malicious Ice.
Destroying it triggers a Jotun Invasion elsewhere in the world. Travel to that invasion, fight through the attackers, destroy the invasion's central Malicious Ice, and you receive one Malicious Blood.
You need three Malicious Blood.
That means the important Deep North loop must be completed enough times to obtain all three.
Reach the Aesir Passage
Mörkhalla can also provide the Vegvisir revealing the Aesir Passage.
Once all three Malicious Blood are collected, travel there and offer them at the Strange Bowl. This opens access to the final encounter and Valheim 1.0's eighth boss.
Before crossing that point, repair everything.
Bring your strongest Deep North equipment, your best food combination, healing and stamina support, a fresh Rested buff, and weapons appropriate for the encounter.
You have reached the end of the full biome progression.
Kall Fimbulbringer – Final Boss of Valheim 1.0
Kall Fimbulbringer is the eighth Forsaken and the final boss of the Deep North progression.
Getting to him is arguably as important as the fight itself because the Deep North forces you through its crafting, dungeon, invasion, and Malicious Blood systems first.
This is not a boss designed for a player who merely sailed north in upgraded Ashlands armor and found the correct altar.
Prepare for more than raw damage
Current post-launch guides describe Kall as a multi-stage encounter with significant resistance to several elemental and ranged damage types. Blunt and Slash damage are among the safer offensive choices for reliable damage.
Your priorities should be:
Use upgraded Deep North equipment. The biome exists to prepare you for its finale; skipping its gear progression gives away much of the advantage you spent the entire game building.
Bring multiple strong food options. Health matters, but stamina is equally important because movement, blocking, attacking, and recovering from bad positioning all compete for the same resource.
Carry recovery consumables. A boss attempt can last much longer than a normal encounter, and having another heal available can matter more than squeezing out one additional attack.
Understand that survival is progression. Every unnecessary death risks equipment recovery and interrupts momentum. Valheim rewards players who recognize an unsafe damage window and disengage.
Defeating Kall completes the main Meadows-to-Deep-North progression line introduced with Valheim 1.0.
The Biggest Valheim Progression Mistakes
Getting stronger in Valheim is not only about knowing which boss comes next. Most stalled playthroughs are caused by preparation mistakes rather than an inability to defeat enemies.
Rushing directly into the next biome
Entering a biome and being ready to progress through it are completely different things.
You can wander into the Mountains without defeating Bonemass. You can enter Mistlands before killing Yagluth. You can travel toward the Deep North as soon as you feel brave enough.
That does not mean those routes are efficient.
Boss rewards deliberately reduce friction in the following biome. Skipping them generally forces you to invent more difficult alternatives to mechanics the game intended you to unlock normally.
Ignoring food progression
Players often focus entirely on armor ratings and weapon damage.
That is a mistake.
Health determines how safely you can survive major hits and blocks. Stamina determines how often you can attack, dodge, sprint, jump, climb, mine, and escape.
Whenever you enter a new biome, investigate its food resources almost as seriously as its weapon recipes.
Losing the Rested buff
The further you progress, the more damaging poor stamina regeneration becomes.
A simple portal back to a comfortable base can transform an expedition. Repair your equipment, refresh Rested, empty your inventory, restock food, and return.
There is very little value in continuing deep into dangerous territory simply because you are already there.
Crafting every weapon
New recipes are exciting, but resources become expensive.
Pick weapons that complement your preferred damage type and playstyle. Upgrade a smaller number of useful items rather than keeping six under-upgraded weapons in a chest.
The exception is when a boss or biome strongly punishes your current damage type. Valheim deliberately rewards players who understand resistances.
Ignoring portal infrastructure
Good portal placement turns Valheim from a repeated corpse-running simulator into an exploration game.
Whenever you enter a serious new area, think about how you will return if everything goes wrong.
Late-game progression makes logistics even more important because Ashlands and Deep North excursions can involve expensive equipment and long-distance travel.
Should You Start a New World for Valheim 1.0?
You do not have to.
Iron Gate confirms that older saves continue working with Valheim 1.0. However, new terrain and structures are generated correctly only in areas that had not already been explored. The developers therefore recommend starting a fresh world for the complete 1.0 experience.
The same rule has historically applied to major Valheim biome updates: previously explored terrain is intentionally protected so an update does not suddenly overwrite player builds.
For a returning player with an advanced world, continuing your existing character can still be perfectly reasonable—especially if the far northern areas of the map remain unexplored.
For someone who wants to experience Valheim 1.0 as a complete game, however, the Meadows-to-Deep-North journey works extremely well as a fresh progression run.
Valheim 1.0 Progression FAQ
What is the correct Valheim biome order?
The main order is Meadows → Black Forest → Swamp → Mountains → Plains → Mistlands → Ashlands → Deep North. The boss order follows Eikthyr → The Elder → Bonemass → Moder → Yagluth → The Queen → Fader → Kall Fimbulbringer.
Who is the final boss in Valheim 1.0?
Kall Fimbulbringer is the Deep North Forsaken and eighth main boss in the current Valheim 1.0 progression.
Can you skip bosses in Valheim?
You can explore many areas before killing their preceding boss, but several bosses provide progression items that make the next biome practical. Skipping them can prevent or complicate access to important resources, crafting structures, visibility mechanics, dungeons, or transportation.
What comes after Fader?
After defeating Fader in the Ashlands, your main progression moves into the Deep North. The 1.0 Deep North progression involves Winding Tunnels, Frostcores, Bloodgold, crafting moulds and Intricate Keys, Mörkhalla, Jotun Invasions, Malicious Blood, the Aesir Passage, and eventually Kall Fimbulbringer.
How many bosses are in the main Valheim 1.0 progression?
There are eight main Forsaken bosses in the full Meadows-to-Deep-North route: Eikthyr, The Elder, Bonemass, Moder, Yagluth, The Queen, Fader, and Kall Fimbulbringer.
Do I need three Malicious Blood for Kall Fimbulbringer?
Yes. Current 1.0 documentation confirms that you need three Malicious Blood at the Strange Bowl to open the Aesir Passage leading toward the final encounter. Each Malicious Blood is earned through the Mörkhalla and Jotun Invasion progression chain.
Should I fully upgrade gear before every boss?
Not necessarily.
Full upgrades can make bosses easier, but farming every possible upgrade can add a huge amount of unnecessary resource grinding. Prioritize your main weapon, defensive setup, current food tier, important utility gear, and enough armor to survive mistakes.
Late-game biomes such as Ashlands and Deep North justify more preparation because the punishment for arriving undergeared becomes much higher.
Conclusion
Valheim 1.0 turns what began as a simple survival journey through the Meadows into a complete eight-biome adventure.
The progression has a clear rhythm: survive a biome, understand its resources, improve your crafting, strengthen your food and equipment, defeat its Forsaken, and use the resulting unlock to tackle what comes next.
Eikthyr opens mining. The Elder opens the Swamp's crypt progression. Bonemass guides you toward Silver. Moder expands advanced crafting. Yagluth helps you pierce the Mistlands. The Queen provides the crafting progression needed to reach Ashlands. Fader connects into the new Deep North resource chain. And the Deep North finally brings everything together for the journey toward Kall Fimbulbringer.
The biggest mistake is treating Valheim like a race between bosses. The farming, crafting, food, portals, preparation, and resource economy between those encounters are the progression.
Take the right resources from each biome, build around what actually helps your character, and every new region becomes much more manageable.
For players who want help progressing through difficult bosses, farming stages, or other Valheim content, BoostRoom can also be used as a starting point for Valheim services as they become available.



