How Valheim Boss Progression Works
Valheim gives players plenty of freedom to explore, but the boss order is closely connected to progression.
Defeating a Forsaken usually unlocks an item, crafting system, key, or resource that makes the next biome practical. Eikthyr gives you your first mining tool. The Elder opens Sunken Crypts. Bonemass leads you toward Silver. Yagluth enables reliable Mistlands exploration. The Queen opens the crafting route required for Ashlands progression, and Fader's drop feeds directly into Deep North systems.
You can enter some later biomes early, but skipping bosses often means deliberately giving up the tools the game provides to deal with those environments.
Prepare Before Every Boss Fight
Good preparation usually matters more than perfect combat.
Before summoning a boss:
Refresh Rested.
Stamina and health regeneration matter in every prolonged encounter. Entering without Rested makes mistakes much harder to recover from.
Repair everything.
Do not discover halfway through the fight that your main weapon is almost broken.
Eat proper biome-tier food.
A common melee setup uses two health-focused foods and one stamina food, while magic builds need enough Eitr to support their spells.
Bring the correct resistance.
Poison resistance fundamentally changes Bonemass. Frost resistance matters against Moder. Fire protection is extremely valuable for Yagluth and Fader.
Clear the surrounding area.
A boss is much harder when regular biome enemies join the encounter.
Build a recovery portal once portals are available.
Place it far enough from the arena that the boss is unlikely to destroy it.
These are the same broad preparation principles recommended by current 1.0 boss documentation.
1. Eikthyr – Meadows Boss
Eikthyr is the first Forsaken and the introduction to Valheim's boss system.
He has only 500 HP, but defeating him is extremely important because his Hard Antlers allow you to enter normal ore progression.
How to Find and Summon Eikthyr
You need two Deer Trophies.
The Vegvisir beside the starting Sacrificial Stones can mark an Eikthyr altar on your map. Hunt Deer in the Meadows until you have two trophies, then place them at the altar.
Good early equipment includes:
Flint Spear or another upgraded Flint weapon
Wood Shield
Crude Bow
Leather armor if available
Cooked meat and other strong Meadows food
You do not need to spend hours upgrading everything before this encounter.
How to Beat Eikthyr
Eikthyr primarily teaches you to react to telegraphed attacks.
He uses:
a close-range antler attack,
a ranged lightning attack,
an electrical area burst around himself.
Keep stamina available instead of attacking continuously.
Block or dodge his physical attack, strike while he recovers, and create distance when he prepares the larger electrical burst.
A bow also works well if you prefer ranged combat. Circle him and shoot between attacks instead of permanently sprinting.
The biggest beginner mistake is spending all stamina attacking and then having nothing available for a dodge.
Eikthyr Rewards
Defeating Eikthyr gives you Hard Antlers, which craft the Antler Pickaxe and open Copper and Tin mining.
His current Forsaken Power reduces stamina consumption for running, jumping, and swimming by 60%.
That remains useful throughout the entire game for exploration and travel.
2. The Elder – Black Forest Boss
The Elder is the second boss and the first encounter where arena positioning becomes particularly important.
He has 2,500 HP and is fought in the Black Forest.
How to Summon The Elder
Burn three Ancient Seeds at The Elder's altar.
Vegvisirs inside Burial Chambers and some Black Forest structures can reveal the altar. Ancient Seeds can be collected from Greydwarf-related enemies and nests.
Recommended preparation includes:
How to Beat The Elder
Fire is especially effective against The Elder.
His arena contains stone pillars that are excellent cover against his long-range vine attack. Current boss guides recommend moving from pillar to pillar while firing between volleys.
His main threats are:
Ranged vine barrage.
Get behind a pillar rather than attempting to outrun every projectile.
Summoned roots.
These appear around your position and attack locally. Move away instead of wasting time killing every root.
Close-range stomp.
Do not assume a ranged boss is harmless when you move close.
The roots themselves are weak to Fire and disappear after a short duration or when The Elder dies.
Movement is the real solution to this fight.
Shoot from cover, relocate when roots appear, and avoid dragging the battle far enough into the surrounding forest that Trolls or large Greydwarf groups join.
The Elder Rewards
The Elder drops the Swamp Key, which unlocks Sunken Crypts and therefore your main route to Scrap Iron.
His current Forsaken Power provides:
+60% chopping damage
+60% pickaxe damage
+30% health regeneration
This makes The Elder's power especially useful during major resource-farming sessions.
3. Bonemass – Swamp Boss
Bonemass is where many first playthroughs hit their first serious wall.
He has 5,000 HP, constantly pressures you with Poison, and strongly punishes poor weapon selection.
How to Summon Bonemass
Offer 10 Withered Bones at his Swamp altar.
Withered Bones can be found while exploring Sunken Crypts, which also contain Vegvisirs capable of revealing Bonemass's location.
Bring:
How to Beat Bonemass
Use Blunt damage.
Bonemass is weak to Blunt and Frost, resistant to Slash, very resistant to Pierce and Fire, and immune to Poison.
At this stage, the Iron Mace is therefore one of the most practical answers.
His main mechanics are:
Poison cloud.
The large vomit attack fills the nearby area with Poison. Current game data puts it at 130 Poison damage and notes that the cloud cannot simply be blocked. Poison Resistance Mead is extremely valuable.
Melee punch.
Block, parry if your equipment supports it safely, or dodge before counterattacking.
Enemy summon.
Bonemass throws a glob that can produce Skeletons or Blobs. Clear them before the arena becomes crowded.
Do not stand in his poison cloud trying to win a damage race.
Move out, recover stamina, eliminate additional enemies, then return.
Bonemass Rewards
Bonemass drops the Wishbone.
Equip it in the Mountains to detect buried Silver and other hidden objects.
His current power gives 25% resistance to Blunt, Slash, and Pierce, removes block stamina cost, and restores stamina when you block.
This remains one of the most broadly useful combat-oriented Forsaken Powers later in the game.
4. Moder – Mountains Boss
Moder moves the boss system into a mixture of aerial and ground combat.
She has 7,500 HP and requires considerably more logistical preparation than earlier bosses.
How to Summon Moder
You need three Dragon Eggs.
Vegvisirs in Mountain structures can reveal her altar. Dragon Eggs are found around Drake nests.
The complication is weight.
Each Egg weighs 200, making transporting all three an expedition rather than a normal inventory run.
Prepare with:
How to Beat Moder
Moder alternates between airborne attacks and grounded combat.
While flying, she launches Frost projectiles across the arena. When grounded, she gains access to bites, claw attacks, and a powerful frost breath.
Do not chase her constantly while she flies.
Instead:
move laterally when the projectile barrage begins,
use terrain for cover,
fire when you have a clean ranged opportunity,
save stamina for repositioning.
When Moder lands:
attack from the side when possible,
avoid standing directly in front of her breath,
use short damage windows,
move again when she turns.
Moder is weak to Fire and immune to Frost and Spirit damage.
That makes Fire Arrows especially useful during the aerial portions.
Moder Rewards
Moder drops Dragon Tears, which allow you to construct the Artisan Table and continue into Plains crafting infrastructure.
Her current Forsaken Power provides:
It is an excellent exploration, hauling, and sailing power.
5. Yagluth – Plains Boss
Yagluth has 10,000 HP and turns the Plains boss fight into a test of elemental defense and movement.
How to Summon Yagluth
You need five Fuling Totems.
Totems are obtained primarily from Fuling settlements, while Yagluth's Vegvisir can be found around certain Plains stone formations. His altar itself resembles a huge stone hand rising from the ground.
Prepare with:
How to Beat Yagluth
Fire resistance is one of the most important preparations for this fight.
Yagluth's main attacks include:
His meteor attack is particularly dangerous because several impacts can overlap.
When you see the telegraph:
Move immediately instead of trying to finish another combo.
His beam tracks more slowly than a player can move, so strafe sideways rather than retreating directly backward.
When the close-range explosion begins, create space and wait for the danger window to end.
Yagluth is very resistant to Pierce, resistant to Fire, and immune to Poison. Blunt and Slash deal normal damage.
That is why relying entirely on a bow can turn a manageable battle into a very long one.
Yagluth Rewards
Yagluth drops Torn Spirits, which are required for the Wisp Fountain. Wisps become central to navigating the dense mist of the Mistlands.
His current Forsaken Power gives:
50% Lightning resistance
+25 Farming skill
+10% damage dealt
The damage bonus gives this power obvious value when preparing for later bosses.
6. The Queen – Mistlands Boss
The Queen changes how boss access works.
Instead of finding an outdoor altar and offering ordinary trophies, you must unlock her Infested Citadel.
She has 12,500 HP.
How to Find and Access The Queen
Search Infested Mines for:
The nine fragments combine into the Sealbreaker used to open the Infested Citadel.
The first encounter does not require an additional summoning sacrifice once you open the Citadel.
For a rematch, current game data lists three Seeker Soldier Trophies at the hive seat above the arena.
How to Beat The Queen
The Queen fight happens inside the Citadel and is much more confined than earlier encounters.
Her major threats include:
Control her adds before they control the room.
This is one of the most important rules of the fight.
Ignoring Seeker Broods and additional enemies might increase your boss DPS for a few seconds, but it quickly destroys the safe movement space you need.
Useful approaches include:
Melee: Carapace equipment and a strong Slash weapon such as Mistwalker.
Area damage: excellent for clearing smaller enemies.
Magic: Mistlands Eitr builds can perform very well because they provide both ranged pressure and area control.
Poison Resistance: strongly recommended.
The Queen resists Pierce, so relying exclusively on conventional arrows is inefficient.
Attack after she commits to an animation, then reposition before the next charge or add wave.
The Queen Rewards
The Queen drops Majestic Carapace, used to create the Artisan Press and advance the crafting chain needed for Ashlands progression.
Her current Forsaken Power gives:
Magic-focused players benefit especially strongly from it.
7. Fader – Ashlands Boss
Fader represents the end of Ashlands progression and is the final hurdle before the Deep North systems become fully accessible.
He has 25,000 HP, making him dramatically more durable than the bosses before him.
How to Summon Fader
Your main objective is Charred Fortresses.
Vegvisirs can be found in their central towers, while the fortresses also provide the Bell Fragments needed for summoning.
You need:
Prepare thoroughly before activating them.
How to Beat Fader
Fader combines huge physical hits with heavy area denial.
His attacks include:
Watch the ground as much as you watch Fader.
The fissures are telegraphed before they erupt. Continuing a melee combo while standing on an incoming eruption is one of the fastest ways to lose control of the encounter.
Fader:
Fire weapons are therefore a poor primary choice against him even though you are fighting in the Ashlands.
Fire Resistance remains very useful defensively.
Keep Your Damage Windows Short
Fader punishes greed.
A safer rhythm is:
avoid his attack,
move away from dangerous ground,
take a short damage window,
restore stamina,
reposition.
Do not chase DPS while the arena is becoming unsafe.
The longer the battle lasts, the more valuable consistent survival becomes.
Fader Rewards
Fader currently drops his trophy and five Kindled Ribs. Kindled Ribs are the visible in-game material associated with the internal FaderDrop item and are used to build an Eternal Pyre, which is important for Deep North progression.
His Forsaken Power provides:
After Fader, your main progression moves north.
8. Kall Fimbulbringer – Deep North Final Boss
Kall Fimbulbringer is the eighth Forsaken and the final main boss of Valheim 1.0.
His encounter is fundamentally different from everything before it because it consists of three phases.
Current game data calculates 52,800 effective HP that players must remove:
You may also see a 47,000 HP figure in some guides. That comes from counting Kall's immune Phase 2 body rather than the health of the seven Aspects players actually have to kill. For practical combat planning, 52,800 is the more useful number.
How to Summon Kall Fimbulbringer
Kall waits beyond an Aesir Passage in the Deep North.
You need three Malicious Blood.
Obtaining them requires Deep North progression:
Enter Mörkhalla.
Destroy its Black/Malicious Ice objective.
Trigger a Jotun Invasion elsewhere in the world.
Travel to the invasion.
Destroy its central Black Ice Core.
Receive one Malicious Blood.
Repeat until you have three.
Offer all three at the bowl inside the Aesir Passage to begin the final encounter.
This is much more involved than collecting five Totems or three Eggs, so treat the entire Deep North progression chain as part of preparing for Kall.
Best Damage Types Against Kall
Use Blunt or Slash.
Kall:
A bow or crossbow can still have situational uses during Phase 2, but it should not be the foundation of your damage against Kall himself.
Phase 1 – Learn the Chains
Phase 1 introduces Kall's core chain attacks.
His kit includes:
Do not try to burst the first phase.
Use it to learn the timing.
Kall's chains reach much farther than ordinary melee attacks, so backing away is not always enough. Lateral movement and well-timed dodges are extremely important.
Attack after a committed chain animation, then reset.
Phase 2 – Kill the Seven Forsaken Aspects
At this point, Kall becomes immune.
Instead, you must defeat spectral Aspects based on the seven bosses you already defeated:
Lightning Stag
Living Forest
Writhing Dead
Dragon Mother
Twisted Soul
Crawling Matriarch
Emerald Flame
Together, they represent 12,800 HP of combat.
Do not continue attacking Kall.
Your damage will not matter until the Aspects are gone.
Instead, focus targets and reduce the number of active enemies.
The Aspects retain different weaknesses. For example, the Living Forest Aspect is highly vulnerable to Fire, while the Dragon Mother Aspect is also weak to Fire and immune to Frost.
This phase deliberately rewards everything you learned from earlier bosses.
Phase 3 – Survive the Endurance Fight
The final Kall phase has 30,000 HP by itself.
His upgraded arsenal includes:
This phase is where stamina discipline matters most.
Never spend your final stamina on another attack.
You need enough available to:
Kall regenerates health over time like other creatures, but dying because you became impatient usually costs far more progress than temporarily disengaging.
Kall Rewards
Kall drops:
Sacrificial Blood
Crown Jewel
Sacrificial Blood connects to Valheim 1.0's finale, while the Crown Jewel is used in the Crown of Valheim crafting route.
Kall is also unusual because he does not grant another Forsaken Power.
The boss chain ends with him.
Which Forsaken Power Is Best for Boss Fights?
Valheim's powers were significantly reworked before 1.0, so older guides can contain outdated values. Current powers include broader effects than many players remember.
For boss combat, several are especially relevant.
Bonemass Power
Excellent when physical survivability is the priority.
The physical resistance and improved blocking make it a strong general defensive option against many later encounters.
Yagluth Power
Excellent when you want additional offensive pressure.
Its current version gives +10% damage alongside Lightning resistance and Farming skill.
Fader Power
Strong in high-pressure late-game combat.
Fire resistance, faster Adrenaline generation, and reduced stagger buildup all have practical combat applications.
There is no universal answer because the best power depends on your build and the boss you are fighting.
Common Mistakes When Fighting Valheim Bosses
The same errors repeatedly cause deaths across multiple bosses.
Using the Same Weapon for Every Boss
Damage type matters.
Bonemass rewards Blunt. Moder is weak to Fire. Yagluth strongly punishes Pierce. Fader ignores Fire. Kall resists several elemental types.
Crafting one strong weapon does not mean it remains optimal for every Forsaken.
Ignoring Resistance Mead
Resistance consumables often provide more practical survivability than another small armor upgrade.
Important examples include:
Poison Resistance for Bonemass and The Queen
Frost protection against Moder
Fire Resistance for Yagluth and Fader
Fire and Frost protection for Kall's later phase
Use them before the damage arrives.
Entering Without Rested
Later fights are long.
Reduced regeneration turns a small mistake into a chain of problems because your stamina never recovers quickly enough to regain control.
Getting Greedy at Low Boss Health
This kills experienced players constantly.
The boss reaches 5%.
You stop following the strategy that worked for the previous 95%.
You use the last of your stamina trying to finish it.
The boss attacks.
You die.
The fight is not over until the boss actually falls.
Forgetting the Arena
Clear enemies and inspect the terrain before summoning.
A safe arena means:
fewer random enemies,
cleaner movement,
better visibility,
easier corpse recovery.
This becomes especially important against Bonemass, Moder, Yagluth, and Fader.
Valheim 1.0 Boss FAQ
How many main bosses are in Valheim 1.0?
There are eight main Forsaken bosses in the complete progression: Eikthyr, The Elder, Bonemass, Moder, Yagluth, The Queen, Fader, and Kall Fimbulbringer. Current 1.0 achievements also include individual achievements for defeating all eight.
What is the correct Valheim boss order?
The standard progression is Eikthyr → The Elder → Bonemass → Moder → Yagluth → The Queen → Fader → Kall Fimbulbringer.
Who is the final boss in Valheim 1.0?
Kall Fimbulbringer is the Deep North Forsaken and the eighth main boss in the live 1.0 build.
Can you fight Valheim bosses out of order?
Valheim allows considerable freedom, so you can reach many biomes early. However, boss drops often unlock the intended tools and systems for the next stage, so skipping several bosses usually makes progression significantly harder.
Can bosses be summoned more than once?
Yes. Most can be summoned again by providing their offering again. The Queen works differently: after the initial Sealbreaker entry, a rematch uses three Seeker Soldier Trophies. Another Kall attempt requires another three Malicious Blood.
What is the hardest Valheim boss?
Difficulty depends strongly on build, player count, preparation, and experience. In raw encounter scale, Kall is the largest main boss fight in the current version, requiring 52,800 effective damage across three phases compared with Fader's 25,000 HP.
What boss comes after Fader?
Kall Fimbulbringer comes after Fader. Before you can fight him, you must progress through the Deep North, including Mörkhalla and Jotun Invasions, to acquire three Malicious Blood.
Does Kall give a Forsaken Power?
No. Kall is the only main Forsaken in the current boss chain that does not provide a new Forsaken Power.
What boss should I prepare for the most?
Preparation becomes increasingly important from Bonemass onward. Bonemass punishes missing Poison Resistance, Moder requires cold preparation and Egg transport, The Queen demands Mistlands dungeon progression, Fader requires Ashlands fortress clears, and Kall is locked behind the entire Deep North endgame chain.
Conclusion
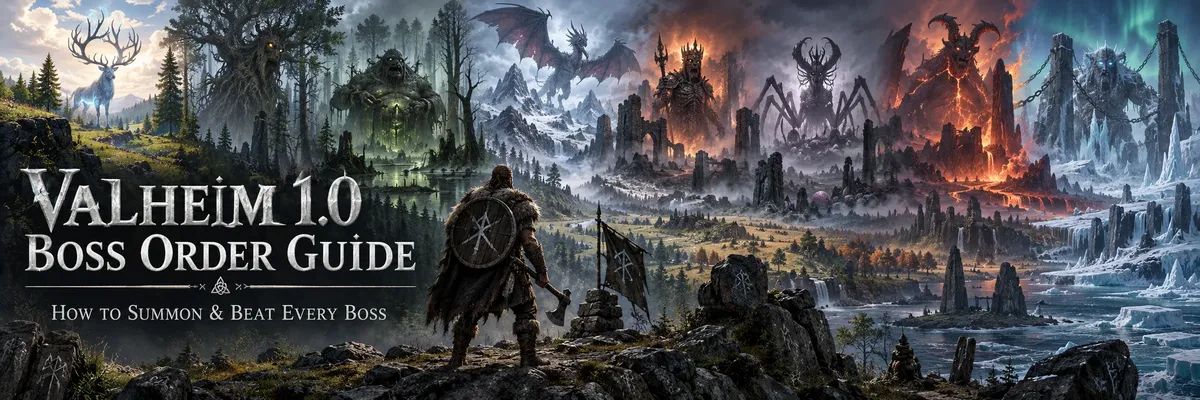
Valheim 1.0 now has a complete boss journey stretching from a lightning stag in the peaceful Meadows to a three-phase final battle in the frozen Deep North.
The progression is straightforward to remember:
Eikthyr → The Elder → Bonemass → Moder → Yagluth → The Queen → Fader → Kall Fimbulbringer.
But knowing the names in order is only the beginning.
Each Forsaken tests a different part of Valheim.
Eikthyr teaches stamina and dodging. The Elder teaches positioning. Bonemass forces you to understand resistance and damage types. Moder introduces aerial pressure and environmental preparation. Yagluth turns elemental defense into a requirement. The Queen demands add control and flexible builds. Fader tests movement inside an increasingly dangerous arena. Kall then combines years of progression into a final three-stage endurance battle.
The most reliable way to beat every boss is therefore not grinding every equipment piece to maximum level.
It is understanding what the encounter wants from you.
Bring the right damage type. Use the correct resistance. Maintain Rested. Eat proper food. Protect your stamina. Clear the arena. Create a recovery route. And when a boss gives you a safe damage window, take it without becoming greedy.
Master those fundamentals and the entire boss line becomes considerably more manageable—from the first two Deer Trophies in the Meadows to the final three Malicious Blood in the Deep North.
For players looking for help with boss encounters, progression, farming, or other Valheim content, BoostRoom can be used to explore available Valheim services.



