How Horde Siege Works in Gears of War: E-Day
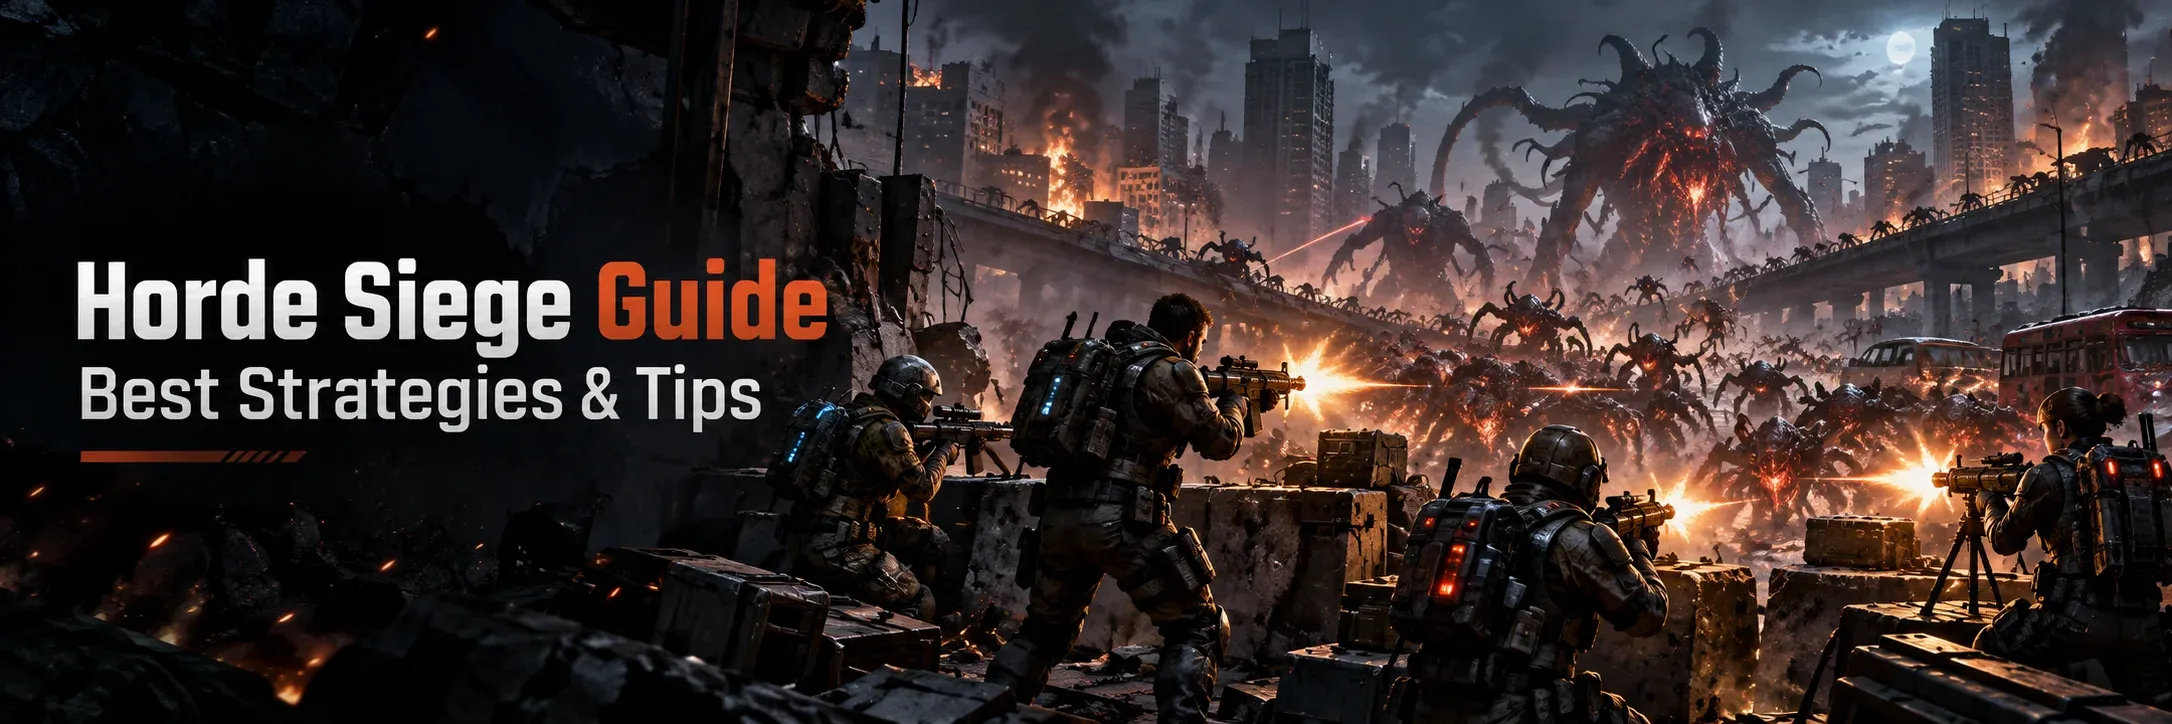
Horde Siege is a cooperative PvE mode featuring 12 players divided into three squads of four.
Unlike traditional Horde, where players typically defend a fixed position against waves of enemies, E-Day introduces a larger battlefield with separate squad missions, changing objectives, optional activities, and major encounters involving multiple teams.
Each squad operates within the same shared battlefield across the city of Kalona.
However, all three squads don't necessarily receive the same objectives.
Your immediate squad has its own mission to complete, but you can encounter other teams, help them defeat powerful enemies, and benefit from fortifications or equipment they leave behind.
This creates a much more unpredictable experience.
You might begin by defending a COG scanning device, move through several blocks to repair another objective, and suddenly find yourself helping another squad fight a gigantic Locust threat.
Eventually, your squad must reach its extraction point and escape aboard a Raven.
The most important rule is simple: at least one member of your squad must successfully extract to complete the mission and retain the Weapon Parts collected during that run.
That means successful progression requires much more than defeating enemies.
The Four Pillars of Successful Horde Siege Runs
Complete the main objectives.
Every mission has specific objectives that determine how your squad progresses. Ignoring them to chase eliminations can leave your team overwhelmed or unable to advance.
Keep your squad alive.
Death can lead to lost Squad Lives and failed missions. Revives, positioning, and protecting weakened teammates become increasingly important on higher difficulties.
Manage Energy intelligently.
Energy allows your squad to purchase equipment, improve defensive positions, and activate useful upgrades. Spending it carelessly can leave you underprepared when dangerous enemies appear.
Prepare for extraction.
Surviving the main mission isn't the final victory. You still need to clear the landing zone, survive the final enemy pressure, and board the Raven.
The strongest squads balance all four priorities instead of focusing exclusively on damage.
Best Horde Siege Mode for Your Squad
Horde Siege offers three primary mission playlists: Blitz, Siege, and Horde.
They share many fundamental mechanics, but each creates a different challenge.
Blitz – Best for Learning the Fundamentals
Blitz features shorter missions built around one or two primary objectives.
It's an excellent place to learn the basics of Horde Siege without committing to the larger mission structure found in Siege.
You can practice class abilities, familiarize yourself with Supply Caches, and learn how the extraction process works.
Best Blitz strategy:
Prioritize objectives over unnecessary fights. With fewer objectives to complete, your team should maintain a clear focus instead of scattering across the map looking for additional eliminations.
Experiment with your class ability. Learn the effective range, positioning, and cooldown behavior of your Tactical Gear before attempting more punishing missions.
Practice extraction discipline. Treat the Raven landing zone seriously, even when the enemies feel manageable.
Blitz is particularly useful for players learning an unfamiliar class.
However, shorter missions aren't automatically the most efficient source of every reward. Success rate, difficulty, and the rewards available in a particular run all matter.
Siege – Best for Objective-Based Teamplay
Siege is the main objective-driven experience.
Your squad moves between different areas of the battlefield, completes multiple objectives, encounters optional activities, and reacts to changing threats.
This playlist rewards flexibility.
A successful squad needs enough damage to eliminate dangerous enemies, enough survivability to withstand unexpected attacks, and sufficient coordination to complete objectives efficiently.
Best Siege strategy: Build a versatile squad that can move between defense, attack, and support roles without becoming dependent on a single fighting position.
Siege is also a good environment for learning how your squad interacts with other teams.
Horde – Best for Defensive Survival Challenges
The Horde playlist focuses on defending a single R.I.G. through 10 increasingly difficult waves.
This is closer to the classic Horde experience, although it uses E-Day's updated combat systems.
You have fewer opportunities to solve problems simply by relocating to another objective.
Instead, positioning, defensive equipment, ammunition management, and coordination become extremely important.
Best Horde strategy: Establish overlapping firing lanes, protect your defensive equipment, and avoid spending valuable resources on threats that can be handled with ordinary gunfire.
Players who enjoy defensive combat will feel comfortable here.
However, higher difficulty Horde missions can become extremely punishing if your squad lacks damage or healing.
Best Horde Siege Classes and Squad Composition
There are four launch classes in Horde Siege:
Assault, Breacher, Marksman, and Medic.
Each class has a unique starting loadout, combat bonus, and Tactical Gear ability.
The Coalition allows flexible combinations, so you don't have to bring exactly one of every class.
However, a balanced squad is one of the safest choices for difficult missions.
Assault – Best for Versatile Damage and Objective Defense
Assault focuses on mid-range weapons and dependable combat performance.
Its signature ability is the Sonic Disruptor, which can stun incoming enemies.
The class also receives bonus damage while fighting from cover.
This makes Assault particularly valuable when protecting R.I.G.s or controlling enemy approaches.
How to play Assault effectively:
Use cover as your primary fighting position. Your damage bonus encourages disciplined combat rather than constantly rushing into exposed areas.
Save Sonic Disruptor for dangerous pushes. Stunning a group of enemies before they overwhelm an objective can provide more value than using the ability on an isolated target.
Support your team's most vulnerable position. Assault performs well as a flexible defender who can help the Medic, protect a Marksman, or reinforce a collapsing firing lane.
Assault is an excellent choice for players who prefer straightforward rifle combat and consistent team utility.
Breacher – Best for Close-Range Survival and Aggression
Breacher specializes in close-range fighting.
Its Adrenaline Injector restores health and reduces incoming damage, creating opportunities for aggressive plays.
The class also receives improved resistance to status effects and melee damage.
Breacher can be extremely useful when your squad needs someone to push into a dangerous area or rescue a teammate under pressure.
However, close-range fighting becomes riskier as enemy difficulty increases.
How to play Breacher effectively:
Attack isolated threats rather than charging entire groups. Your survivability tools are powerful, but they don't make you invincible.
Use Adrenaline Injector deliberately. Activate it when preparing for a dangerous engagement or recovering from heavy pressure, rather than wasting it while already safe.
Always maintain an escape route. A successful push should end with your character returning to cover or a defensible position.
The biggest Breacher mistake is confusing aggression with reckless movement.
A disciplined Breacher creates space for teammates.
A reckless Breacher creates additional rescue missions.
Marksman – Best for Precision Damage and Target Identification
Marksman specializes in ranged precision.
Its Pulse Drone can tag Locust enemies, helping your entire squad identify important targets.
Marksman also receives increased critical-hit damage.
This makes the class particularly useful against dangerous enemies that should be eliminated before they reach your defensive position.
How to play Marksman effectively:
Prioritize high-threat enemies. Focus on enemies that can seriously damage your squad or disrupt an objective rather than competing for ordinary eliminations.
Use Pulse Drone to support teammates. Enemy identification is valuable because everyone benefits from knowing where the biggest threats are located.
Choose positions with visibility and protection. An elevated position may offer a useful sightline, but it becomes dangerous if enemies can approach from multiple directions.
Marksman is particularly attractive for players with accurate aim.
Its performance depends on identifying valuable targets and consistently connecting critical hits.
Medic – Best for Keeping the Squad Alive
Medic provides one of the most valuable abilities in Horde Siege.
Its Stim Vaporizer can heal and revive nearby soldiers, including downed players belonging to other squads.
The class also benefits from faster health regeneration.
A good Medic can prevent difficult situations from turning into full squad wipes.
However, playing Medic involves much more than activating healing whenever someone takes damage.
How to play Medic effectively:
Stay close enough to support teammates. You need to reach wounded players without exposing yourself to unnecessary danger.
Avoid becoming the first player eliminated. Losing your Medic during a difficult wave removes a major source of team recovery.
Position before using Stim Vaporizer. Try to reach multiple teammates when possible instead of wasting the ability on a poorly positioned rescue.
Watch other squads during major events. Your healing ability can help players beyond your immediate four-person team.
For unfamiliar groups, Medic is one of the safest classes to include because preventing a wipe is often more valuable than dealing slightly more damage.
Recommended Four-Player Squad
For general-purpose missions, we recommend:
1 Assault: Handles mid-range combat and helps control enemy pushes.
1 Breacher: Clears dangerous close-range threats and creates space during contested objectives.
1 Marksman: Identifies and eliminates priority enemies.
1 Medic: Provides healing, revives, and additional squad survivability.
This composition covers most common combat situations.
However, it isn't an official best-in-slot setup.
Some encounters may favor additional damage, while experienced teams might replace Breacher with another Marksman or bring a second Medic for stronger recovery.
The important thing is understanding what your squad needs rather than blindly following a fixed composition.
How to Complete Every Horde Siege Objective
Most Horde Siege missions revolve around R.I.G.s, short for Resonation Imaging Geographer.
These devices were originally developed to locate underground Imulsion deposits and are repurposed to map Locust tunnels.
Your squad must secure, repair, calibrate, or protect them depending on the objective.
There are five primary objective types.
Secure – Capture Enemy-Controlled Areas
Secure requires your squad to push into an area occupied by Locust forces and drive them out.
The main challenge is approaching without getting surrounded.
Best strategy:
Identify the strongest enemy position before attacking. Entering an area without checking where enemies are firing from can expose your entire team.
Advance using available cover. Let your frontline players move forward while teammates maintain supporting fire.
Clear immediate threats before becoming fully committed to the objective. A few enemies left behind can quickly disrupt the capture attempt.
Don't split into four completely separate attack routes.
A coordinated push is generally safer than having every player fight independently.
Calibrate – Defend Multiple Control Zones
Calibrate requires players to defend a series of zones around a R.I.G.
The biggest challenge is keeping control of the correct locations while Locust forces attack.
Best strategy:
Identify the active zone immediately. Avoid spending valuable time defending an area that is no longer relevant to the objective.
Create overlapping firing angles. One player should be able to cover an approach that another teammate cannot easily see.
Use Sonic Disruptor against dangerous pushes. Stunning enemies can provide breathing room when your squad is losing control.
Avoid fighting so far away from the calibration area that you cannot return when pressure increases.
Repair – Recover Missing R.I.G. Components
Repair objectives require your squad to collect scattered components and reinstall them.
This introduces movement and carrying responsibilities during combat.
Best strategy:
Assign a player to handle the component. Make sure the rest of the team understands who is responsible for completing the interaction.
Protect the carrier. Players transporting or installing components should not be forced to fight every nearby enemy alone.
Clear dangerous approaches before interacting. Rushing toward an objective while enemies control the surrounding area can cause unnecessary deaths.
The goal is to maintain steady progress without repeatedly exposing players to the same threats.
Defend – Protect an Active R.I.G.
Defend objectives require your team to protect a R.I.G. while its mapping sequence progresses.
This is where positioning becomes especially important.
Best strategy:
Defend the approaches, not just the device itself. Stopping enemies before they reach the R.I.G. gives your squad more time to react.
Avoid grouping everyone behind the same cover. A concentrated squad can become vulnerable to explosive attacks and flanking enemies.
Use defensive equipment where it has a clear purpose. Sentries and other tools work best when covering dangerous approach routes.
Don't abandon the R.I.G. to chase an enemy that is already retreating.
Protecting the objective is more important than collecting every elimination.
Horde – Survive Ten Defensive Waves
Horde objectives challenge your squad to survive 10 waves while protecting a single R.I.G.
The increasing pressure rewards careful resource decisions.
Best strategy:
Establish reliable firing lanes. Each player should understand which approach they are covering.
Prepare for enemies that break your defensive formation. Fast melee attackers and heavily armored enemies can force immediate changes in positioning.
Preserve specialist ammunition for dangerous targets. Using every explosive round against ordinary enemies can leave your team underprepared.
Maintain access to supplies and escape routes. A defensive position becomes dangerous when players have no safe way to recover.
The most effective defensive setup isn't necessarily the one with the most equipment.
It's the one that lets your squad respond when the Locust change their attack.
Best Energy Management Strategies
Energy is one of the most important resources in Horde Siege.
Your squad earns it by completing objectives and defeating enemies.
Energy is collected into a shared squad pool, but individual players make spending decisions.
That creates a major teamwork challenge.
One player might want a better weapon, another might need equipment, and someone else may believe the squad should improve its defenses.
All three choices can be useful.
The problem is spending without considering what the squad needs.
Understand Supply Caches
Supply Caches allow players to purchase various equipment and upgrades.
Available options depend on your class and progression.
Purchases can include weapons, grenades, defensive equipment, and Squad Perk upgrades.
Importantly, grenades and defensive equipment share an inventory slot.
That means choosing a sentry or decoy affects your available offensive equipment options.
Always check what you're sacrificing when changing your equipment.
Prioritize Useful Purchases
There isn't one perfect spending order for every mission, but these principles help.
Fix immediate weaknesses first.
If your squad consistently struggles against enemies approaching from a certain direction, consider purchasing defensive equipment that addresses that problem.
Invest in equipment you can actually use.
An expensive weapon isn't valuable when it doesn't fit your role or the available combat space. Choose purchases that improve your contribution.
Upgrade Squad Perks when they benefit the team's current needs.
Shared buffs can offer useful advantages during a mission. However, you should consider whether the upgrade is more important than immediate survival equipment.
Avoid unnecessary spending before major encounters.
Keeping some flexibility can be valuable when a dangerous event forces your squad to change strategy.
The key is communication.
Before making an expensive purchase, check whether another player has a more urgent need.
Use Turrets Intelligently
Horde Siege allows players to purchase and upgrade turret installations at specific defensive locations.
These can provide powerful support when placed along useful enemy approaches.
Turrets can also be detached and carried as Heavy Weapons.
This adds flexibility but also creates an important decision.
Do you keep the turret installed to protect an area, or remove it to bring additional firepower somewhere else?
If your squad is defending a fixed objective, maintaining a useful turret position may be more valuable.
If you're moving to another objective or preparing for a major encounter, a detachable heavy weapon can become an attractive option.
Always consider what the team loses when removing a defensive installation.
How to Farm Weapon Parts and Upgrade Your Gear
Weapon Parts are an important progression resource because they allow you to purchase unlocked Weapon Mods.
Unlike Energy, which supports your immediate mission, Weapon Parts contribute to longer-term customization.
However, collecting Weapon Parts doesn't guarantee you'll keep them.
At least one squad member must extract successfully.
This changes how you should approach farming.
Complete Secondary Objectives
Secondary Objectives offer additional opportunities to earn rewards.
Confirmed examples include:
Defusing Locust explosives. These tasks provide optional rewards while requiring your squad to deal with a dangerous battlefield threat.
Eliminating High Value Targets. Dangerous enemies can offer worthwhile rewards, but they may also consume substantial ammunition or threaten weaker players.
Collecting COG intel. These objectives reward exploration and teamwork beyond the main defensive mission.
Delivering Power Cores. Some tasks involve bringing a Power Core to another squad's R.I.G. to provide support during an encounter.
Secondary Objectives can provide Weapon Parts, free equipment, and Squad Perks.
However, you shouldn't automatically attempt every optional objective.
If your squad is badly damaged, has limited ammunition, or is close to losing its remaining Squad Lives, survival may be more important than additional rewards.
Look for COG Resupplies
COG Resupplies provide free battlefield resources.
There are three confirmed types.
Supply Drops: Offer free equipment and modded weapons. These can help your squad replace weak equipment without spending Energy.
Perk Caches: Contain three Squad Perks. The best perk goes to the first squad that interacts with the cache, making coordination valuable.
Weapon Part Stockpiles: Provide Weapon Parts but require cooperation with other squads to obtain their rewards.
These opportunities can improve your progression considerably.
However, they come with a warning.
COG Resupplies attract Locust enemies.
Approaching one without preparing for additional fighting can leave your team in a dangerous position.
Secure the surroundings, communicate your intentions, and avoid having all four players become vulnerable during the interaction.
Prioritize Successful Extractions
The best Weapon Parts farming method isn't necessarily the most difficult mission.
It's the strategy that produces useful rewards while maintaining a strong completion rate.
A failed high-difficulty attempt can be less productive than a successful lower-difficulty run.
If your squad repeatedly loses before extraction, reduce the difficulty, improve your class build, or reconsider which optional encounters are worth attempting.
Don't sacrifice a valuable collection of Weapon Parts chasing one final unnecessary fight.
How Class Progression and Weapon Mods Work
Each of the four launch classes has 30 progression levels.
Advancing a class unlocks additional equipment, weapons, Armor Mods, Tactical Gear Mods, and Weapon Mods.
Certain class milestones also provide increased base health and damage.
This makes class progression important for more than unlocking cosmetic rewards.
A higher-level class can have a meaningful advantage when tackling difficult missions.
Armor Mods – Improve Your Soldier
Armor Mods adjust your character's combat capabilities.
Their effects can include improved health, increased ammunition reserves, faster weapon swapping, and benefits linked to executions.
These modifications are especially useful when they reinforce your class role.
For example, a close-range Breacher may value survivability, while a player using ammunition-intensive weapons may benefit from additional reserves.
Avoid choosing an upgrade simply because its effect sounds impressive.
Consider whether it solves a problem you regularly experience.
Tactical Gear Mods – Improve Your Class Ability
Tactical Gear Mods improve your signature class equipment.
Depending on the modification, they can reduce cooldowns, increase effective range, or provide additional effects.
These upgrades are valuable because class abilities can influence entire encounters.
A better-positioned Medic ability or more reliable defensive tool may have a greater impact than a small increase in individual damage.
Prioritize abilities that your playstyle uses consistently.
Weapon Mods – Customize Your Firepower
Weapon Mods alter the behavior or functionality of your weapons.
Some improve existing characteristics, while others introduce more substantial changes.
For example, Horde Siege supports modifications that can add a bayonet to the Gnasher.
Weapon Mods must first be unlocked through class progression and then purchased with Weapon Parts.
A useful detail is that weapon customization is shared across Horde Siege classes.
If you modify a Prototype Lancer, those modifications remain associated with that weapon when another class uses it.
This makes upgrades to weapons you use across multiple classes especially attractive.
The smartest approach is to invest in equipment you consistently rely on instead of purchasing every available modification immediately.
How to Survive Locust Bosses and Invasion Events
Invasion Events are among the most dangerous parts of Horde Siege.
They involve powerful Locust threats that affect all three squads on the battlefield.
Confirmed examples include the Corpser and Brumak.
These events are important because they can introduce temporary modifiers that affect the entire map.
Some modifiers can block extraction or disable Supply Caches.
Ignoring the event may therefore prevent your squad from completing its mission safely.
Best Strategy for Invasion Events
Check the event modifier immediately.
Before deciding whether to continue your current objective, determine how the event affects your squad. Losing access to Supply Caches is a different problem from having extraction temporarily blocked.
Coordinate with other squads.
Large enemies are designed to encourage cooperation. A boss that feels overwhelming for one squad may become much more manageable when multiple squads contribute damage and support.
Eliminate supporting enemies.
Focusing exclusively on the boss can allow ordinary Locust to overwhelm your position. Assign some attention to nearby threats while teammates attack the primary target.
Maintain space to retreat.
Large bosses can punish players trapped against walls or environmental obstacles. Keep enough room to reposition when attacks force you out of cover.
Protect support players.
Medics and precision-focused teammates can provide significant value during difficult encounters. Don't allow them to become isolated while everyone else chases the boss.
Participating squads receive a share of the event rewards.
However, it is still important to evaluate whether your squad can contribute safely.
How to Handle a Brumak
The Brumak is an enormous Locust threat capable of overwhelming poorly positioned teams.
The most important consideration is battlefield control.
Avoid clustering where its attacks can pressure multiple teammates at once.
Use available cover while maintaining enough freedom to move when the boss changes position.
Coordinate heavy firepower and concentrate on vulnerable areas when they are exposed.
A Marksman can help identify important targets, while Assault and Breacher players contribute damage and control surrounding enemies.
Your Medic should remain close enough to support the group without becoming trapped in the most dangerous part of the fight.
Don't assume that a single campaign-specific Brumak tactic applies to every Horde Siege encounter.
Follow the attack patterns and objective conditions in the mission you're actually playing.
How to Handle a Corpser
The Corpser creates a different challenge because of its intimidating size and movement.
Your squad needs to maintain awareness of both the boss and nearby enemies.
Avoid standing directly in dangerous approach routes.
Reposition when the Corpser pressures your current location rather than remaining behind cover that no longer protects you.
If other squads are participating, coordinate your attacks instead of spreading damage across unrelated threats.
A safe, coordinated fight is usually more valuable than attempting a risky damage race.
Watch for Dangerous Enemy Combinations
Regular Locust can be just as dangerous as bosses when their abilities overlap.
Important threats include:
Armored Wretches: Their scream can disorient players and limit actions. Prevent them from reaching vulnerable teammates, especially during close-range objective defense.
Boomers: These durable enemies can dominate important positions. Concentrate damage instead of letting them pressure the squad indefinitely. At low health, they can become eligible for a Lancer chainsaw execution.
Seeders: These require a different approach from ordinary enemies. Players must get close enough to provoke the Seeder out of its protected position, exposing its vulnerable head.
Reavers: These enemies can transport Drones or remain on the battlefield as dangerous mobile threats. Their ability to attack from elevated positions makes them particularly disruptive to static defenses.
Elite Drones: Stronger loadouts and more advanced tactics make certain Drone variants much more dangerous than basic infantry. Avoid assuming every Drone can be handled with the same amount of pressure.
The biggest mistake is allowing several dangerous enemies to attack freely while your team focuses on a single target.
Target prioritization wins difficult fights.
Understand Poisons and Mission Modifiers
Horde Siege introduces mechanics that make enemies more dangerous as missions progress.
Two of the most important are Poisons and Mission Modifiers.
Poisons – Increasing Enemy Strength
Poisons return as a difficulty mechanic.
Whenever your squad completes a boss wave within its main objectives, the Locust enemies you face become stronger.
Their health and damage increase.
Importantly, Poisons are squad-specific.
Your squad's increased enemy strength doesn't automatically mean that every other team on the map has identical scaling.
This creates an interesting tactical decision.
Should you immediately continue progressing through the main mission, or complete a useful Secondary Objective to obtain better equipment and Squad Perks first?
There is no universal answer.
If your team is already struggling, improving your combat effectiveness before the next major fight may be sensible.
If your squad is strong and well-equipped, unnecessary detours can create additional risks.
Mission Modifiers – Adapt Your Combat Strategy
Mission Modifiers introduce special combat conditions.
Officially described examples include:
Perfect Active Reload restrictions. Some modifiers demand more accurate reload timing. Players who depend on careless reload habits may struggle significantly.
Health regeneration only while in cover. This increases the importance of defensible positions and discourages prolonged exposure.
Exploding enemies. Enemies that explode upon death create additional positioning hazards, especially when several are eliminated nearby.
Always check active modifiers.
A strategy that works normally can become much more dangerous when special conditions change the rules.
For example, close-range aggression becomes riskier when defeated enemies explode.
Adapt your positioning and equipment instead of assuming your usual build will handle every modifier equally well.
Best Survival Strategies for Higher Difficulties
Horde Siege's difficulty system is tied to class progression.
The game recommends challenges based on your current class level.
The confirmed advanced difficulty recommendations are:
Infantry: Recommended for classes between levels 10 and 20.
Commander: Recommended for classes between levels 20 and 30.
Allfather: Recommended for classes at the maximum level.
These are recommendations rather than absolute guarantees of success.
Player skill, coordination, equipment, and encounter difficulty still matter.
Don't Rush Higher Difficulties
Higher difficulties offer greater rewards, but failed missions can destroy your farming efficiency.
If your class lacks important upgrades or your squad consistently struggles to survive, improve your build before increasing the challenge.
This is especially important because class milestones provide improvements beyond simple equipment unlocks.
Surviving and extracting consistently is more productive than repeatedly failing content your squad isn't ready to complete.
Maintain Overlapping Fields of Fire
Each teammate should cover a useful part of the battlefield.
You don't need everyone firing at the same ordinary enemy.
Instead, position your squad so that players can help each other when threats approach.
A Marksman covering a long street becomes much safer when an Assault player can protect a nearby entrance.
A Medic can provide valuable support when positioned behind the main fighting line rather than directly in front of it.
Avoid Dangerous Clustering
Standing together can make revives and healing easier, but excessive clustering creates vulnerabilities.
Explosive enemies and powerful attacks can punish several players simultaneously.
Spread enough to reduce that danger while maintaining supporting distance.
The goal is controlled spacing, not complete separation.
Use Movement to Recover Position
E-Day introduces more flexible movement with sprinting, sliding, climbing, and expanded cover interactions.
These mechanics are useful when an enemy breaks through your position.
Sliding toward cover can help you avoid prolonged exposure, while climbing provides opportunities to change elevation.
However, movement doesn't eliminate the importance of planning.
Rushing into another exposed area simply replaces one dangerous position with another.
Move toward a safer position, not just away from your current one.
Manage Your Downs Counter
E-Day features a Downs Counter that helps indicate how many additional downs you can sustain before progressing directly to death.
This is particularly important in Horde Siege.
A player who has already been downed repeatedly shouldn't continue taking the same risks.
Adjust your positioning, allow teammates to cover dangerous approaches, and prioritize survival.
Keeping four soldiers active is usually more valuable than allowing one player to repeatedly trade their life for a few eliminations.
How Revives, COG Tags, and Squad Lives Work
Death in Horde Siege does not always mean you're permanently out of the mission.
When a player is killed, they drop COG tags.
Squadmates can recover those tags and deliver them to a Supply Cache to revive the player.
There is also an important cross-squad mechanic.
A player belonging to another squad can collect your COG tags and immediately revive you.
That makes helping other teams valuable for reasons beyond additional damage.
Best COG Tag Recovery Strategy
Check the surrounding enemies before retrieving tags.
A player running directly into enemy fire may turn one death into two. Clear the immediate danger or create an opportunity to approach safely.
Protect whoever is carrying the tags.
Recovering tags is only useful when your teammate can reach the appropriate Supply Cache.
Coordinate with nearby squads.
Cross-squad assistance can provide faster recovery in situations where your own squad is struggling.
Avoid sacrificing everyone for one recovery.
If retrieving the tags would almost certainly eliminate the remaining team, preserving squad survival may be the better decision.
If your entire squad dies, a Squad Life is consumed.
Running out of Squad Lives results in mission failure, although partial XP can still be awarded.
That makes avoiding full squad wipes an essential objective.
A good Medic, sensible positioning, and coordinated recoveries can prevent difficult missions from collapsing.
Best Extraction Strategies – How to Escape Successfully
Extraction is one of the most important parts of Horde Siege.
After completing the main objectives, your squad must clear a landing zone and survive until the Raven arrives.
You then need to board the helicopter before it leaves.
At least one squad member must escape to complete the mission and preserve collected Weapon Parts.
However, relying on a desperate final survivor should be your emergency backup, not your preferred strategy.
Clear the Landing Zone Carefully
Don't rush into the extraction area without checking nearby enemies.
Identify useful cover and eliminate the threats most likely to disrupt your escape.
Players with precision weapons can help remove dangerous distant targets.
Close-range specialists should protect approaches where enemies could rush the squad.
Protect Your Most Vulnerable Teammates
When the landing zone becomes crowded, weaker or wounded players can be eliminated quickly.
Use your Medic's ability when it provides meaningful protection or recovery.
Assault players can help control dangerous enemy pushes with Sonic Disruptor.
Avoid moving so far from teammates that nobody can help if you are downed.
Keep a Route to the Raven
A position that offers excellent defensive cover isn't useful if it leaves you unable to reach extraction.
Stay aware of your movement options as the final encounter develops.
Don't trap the entire squad behind environmental obstacles or defensive equipment.
As the Raven becomes available, prioritize the actual escape condition rather than continuing to chase enemies.
Make Sure Someone Boards
This is the most important extraction rule.
If your entire squad remains outside the Raven and the extraction opportunity ends, you can fail despite completing the previous objectives.
When teammates are at risk, having one available player secure extraction may be the safest option.
Don't sacrifice the run attempting to achieve a perfect four-player escape when a successful mission completion is already within reach.
A completed extraction protects your progression.
Common Horde Siege Mistakes to Avoid
Many failed missions come from avoidable decisions rather than a lack of shooting skill.
These are the biggest mistakes to watch for.
Ignoring the mission objective.
Eliminating enemies does not automatically complete a Secure, Repair, Calibrate, or Defend objective. Pay attention to what the mission actually requires.
Spending Energy without coordination.
Because Energy is shared, careless purchases can prevent teammates from obtaining equipment they urgently need.
Choosing difficulty based only on confidence.
Class level, equipment, and team composition matter. Starting a challenge above your squad's capabilities can make success unnecessarily difficult.
Ignoring Invasion Events.
Powerful enemies can introduce map-wide modifiers, including disabled Supply Caches or blocked extraction. Check the effect before deciding to ignore the event.
Chasing optional rewards while the team is collapsing.
Weapon Parts only help your long-term progression when you successfully extract. Don't gamble the entire mission on rewards your squad may never retain.
Using Tactical Gear without considering teammates.
A poorly positioned heal or stun wastes an opportunity to protect several players. Use class abilities where they can meaningfully affect the fight.
Separating too far from your squad.
Individual exploration can leave teammates exposed and make recoveries difficult. Maintain enough proximity to support one another.
Forgetting about enemy modifiers.
Exploding enemies, health regeneration restrictions, and stronger Locust can completely change which tactics are safe.
Failing to protect extraction.
Completing every main objective means little if nobody boards the Raven. Keep the final escape condition in mind.
Fixing these mistakes can improve your consistency more than simply switching to a stronger weapon.
Advanced Horde Siege Tips for Experienced Players
Once you understand the fundamentals, the biggest improvements come from coordinating your squad's decisions.
Assign Responsibilities Without Becoming Rigid
A balanced squad benefits from having clear responsibilities.
For example, your Marksman might focus on dangerous ranged enemies while your Assault protects the objective.
However, these assignments should remain flexible.
When the Medic needs help, another player should immediately provide support.
When a dangerous boss appears, the squad may need to abandon its usual firing positions.
Good teamwork means knowing your role while still responding to changing threats.
Use Other Squads as a Tactical Advantage
Horde Siege's shared battlefield offers opportunities unavailable in older Horde formats.
You can encounter another squad during an active mission, help them defeat an Invasion boss, or find equipment they previously left behind.
Use these opportunities intelligently.
Helping another squad recover can keep more players fighting against map-wide threats.
However, don't abandon your own mission without considering its current risks.
Make Secondary Objectives Worth the Risk
Optional objectives are valuable because they can provide Weapon Parts, equipment, and Squad Perks.
But every detour introduces potential danger.
Before pursuing one, consider your current survivability, ammunition, available Squad Lives, and remaining mission requirements.
If your team has plenty of resources and control over the battlefield, an optional objective may be worthwhile.
If the squad is struggling, preserving a successful extraction may provide greater long-term value.
Learn When to Disengage
Not every fight needs to end with every enemy eliminated immediately.
Sometimes your squad's best option is to reposition, recover health, reload, and attack from a better angle.
This is especially important when several dangerous enemy types attack together.
Fighting from a poor position simply because you started the encounter there is a common mistake.
Retreating to stronger cover is a tactical decision, not a failure.
Prioritize Consistency Over Highlight Plays
Spectacular executions and aggressive flanks can be satisfying, but repeated successful extractions depend on reliable decisions.
The best Horde Siege player isn't necessarily the person with the highest elimination count.
Sometimes it's the Medic who prevents a wipe.
Sometimes it's the Assault player who stuns an enemy group before it reaches the R.I.G.
And sometimes it's the final surviving Gear who reaches the Raven with the squad's Weapon Parts.
Horde Siege rewards players who understand when the mission matters more than personal statistics.
Gears of War: E-Day Horde Siege FAQ
What Is Horde Siege in Gears of War: E-Day?
Horde Siege is a cooperative PvE mode featuring 12 players divided into three four-person squads. Teams complete objectives, fight Locust enemies, participate in major battlefield events, and attempt to extract successfully.
How Many Players Can Play Horde Siege?
Horde Siege supports 12 players on the same battlefield.
Players are organized into three squads of four, each with its own mission responsibilities.
What Is the Best Class for Horde Siege?
Medic is an excellent choice for teams that need reliable healing and revives.
Assault is a versatile alternative, while Marksman provides precision damage and Breacher specializes in aggressive close-range combat.
The strongest class depends on your squad composition and playstyle.
What Is the Best Horde Siege Squad Composition?
A balanced setup with one Assault, one Breacher, one Marksman, and one Medic is a strong starting point.
However, experienced groups can adjust this composition based on the difficulty, objective, and available builds.
How Do You Get Weapon Parts?
Weapon Parts can be obtained through class progression, Secondary Objectives, and activities such as Weapon Part Stockpiles.
To keep Weapon Parts collected during a mission, at least one member of your squad must successfully extract.
What Happens If Your Squad Fails Extraction?
If your squad fails to complete the mission, Weapon Parts collected during that run are not retained.
Mission failure can still provide partial XP, but successful extraction is essential for protecting collected Weapon Parts.
What Is the Maximum Horde Siege Class Level?
Each of the four launch classes has a maximum class level of 30.
Leveling unlocks additional equipment and modifications, while certain milestones increase your base combat capabilities.
What Is the Hardest Horde Siege Difficulty?
Allfather is the highest of the officially described advanced difficulty levels.
It is recommended for max-level classes and remains highly challenging even for experienced players.
Can You Revive Players From Other Squads?
Yes.
Medic's Stim Vaporizer can heal and revive nearby soldiers from other squads.
Players can also collect COG tags from members of another squad to revive them immediately.
What Are Poisons in Horde Siege?
Poisons are difficulty modifiers that increase enemy health and damage after your squad completes boss waves in its main objectives.
They affect each squad separately rather than applying identical scaling to all three teams.
Can You Customize Weapons in Horde Siege?
Yes.
Weapon Mods can change weapon characteristics and functionality.
They are unlocked through class progression and purchased using Weapon Parts.
Weapon customization is shared across Horde Siege classes when they use the same weapon.
Is Horde Siege Better Than Classic Horde?
That depends on what you enjoy.
Horde Siege offers larger maps, objective-based missions, multiple squads, and extraction mechanics.
Players who prefer traditional defensive survival can choose the Horde playlist, which focuses on surviving 10 waves while protecting a single R.I.G.
Conclusion – How to Master Gears of War: E-Day Horde Siege
Gears of War: E-Day Horde Siege is much more than surviving another wave of Locust enemies.
It's about understanding objectives, making intelligent resource decisions, supporting your squad, and adapting when the battlefield becomes unpredictable.
The most effective approach starts with choosing a class that fits your role.
Learn how to use your Tactical Gear, understand the different R.I.G. objectives, and coordinate Energy spending so your squad always has the equipment it needs.
As you progress, focus on improving your class, purchasing useful Weapon Mods, and completing optional objectives when the rewards justify the risk.
On higher difficulties, remember that survival matters just as much as damage. Use cover, prioritize dangerous enemies, support nearby squads during major events, and never underestimate the importance of a successful extraction.
The best Horde Siege squads aren't the ones that fire the most bullets. They're the ones that make the right decisions when everything starts going wrong.
Master those fundamentals, and you'll be much better prepared to survive Kalona's toughest battles.
For players looking for additional gaming services and support, explore BoostRoom.



