🧭 TL;DR Route (Bookmark This)
- 00:00–00:10 — Settings & keybinds, starter class & build, tutorial skips done right.
- 00:10–00:30 — Zone 1 path: main story hubs only; grab 3 fast side quests that overlap.
- 00:30–01:00 — Early gear check, weapon choice, first dungeon unlock; claim Starmap materials.
- 01:00–01:30 — Spend first Starmap points, unlock mobility + sustain; pick talent row 1.
- 01:30–02:00 — Farm a quick event, do the “free power” checklist (consumables, crafting basics), and finish with a repeatable daily loop.
Tip: If you’re ever short on time, focus story → Starmap → talent → dungeon in that order. When in doubt, story quests push the most systems forward the fastest.
🖥️ Pre-Game Setup: FPS, UI, and Keybinds
A smooth two hours beats a stuttery four. Spend a few minutes up front and the whole session feels better.
Graphics & FPS
- Cap FPS slightly under your monitor max (e.g., 117 on a 120Hz panel) for stable frame pacing.
- Shadows/Reflections: Medium is the sweet spot early; High costs frames and won’t help you aim.
- View Distance: Bump this one step above default; spotting elite patrols sooner saves wipes.
- Motion Blur: Off.
- V-Sync: Off (unless tearing drives you nuts).
- FOV: Set high enough to see flanks without fisheye—usually +10 over default.
UI & Combat Readability
- Turn on floating damage for learning breakpoints, but hide tiny ticks (clutter).
- Drag buff/debuff trays close to center; you want eyes near your crosshair/character.
- Enable cooldown text on abilities.
Keybinds You’ll Actually Use
- Primary/Secondary on mouse 1/2 (obvious).
- Mobility on a thumb button (MB4/MB5) or a close key like E.
- Interrupt on Q (fast reaction).
- Health potion on R (or mouse wheel click).
- Starmap/Character on Tab (quick check mid-run).
- Ping on Middle Mouse (duo/party lifesaver).
Controller Setup (If You Play on Pad)
- Turn on Aim Assist Slowdown only; magnetism can throw you off on burst builds.
- Put Dodge on B/O and Interact on X/□; bind Potion to D-Pad Down.
- Remap Ultimate to LB+RB/L1+R1 (default is fine, but make sure it’s comfy).
🧙 Choosing Your Starter Class & Early Build
You can make everything work, but the first two hours shine with forgiving kits. Pick one:
Guardian (Tanky Bruiser)
- Why: Hard to kill, smooth leveling, simple rotations.
- Core Loop: Gap close → core combo → block/mitigate → repeat.
- Stat Priorities: Health, Armor, then Power.
- New Player Win: Lets you learn boss telegraphs without exploding.
Archer (Mobile Ranged)
- Why: Great single-target early, kite-friendly.
- Core Loop: Mark → burst shot → roll → repeat; weave in slow traps.
- Stat Priorities: Power, Crit, then Stamina.
- New Player Win: Easiest bossing feel in the first dungeon.
Battle Mage (Spellblade Hybrid)
- Why: Fun AoE with a self-heal if specced right.
- Core Loop: Apply burn → dash through packs → detonate → sustain tick.
- Stat Priorities: Power, Mana Regen, then Health.
- New Player Win: Early AoE clears side quests quickly.
Don’t overthink it. If you like melee, go Guardian. If you want ranged, Archer is perfect. If you want a flashier, AoE-leaning start, choose Battle Mage.

📜 00:00–00:10 — Tutorial That Actually Helps
Loot everything in the tutorial but don’t craft yet. Tutorials love to bait you into crafting with awful mats. You want to leave with:
- A weapon in your main stat,
- 3–5 potions,
- and a Starmap Fragment (guaranteed when you clear the mini-boss).
Mini-Boss Tips
- Guardian: Block the heavy swing (blue flash), punish afterward.
- Archer: Drop slow, roll the leap, burst while it recovers.
- Battle Mage: Dash through to get behind, apply Burn, step out of ground swirls.
Dialogue Choices: Always pick the “learn about Starmap” line. It unlocks the early node tutorial later without extra backtracking.
🗺️ 00:10–00:30 — Zone 1 Route (Fast Leveling Path)
You’ll spawn at Camp Waystone (starter hub). Here’s the route:
- Camp Waystone → South Gate
- Grab Main Quest and the side quest “Clear the Thicket” (kill 8 vines—free).
- On your way, open two roadside caches (random potions, Starmap dust).
- South Gate → Overlook Ridge
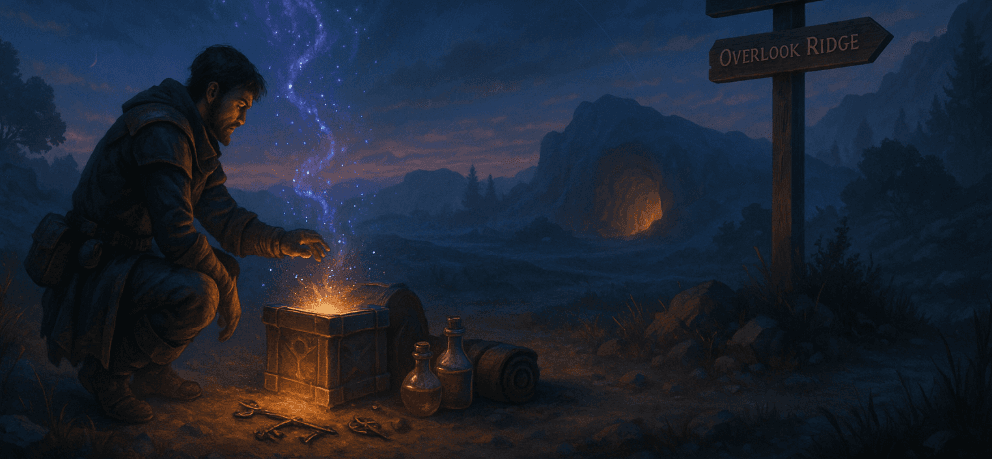
- Main quest wants 3 markers. The middle marker sits by a mini-event spawner. Wait 30 seconds and complete it for +1 potion, +1 Starmap dust.
- Overlook Ridge → Shallow Grotto
- Side quest “Waterlogged Tools” is 100% on the direct path; loot in the first cave pocket.
- Watch for the elite burrower—kite left or block the pop-up slam.
- Grotto Exit → Back to Camp Waystone
- Turn in main + two sides together.
- Level bump plus early Accessory reward—pick +Stamina if you’re ranged, +Health if melee.
Don’t detour for shiny markers. Your first 20 minutes are about unlocking systems, not 100%ing a map.
🗡️ 00:30–01:00 — Early Gear, First Dungeon, and Power Spikes
Weapon Check (Very Important)
- If your weapon isn’t your main stat, buy the Vendor Basic (cheap) that matches your class.
- Guardian: sword + board > two-hander at first (survivability trumps speed).
- Archer: shortbow for faster shots until you can handle longbow charge timing.
- Battle Mage: the spellblade with Mana Regen if available.
Crafting? Not yet. Save mats. You’ll unlock a +Power recipe after your first dungeon.
Dungeon Unlock: Emberlight Tunnels
- Requirements: finish Camp Waystone Chapter 1 (you did), grab the key from South Gate.
- Route Inside:
- Tunnel 1: Hug right wall, skip the optional worm nest.
- Central Cavern: Kill the Broodcaller first (spawns adds).
- Boss: The Ember Mound—watch for triple spit pattern, then burst the exposed core.
Boss Cheat Sheet
- Guardian: Hold block for spit volley 1–2, dodge the 3rd; taunt adds on spawn; burst during core expose.
- Archer: Use slow trap before expose; never stand still for two volleys in a row.
- Battle Mage: Save dash for the 3rd spit; keep burn up; detonate when core opens.
Rewards That Matter
- +1 Starmap Node Currency (guaranteed)
- Dungeon Trinket with a small sustain proc (great for new players)
- Recipe: Minor Empowerment (your first meaningful craft)
Leave the dungeon around minute 55–60 with: fresh trinket, mats, Starmap currency, and a plan.
✨ 01:00–01:30 — Starmap 101 (Spend Your First Points Right)
Open Starmap. Think of it as your account-wide grid of mini-upgrades plus horizontal unlocks. First hour nodes should make you faster and harder to kill, not just “bigger numbers.”
Priority Node Order (Universal Start)
- Fleetfoot Paths (+movement speed out of combat)
- Field Rations (+potion effectiveness)
- Basic Mastery (+primary stat)
- Safecracker (+chance to find extra mats in caches)
- Quick Study (+XP from first-time discoveries)
Why this order? Movement speed is a time machine. Potions let you play aggressively. Primary stat raises baseline damage/healing. Extra mats = earlier crafts. First-time XP lines up with a beginner’s natural exploration.
Branch Choice Moment
You’ll see Path of Iron (tanky route) and Path of Gale (mobility + crit).
- Guardian: take Path of Iron—gives Block Efficiency node 2 steps in.
- Archer/Battle Mage: take Path of Gale—unlocks Dash Cooldown reduction quickly.
Don’t chase deep DPS nodes in the first 90 minutes; survivability + tempo beat everything early.
🧠 01:30–01:45 — Your First Hero Talents
You’ll now have Talent Row 1 and possibly Row 2.
Guardian Picks
- Row 1: Bulwark’s Reward (blocking grants a tiny shield).
- Row 2: Measured Strikes (first hit after block deals bonus damage).
Archer Picks
- Row 1: Hunter’s Rhythm (rolling grants a short damage buff).
- Row 2: Piercing Setup (marked targets take extra damage from your next burst).
Battle Mage Picks
- Row 1: Spell Sustain (ability hits restore a sliver of mana).
- Row 2: Heat Cycle (after three burns, your next detonate gains radius).
Don’t respec yet. Early talents are cheap, but the defaults above are perfect while you learn fights.
🛠️ 01:45–02:00 — The Free Power Checklist
Before you log off after your first session, do these:
1) Craft “Minor Empowerment”
- It adds +Power to your weapon/armor (small but meaningful).
- Apply it to your weapon first, then your chest.
2) Buy 3× Utility Consumables
- Stamina Tonic (more dodges), Whetstone (short damage buff), Camp Kit (mobile rest).
- Use whetstone on dungeon bosses or elites only—don’t waste on trash.
3) Unlock the 20-Minute Daily Loop
- Camp Waystone → Overlook Ridge mini-event → Shallow Grotto cache → Back to Camp
- You’ll net a steady trickle of potions, Starmap dust, and a chance at blue-grade accessories.
4) Spend Leftover Starmap Points
- Fill Basic Mastery and Fleetfoot before branching deeper.
5) Set a Goal for Next Login
- Example goals: “Clear Tunnels again in 12 minutes,” “Craft +2 piece,” or “Unlock next zone waypoint.”
- Goals focus you and prevent wandering (the biggest early time sink).
🪓 Simple Combat Playbooks (By Class)
Guardian — “Anchor and Answer”
- Pull: Shield up → step into pack → quick cone to tag.
- Core: Block heavy, punish with your strongest hit; keep DoT if you have it.
- Elites: Pop mitigation when ground swirls appear; never block 3 heavies in a row without moving—sidestep to reset timing.
- Bosses: Learn the 3-hit pattern: normal, normal, big—only greed after the big.
Archer — “Tag, Trap, Trim”
- Pull: Mark priority target → trap angle between you and it.
- Core: Two light shots → roll → burst; repeat.
- Elites: Keep slow up, kite in an L-shape (never straight back).
- Bosses: Save burst for exposed windows; don’t over-charge shots during mobility phases.
Battle Mage — “Burn, Dash, Boom”
- Pull: Burn → step in → detonate → dash out.
- Core: Maintain burn on everything; detonate when 3+ stacked.
- Elites: Dash through instead of away (face their back).
- Bosses: Learn to pre-dash the ground spikes—dash early so you land safe.
🔁 Solo vs Duo: Which Route Is Better?
Solo Advantages
- Learn telegraphs faster, own your pace, zero queue downtime.
- Perfect for mastering class flow and node choices.
Duo Advantages
- You delete the first dungeon and events much faster.
- Mistakes get covered—especially nice for Archers and Battle Mages early.
Best Duo Comps
- Guardian + Archer (classic: anchor + burst)
- Guardian + Battle Mage (AoE clears + safe pulls)
- Archer + Battle Mage (glass cannon duo with big time-to-kill—proactive kiting required)
Duo Etiquette
- Ping often, don’t open chests mid-pull, and rotate potions (one drinks, the other kites).
📦 Inventory & Money: Spend Smart
Your first 2 hours should leave you with just enough to buy basics. Don’t blow it.
What To Buy
- Vendor Basic weapon in your main stat (if you didn’t get a drop).
- 3–5 potions + 1 Camp Kit (comfort and safety).
- One accessory with Stamina (ranged) or Health (melee).
What To Skip
- Expensive cosmetics, crafting re-rolls, and off-stat upgrades.
- Don’t buy bags yet—complete “Pack Rat” in Zone 2 for a free slot upgrade.
Gold Route (10-Minute Starter)
- Camp Waystone cache → Overlook Ridge mini-event → vendor junk greens → buy potions.
- Do this daily until you unlock better flips/farms.
🧵 Crafting & Upgrades: When to Start
Crafting unlocks real power after your first dungeon. The trap is starting too early.
Green → Blue Upgrade Path
- Weapon Empowerment (weapon first, always).
- Chest Empowerment (+survivability).
- Re-roll stats only when you have 2+ of the same slot so you can swap back if you brick it.
Consumables You’ll Actually Use
- Whetstone (+damage short burst)
- Stamina Tonic (extra dodge uptime)
- Camp Kit (saves 5–7 minutes of backtracking—huge)
🐉 World Events & Mini-Bosses: Free Loot, No Drama
World events are your friend, especially the quick ones:
- Portal Flickers: 90 seconds, lots of small enemies. Great for AoE classes.
- Supply Caravan: Escort for 2 minutes, open the chest at the end (often potions + dust).
- Mini-Boss Spawns: Learn the tell: the sky flickers once, then again; spawn within 20 seconds.
Tip: Arrive, clear adds first, then burst the mini-boss. Adds do more cumulative damage than the boss hitbox.
🧩 Starmap Deep Dive: Understanding Early Nodes
You’ve grabbed your first nodes. Here’s how the system shapes your early game:
Tempo Nodes (Speed/Flow)
- Fleetfoot Paths: Out-of-combat speed = faster quests = faster level.
- Dash Cooldown: Feels like cheating on Archer/Battle Mage—kite forever.
Sustain Nodes (Safety)
- Field Rations: Your potions hit harder; lets you do greedier pulls.
- Block Efficiency (Path of Iron): Guardian’s bread and butter.
Economy Nodes (Progress Engine)
- Safecracker: Tiny mat bonus snowballs into real crafting power.
- Quick Study: Front-loads XP where you’re naturally going anyway.
Rule of Thumb: Never path 6 nodes for a +2% damage node in the first two hours. Speed + safety multiply every other stat.
🏰 Your Second Dungeon (Prep for Next Session)
The second dungeon tends to be a bit spicier. Prep now, clear next time you log in.
Checklist
- Weapon Empowered (yes)
- 3+ Potions (yes)
- Whetstone for boss (yes)
- Talent Rows 1–2 set (yes)
- Starmap has Fleetfoot + Basic Mastery (yes)
Walk in confident. You’ll learn the “dance then dunk” rhythm fast: dodge → set up → burst → reset.
💡 Common Beginner Mistakes (Don’t Do These)
- Over-looting and under-moving. Speed comes from pathing, not killing every critter.
- Crafting too early. Save mats for real upgrades after Dungeon 1.
- Ignoring mobility. Movement nodes/tonics create free wins.
- Greeding boss windows. Learn patterns first, burst second.
- Playing zoomed in. Bump FOV to read fights.
- Not setting a next-session goal. You’ll wander → log off weaker.
🧪 Quick Practice Drills (5 Minutes Each)
- Roll Timing: In town, roll on cooldown for 60 seconds while strafing; build muscle memory.
- Block/Punish (Guardian): Find an elite goat in Overlook Ridge; block heavy once, punish once—repeat 10 times.
- Kite Triangle (Archer): Draw a triangle on the ground with your pathing; kite elites around its edges.
- Dash-Through (Battle Mage): Practice passing through enemies during cast wind-ups; stick to their back.
🧑🤝🧑 Social & Party Tips Without the Awkwardness
- Ping everything. Even solo, ping helps you plan (there’s no shame in self-pings).
- Ask for 2-minute buffs at dungeon doors if a support is nearby.
- Be the calm player. Everyone loves the person who says “reset, we’ve got this.”
🛡️ Why Choose BoostRoom When You Want the Fast Lane
You can absolutely solo your early path, and this guide is built so you can. But if your time is limited or you just want the smoothest start, BoostRoom is built for that gamer-to-gamer shortcut:
- Customized goals: We align runs to your class/build plans—no generic routes.
- Pro execution: Consistent clears, clean mechanics, and steady progress.
- Flexible scheduling: We fit sessions to your calendar.
- Transparent updates: You always know what’s done and what’s next.
Whether you want a clean Dungeon 1 & 2 route, Starmap unlock plan, or a talent + gear consult, BoostRoom has your back.
❓ FAQs
- What class is best for absolute beginners? - Guardian if you want chill survivability, Archer if you want easy bossing and kiting, Battle Mage if you like flashy AoE with sustain.
- I die a lot—what should I change first? - Take sustain Starmap nodes (Field Rations), buy more potions, and equip +Health or +Stamina accessories. Learn boss 3-hit patterns.
- When should I start crafting seriously? - After Dungeon 1. Use the Minor Empowerment recipe on your weapon, then chest.
- Is duo better than solo early on? - Duo clears dungeons/events faster. Solo is better for learning. Both are valid—pick what’s fun now.
- What’s the fastest daily loop when I’m short on time? - Camp Waystone → Overlook Ridge event → Shallow Grotto cache → turn-ins. 15–20 minutes for potions, dust, and a blue accessory chance.
- What Starmap branch do I prioritize first? - Path of Iron for Guardian (Block Efficiency), Path of Gale for Archer/Battle Mage (Dash Cooldown, crit flow).
- How do I handle bosses with adds? - Kill adds first, then burst boss during safe windows. Adds are the real damage taken over time.
- What’s a good “next session” goal after this guide? - Prep and clear Dungeon 2: Empowered weapon, 3+ potions, whetstone for the boss, and talent rows 1–2 set.
🏁 Conclusion
Your first two hours in Fellowship should feel crisp, not chaotic. With the route above—clean settings, smart keybinds, class-friendly builds, an early dungeon clear, and a few Starmap upgrades—you’re already playing like a veteran. Next session, knock out Dungeon 2, unlock the next waypoint, and start experimenting with deeper talent rows and economy nodes.
When you want a tailored plan or just a boost to hit early milestones faster, BoostRoom is always ready to help—straightforward routes, zero drama, real progress. And if you like to dig into names, stats, and community notes, the Fellowship Wiki is a great rabbit hole.


