🥇 The Shortlist: 15 Resources That Change Everything
These are the things that make the first hours feel fast and safe, not just “grindy.” We’ll go deep on each one next.
- Starmap Dust & Fragments – unlocks Fleetfoot, Dash/Block nodes, and early XP multipliers.
- Health / Stamina / Mana Potions – cheap survivability and tempo.
- Whetstone – short, high-impact damage windows (bosses & elites).
- Camp Kit – saves 5–7 minutes per session (no backtracking).
- Weapon Empowerment I reagents – the biggest early DPS/comfort spike.
- Chest Empowerment I reagents – early eHP without sacrificing damage.
- Cache Keys (basic) – multiply loot from world caches on your route.
- Vendor Main-Stat Weapon (stopgap) – avoids bad early RNG.
- Survival Accessory – +Health (Guardian), +Stamina (Archer), +Mana Regen (Mage).
- Dungeon Key: Emberlight Tunnels – first instance unlock + guaranteed dust.
- Gathering Tools (hatchet/pick/herb pouch) – passive mats while moving.
- Mini-Event Tokens – convert flickers/carabans into dust & potions.
- Waypoint Shards – unlock fast travel to cut dead time.
- Talent Notes/Tomes (Row 1–2 unlockers) – early talent progression.
- Discovery XP Pings – not an item, but a resource: pop them after Quick Study.
The order matters. You’ll prioritize Starmap → potions/tempo → empowerment mats → keys before deep damage rolls.
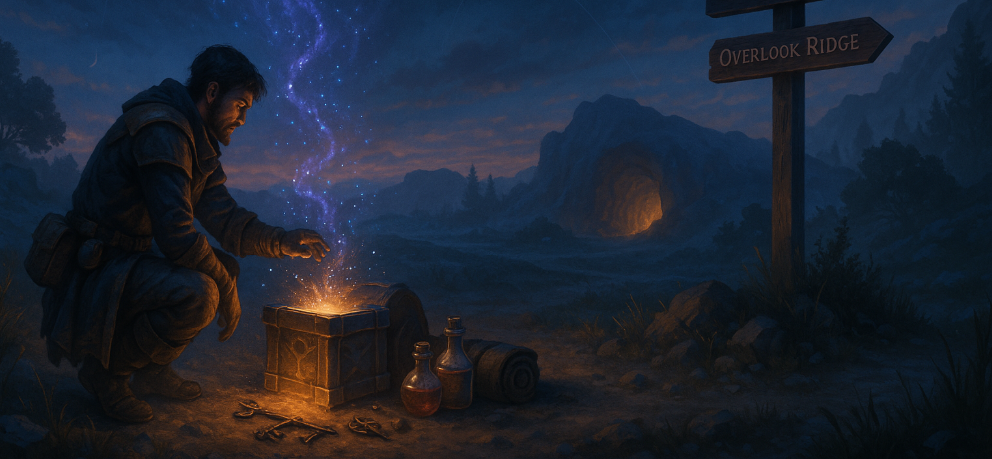
🌌 1) Starmap Dust & Fragments — Your Power Multiplier
What it is: Currency that unlocks nodes on the Starmap (account-wide micro-upgrades and path branches).
Why it’s unskippable: Movement speed + potion value + block/dash/CD nodes multiply everything you do—fighting, looting, and pathing.
Targets (first sessions):
- 2–3 Dust from starter caches (South trail from Camp Waystone).
- 1 Fragment from the tutorial mini-boss.
- 1–2 Dust from a Portal Flicker or Supply Caravan near Overlook Ridge.
- Guaranteed Fragment from Emberlight Tunnels (Dungeon 1).
Spend order (any class):
- Fleetfoot Paths → 2) Field Rations → 3) Basic Mastery →
- Branch: Path of Iron (Guardian) or Path of Gale (Archer/Mage) →
- Block Efficiency (Guardian) or Dash Cooldown (Archer/Mage) →
- Safecracker → 7) Quick Study → 8) Basic Mastery II
Pro tip: Don’t chase deep +2% damage early. Tempo + sustain turn you into a machine; damage nodes start paying once you’re alive and moving.
🧪 2) Health / Stamina / Mana Potions — Cheap Time Machines
What they do: Potions are mistake budgets and pull multipliers. The right drink at the right time makes a 3-minute slog a 45-second clean pull.
Stock goals (first evening):
- Health: 5–8
- Stamina (dodge count): 2–3
- Mana (BM only): 2–3
Smart timing:
- Drink before multi-hit patterns (e.g., Ember Mound triple spit) to flatten incoming damage.
- Use Stamina Tonic on big trash pulls or mobility fights; more rolls = fewer hits = fewer potions burned.
Where to get: Vendor at Camp Waystone / Waypost Vale, caravan chests, Overlook caches.
🪓 3) Whetstone — Burst When It Matters
What it does: Short damage buff for elite chains and boss exposes.
When to use: Not on trash. Pop right before a window: Guardian’s punish, Archer’s roll-burst, Battle Mage’s detonate after a safe dash.
Stock goal: Keep 2 in inventory.
Where: Starter vendors, rare in caches, occasional event rewards.
🏕️ 4) Camp Kit — The Travel Skip You Forget
What it does: Places a rest spot so you don’t walk back for recovery or crafting. Saves 5–7 minutes every session.
When to use: After Dungeon 1 → craft Weapon Empowerment I at your field camp.
Stock goal: 1–2.
Where: Vendor at Waypost Vale, sometimes in caravan rewards.
⚙️ 5) Weapon Empowerment I Reagents — First Real Spike
Why first: Empowering your weapon is the most noticeable DPS/comfort bump in the first hours. It also stabilizes bad RNG if your drop is mid.
Reagents needed: Empowerment Powder + Basic Solvent (names vary by server/patch; think “early craft mats”).
Where:
- Powder: from Emberlight Tunnels chest and caches south of Overlook Ridge.
- Solvent: buys from Waypost Vale craft vendor or uncommon cache drop.
Apply order: Weapon → Chest → Gloves/Boots (if mats allow).
Mistake to avoid: Don’t re-roll a fresh green with perfect stats; empower first, gamble later when you have a duplicate.
🛡️ 6) Chest Empowerment I Reagents — Early eHP
Why second: Survivability without sacrificing uptime. On Guardian it’s massive; Archer/Mage feel it on bad pulls.
Where: Same sources as weapon reagents; favor caravan end chests and Grotto cache.
🔑 7) Cache Keys (Basic) — Loot Doublers
What they do: Keyed caches drop more dust, potions, and reagents.
Where: Intro quest chain at South Gate, world events, vendor bundles (occasionally).
When to use: Only on on-route caches (Shallow Grotto, ridge outcroppings). Don’t wander a kilometer to force one.
🏹 8) Vendor Main-Stat Weapon — RNG Insurance
Why: If your drop is off-stat, buying a cheap main-stat weapon prevents a weak hour that stalls everything else.
Where: Camp Waystone and Waypost Vale vendors (rotate checks).
Class picks:
- Guardian: Sword + shield (block loop is king early).
- Archer: Shortbow until you’re comfortable; longbow later.
- Battle Mage: Spellblade/Focus with Mana Regen or Power.
💍 9) Survival Accessory — The Small Piece That Saves Runs
What to look for:
- Guardian: +Health (or +Block)
- Archer: +Stamina → +Crit
- Battle Mage: +Mana Regen → +Power
Where: Starter story turn-in at Camp Waystone often offers a choice; take the survival piece over a flimsy +2% damage trinket.
🗝️ 10) Dungeon Key: Emberlight Tunnels — Your First Instance
Why it matters: Guaranteed Starmap Fragment, trinket, and often your first recipe.
Where: South Gate keygiver after you complete the “learn the area” step.
Run notes:
- Tunnel 1: hug the right wall; skip optional worm nest.
- Central Cavern: kill Broodcaller first (adds lose runs).
- Boss (Ember Mound): count spits 1–2, sidestep 3, burst core expose.
🧰 11) Gathering Tools — Free Mats While You Move
Why: You’ll pass herbs/ore/wood anyway. With tools, those nodes become dust and empowerment mats.
Where: Waypost Vale craft vendor; sometimes a side quest reward.
Buy order: Herb pouch → Pick → Hatchet (unless your build uses wood crafts).
📣 12) Mini-Event Tokens — Small Timers, Big Value
Events worth it (on route):
- Portal Flicker: 60–90 seconds; spray of small mobs (Archer/Mage heaven).
- Supply Caravan: 2 minutes, guaranteed chest at the end.
- Use: Exchange or turn in at Waypost Vale for potions, dust, and occasionally keys.
Rule: Take events if they’re ≤30 seconds off your path. Otherwise keep moving.
🪶 13) Waypoint Shards — Fast Travel = Free Hours
What they do: Activate fast travel points early, particularly Overlook Ridge and Waypost Vale.
Where: Side caches and story nodes; some servers call them “shards” or “sigils.”
Why early: Cuts travel time on repeat dungeon runs and daily loops.
📜 14) Talent Notes/Tomes — Row 1–2 Unlockers
Why: Early talents smooth rotations: block shield, roll-buff, mana sustain, etc.
Where: Story turn-ins and Dungeon 1.
Picks:
- Guardian: Bulwark’s Reward → Measured Strikes
- Archer: Hunter’s Rhythm → Piercing Setup
- Battle Mage: Spell Sustain → Heat Cycle
🗺️ 15) Discovery XP Pings — Pop After Quick Study
What: Exploration XP chunks when you touch new names on the map.
Why: With Quick Study (Starmap), those pings are free levels on the route.
How: Delay a couple of discoveries until after you buy Quick Study, then go claim them.
🧭 The Route: Where To Grab Each Resource Fast
Path: Camp Waystone → South Gate → Overlook Ridge → Shallow Grotto → (back) → Emberlight Tunnels → Waypost Vale → Emberlight repeat
Camp Waystone (0:00–0:10)
- Buy 3× Health potions.
- Vendor check: main-stat weapon (if RNG hates you).
- Grab story + one overlap side quest (vines/kills).
- Cache behind the supply wagon: chance at Dust.
South Gate (0:10–0:20)
- Talk to keygiver (progress Dungeon 1 unlock).
- Side cache near the broken palisade: Cache Key chance.
- Small herb cluster by the shallow stream (if you bought the pouch).
Overlook Ridge (0:20–0:30)
- Scan 3 markers for story.
- Wait 30–60s for a Portal Flicker spawn at the middle marker: dust + potion.
- Pop Discovery pings only if you already have Quick Study; otherwise mark and come back.
Shallow Grotto (0:30–0:35)
- Free cache; save Key if it’s the keyed type.
- Elite burrower: easy Whetstone test; loot count toward side quest.
Back to Camp Waystone (0:35–0:40)
- Turn in bundles (3 quests at once).
- Take the survival accessory.
Emberlight Tunnels (0:40–1:00)
- Right wall → Broodcaller first → boss triple-spit dance.
- Rewards: Fragment, trinket, recipe.
- Set a Camp Kit outside the exit if you own one.
Field Crafting (1:00–1:05)
- Spend Starmap → Weapon Empowerment I (use your field camp).
- Buy Stamina/Mana tonics based on class.
Waypost Vale (1:05–1:25)
- Unlock waypoint; buy Gathering Tools.
- Turn in Mini-Event Tokens for potions/dust.
- Pick Mana Regen / Stamina / Health accessory if offered.
Emberlight Repeat (1:25–1:40)
- Faster clear with empowered weapon.
- Aim for <12 minutes solo; <10 with a duo.
🎮 Class-Specific Shopping Lists
Guardian (Anchor & Answer)
- Must buy: Shield upgrade if vendor has +Health/Block, 5× Health, 1× Whetstone.
- Nodes: Path of Iron → Block Efficiency ASAP.
- Craft: Weapon Empowerment I → Chest Empowerment I.
- Accessory: +Health (first pick).
- Why: You turn dangerous pulls into predictable drills.
Archer (Tag, Trap, Trim)
- Must buy: Shortbow if you didn’t get a good drop, 3× Health, 2× Stamina, 1× Whetstone.
- Nodes: Path of Gale → Dash Cooldown.
- Craft: Weapon Empowerment I (feel it immediately).
- Accessory: +Stamina → +Crit.
- Why: Movement rhythm = damage.
Battle Mage (Burn, Dash, Boom)
- Must buy: Spellblade/Focus with Mana Regen if possible, 3× Health, 2× Mana, 1× Stamina.
- Nodes: Dash Cooldown → Arcane Efficiency.
- Craft: Weapon Empowerment I; camp kit is huge quality-of-life.
- Accessory: +Mana Regen.
- Why: Mana flow + dash control keeps detonates clean.
🕒 The Busy-Day 30-Minute Loop (Any Level)
Route: Closest waypoint → Mini-event → Cache → Cache → back to waypoint → vendor → Starmap spend.
Expect: 1–2 potions, 1 dust, a few reagents, and 10–12 minutes of clean muscle-memory combat. It stacks over a week.
📅 First 24 Hours: Resource Plan
Hour 0–1.5:
- Story to Overlook Ridge; grab 1–2 dust from event + cache.
- Unlock Dungeon 1; clear it; spend nodes; empower weapon.
Hour 1.5–3:
- Path to Waypost Vale, buy gathering tools, pop Camp Kit when needed.
- Run Emberlight again for Fragment and mats; craft Chest Empowerment I if possible.
Hour 3–6:
- Finish Fleetfoot/Field Rations/Basic Mastery + Branch.
- Stock Whetstones and Stamina/Mana potions based on class.
- Activate Overlook and Vale waypoints for fast travel.
📆 First 48 Hours: Scale the Loop
Day 2 Goals:
- Two quick Emberlight clears (sub-10s with a duo).
- Buy 2× Camp Kits for future dungeons.
- Cap Quick Study and Safecracker; start nibbling minor damage nodes now that engine is online.
Stretch:
- Find your farming event (the one that spawns reliably at your local hour).
- Stock 10× Health, 4× Stamina/Mana for comfort margins.
🧠 Pro Tactics That Multiply Resource Gain
- Bundle turn-ins. Two or three at once. Travel time kills XP.
- Only detour ≤30 seconds for events/caches. This one rule keeps you fast.
- Pre-dash telegraphs (Mage/Archer) and block-punish (Guardian) to cut potion burn.
- Duplicate before reroll. If you don’t have a backup, skip the gamble.
- Weapon first. Empower weapon before any other slot. It changes everything.
🧹 Common Mistakes + Quick Fixes
- Mistake: Crafting armor before Dungeon 1.
- Fix: Weapon Empowerment I first, always.
- Mistake: Chasing every map icon.
- Fix: Route discipline—on-path events only.
- Mistake: Buying longbow early when you can’t kite well.
- Fix: Shortbow until your roll-burst rhythm is clean.
- Mistake: Guardian double-greed after a heavy.
- Fix: Hit once, reposition, then reassess.
- Mistake: Burning all mana then whiffing a detonate.
- Fix: Weave light pokes; detonate after the safe dash.
🎯 Micro Drills That Save Potions (and Time)
- Guardian: 10× block-single punish on a field elite without taking chip. Add second hit only when perfect.
- Archer: 60 seconds roll → burst metronome. Move on every shot.
- Battle Mage: 15× dash through → quick turn → detonate without whiffs.
These feel tiny. They’re why better players never run out of potions.
🤝 Duo Synergy = Resource Safety
- Guardian + Archer: Anchor + window burst; split potions (one drinks, one kites).
- Guardian + Mage: Safe big pulls → detonate parties.
- Archer + Mage: High DPS duo; play wider kites to avoid overlapping damage.
Etiquette: Ping pulls, never open chests mid-fight, call “heavy next,” and rotate consumables.
🛡️ Why Choose BoostRoom When You Want the Fast Lane
You can run this plan solo—it’s built that way. But if your time is limited or you’d rather skip to results, BoostRoom makes your early game buttery smooth:
- Custom resource routes: We plan your dust, mats, and keys per class.
- Pro execution: Clean dungeon clears and event chains with low potion burn.
- Flexible sessions: Schedules that match your availability.
- Clear updates: You always know what’s done and what’s next.
Need a Dungeon 1–2 package, a Starmap spend consult, or a class-specific resource route? We’ve got you.
❓ FAQs
Is it worth buying a vendor weapon if I have a green drop? - If the drop is off-stat or has junk affixes, yes—buy a main-stat weapon and empower it. Smoothness matters more than rarity tags early.
How many potions should I carry? - 5–8 Health, plus 2–3 Stamina/Mana depending on class. Drink before known multi-hit patterns.
Which Starmap nodes come first? - Fleetfoot → Field Rations → Basic Mastery → class branch (Block or Dash). Then Safecracker and Quick Study. Damage later.
When do I start rerolling stats? - After you have duplicates for a slot. Never gamble your only good piece.
Solo or duo for resource efficiency? - Duo shreds events and dungeons (fewer potions, faster clears). Solo teaches you fights and keeps routing sharp. Both work—play what you enjoy.
Where do I get Camp Kits reliably? - Craft/vendor at Waypost Vale, sometimes from caravan chest rewards. Always keep 1–2 in your bag.
🏁 Conclusion
Early resources are not about hoarding—they’re about conversion. Grab Starmap dust/fragments, keep potions ready, craft Weapon Empowerment I, use Camp Kits, and route your keys/caches on the way to Emberlight Tunnels and Waypost Vale. Build the engine first (tempo + sustain), then layer damage and profits on top. Do it right, and every future hour feels like you’re playing on fast-forward.
When you want an optimized plan or a hands-off jumpstart, BoostRoom is here with clean routes, pro execution, and flexible sessions tailored to your class and schedule.
Learn more: link to the best active Fellowship wiki (official or community—use the most up-to-date site for systems, materials, and waypoint maps).
