The Two Main Teamfight Styles: Front-to-Back vs Backline Dive
Deadlock fights usually fall into one of two styles. Knowing which one you’re in instantly fixes your target priority and positioning.
Front-to-back (the safer, more consistent style)
Your frontline holds space, your backline shoots what’s in front, and you win by deleting threats as they step into your range.
This is best when:
- your team has strong sustained damage (gun carries)
- you have a durable frontline
- the enemy has dangerous flankers and you’d rather punish them than chase
Backline dive (the faster, higher-risk style)
Your initiators/assassins jump onto enemy damage dealers/supports, and your team follows with burst and control.
This is best when:
- you have reliable engage tools
- the enemy backline is fragile and poorly protected
- your team has burst and crowd control to finish quickly
Most losing teams make the same mistake: they try to dive like a coordinated squad while actually playing like solo queue. If your team is not arriving together, front-to-back is usually the higher winrate choice.
A practical rule:
If you’re not sure what your team is doing, fight front-to-back and protect your strongest damage dealer.
Target Priority That Actually Works: Threat, Access, Value, Time
Most guides say “focus supports” or “focus carries.” That advice is too simple for Deadlock. The right target is the one you can kill fast that changes the fight now.
Use this 4-part target priority filter:
1) Threat (Who is killing or controlling your team right now?)
If one enemy is melting your carry, stunning your frontline, or zoning your whole team, that’s the priority—even if they’re not the “highest DPS hero” on paper.
2) Access (Who can you hit safely right now?)
If the enemy carry is behind cover and you’d have to sprint into open space to reach them, they’re not the priority right now. Your priority is the best target you can damage without dying.
3) Value (If this enemy dies, what does the enemy team lose?)
Some kills remove damage. Some remove engage. Some remove saves and cleanses. The “value” of a target is what their death removes from the fight.
4) Time-to-kill (Can your team finish this target quickly?)
A tank that takes 10 seconds to kill may be the wrong call if a squishy threat can die in 2 seconds and ends the fight.
Put those together and you get the real rule:
Focus the highest-threat target you can kill quickly without sacrificing your positioning.
This single rule solves most teamfight chaos.
The Deadlock “Kill Order” Cheat Sheets by Situation
Instead of one universal kill order, use situation-based priorities. Pick the one that matches the fight you’re in.
If your carry is being jumped (anti-dive priority)
- The diver currently on your carry
- The crowd control that enables the dive
- The nearest damage threat you can safely delete
- Then the frontline once the danger is gone
If your team started the engage (dive priority)
- The target you caught (the person your initiator locked)
- The enemy support/saver who can undo the kill
- The enemy carry nearest to the engage
- Then stabilize and switch to front-to-back if the dive stalls
If the fight is messy and split (stabilize priority)
- The lowest HP enemy you can confirm safely (remove guns from the fight)
- The enemy controlling space (big zones/CC)
- The easiest-to-hit damage dealer
- Then regroup and re-enter together
If the fight is at an objective (conversion priority)
- Whoever can stop your objective damage (the enemy who can force you off the Walker/Shrine)
- Whoever can steal or flip the objective area fight (high control/CC)
- Then the remaining threats as you secure the area
Notice what’s missing: “Always focus supports.” Supports are high value, but only if you can reach them without dying and only if killing them changes the fight right now.
Positioning Fundamentals: Cover, Angles, and the “Safe Triangle”
Deadlock is built around urban geometry. The best teamfighters don’t stand in open streets unless they’re forced to. They fight from positions that give them damage and safety at the same time.
Use the Safe Triangle concept during every fight:
- Cover: something that blocks line of sight immediately (a wall, structure, corner, elevation).
- Damage lane: an angle where you can shoot or cast without stepping into open space.
- Exit route: a path you can take if you get focused (back to teammates, around a corner, down a ramp, into a safer lane).
If you don’t have all three, you are gambling. Great positioning feels boring because it’s stable.
The single best positioning habit
Reposition before you’re forced to.
If you wait until you’re half HP, you’ll panic dash into bad space and die. Good teamfighters move early, not desperately.
Angle discipline (why you stop dying first)
- If you are a backliner, never be the closest visible target unless your team is already winning hard.
- If you are a frontline, don’t overextend past cover where your backline can’t shoot with you.
- If you are flanking, don’t reveal yourself early. A flank only works if it arrives at the moment the enemy is already busy.
Stamina Discipline: The Hidden Teamfight Stat
Deadlock movement is stamina-limited, and teamfights are won by the player who still has stamina when the real danger happens. Recent updates also made stamina feel faster and movement smoother in fights (for example, stamina regeneration became faster and the “on bullet hit move slow” was removed). That means good movement players can survive more often—but only if they don’t burn stamina for no reason.
The stamina budgeting rule
In dangerous space, keep at least 1 stamina reserved.
That one stamina is often your difference between living and dying.
Where people waste stamina and throw fights
- Double-dashing forward to chase a kill that doesn’t end the fight
- Using stamina for travel, then arriving to the fight empty
- Panic air dashing in open space instead of moving behind cover first
- Spending everything on engage and having nothing to disengage
Stamina usage by role
- Carries: spend stamina to dodge and reposition, not to chase deep.
- Frontliners: spend stamina to hold angles and retreat after first contact.
- Assassins: spend stamina to enter and exit cleanly; if you can’t exit, don’t enter.
- Supports: spend stamina to stay alive; your life equals your team’s stability.
Fight Setup: How to Win Before the First Shot
Teamfights often end in the first 3 seconds. The team that starts with better setup usually wins even if their aim is weaker.
A strong setup includes:
- Arriving early to the area (objective entrances, choke points, corners)
- Holding angles instead of walking into the enemy’s crossfire
- Not getting picked while someone is shopping or catching a wave
- Knowing where the enemy can flank (ziplines, corners, side streets)
The “don’t donate the first death” rule
If your team loses one player before the fight begins, you often lose the fight and the objective chain after it. Play the first 15 seconds like it matters—because it does.
Setup is also economy
If you are carrying a lot of Souls and haven’t shopped, you’re weaker than you should be. A clean pre-fight reset is often better than showing up early with a wallet and no items.
Engage Timing: When to Start, When to Wait, When to Turn
Deadlock is full of heroes who can “start fights,” and full of teams that start fights at terrible times.
Use these engage rules:
Start the fight when you have one advantage
- Numbers advantage (someone is late, dead, or split)
- Position advantage (you control cover and angles)
- Cooldown advantage (their key ability is down)
- Economy advantage (you just shopped; they haven’t)
- Objective advantage (the fight happens where you can convert instantly)
Wait when you don’t
If you engage with no advantage, you’re flipping the game.
Turn the fight when the enemy overcommits
A lot of fights are won by “letting them come”:
- You hold a strong angle
- They dive too deep
- You delete the diver
- The fight becomes a 6v5 and you convert
This is especially powerful in solo queue because enemies often over-chase.
Peel vs Dive: The Decision That Stops Throws
“Peel” means protecting your backline (carry/support) by controlling the enemies who are trying to kill them. “Dive” means attacking the enemy backline.
Most teams lose fights because half the team peels and half the team dives—so nobody actually gets protected and nobody actually gets killed.
Here’s how to decide:
Peel if your win condition is one carry staying alive
If your team’s main damage dealer is the reason you win fights, peel. Don’t trade your carry’s life for a risky backline chase.
Dive if you have reliable follow-up and the enemy backline is exposed
Dive works when:
- your initiator can lock a target
- your team can follow quickly
- you can finish the kill before the enemy turns
- you can leave after the kill
If you’re unsure: peel first, then counter-dive
Many winning fights look like:
- enemy dives your carry
- you peel and delete the diver
- now you have numbers advantage
- then you push forward into their backline safely
This is the safest way to teamfight without perfect coordination.
Role-by-Role Teamfight Job List
If you want to teamfight better instantly, stop trying to do everything and do your job.
Gun carry (sustained DPS)
- Stand where you can shoot safely
- Hit the nearest high-threat target you can reliably kill
- Do not be first into open space
- Prioritize staying alive over chasing kills
- After winning, shred the objective immediately
Spirit carry (burst/zone/control)
- Arrive early to set zones in choke points
- Use cooldown windows to force enemies out of cover
- Don’t dump burst into the tank if the backline is reachable
- Save one key tool to protect yourself when focused
- Your best value is fight-defining casts, not constant random spam
Initiator (fight starter)
- Start fights only when the team can follow
- Lock a target that can be killed quickly
- If you miss engage, don’t keep pushing forward—reset
- Your second job after engage is often peeling (stop enemy counter-engage)
Frontliner (space maker)
- Stand in the dangerous area so your backline doesn’t have to
- Hold entrances and angles around objectives
- Don’t chase too far past your team’s damage range
- If your carry is being dove, body-block and disrupt the dive
- If your carry is safe, create space so they can hit objectives
Assassin/roamer (flank and cleanup)
- Don’t reveal early; wait until the fight begins
- Kill or force out a backliner, then leave or reset
- If the backline is protected, swap to cleanup: finish low targets
- Your job is to create numbers advantage, not to die “trying to make a play”
Support (enable and stabilize)
- Keep your carry alive through the first burst
- Use barriers/saves on the target the enemy is focusing
- Position so you can help instantly without dying first
- After the first wave of cooldowns, support becomes a fight controller: slows, debuffs, and regroup tools
If everyone does their job, fights feel easy. If everyone tries to be the hero, fights feel like chaos.
Ability and Ultimate Economy: Winning Two Fights in a Row
A lot of Deadlock teams win one fight and then lose the next because they used everything in the first fight—even when they didn’t need to.
Think of your big cooldowns like money:
- Don’t spend everything unless the purchase ends the game or wins a major objective.
- If the enemy is already losing and retreating, save something for the next push.
The two-fight plan
A smart team often plans:
- Fight #1: win with a moderate investment
- Convert to objective
- Reset and shop
- Fight #2: use the saved ultimates to break the next layer (Walkers → Shrines)
If your team uses every ultimate to kill two enemies in the jungle, you might “win the moment” and lose the next objective fight where it actually mattered.
Don’t stack the same utility
If three teammates use their big crowd control on the same target instantly, you waste tools. It’s better to chain control:
- first control secures the kill
- second control stops the counter-engage
- third control is saved for the next threat
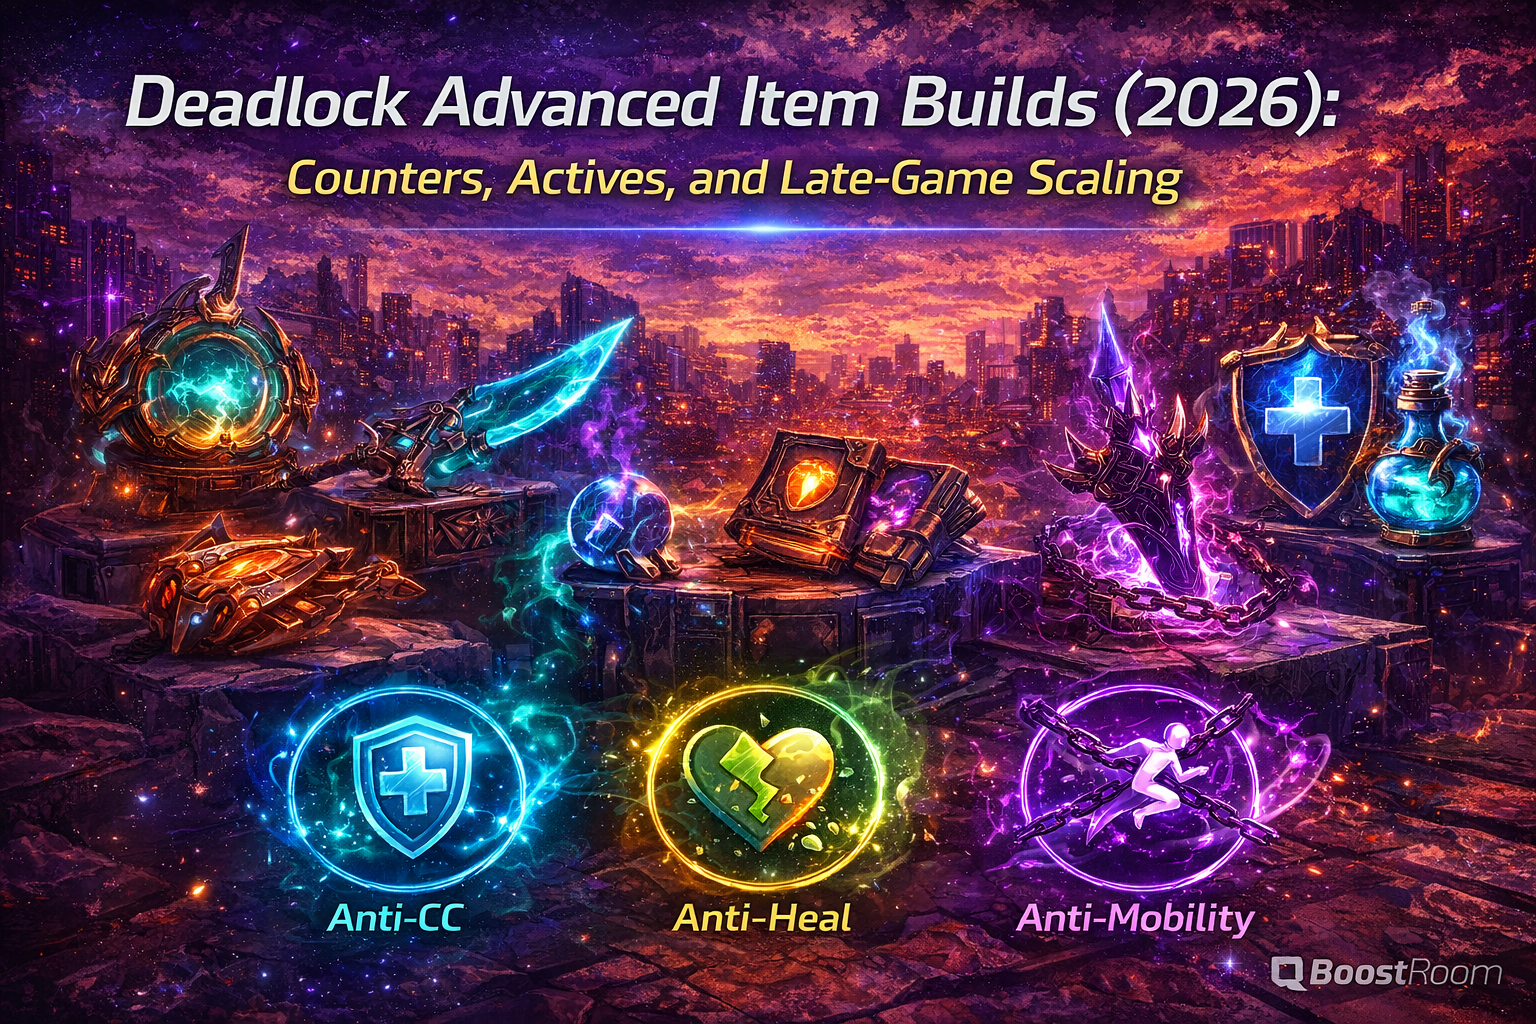
Teamfight Items That Matter in 2026: Cleanses, Barriers, and Anti-Debuff Tools
Deadlock’s item system is deep, but teamfights become much easier when you recognize the “fight-saving” items and what they’re for.
Debuff Remover (survival swing item)
Debuff Remover is a Vitality item designed to reduce negative effect duration and purge negative effects on use, with a cooldown and restrictions (not usable while stunned or slept). This is the difference between “I got slowed and died” and “I cleansed and lived.”
How to use it correctly:
- Don’t press it at full HP for no reason
- Use it when a debuff is the reason you’re about to lose control (damage over time, heavy slow, damage amp, etc.)
- Pair it with repositioning: cleanse → move behind cover
Divine Barrier and Guardian Ward (save your carry, keep tempo)
Guardian Ward is a barrier + move speed active. Divine Barrier upgrades this concept by removing non-stun debuffs and giving a larger barrier and move speed for the target, with reduced cooldown when cast on allies.
Why it wins fights:
- Your carry survives the first burst
- The enemy’s engage is wasted
- Your team gets a counter-engage window
This is one of the most direct “teamfight equals win” tools because it turns a teammate’s near-death into a stabilized fight.
Enduring Speed (slow resist = positioning power)
Enduring Speed provides slow resistance and reduces the effect of enemy movement speed penalties. In real fights, slow resist is positioning power:
- You can retreat behind cover
- You can kite divers
- You can maintain your safe triangle without burning stamina
Debuff Reducer / Debuff resist tools
If you feel like you’re permanently controlled, reducing debuff duration can be as valuable as raw health. It’s not glamorous, but it keeps you active in fights instead of stuck.
The real item rule
If you die before doing your job, your next purchase should be survivability or control reduction—every time.
Damage doesn’t matter if you can’t stay alive long enough to apply it.
Deadlock-Specific Combat Mechanics That Change Teamfights
Deadlock has a few universal mechanics that strongly influence how fights play out.
Parry changes melee threat and punishes mindless brawling
Parry can stun the attacker for several seconds if timed correctly, and missing parry can leave you vulnerable due to cooldown. This means:
- mindless melee spam in teamfights can get you punished hard
- melee plays should be timed and supported, not random
- if you’re facing heavy melee threats, spacing and baiting parry windows can decide fights
Movement matters more than you think (because fights are urban)
Deadlock fights happen around corners, ramps, rooftops, and cover lines. If you stand in open lanes like it’s a flat shooter map, you get deleted. Good positioning uses:
- corners to break line of sight
- elevation to create safer angles
- movement routes to rotate without exposing yourself
Base fights have special rules that reward defenders
In modern updates, the Weakened Patron can gain large damage reduction based on defenders present in the pit (one defender reduces damage significantly; two or more can make it impossible to damage). That means in base fights:
- killing or removing defenders from the pit is a priority
- “tunneling the objective” while defenders stand in the pit often fails
- you must win space first, then hit the objective
This is a huge reason teams “get into base and still can’t end.”
Objective Teamfights: How to Fight Around Walkers, Urn, and Mid Boss
Teamfights are easiest to play when your goal is clear. Objectives create clear goals.
Walker fights (the most common midgame fight)
Walker fights are about space control.
- If you’re attacking: your frontline must hold angles so your backline can hit the Walker safely.
- If you’re defending: clear waves early and threaten engages on anyone who hits the Walker without cover.
Conversion rule:
- Win a fight near a Walker → hit the Walker immediately → secure objective value → reset and shop.
Soul Urn fights (escort and intercept fights)
Urn fights are not “normal teamfights.” They’re escort/intercept fights with a moving focal point.
- If you’re escorting: protect the carrier from being tagged and forced to drop.
- If you’re defending: focus on touching and forcing drops, not on chasing deep.
Teamfight tip:
- Don’t overcommit to a kill chase while Urn is active; your job is controlling the Urn moment, not padding stats.
Mid Boss fights (tight space fights)
Mid Boss areas create narrow entrances and high focus. These fights are usually won by:
- arriving first
- holding entrances
- saving a key control tool to stop a steal or a collapse
- using the reward to force the next objective chain
If you win Mid Boss and then don’t push with it, you often wasted your best window.
Base Teamfights: Shrines, Patron, and Ending Cleanly
Base fights are where many teams throw because they stop thinking like macro players and start thinking like duelists.
Shrine fights
Shrines punish greedy pushes. Treat shrines like a structured operation:
- frontline holds space
- backline hits objective
- support keeps the push stable
- assassins look for punishments on defenders who overstep
If you cannot safely finish a shrine, reset. Dying in base gives the enemy the best comeback window in the game.
Patron pit fights and defender damage reduction
Because defenders in the pit can dramatically reduce or nullify Patron damage in modern rules, the correct plan is:
- remove defenders from the pit first (kills, displacement, forced retreat)
- then hit Patron with a formation
- don’t chase random kills away from the objective if defenders are still in the pit
The “end” checklist
- Are Shrines down?
- Do we have enough enemies dead to finish?
- Are defenders in the pit reducing damage?
- Is our team grouped and healthy enough to commit?
If the answer is no, reset and set up the next push. Ending is a discipline skill.
The 10 Most Common Teamfight Mistakes (And the Fix)
- Starting fights late (arriving second).
- Fix: rotate earlier and set up angles first.
- Chasing the wrong target.
- Fix: use Threat + Access + Value + Time-to-kill.
- Splitting into six duels.
- Fix: fight as a unit; focus what your team is focusing.
- Using all cooldowns on the first tank you see.
- Fix: save control/burst for real threats or peel moments.
- Dying with stamina at 0.
- Fix: reserve 1 stamina in dangerous space.
- Standing in open space because “I need to shoot.”
- Fix: shoot from cover lanes and angles; reposition early.
- Ignoring the diver on your carry.
- Fix: peel first, then counter-dive.
- Not buying any fight-safety items.
- Fix: get debuff removal, barriers, slow resist, or durability when you’re dying first.
- Winning fights and not converting.
- Fix: immediately take Walker/Shrine/Mid Boss or shove lanes.
- Overstaying in base and throwing.
- Fix: if you can’t end, reset with your lead intact.
The “Fight Checklist” You Can Use Mid-Match
Before the fight:
- Do we know where the enemy flankers are?
- Do we have shop items spent?
- Do I have at least 1 stamina reserved?
- What’s our fight style: front-to-back or dive?
- Which objective are we converting into if we win?
During the fight:
- Am I shooting from cover and keeping an exit route?
- Am I focusing the highest threat I can kill quickly?
- If my carry is pressured, am I peeling or ignoring it?
- Am I using cleanses/barriers at the moment they prevent death?
After the fight:
- Take the nearest permanent objective immediately
- Secure the value
- Reset and shop
- Set up the next objective window early
If you follow this checklist consistently, your teamfights become predictable—and predictable fights win games.
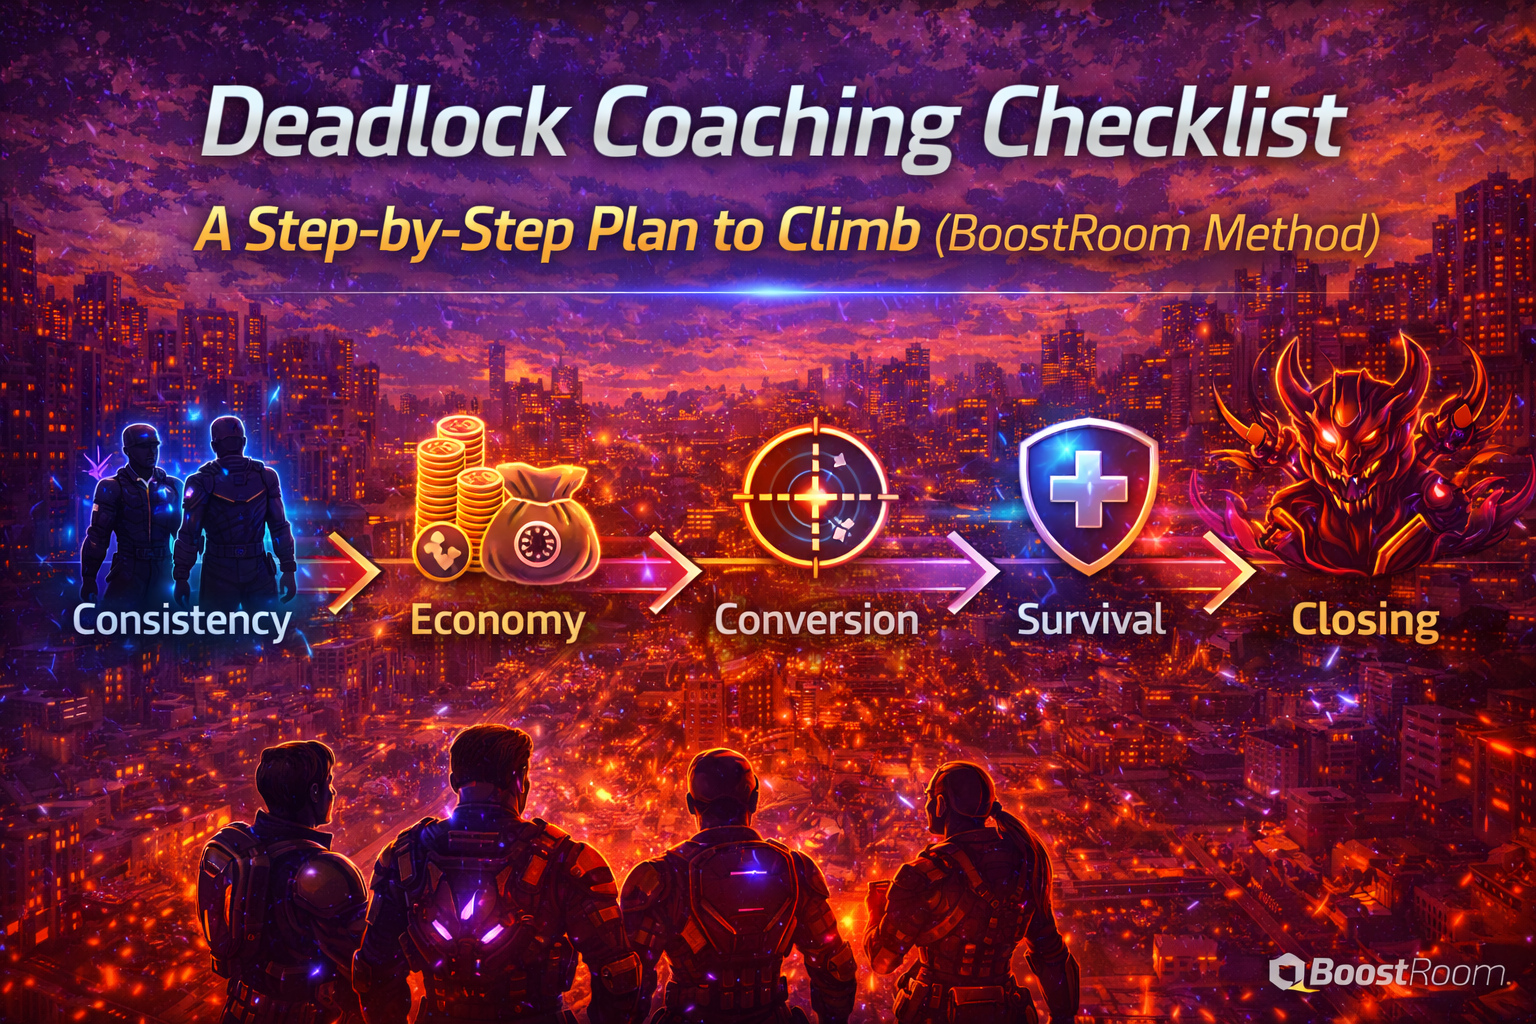
BoostRoom: How We Help You Win Teamfights Consistently
If you want faster improvement, teamfights are one of the highest-return areas to train because they decide objectives and end games. BoostRoom focuses on turning “I hope we win fights” into repeatable decisions you can execute every match.
What BoostRoom-style improvement targets for teamfights:
- Target priority coaching: identifying the real threat each fight and fixing tunnel vision
- Positioning review: where you should stand based on your hero, stamina, and cover angles
- Role clarity: when you should peel, when you should dive, and how to communicate it simply
- Item timing: when debuff cleanses and barriers are mandatory to survive specific matchups
- Conversion discipline: turning every won fight into Walkers, Shrines, and Patron progress instead of random chasing
The goal is simple: fewer “instant deaths,” cleaner fights, and more wins that actually end the match.
FAQ
How do I choose the right target in a Deadlock teamfight?
Use Threat + Access + Value + Time-to-kill. Focus the highest-threat target you can kill quickly without breaking your positioning.
Should I always focus supports first?
No. Supports are high value, but only if you can reach them safely and killing them changes the fight immediately. Often the correct play is killing the diver on your carry or deleting the nearest damage threat first.
What’s the biggest positioning tip for carries?
Never be the closest visible target in open space. Fight from cover, keep an exit route, and reposition before you’re forced to.
How do I stop dying first in teamfights?
Arrive earlier, fight from cover, reserve stamina, and buy survivability or debuff tools (barriers, slow resist, debuff purge) when you’re being focused.
When should we dive the enemy backline?
Dive when you have reliable engage, fast follow-up, and a plan to exit. If your team isn’t coordinated, front-to-back is usually safer.