Why Tarkov Settings Matter So Much
Settings matter in Tarkov because the game does not give players many simple safety nets. You do not have a constant enemy outline. You do not have a simple minimap. You do not get perfect teammate markers. You often need to identify movement, sound, and threats with limited information.
Every setting should support one goal: making raids easier to read.
FPS matters because smoother gameplay makes movement and aim feel more consistent. Visibility matters because maps can be dark, cluttered, rainy, foggy, wooded, or full of indoor shadows. Audio matters because footsteps, surfaces, reloads, healing, looting, doors, bushes, metal, wood, and glass can reveal danger. Keybinds matter because Tarkov has more actions than a simple shooter, and slow controls can cost raids.
A good settings setup can help you notice information earlier. You may hear movement before pushing a hallway. You may see a player crossing a road sooner. You may heal faster after a fight. You may switch movement speed more comfortably. You may avoid input confusion in a squad. You may reduce stutters on demanding maps like Streets, Lighthouse, or Interchange.
Settings do not replace map knowledge or decision-making, but they make those skills easier to use.
There Is No Perfect Universal Settings Preset
Many players search for “the best Tarkov settings” and expect one perfect list. The problem is that Tarkov performance depends on your CPU, GPU, RAM, storage, monitor resolution, refresh rate, drivers, Windows setup, map, game version, and personal preference.
The best settings for one PC can be bad settings for another PC.
A high-end PC may benefit from higher textures and better image clarity. A lower-end PC may need lower shadows, lower view distance, reduced visual effects, and aggressive performance choices. A 1080p monitor may need different sharpening than a 1440p monitor. A player with an older GPU may avoid upscaling options that blur visibility. A player with an RTX card may use DLSS differently from someone using AMD FSR.
Even third-party settings guides usually recommend adjusting settings based on resolution and hardware. For example, one 2026 settings guide recommends low shadows, lower object LOD, reduced clouds, disabled HBAO and SSR, NVIDIA Reflex enabled, and DLSS or FSR depending on hardware and resolution. That type of advice is useful, but it still needs testing on your own system.
Use settings guides as a starting point, then test in real raids.
The Main Goal: Stable FPS Over Maximum FPS
Many players focus only on the highest FPS number. That is understandable, but Tarkov often feels worse when FPS is unstable. A game that jumps from 140 FPS to 60 FPS during fights may feel worse than a game holding a steady 90 FPS.
Stable FPS is more important than a high number that drops at the worst moment.
Frame stability matters because Tarkov fights are often decided quickly. If your game stutters when a player appears, when a Scav spawns, when you enter a busy area, or when you turn toward a dense part of the map, your reaction becomes harder. Stutters can also make audio and movement feel less reliable.
A good performance setup should aim for consistent frametimes. That means lowering settings that cause dips, reducing background apps, keeping enough RAM free, using an SSD, and choosing graphics options that your system can handle across multiple maps.
Your goal is not “highest FPS in the menu.” Your goal is “smooth FPS when the raid becomes dangerous.”
Start With Your Hardware Reality
Before changing every setting, understand your PC. Tarkov can be CPU-heavy, RAM-heavy, and map-dependent. Streets of Tarkov and other dense maps may demand more from your system than smaller maps. If your hardware is close to minimum requirements, settings changes can help, but they cannot fully turn a weak PC into a high-end system.
Good settings begin with honest hardware expectations.
The official support page minimum lists 16 GB RAM, while the Steam recommended specs list 64 GB RAM. That gap is important because Tarkov can be sensitive to memory and background usage, especially on large maps.
If you have 16 GB RAM, close browsers, launchers, recording software, and unnecessary apps before raids. If you have 32 GB or more, you may have more breathing room. If your game is installed on a slow drive, moving it to an SSD can help loading and general responsiveness. If your CPU is older, lowering CPU-heavy settings and reducing background tasks may matter more than changing texture quality.
Do not copy settings blindly. Tune around your weakest component.
Best Display Settings for Tarkov
Your display settings should make the game feel responsive and clear. Use your monitor’s native resolution if your system can handle it. Native resolution usually gives the cleanest image. Lowering resolution can improve FPS, but it can also make enemies harder to see because the image becomes softer.
Clarity matters in Tarkov because small movement can decide a raid.
Use full-screen mode if it gives your system better performance and lower input delay. Some players prefer borderless for alt-tabbing, but full-screen can feel more consistent on certain systems. Test both. Use the refresh rate that matches your monitor. If you have a 144 Hz monitor, make sure the game and Windows are actually set to 144 Hz or higher.
Turn off V-Sync in most cases if you care about input responsiveness, unless you are dealing with screen tearing and have a specific sync setup. If you use G-Sync or FreeSync, test a frame cap slightly below your monitor refresh rate for smoother frametimes. A stable cap can feel better than unlimited FPS if unlimited causes heat, noise, or sudden drops.
A stable frame cap can make Tarkov feel smoother than uncapped FPS.
Resolution: 1080p, 1440p, and 4K
Resolution affects both visibility and performance. 1080p is easier to run and can provide high FPS on mid-range systems, but distant objects may look less sharp. 1440p is often a strong balance between clarity and performance if your GPU can handle it. 4K looks sharp but can be demanding and may require strong hardware or upscaling.
Higher resolution improves clarity, but only if your FPS stays stable.
For most competitive Tarkov players, 1080p or 1440p is more practical than 4K. If you play at 1440p and your FPS drops too much, lowering certain graphics settings or using quality upscaling may help. If you play at 1080p, avoid over-sharpening the image to the point that it becomes noisy or harsh.
Your resolution should match your system and monitor. Do not use 4K just because it looks good in screenshots if your raids become choppy. Do not lower resolution too much if the game becomes blurry and hard to read.
The best resolution is the one that keeps enemies visible and FPS consistent.
Texture Quality
Texture quality affects how surfaces, gear, items, and environments look. Higher textures can improve clarity, but they use more VRAM. If your GPU has enough VRAM, higher texture quality may be worth using because Tarkov’s environments contain many small details.
Texture quality is useful when your GPU can handle it without stutters.
If you have a stronger GPU, start with high textures and test performance. If you have limited VRAM or stuttering when entering dense areas, lower textures. Texture stutter can be frustrating because it may appear when loading areas, turning quickly, or entering loot-heavy zones.
Players with mid-range systems should test medium or high rather than assuming low is always best. Sometimes lowering textures too much makes visibility worse without giving a huge FPS gain, depending on your GPU.
Use the highest texture quality your system can run smoothly.
Shadows Quality
Shadows are one of the most important settings to lower for performance. High shadow quality can look better, but it often costs FPS and may make some indoor or wooded areas feel darker and busier.
Lower shadows are usually better for performance and cleaner visibility.
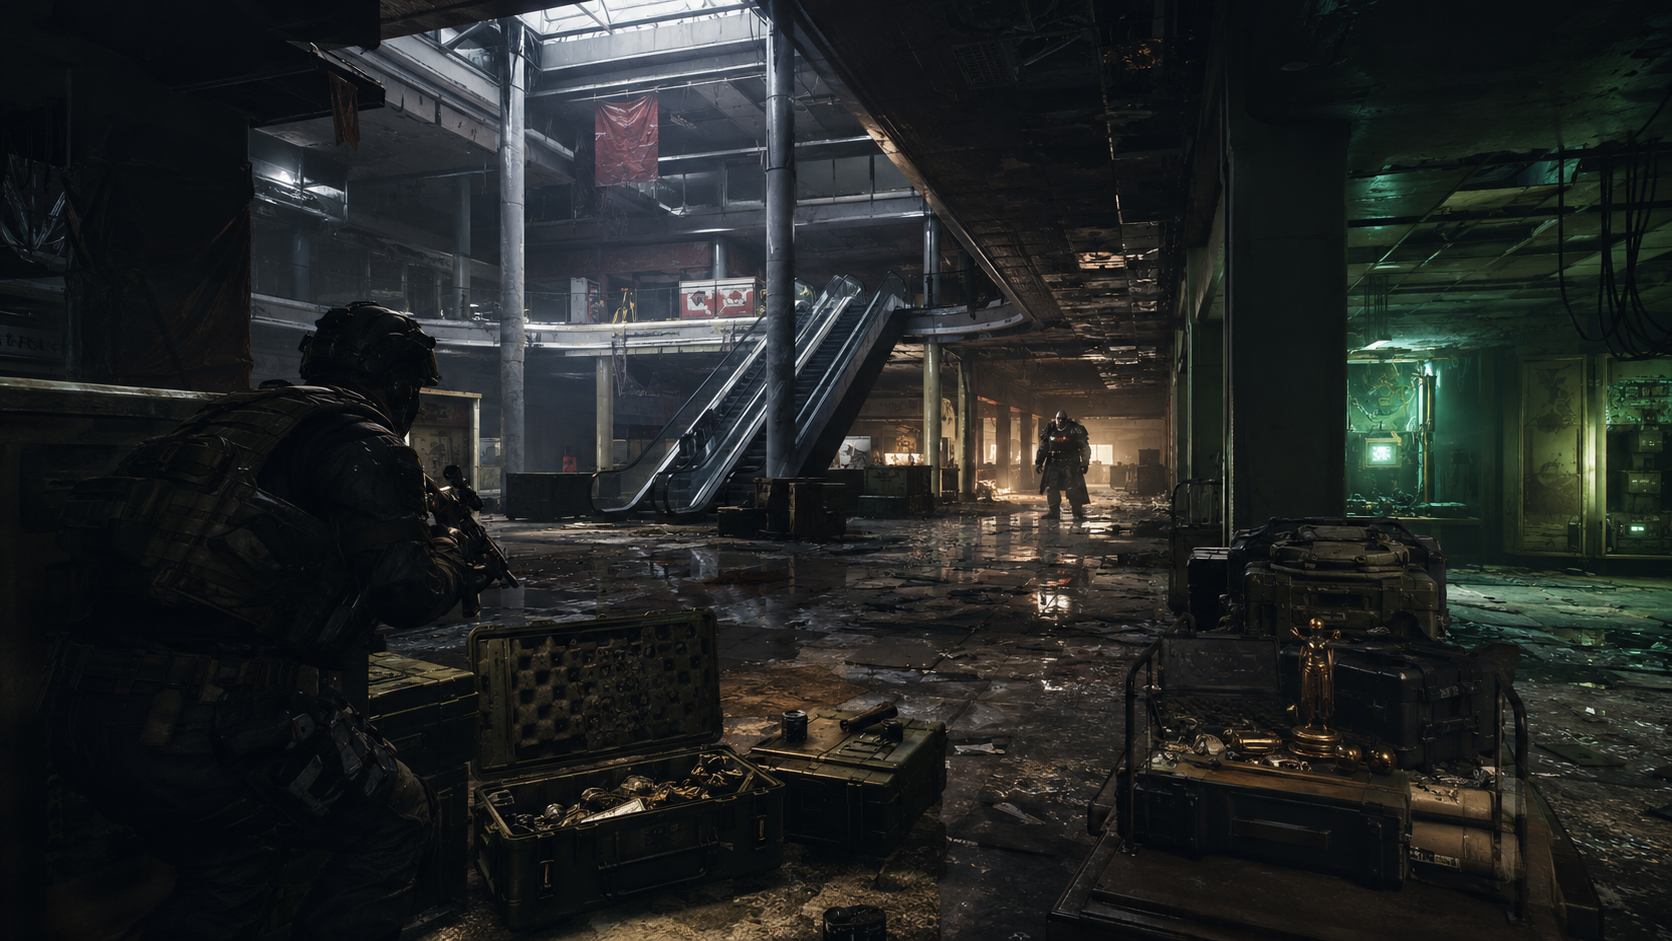
Many players use low shadow quality because it reduces performance cost and makes scenes easier to read. Tarkov has many dark indoor areas, forests, shelves, corners, and complex lighting zones. Heavy shadows can make enemies harder to notice, especially on maps like Interchange, Woods, Shoreline Resort, Reserve bunkers, and Streets interiors.
Do not remove all visual awareness from the game, but keep shadows low enough that they do not hide important movement or reduce FPS.
In Tarkov, pretty shadows are rarely worth losing smoothness and visibility.
Object LOD Quality
Object LOD affects how objects render at distance. Higher values can show more detail far away but may reduce FPS. Lower values improve performance but can make distant terrain and objects look less detailed.
Object LOD should be high enough to read the map, but not so high that it costs stability.
A common performance-focused approach is keeping Object LOD low or moderate. You want enough distant information to navigate and notice movement, but you do not need every far object rendered with maximum detail. On maps like Woods, Lighthouse, and Shoreline, distance matters, so test carefully. Too low can make the world feel pop-in heavy. Too high can cost FPS.
Start around a low-middle value and adjust based on your system. If your FPS drops in open maps, lowering LOD may help.
Object LOD is a balance between distance clarity and FPS stability.
Overall Visibility
Overall visibility controls how far some objects and terrain elements are rendered. Higher visibility can help long-distance awareness but can reduce FPS, especially on open maps. Lower visibility can improve performance but may make long-range map reading less comfortable.
More visibility is not always better if it makes the game unstable.
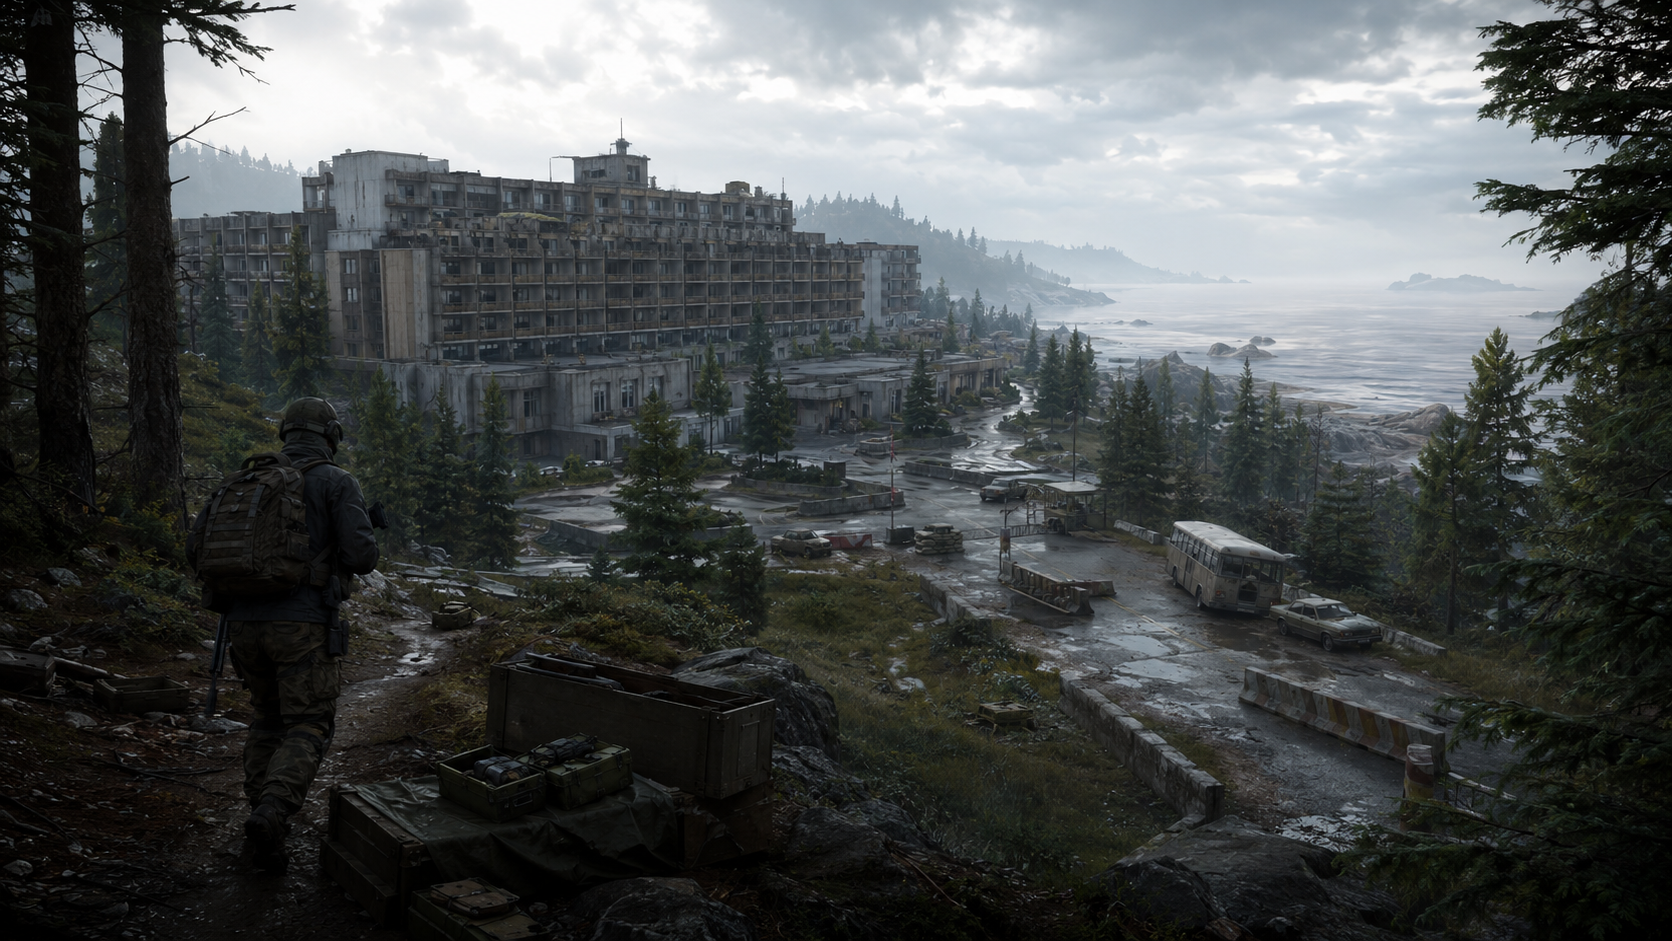
On Woods, Shoreline, and Lighthouse, higher visibility can feel useful because long sightlines matter. On indoor maps or dense city maps, maximum visibility may not provide enough benefit to justify FPS loss. A moderate setting is often better than maxing it out.
Do not lower it so much that distant terrain becomes confusing. Do not max it if your system struggles. Test on Woods or Shoreline to see how it affects long-range clarity.
Overall visibility should support your route knowledge without destroying your FPS.
Anti-Aliasing and Sharpness
Anti-aliasing smooths jagged edges. In Tarkov, this can improve image quality, but some settings can make the game look soft. Sharpness can help restore detail, but too much sharpness creates noisy edges and visual clutter.
The goal is a clean image, not an over-sharpened image.
If the game looks blurry, increase sharpness slightly. If the image looks grainy, harsh, or shimmering, reduce sharpness. Tarkov already has complex environments, so too much sharpening can make bushes, fences, shelves, and distant objects visually tiring.
Anti-aliasing choice depends on your system and monitor. Use a setting that reduces jagged edges without making distant movement too soft. Test in maps with trees, power lines, and indoor shelves.
Visibility improves when the image is clear and calm, not when every edge screams for attention.
DLSS, FSR, and Upscaling
DLSS and FSR can improve FPS by rendering the game internally at a lower resolution and reconstructing the image. This can help on demanding systems, especially at 1440p or higher. However, upscaling can sometimes blur small details, create ghosting, or make distant movement harder to read depending on mode and hardware.
Upscaling is useful when the FPS gain is worth the visibility trade-off.
If you have an NVIDIA RTX GPU, DLSS may be available. If you do not, AMD FSR options may help. Use Quality mode first if visibility matters. Balanced may help if you need more FPS. Performance modes can be too blurry for some players, especially at 1080p.
The official wiki changelog references DLSS-related settings and notes that DLSS works with Nvidia RTX graphics cards. Third-party 2026 settings guidance also commonly recommends DLSS or FSR depending on resolution and GPU support.
Use upscaling as a tool, not a default. Test whether you can still see movement clearly.
NVIDIA Reflex Low Latency
NVIDIA Reflex can reduce system latency on supported systems. Lower latency can make input feel more responsive, especially when GPU load is high. If you have a compatible NVIDIA setup, it is usually worth testing.
Lower input latency helps Tarkov feel more responsive during fast moments.
Many performance-focused guides recommend NVIDIA Reflex on when available. If your system supports it, try enabling it and test how movement, aiming, and menu responsiveness feel. If you experience instability or unusual issues, test without it.
The key point is that FPS is not the only part of responsiveness. Latency matters too. A game can show high FPS but still feel delayed if input latency is poor.
A responsive game helps your decisions turn into actions faster.
HBAO, SSR, and Expensive Visual Effects
HBAO and SSR can improve visual depth and reflections, but they can also cost performance and make scenes visually busier. In Tarkov, competitive clarity usually matters more than extra visual atmosphere.
Turn off expensive effects if they reduce FPS or make visibility worse.
HBAO can add ambient shadowing, but Tarkov already has dark and cluttered areas. SSR adds screen-space reflections, but reflections rarely help survival. Third-party performance guides often recommend disabling HBAO and SSR for cleaner FPS and visibility.
If you are playing for immersion on a strong PC, you may keep some visual effects on. If your goal is performance and survival, reduce or disable them.
In Tarkov, visual effects should never make enemies harder to notice.
Clouds, Grass, and Environmental Clutter
Environmental settings can affect both FPS and visibility. Dense grass, heavy clouds, and extra environmental detail can make maps look better but may reduce clarity or performance.
Outdoor maps become easier to read when unnecessary visual clutter is reduced.
Lowering clouds can help performance. Grass and vegetation-related settings should be tested carefully because Woods, Shoreline, Lighthouse, and Customs have many outdoor sightlines. You still need the map to look natural enough to navigate, but you do not need maximum environmental detail if it makes movement harder to spot.
Weather and lighting can change raid visibility. Your settings should work in bright, cloudy, rainy, and darker conditions. Do not tune only for one perfect sunny raid.
Good visibility settings work across multiple maps and weather conditions.
Post Effects: Helpful or Harmful?
Post effects can change brightness, color, contrast, saturation, and sharpness. They can make the game look clearer, but they can also hurt FPS or create an unnatural image. The best post effects are subtle.
Post effects should reveal information, not turn Tarkov into a cartoon.
Some players increase brightness, saturation, or clarity to make enemies easier to see. Others turn post effects off for performance and a cleaner image. There is no universal answer. If your monitor is dark, a mild brightness or clarity adjustment may help. If your image becomes washed out or over-sharpened, reduce it.
Test post effects in several locations: Interchange dark stores, Woods tree lines, Shoreline Resort hallways, Reserve underground, and Streets interiors. A setting that looks good in one map may look bad in another.
The best post effects are the ones you stop noticing because the game simply becomes easier to read.
Brightness and Monitor Settings
In-game settings are only part of visibility. Your monitor settings also matter. Brightness, contrast, black equalizer, gamma, color temperature, and sharpness can change how Tarkov looks. However, extreme monitor settings can create eye strain or make the game look unnatural.
Your monitor should help visibility without destroying image balance.
If dark areas are impossible to see, slightly increase brightness or black equalizer if your monitor has it. If bright outdoor areas become washed out, lower brightness or adjust contrast. If the image looks too sharp or noisy, reduce monitor sharpness.
Do not copy someone else’s monitor settings exactly unless you have the same panel and lighting environment. Room lighting also matters. Playing in a bright room can make dark maps harder to see.
A comfortable monitor setup helps long sessions feel less tiring.
FPS Testing Method
Do not test settings only in the menu or hideout. Test in actual raids or practice situations on demanding maps. Different maps stress your PC differently. Streets, Lighthouse, Interchange, Woods, and Reserve can all behave differently depending on location.
A settings preset is not proven until it survives real raid conditions.
Test one setting at a time when possible. If you change ten settings and the game feels better, you will not know which setting helped. If it feels worse, you will not know what caused the problem. Start with shadows, texture quality, LOD, visibility, upscaling, HBAO, SSR, and post effects.
Record your average FPS and, more importantly, how stable the game feels. Watch for stutters when turning quickly, entering buildings, fighting Scavs, opening inventory, or moving into dense areas.
The best test is not “what FPS did I get standing still?” It is “did the game stay smooth when information mattered?”
Windows and Background Optimization
Tarkov performance can be affected by background apps. Browsers, video players, game launchers, recording tools, RGB software, overlays, and update services can consume CPU, RAM, disk, or GPU resources.
A clean PC environment can improve Tarkov as much as changing one graphics setting.
Close unnecessary apps before playing. Keep enough free RAM. Avoid running heavy downloads during raids. Make sure Tarkov is installed on an SSD if possible. Keep GPU drivers reasonably updated, but avoid updating right before an important session unless you are ready to troubleshoot.
Overlays can be useful, but too many overlays may cause issues. If you experience stutters or crashes, test with overlays disabled.
Tarkov already asks a lot from your PC. Do not make it share resources with unnecessary background tasks
Audio Settings: Why Sound Is Critical
Audio is one of the most important parts of Tarkov. Footsteps, bushes, doors, looting, healing, reloading, surfaces, Scav voices, glass, metal, wood, and distant shots can all give information. Poor audio settings can make raids feel random.
In Tarkov, sound is not decoration. Sound is survival information.
Your goal is not simply to make the game louder. Louder is not always better. If everything is too loud, important cues blend together and fatigue builds quickly. You want a balanced volume where footsteps and movement cues are clear without painful gunfire or overwhelming ambience.
Use a headset or headphones if possible. Speakers make it harder to judge direction and distance. Avoid heavy bass boosts that make explosions or low sounds overpower footsteps. Avoid music or background videos while raiding if you care about hearing.
Good audio settings make small sounds easier to trust.
Game Volume and Interface Volume
Set master volume to a comfortable level where sudden loud sounds do not hurt. Then adjust interface, music, and other audio categories if available. Menu or interface sounds should not distract you in raid. Music should usually be low or off for focused gameplay.
Your raid audio should prioritize movement and environmental cues.
If interface sounds are too loud, inventory actions can mask nearby movement. If overall volume is too low, you may miss footsteps. If gunfire is painful, lower volume rather than forcing yourself through discomfort. Long sessions with painful audio are not worth it.
A comfortable audio setup helps you play longer and stay calmer. Tarkov is already stressful; your settings should reduce unnecessary strain.
Audio clarity is more valuable than maximum loudness.
Stereo vs Virtual Surround
Many players prefer stereo headphones for Tarkov because clean directional audio can be easier to interpret. Virtual surround can sometimes make sound wider or more dramatic, but it may also make direction less precise depending on the headset and software.
Use the audio mode that helps you locate sounds reliably, not the one that sounds most cinematic.
Test stereo first. Walk through buildings, stairs, metal, wood, and outdoor areas. Then test any surround or spatial audio options you use. If virtual surround makes footsteps harder to place above, below, or behind you, turn it off. If it helps your specific headset and ears, keep it.
Do not stack multiple audio processing systems. For example, using headset software surround, Windows spatial audio, and additional equalizers together can create messy results.
Simple audio is often easier to trust than processed audio.
Equalizer Settings
An equalizer can help, but extreme EQ can hurt. Boosting certain frequencies may make footsteps more noticeable, but too much boosting can make audio harsh, noisy, or misleading.
EQ should improve clarity, not make every sound aggressive.
If your headset has too much bass, reduce bass slightly so low rumbles do not cover footsteps. If your headset sounds dull, a mild clarity boost can help. Avoid extreme treble that causes fatigue. Tarkov has many sharp sounds, and over-bright EQ can become uncomfortable.
Test EQ by walking on different surfaces and listening to distant movement. The best EQ is one where you can distinguish surfaces and direction without discomfort.
If an EQ setting makes your ears tired, it is not a good Tarkov setting.
Keybinds: Why Controls Matter
Tarkov has many more controls than a typical FPS. You need movement, leaning, stance changes, checking ammo, checking chamber, changing fire mode, changing scope zoom, changing tactical devices, healing, using items, discarding loot, inspecting, inventory shortcuts, voice lines, and more.
Good keybinds reduce hesitation during stressful moments.
The official controls page lists many default controls, including WASD for movement, mouse wheel for changing movement speed, Caps Lock to switch to minimum movement speed and back, Left Shift for sprint, Spacebar for jump, Spacebar hold for vaulting, Q and E for quick lean, and Left Alt combinations for slow lean and side step.
Default binds can work, but they are not perfect for everyone. The goal is comfort. Important actions should be easy to press without taking your hand away from movement too much. Rare actions can stay on less convenient keys.
Keybinds should match how your hand naturally plays, not how someone else’s keyboard looks.
Movement Keybinds
Keep movement simple. WASD should stay stable unless you have a strong personal reason to change it. Sprint, crouch, prone, jump, and vault should be easy to reach. Movement is the foundation of every raid.
Movement keys should never feel confusing under pressure.
Caps Lock movement speed control is extremely important in Tarkov because speed affects sound. The official controls page lists Caps Lock as changing movement speed to minimum and pressing again to return to previous speed. Keep this easy to use or rebind it somewhere comfortable.
Crouch and prone should be easy but not so easy that you hit them accidentally. If you accidentally prone during fights, change the bind. If crouch is too awkward, move it to a key you can reach while still controlling movement.
In Tarkov, movement binds are also sound-control binds.
Lean Keybinds
Leaning is important because Tarkov fights often involve cover, doors, shelves, hallways, and windows. The default quick lean keys are Q and E, according to the official controls page. Many players keep them. Others move lean to mouse side buttons or alternate keys to keep fingers on movement.
The best lean bind is the one you can use without breaking movement control.
If Q and E feel comfortable, keep them. If pressing Q and E makes it hard to strafe or move, test mouse side buttons. If your mouse buttons affect aim, keep leaning on the keyboard. There is no perfect answer.
Slow lean and sidestep are more advanced. They can help in specific situations, but beginners should first master quick lean, movement, and cover.
Leaning should help you expose less, not make your hands fight the keyboard.
ADS, Hold Breath, and Aim Comfort
Aim settings are personal, but consistency matters. Decide whether aiming down sights should be hold or toggle. Many players prefer hold because it feels responsive. Others prefer toggle for comfort. Use what feels stable.
Aim settings should feel automatic, not something you think about mid-fight.
Hold breath should be easy to activate when using optics in-game. Avoid binding it somewhere awkward if you often use medium or long-range setups. Some players combine hold breath with ADS behavior, but that depends on preference and stamina management.
Do not change sensitivity constantly. Tarkov already has different weapon handling, armor effects, stamina effects, and optics behavior. Constant sensitivity changes make learning harder.
Comfortable aim settings are settings you can keep for weeks, not minutes.
Mouse Sensitivity
Mouse sensitivity is one of the most personal settings, but lower and consistent sensitivity is often easier for precise control. Extremely high sensitivity can make small movements harder. Extremely low sensitivity can make close-range reactions uncomfortable.
The best sensitivity lets you turn, track, and make small corrections without fighting your mousepad.
Start with a moderate sensitivity. Test in the hideout, offline practice if available, and real raids. Try moving through doors, aiming at small objects, and turning 180 degrees. If you overshoot constantly, lower sensitivity. If you cannot turn comfortably, raise it slightly.
Keep Windows mouse acceleration off if you want consistent aim. Use a stable DPI. Do not copy a streamer’s sensitivity unless your mousepad, DPI, posture, and preference match.
Consistency builds aim confidence faster than constant tweaking.
Inventory and Looting Keybinds
Inventory speed matters in Tarkov because looting keeps you vulnerable. Good inventory binds help you move items faster and spend less time exposed. Learn item transfer shortcuts, discard binds, inspect binds, and quick-use slots.
Fast looting is a survival skill.
A poor discard bind can slow you down when replacing loot. A comfortable quick-use setup can help you heal or use items faster. Inventory shortcuts should be practiced until they become natural.
Do not put important inventory actions on keys you hit by accident. Accidentally discarding or using the wrong item can create problems. Keep high-risk actions intentional.
The less time you spend staring at inventory, the more time you spend surviving.
Healing Keybinds
Healing binds are critical because Tarkov has multiple medical needs: HP healing, light bleed, heavy bleed, pain, fractures, and surgery. You need to access urgent items quickly.
Your healing keybinds should solve emergencies first.
Put heavy bleed treatment, a main medkit, and pain management on comfortable quick slots. If you use splints, surgery kits, or extra meds, organize them so you know where they are. Keep urgent items in your rig or pockets when possible, not buried in a backpack.
Practice your healing order. After damage, move to cover, stop urgent bleeding, restore critical health, manage pain if needed, and decide whether to fight or leave. Keybinds help only if your item placement supports them.
A good med setup is part keybinds and part inventory organization.
Magazine, Fire Mode, and Tactical Device Binds
Tarkov has important weapon-related controls, but keep them comfortable and avoid accidental presses. Checking magazine, changing fire mode, changing scope zoom, toggling tactical devices, and changing sight modes can matter in raids.
Weapon utility binds should be easy enough to use, but not so easy that you hit them accidentally.
The official controls page lists many default inputs and combinations, and third-party control guides emphasize that Tarkov has many useful hotkeys beyond basic movement.
For beginners, prioritize fire mode awareness, reload comfort, tactical device control, and optic control. You do not need every advanced bind perfected on day one. Add complexity once the basics feel natural.
The best keybinds reduce mistakes without overwhelming your hands.
Push-to-Talk and Squad Communication
If you play in squads, push-to-talk and communication binds matter. Your voice key should be easy to press but not interfere with movement, aiming, healing, or leaning. Bad communication causes friendly confusion.
Squad keybinds should support short, clear callouts.
Do not bind push-to-talk to a key that makes you stop moving during danger. Do not bind it somewhere you accidentally hold during fights. If you use Discord or another voice tool, keep your in-game controls separate enough that they do not conflict.
Communication is part of settings because a squad that cannot call movement clearly will struggle, no matter how good their graphics settings are.
A good squad setup makes callouts easy and panic chatter less likely.
Recommended Beginner Keybind Philosophy
Beginners should not change every key at once. Tarkov already has many systems, and too many keybind changes can create confusion. Start with the default controls, then adjust the binds that feel awkward.
Change keybinds slowly and intentionally.
First, make movement comfortable. Then adjust lean if needed. Then organize healing quick slots. Then set inventory shortcuts. Then tune scope, tactical device, and communication binds. After each change, play several raids before deciding whether it works.
If you change everything after one bad raid, you may never build muscle memory. Settings should help consistency.
The best keybind setup is one you remember under pressure.
Best FPS Settings Starting Point
A strong FPS-focused starting point is: full-screen mode, native resolution if possible, low shadows, low-to-moderate object LOD, moderate visibility, HBAO off, SSR off, clouds low, unnecessary effects off, Reflex on if supported, and DLSS or FSR only if the image remains clear.
Start with performance first, then add clarity where your system allows.
Texture quality depends on VRAM. If you have enough VRAM, high textures may be fine. If you stutter, lower them. Anti-aliasing and sharpening should be tuned for image clarity. Post effects should be subtle or off depending on FPS and visibility.
This starting point is not magic. It is a baseline. Test it on your most demanding maps. If FPS is stable, you can increase visual quality. If FPS dips, reduce expensive settings.
Build settings from stability upward, not beauty downward.
Best Visibility Settings Starting Point
A strong visibility-focused setup uses clean resolution, reasonable anti-aliasing, mild sharpness, low shadows, reduced visual effects, comfortable brightness, and subtle post effects. Avoid extreme saturation or sharpening that makes the game noisy.
Good visibility means enemies and movement stand out naturally.
Test visibility in dark indoor stores, wooded areas, rainy weather, underground bunkers, and bright outdoor roads. Do not tune only in the hideout. Tarkov visibility changes dramatically by map and time of day.
If the game is too dark, adjust brightness or post effects slightly. If the game is washed out, reduce brightness or contrast changes. If trees and bushes shimmer too much, reduce sharpness or adjust anti-aliasing.
The best visibility settings work in bad lighting, not only perfect lighting.
Best Audio Settings Starting Point
A strong audio setup is simple: use headphones, keep master volume comfortable, reduce unnecessary music or interface volume, avoid extreme surround processing, avoid heavy bass boosts, and test whether stereo gives clearer direction.
Audio should help you locate movement without hurting your ears.
Use one audio processing approach at a time. Do not stack headset surround, Windows spatial audio, and equalizer presets unless you know the result helps. Keep volume safe and comfortable. If loud sounds hurt, reduce volume.
Practice listening to surfaces. Wood, metal, grass, bushes, glass, and stairs all create useful information. Your audio settings should make those differences easier to recognize.
Tarkov audio is best when it is clear, directional, and comfortable for long raids.
Best Keybind Starting Point
A strong keybind setup keeps movement familiar, lean comfortable, healing quick slots easy, movement speed control accessible, inventory shortcuts practiced, and communication binds simple. Do not overload one key with too many critical actions.
Keybinds should reduce finger travel during emergencies.
Keep or test these priorities: WASD movement, easy sprint, easy crouch, comfortable lean, accessible Caps Lock or movement speed control, quick meds, quick reload, easy tactical device control, and reliable push-to-talk. Use mouse side buttons only if they do not hurt aim.
Practice your binds outside serious raids. Use low-risk raids, Scav runs, or offline-style practice if available. Do not discover during a fight that your new heal bind is awkward.
A good keybind layout disappears from your mind because your hands already know it.
Settings for Low-End PCs
Low-end PCs should prioritize FPS stability. Use full-screen mode, lower shadows, lower LOD, moderate or lower visibility, low clouds, HBAO off, SSR off, reduced post effects, and careful texture settings. Close background apps and avoid recording software if it causes stutters.
Low-end Tarkov settings should protect smoothness first.
If your GPU has limited VRAM, lower texture quality. If your CPU struggles, reduce settings that increase scene complexity and close background tasks. If RAM is limited, avoid browser tabs and memory-heavy apps during raids.
Upscaling can help, but test clarity. If DLSS or FSR makes the image too blurry at 1080p, it may hurt more than help. If it gives stable FPS at 1440p, it may be worth using.
A low-end setup can still be playable when settings are honest and focused.
Settings for Mid-Range PCs
Mid-range PCs should aim for a balance. Use good texture quality if VRAM allows, low shadows, moderate visibility, low-to-moderate LOD, disabled expensive effects, and subtle sharpening. Consider Reflex if supported and upscaling only if needed.
Mid-range settings should balance clarity and stable FPS.
A mid-range PC may handle 1080p very well and 1440p with tuning. Test demanding maps before increasing settings. If Customs feels smooth but Streets stutters, tune for Streets, not Customs. Your settings should survive your hardest map.
Mid-range players often benefit most from careful testing. You may not need everything on low, but you also should not max settings that provide little survival value.
Use your hardware where it matters: clarity, textures, and stable frametimes.
Settings for High-End PCs
High-end PCs can use higher textures, higher resolution, better image quality, and stronger clarity settings, but even high-end systems should avoid unnecessary visual clutter if the goal is competitive survival.
High-end settings should still be practical, not just beautiful.
You may use 1440p or higher, high textures, better anti-aliasing, and more comfortable visibility settings. But shadows, SSR, HBAO, and post effects should still be judged by whether they help or hurt. High FPS with a cluttered image is not ideal.
A high-end PC should also use a stable frame cap if uncapped FPS creates heat, noise, or inconsistent frametimes. Smoothness still matters.
A powerful PC gives you options, but smart settings still win raids.
Common Settings Mistakes Beginners Make
One common mistake is copying a streamer’s settings without understanding hardware differences.
Settings are personal because PCs, monitors, and eyes are different.
Another mistake is lowering everything to minimum and making the game ugly or blurry without actually fixing the bottleneck.
Another mistake is maxing textures, shadows, and visibility on a PC that cannot hold stable FPS.
Another mistake is using extreme post effects that make the game colorful but visually noisy.
Another mistake is setting audio too loud and becoming tired or overwhelmed.
Another mistake is changing sensitivity every day.
Another mistake is changing too many keybinds at once and losing muscle memory.
The biggest mistake is chasing settings forever instead of testing, choosing a stable setup, and learning the game.
Settings should support improvement, not become an excuse to avoid practice.
How BoostRoom Helps Players Improve Tarkov Settings and Gameplay
Escape from Tarkov settings can be overwhelming because performance, visibility, audio, keybinds, map knowledge, and survival habits all connect. Many players do not know whether they are losing raids because of bad settings, poor routes, weak audio awareness, uncomfortable controls, or simple decision-making mistakes.
BoostRoom helps players turn confusing Tarkov setup choices into a clearer gameplay foundation.
For beginners and returning players, this can make a major difference. A better settings approach helps players improve FPS stability, clean up visibility, organize keybinds, understand audio cues, prepare better raids, and reduce avoidable mistakes. Settings alone do not make someone a strong player, but bad settings can hide information and make learning harder.
BoostRoom is useful for players who struggle with performance, map confusion, PvP pressure, quest planning, loot routes, extract timing, and general Tarkov confidence. When your game feels smoother and your controls feel natural, it becomes easier to focus on decisions instead of fighting your setup.
Better settings create a better foundation for better raids.
Beginner Settings Rules You Should Remember
Rule one: stable FPS matters more than maximum FPS.
A smooth 90 FPS can feel better than unstable 140 FPS.
Rule two: lower shadows first.
Shadows often cost performance and can hurt visibility.
Rule three: keep visibility clear, not over-sharpened.
Too much sharpness can make Tarkov noisy and tiring.
Rule four: use upscaling only if it helps.
DLSS and FSR can improve FPS, but test whether the image stays readable.
Rule five: audio should be comfortable.
Painfully loud sound is not a competitive advantage.
Rule six: change keybinds gradually.
Muscle memory matters in Tarkov.
Rule seven: test settings on demanding maps.
Do not tune only in menus or easy locations.
Rule eight: settings should support survival decisions.
The goal is clearer raids, not perfect screenshots.
Best Simple Tarkov Settings Plan
A strong simple settings plan starts with performance. Set full-screen mode, native resolution if possible, low shadows, moderate LOD, moderate visibility, HBAO off, SSR off, low clouds, and subtle sharpening. Use DLSS or FSR only if needed and only on a mode that keeps the image clear. Enable Reflex if your system supports it and it feels better.
Start with stable FPS, then improve visibility.
Next, tune visibility. Check dark areas, forests, indoor stores, and long outdoor routes. Adjust brightness, sharpness, and post effects carefully. Avoid extreme color changes. Make sure enemies do not blend too much into shadows, but also make sure the image does not become washed out.
Then tune audio. Use headphones, reduce unnecessary volume, avoid too much audio processing, and keep the sound comfortable. Test footsteps and surfaces.
Finally, tune keybinds. Keep movement simple. Make lean comfortable. Put meds on easy quick slots. Keep movement speed control accessible. Practice inventory shortcuts. Do not change everything at once.
A complete Tarkov setup is graphics, visibility, audio, keybinds, and comfort working together.
Final Thoughts: Better Settings Make Tarkov Easier to Read
Escape from Tarkov is hard because raids are full of uncertainty. You need to see small movement, hear useful sounds, move smoothly, heal quickly, loot efficiently, and react without fighting your controls. Good settings do not remove the challenge, but they make the information clearer.
The best Tarkov settings are the ones that help you notice, decide, and act faster.
Prioritize stable FPS. Lower expensive visuals that do not help survival. Keep the image clear without over-sharpening. Use audio settings that make footsteps and surfaces understandable without hurting your ears. Build keybinds around comfort and muscle memory. Test settings across multiple maps. Change one thing at a time. Stop tweaking once your setup feels stable enough to learn.
Do not chase perfect settings forever. Tarkov improvement still comes from map knowledge, extracts, ammo, armor, healing, route planning, patience, and better decisions. Settings are the foundation, not the whole building.
If your game is smooth, your visibility is clean, your audio is clear, and your keybinds feel natural, you can focus on the raid itself. That is where real improvement begins.
In Escape from Tarkov, better settings do not guarantee survival, but bad settings can make survival much harder than it needs to be.
FAQ
What are the best settings for FPS in Escape from Tarkov?
The best FPS settings usually prioritize full-screen mode, low shadows, moderate object LOD, reasonable visibility, disabled HBAO and SSR, low clouds, subtle post effects, and stable texture quality based on your VRAM. Test on demanding maps before finalizing.
Should I use DLSS or FSR in Tarkov?
Use DLSS or FSR if it improves FPS without making the image too blurry. Start with Quality mode, especially at 1080p or 1440p, and avoid modes that make distant movement hard to see.
What are Tarkov’s minimum PC requirements?
Battlestate’s support page lists Windows 10, AMD Ryzen 5 3600 or similar, 16 GB RAM, GTX 1660 or similar, DirectX 11, and 80 GB available storage as minimum requirements.
What are Tarkov’s recommended PC requirements on Steam?
The Steam page lists Windows 11, Intel Core i7-14700F or better, 64 GB RAM, RTX 4070 or better, DirectX 11, and 80 GB storage as recommended specs.
Should I turn shadows down in Tarkov?
Yes, most players should use low shadows for better FPS and cleaner visibility. High shadows may look better, but they often cost performance and can make dark areas harder to read.
Are post effects good in Tarkov?
Post effects can help visibility if used lightly, but extreme settings can make the image noisy, washed out, or tiring. Test them across different maps and lighting conditions.
What audio settings are best for Tarkov?
Use headphones, keep volume comfortable, reduce unnecessary music or interface sound, avoid extreme bass, and test stereo before using heavy virtual surround processing.