The Six Damage Types in Borderlands 4 (The Only List You Need to Memorize)
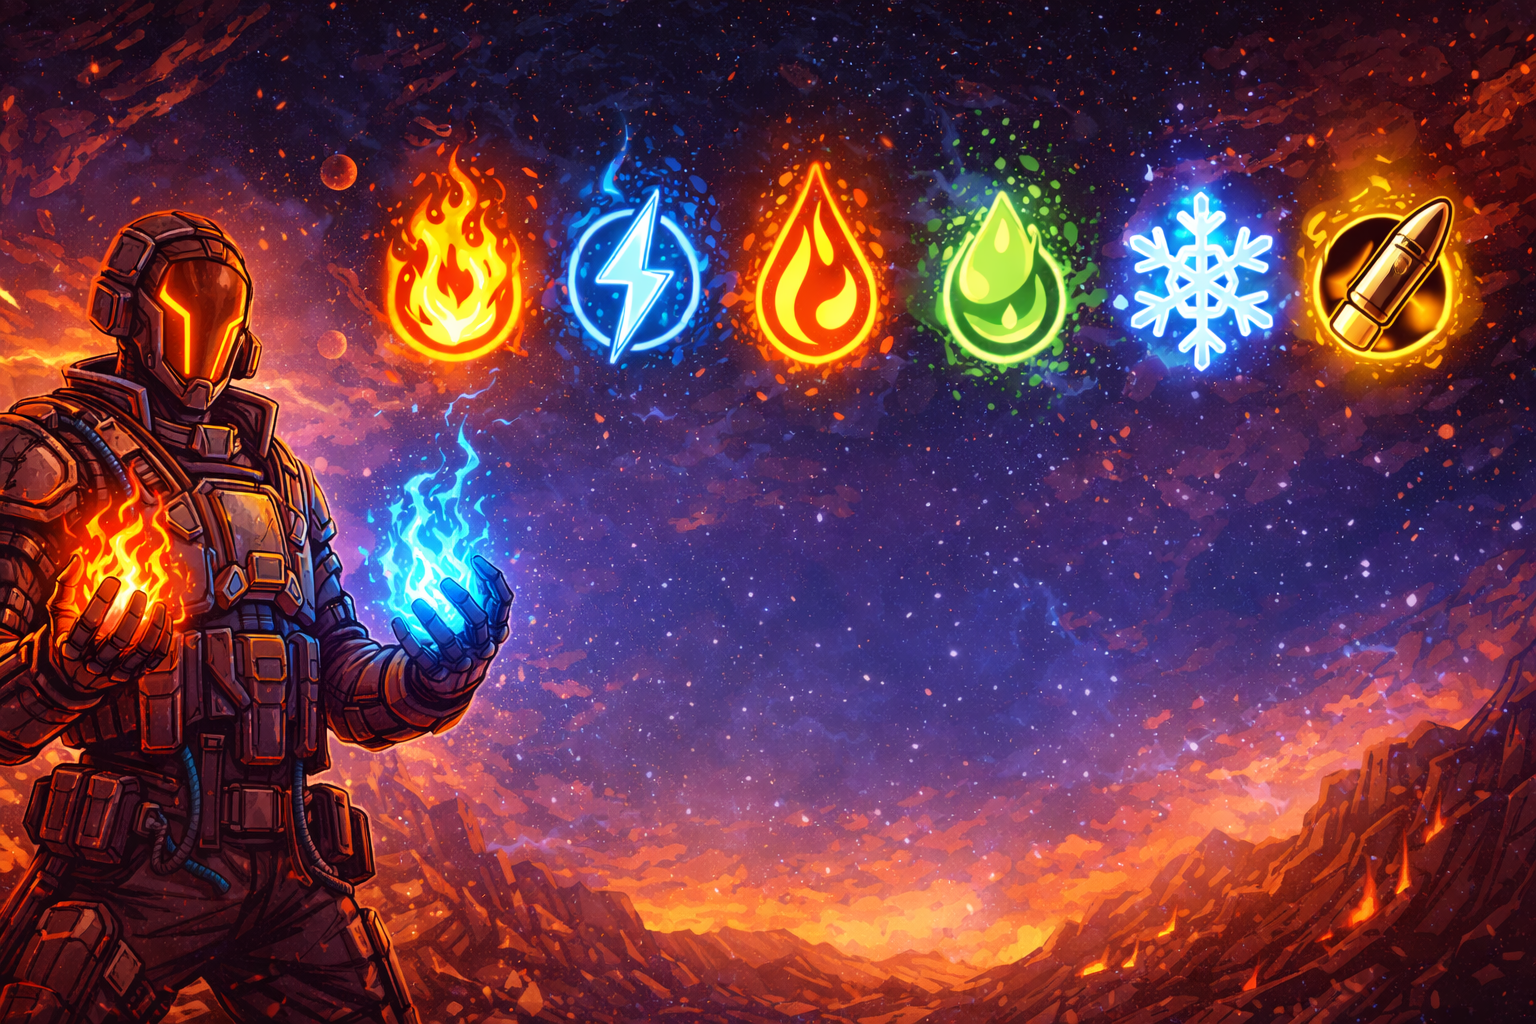
Borderlands 4 guns can deal six core damage types: Kinetic, Incendiary, Shock, Corrosive, Cryo, and Radiation.
That’s it. Everything else you hear—“bleed,” “poison,” “true damage,” “explosive,” “splash,” “sticky,” “gun damage,” “melee damage”—is either a separate damage category (how damage is delivered) or a modifier layered on top of these six (how the game colors and scales the damage).
If you’re brand new, memorize this fast rule set:
- Kinetic = consistent
- Fire (Incendiary) = deletes flesh
- Shock = deletes shields
- Corrosive = deletes armor
- Cryo = control (slow/freeze)
- Radiation = crowd pressure (irradiate + explosions)
Once you know that, you’re already ahead of most players on day one.
Health Bars Explained: Flesh, Shields, Armor (Why Elements Matter So Much)
Borderlands 4 enemies usually present as one or more of these layers:
- Flesh/Health (often red)
- Shields (often blue)
- Armor (often yellow)
Elements are designed to “answer” these layers:
- Incendiary is tuned for flesh.
- Shock is tuned for shields.
- Corrosive is tuned for armor.
This matters because the difference isn’t small. When you use the correct element, enemies don’t just die faster—they die fast enough that you stay safe. When fights end quickly, you take fewer hits, you spend fewer Repkit charges, and you stop losing momentum.
A practical habit that feels like a cheat:
- If an enemy has a shield, swap to Shock immediately.
- If an enemy has armor, swap to Corrosive immediately.
- If it’s pure health, Incendiary will usually feel the best.
Even if you hate swapping weapons, doing it for shield/armor targets is worth it. It turns “bullet sponge” enemies into quick deletes.
Kinetic Damage: The Safety Net Element (And When It’s Actually Best)
Kinetic is the default “no element” damage type. It’s the most reliable because it doesn’t rely on matching weaknesses. That makes it perfect for:
- Your safety weapon (the gun you trust when fights get messy)
- Mixed-health enemies when you don’t want to swap constantly
- Early campaign when you don’t have good elemental coverage yet
- Builds that scale raw gun damage heavily
Kinetic becomes surprisingly valuable in two situations:
- When your element is being resisted (your favorite fire gun suddenly feels terrible)
- When your build multiplies gun damage so hard that “neutral but huge” outperforms “effective but weaker”
If you only keep one non-elemental gun, keep one kinetic weapon that feels accurate, stable, and ammo-friendly. It will save runs.
Incendiary Damage: The Fastest Way to Delete Flesh
Incendiary (Fire) is the “classic power” element: it shreds flesh targets and usually applies a burning damage-over-time effect when it procs.
Incendiary is at its best when:
- You’re clearing mobs that are mostly health bars
- You want reliable pressure that keeps ticking while you reposition
- You’re fighting enemies that don’t heavily layer shields/armor first
Incendiary is at its worst when:
- You’re trying to burn through shield-heavy encounters
- You’re trying to burn through armor-heavy elites
- You’re fighting enemies with strong fire resistance
Practical incendiary tip:
- Fire is a “snowball element.” It feels better when you keep fighting aggressively because the DoT is still working while you keep shooting.
Shock Damage: Your Shield Breaker (Plus the Hidden Value of Interrupts)
Shock is the element you want whenever shields are present. A good Shock weapon makes shielded enemies feel like they forgot to equip a defense.
Shock’s practical value goes beyond “more damage to shields”:
- It can create brief interruptions/staggers on certain enemies and situations (depending on game tuning and enemy type).
- It helps you restore tempo in fights where shields otherwise slow your kill speed.
Your best Shock weapon is usually:
- Accurate enough to stay on target
- Fast enough to crack shields quickly
- Reliable enough that you don’t mind swapping to it constantly
A lot of players make this mistake:
- They carry one Shock gun, but it’s slow, clunky, or bad at range—so they “forget” to use it.
- Instead, carry a Shock option you actually enjoy. Your habits matter more than theory.
Corrosive Damage: The Armor Melter That Makes Elites Feel Normal
Corrosive exists for one job: deleting armor. That matters because armored enemies tend to be the ones that:
- hit hard
- resist chip damage
- survive long enough to create chaos
Corrosive is the difference between:
- “This elite is ruining the fight”
- and
- “That elite died before it did anything.”
Corrosive also tends to feel amazing in zones where armored enemies are common, because it stops fights from dragging. You’ll often notice your survivability improves simply because enemies die before they can stack pressure.
Cryo Damage: Not a DoT Element—A Control Element
Cryo is where many players get confused, because Cryo doesn’t function like Fire/Shock/Corrosive/Radiation. Cryo is primarily about slowing and freezing, and it uses a stat often described as Cryo Efficiency to represent how quickly it can freeze enemies.
Think of Cryo as a power multiplier through control:
- Frozen enemies stop attacking.
- Frozen enemies become easier to crit and focus.
- Frozen enemies make revives safer.
- Frozen enemies let you play more aggressively without dying.
Cryo is “damage through comfort.” It may not always top the raw DPS charts on paper, but it often increases your real-world DPS because you spend less time running, hiding, and recovering.
When Cryo feels best:
- Mobbing (freezing swarms makes rooms easy)
- Co-op support (your team deletes frozen clusters)
- High-pressure content (control reduces wipe risk)
When Cryo feels worst:
- Enemies that freeze slowly or resist control heavily
- Builds that depend purely on DoT ticks as their main damage source
Radiation Damage: Crowd Pressure and Chain Kills
Radiation is an “end fights faster” element in a different way: it turns kills into chain value. Radiation status commonly causes afflicted enemies to explode on death, damaging nearby enemies and accelerating mob clears.
Radiation shines when:
- Enemies are clustered
- You can keep kills rolling (kill → explosion → more kills)
- You want one element that stays useful across mixed-health mobs
Radiation struggles when:
- You’re fighting single targets with lots of downtime between kills
- The fight is mostly “one boss, no adds”
- You need a precise shield/armor answer right now
Think of Radiation as the “room clearer.” You use it to make chaos work for you.
Status Effects vs DoT: The Most Important Distinction
In Borderlands 4, many elemental weapons show a DoT value on their weapon card (especially Fire/Shock/Corrosive/Radiation). Cryo is different—Cryo focuses on slow/freeze instead of a direct DoT value.
Here’s the beginner-friendly truth:
- Hit damage is what your bullet/beam/explosion does immediately.
- Status effects are special effects applied by elemental damage.
- DoT is one kind of status effect (damage ticks over time).
So when you evaluate an elemental weapon, you’re evaluating two things:
- How good it is at killing with direct hits
- How good it is at applying and benefiting from its status effects (including DoT, control, or explosions)
This is why a weapon can “feel insane” even if its base card damage looks mediocre:
- Because its status application is carrying fights
- Or because its DoT scales with your build bonuses
How Status Chance Works in Real Gameplay
You’ll usually see some kind of “status effect chance” or “chance to apply” concept in Borderlands systems. In practice, status chance is best understood like this:
- If your weapon hits often (high fire rate, multi-pellet, beams), you apply status more reliably.
- If your weapon hits hard but slowly (sniper, heavy burst), you may apply less frequently unless the gun or your build boosts status chance.
- Some skills and gear turn your first shot after reload, your crits, or your kills into “status engines.”
Beginner rule:
- If you want a status build early, pick weapons that hit often.
- High hit count is the easiest “status chance booster” you can control without any special gear.
DoT Scaling: Why Some Status Builds Suddenly Become Overpowered
DoT becomes overpowered when you stack multipliers that increase:
- Status effect chance (apply more often)
- Status effect damage (ticks hit harder)
- Status spread (one target infects others)
- Kill triggers (DoT kills cause chain effects)
- Element bonuses (matching the right health bar makes DoT feel unfair)
The “secret” is that DoT often keeps working while you do other things:
- reposition
- reload
- use Repkit
- dodge
- swap targets
So DoT is a damage amplifier on your time. If your DoT is strong, you don’t need to shoot one target forever—you tag it, move on, and let time finish the job.
Cryo Efficiency: Why Cryo Builds Feel Better Than They Look
Because Cryo is control-first, its value often shows up as:
- fewer incoming bullets
- fewer panic moments
- easier crit chains
- safer Second Winds
- smoother boss add management
If you play co-op, Cryo is even better:
- freezing enemies creates a “free damage window” for your team
- you turn chaotic swarms into shooting galleries
- your squad’s burst DPS becomes more reliable
If your friends love pure damage builds, being the Cryo player makes you the reason the squad clears cleanly.
Reading a Weapon Card Like a Pro (Without Becoming a Spreadsheet Person)
When you pick up a gun, don’t try to interpret every stat. Use this 10-second scan:
- Damage type (what element is it?)
- Feel (is it stable, accurate, usable at your preferred range?)
- Kill speed (does it delete the enemy layer it should delete?)
- Status behavior (does it apply quickly? does it spread? does it explode?)
- Downtime (reload, overheat, charge time—does it interrupt your rhythm?)
If a gun is “technically strong” but feels awful, you won’t use it. A slightly weaker gun that you love will outperform a “meta” gun you hate, because habits win.
The Three-Element Loadout That Makes the Campaign Easy
If you want a simple setup that covers almost everything, aim for this:
- Shock weapon (fast shield breaker)
- Corrosive or Incendiary weapon (based on what you’re seeing more)
- Kinetic safety weapon (stable and reliable)
- Optional fourth slot: Cryo or Radiation (based on your preference)
This loadout prevents the classic beginner trap:
- “I love this fire gun… why are these shield enemies taking forever?”
If you can answer shields and armor quickly, Borderlands 4 becomes smoother immediately.
Synergy 1: Primer + Finisher (How to Melt Tough Targets)
A “primer” is a weapon that applies a status effect quickly.
A “finisher” is a weapon that cashes in on that status by bursting damage during the window.
Examples of primer behaviors:
- fast-fire Shock SMG to crack shields
- Radiation weapon to “set up” chain pressure
- Cryo weapon to freeze and create a safe burst window
Examples of finisher behaviors:
- high burst shotgun
- sticky explosive weapon for timed detonation
- precision crit weapon that deletes frozen targets
How you use this:
- Prime the target (status/control)
- Swap to finisher
- Delete during the advantage window
This is how average gear kills like endgame gear.
Synergy 2: Freeze + Crit (The Cleanest “OP Feel” Combo)
Cryo creates control. Control creates easy crits. Easy crits create fast kills.
To build around Freeze + Crit:
- Carry a Cryo tool that freezes reliably (don’t overthink—just make sure it freezes fast)
- Carry a precision finisher you enjoy (pistol, AR, sniper, crit-focused weapon)
- Practice the simple flow: freeze → aim calm → crit chain
This works especially well in co-op:
- one player freezes
- the other player crit deletes
It also works solo because it turns panic fights into calm fights.
Synergy 3: Radiation Chain Clears (How to Delete Rooms Faster Than Your Gear Level)
Radiation shines when enemies are close enough that explosions matter.
To maximize chain clears:
- Use Radiation in dense rooms
- Prioritize killing weaker enemies first (so explosions start the chain)
- Use movement to herd enemies into clusters (yes, positioning creates damage)
Radiation chain clears are one of the best “I feel overpowered” experiences in Borderlands 4 because you’re not just killing enemies—you’re weaponizing the room.
Synergy 4: Shield Strip → Armor Melt → Burn Finish (The Full Layer Combo)
In longer fights, enemies can present multiple layers. You’ll feel like a veteran when you handle them cleanly:
- Shock strips shields fast
- Corrosive deletes armor fast
- Incendiary melts remaining health fast
This is the simplest “swap discipline” that turns hard elites into routine kills.
If swapping constantly annoys you, you can reduce swaps by choosing versatile elements (Radiation, Cryo) as your backups—but the full layer combo is still the fastest when you need pure efficiency.
Maliwan and Status Builds: The “Element Specialist” Identity
Borderlands has a long tradition of associating Maliwan with elemental damage, status chance, and status scaling. If you want to lean into elemental play:
- prioritize weapons and gear that boost status chance
- use skills and gear that spread status effects
- build around one or two elements you enjoy and keep a swap option for resistances
The best status builds usually do one of these:
- apply one element extremely reliably and scale it hard
- apply multiple elements through a skill/gear interaction and stack chaos value
If you enjoy the “element wizard” playstyle, commit to it—half-committing usually feels weak.
Licensed Parts and Element Synergy: Why “Hybrid Guns” Can Be Element Monsters
Licensed Parts can create weapons that behave like cross-manufacturer hybrids. That matters for elemental play because it can combine:
- high hit count (better status application)
- better uptime (less downtime means more applications)
- special behaviors that spread, ricochet, or cluster damage
Practical rule:
- Keep hybrid weapons if they make it easier to apply status or keep pressure high.
- Sell them if they’re just “interesting” without improving your kill speed or survival.
Element builds don’t need perfect gear—they need consistent application and uptime.
Vex and Element Swapping: One of the Strongest Element Tools in the Game
Vex has a trait that converts her action skill and melee damage into the elemental type of her current gun.
That means Vex can “re-color” a big portion of her damage by doing something simple: swapping weapons. In practice, that gives Vex a huge advantage:
- You can match enemy weaknesses without changing your build.
- You can avoid resistances without waiting for a new gun drop.
- You can turn your favorite skill loop into the right element on demand.
Even if you don’t main Vex, this teaches a universal lesson:
- Element flexibility is power.
- When you can change your element quickly, you stop getting hard-stuck on enemy layers.
Co-Op Element Roles: How Squads Kill Faster Without Trying Harder
In co-op, element planning is basically free damage. The simplest squad approach is:
- Player 1 (Shield breaker): Shock focus + fast fire
- Player 2 (Armor melter): Corrosive focus + consistent pressure
- Player 3 (Control): Cryo focus + freeze reliability
- Player 4 (Clear): Radiation focus + chain kill pressure (or Incendiary for flesh-heavy zones)
You don’t need perfect coordination. Just having different “answers” in the squad stops fights from stalling and reduces wipes.
For duos, the cleanest pairing is:
- One Cryo/control player + one burst/crit finisher player
- It feels unfair in the best way.
Boss Fights: Element Strategy That Actually Works
Boss fights are where elements can either carry you or betray you.
Three practical boss rules:
- Bring one shield answer (Shock) if the boss uses shields or shielded phases.
- Bring one armor answer (Corrosive) if the boss is armored or spawns armored adds.
- Bring one control tool (Cryo) if adds are a problem (freezing adds keeps the fight stable).
A common boss mistake:
- Using your favorite element even when it’s clearly underperforming.
- If a boss fight feels slow, swap element first before you respec your entire build. Elements solve more problems than most skill points.
Status Builds vs Direct Damage Builds: Which Is Better Early?
Both are good. The best choice depends on your playstyle and your gear luck.
Direct damage builds feel better early if:
- you like simple gunplay
- you prefer instant feedback
- you don’t want to manage stacking mechanics
Status builds feel better early if:
- you like tagging targets and moving on
- you enjoy control and crowd pressure
- you want damage that keeps working while you reposition
The easiest “best of both worlds” approach:
- run a direct damage finisher
- keep one status primer (Radiation or Cryo) to set up advantage windows
That hybrid approach is beginner-friendly and scales well into endgame.
Common Element Mistakes (And the Fixes That Save Hours)
Mistake 1: Only using one element because it “feels strong.”
Fix: carry at least one Shock and one Corrosive option, even if they’re not your favorites.
Mistake 2: Judging an elemental gun only by its base damage number.
Fix: test how fast it applies status and whether its status changes fight tempo.
Mistake 3: Hoarding Cryo but never freezing anything.
Fix: prioritize Cryo tools with strong Cryo Efficiency and high hit count so freeze actually happens.
Mistake 4: Forcing Radiation on bosses with few adds.
Fix: bring Radiation for rooms, but use layer answers (Shock/Corrosive/Incendiary) for bosses when you need raw efficiency.
Mistake 5: Ignoring Kinetic because it’s “boring.”
Fix: keep one kinetic safety weapon—reliability wins runs.
The “Element Discipline” Checklist for Faster Progress
If you want a simple rule set to follow every session:
- Always keep one Shock option.
- Always keep one Corrosive option.
- Keep either Incendiary or Radiation depending on the zone.
- Keep one Kinetic safety weapon you trust.
- If you play co-op, add Cryo for control value.
- When a fight feels slow, swap element before you blame your build.
Follow that and your time-to-kill improves immediately, which means:
- fewer deaths
- smoother farming
- faster leveling
- better loot per hour
BoostRoom: Get to Strong Element Builds Faster
Element mastery is one of the fastest ways to feel powerful in Borderlands 4—but it still takes time to reach the point where you have:
- the right elemental coverage
- consistent status application tools
- stable survivability to keep uptime high
- enough gear variety to swap without losing power
BoostRoom helps players who want to reach that “my build is online” moment faster, so you can spend more time:
- testing element synergies
- farming targeted upgrades
- pushing harder content confidently
- playing co-op without feeling underpowered
You keep the fun (build choices, gear testing, chasing perfect rolls). You just cut down the slowest grind layers that delay your best setups.
FAQ
What are the damage types in Borderlands 4?
Borderlands 4 uses six core damage types: Kinetic, Incendiary, Shock, Corrosive, Cryo, and Radiation.
What element should I use against shields?
Shock is the best general answer for shields. If you don’t have Shock available, Radiation or a strong kinetic safety gun can work, but Shock is the fastest.
What element should I use against armor?
Corrosive is the best general answer for armor. If you’re struggling to survive, Cryo can stabilize the fight by freezing threats while you work through the armor.
Does Cryo do damage over time?
Cryo is primarily a control element (slow/freeze). It focuses on Cryo Efficiency and freezing behavior rather than a typical DoT value.
Is Radiation good for bosses?
Radiation is strongest in mobbing and clustered fights where chain explosions matter. For bosses with few adds, you’ll usually want layer answers (Shock/Corrosive/Incendiary) or a strong kinetic finisher.
How do I build around status effects without overcomplicating it?
Start with high hit-count weapons to apply status reliably, then add one finisher weapon that benefits from the control or pressure your status creates.
What’s the best “beginner element loadout”?
Shock + Corrosive + Kinetic safety, with a fourth slot for Incendiary (flesh-heavy zones) or Radiation (room clear) or Cryo (control).
Why does my Legendary feel weak sometimes?
Often it’s an element mismatch. If you’re using Fire on shields or Corrosive on flesh-heavy rooms, your kill speed drops even if the gun is rare. Swap element first before you respec.
How does BoostRoom help with elemental builds?
BoostRoom helps you reach stable power and better gear coverage faster, so you can run the right elements consistently and focus on synergy testing and farming instead of slow early progression.
