How Classes Work in BF6 (and Why “Open vs Closed” Matters) ⚙️
- Four classes, four jobs. Assault cracks space and leads pushes; Engineer controls vehicles and chokepoints; Support keeps guns firing and bodies standing; Recon gathers intel, sets traps, and wins long lanes. Official pages and press breakdowns confirm BF6’s return to this classic identity.
- Open vs Closed weapons. In Open, any class can equip any weapon—great for comfort weapons but dilutes identity. In Closed, roles feel purer (and teamwork matters more) because weapon families are locked to classes. DICE says both rulesets coexist at launch, so pick the one your squad prefers.
- Gadgets + training paths. Class-specific gadget pools and “training” perks shape your impact: Engineers get powerful AV tools; Recon leans into spotting and deception; Support leans medic+ammo; Assault gets push tools such as Deploy Beacon (moved from Recon in finalization), plus breaching/entry options.
- Movement & revives glue it together. Drag-and-revive and mounting formalize teamplay—Support and Assault become revive machines, Engineers mount to laser vehicle lanes, and Recon’s intel lets everyone move safely.

Assault — The Space-Maker (Entries, Flanks, Objective Cracks) 🔥
Identity: Front-line shock trooper for 10–35 m fights. Your job is to create openings: breach doors, force rotations, and get a spawn foothold behind cover. In current balancing passes, DICE has nudged Assault away from overpowered solo play and toward team coordination—hence the Deploy Beacon shift to Assault to anchor flanks for everyone, not just snipers.
Typical gadget picks & perks (examples): entry/breach tools, Deploy Beacon for on-demand forward spawns, mobility/frag-forward specs; in some playlists you can trade a slot for more killing power, but expect ongoing tuning to keep teamplay at the center. Guides consistently spotlight Assault as the most popular pick in early playtests—no surprise when objectives need cracking.
Play patterns that win:
- “Make space, then hold it.” Breach → smoke or stun → plant on head-height cover → call the beacon → protect the first two spawns.
- Slide-then-stand. BF6 lowers accuracy while sliding/jumping; slide only to close distance, stand to shoot. Movement patches made this the high-percentage flow.
- Tempo swaps. Win one duel? Don’t ego-swing. Beacon + anchor so your squad turns one pick into a cap.
Loadout logic: In Open, an AR or fast-handling DMR are both valid; in Closed, expect classic AR dominance. Favor ADS speed + horizontal recoil cleanup; a mid-sized mag prevents doorway reload deaths.
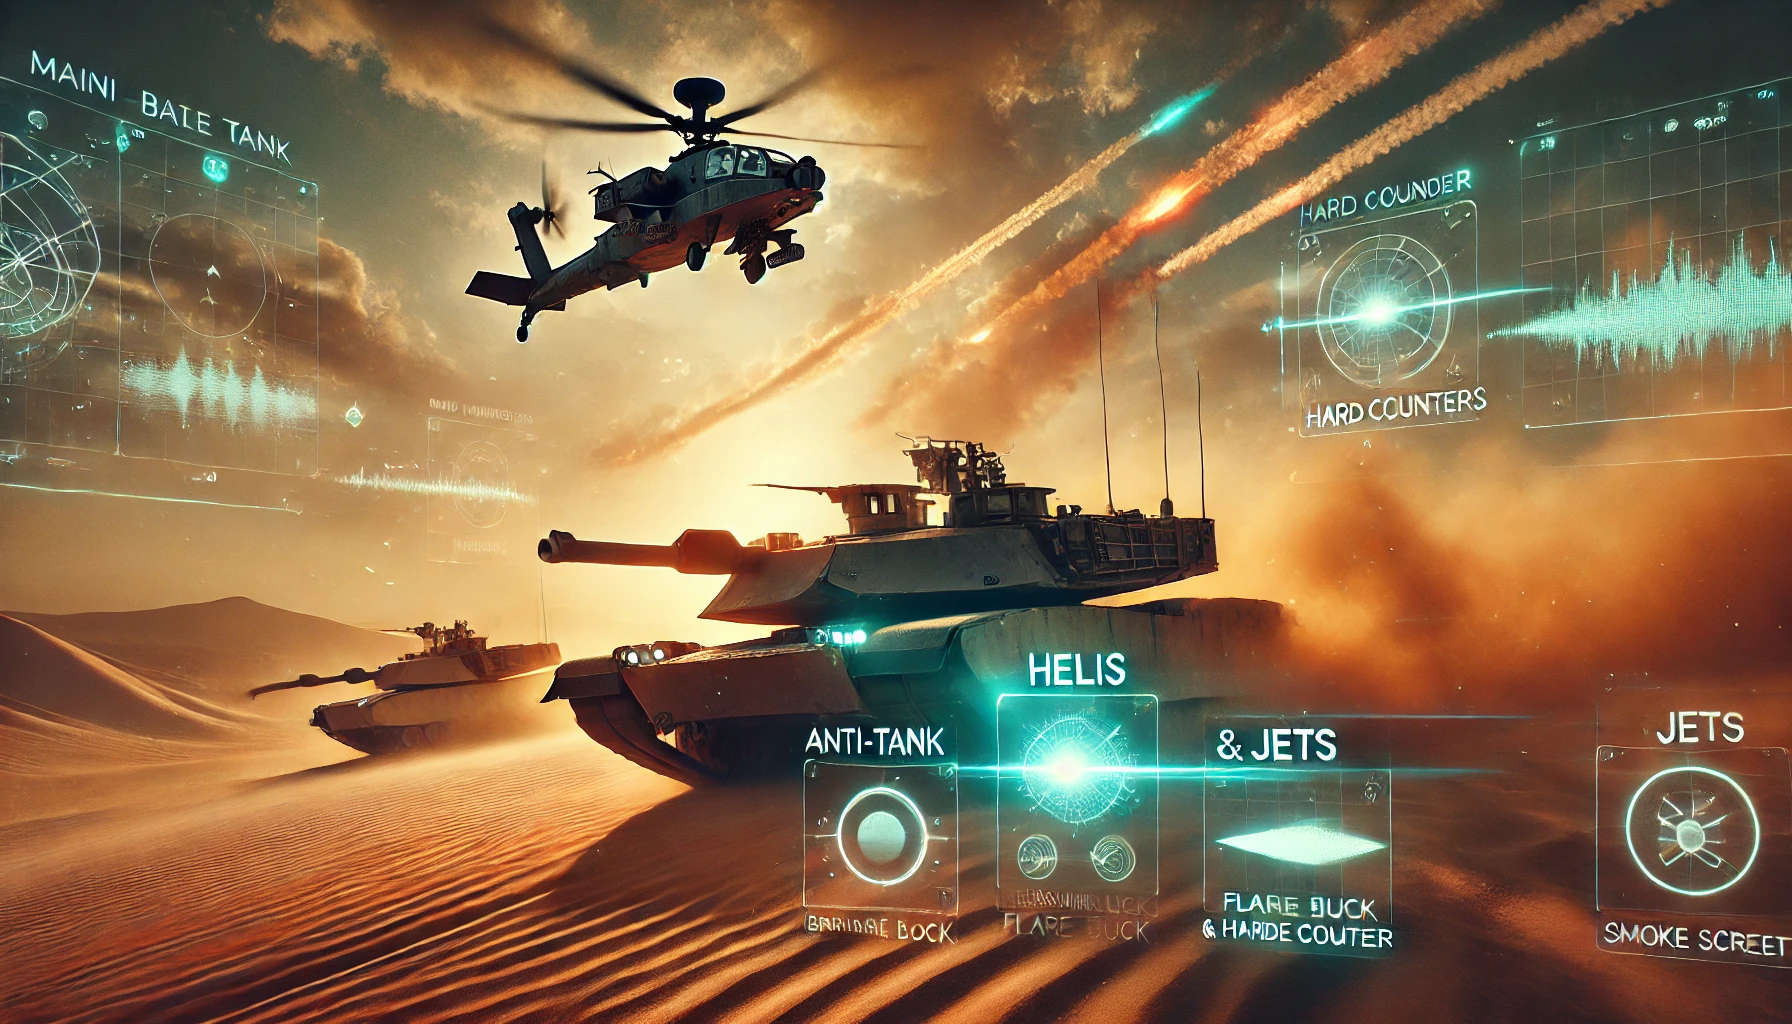
Engineer — Vehicle Control & Lane Denial (Anti-Armor Brain) 🛡️
Identity: Strip vehicles of map control and keep your own armor alive. Engineers tote rocket launchers, mines, repair tools, and EOD bots, with training perks that improve AV consistency. They also excel at mounted lane denial on refinery rails, bridges, and river flats.
Signature tools (examples): aim-guided or free-aim launchers (RPG-7V2, MBT-LAW…), anti-vehicle mines, repair tool, supply crates. Third-party and community guides list deep AV pools; plan around your map’s armor routes.
Play patterns that win:
- Two-piece traps. Soften with a launcher, finish with mines placed on the reverse of a common retreat line.
- Mount to melt. When defending a lane, mounting dramatically tightens LMG/DMR beams—trade a bit of mobility for certainty.
- Repair priority. Your tank that lives forces rotations; your K/D doesn’t matter if your armor is smoking.
Loadout logic: Closed favors LMG+launchers; Open lets you run a DMR/AR if you’re focused on infantry with AV on the side. Use long/heavy barrels and grips that tame horizontal so you can track moving armor/infantry at range.
Support — Sustain Engine (Ammo, Heals, Drag-Revive) 💉
Identity: Modern Support is a true hybrid of medic + resupply. You drag teammates into cover, revive quickly, patch armor or bodies, and keep ammo flowing so your squad doesn’t stall on a push. Media previews and guides repeatedly highlight Support’s revive power and how drag-revive elevates your life-saving plays in tight lanes.
Signature tools (examples): medical crates or packs, defibs, ammo resupply, deployable covers, anti-explosive utilities. Healing speed and explosive resistance perks are common picks.
Play patterns that win:
- Drag first, stick second. Smoke slightly past the downed player, drag into smoke, then revive—this baits greedy swings.
- Two-angle medicine. Put your resupply in the most defended corner of the hold; don’t make people expose to pick ammo.
- Tempo stabilizer. On defense, call rotations and top off teammates between waves—ammo and HP are time, and time is tickets.
Loadout logic: In Open, AR/LMG both work; in Closed, LMGs shine for hold-and-heal gameplay. Build for mid-range consistency (velocity + horizontal control) with a mid-size mag so you can defend immediately after reviving.
Recon — Intel, Disruption & Long-Range Pressure 🎯
Identity: Vision wins fights. Recon sets spotting nets, triangulates pushes with drones and sensors, and picks high-value targets across 50–120 m lanes. After the Deploy Beacon moved to Assault, Recon’s design leans harder into intel and marksmanship; expect training paths that reward spotting and stealth.
Signature tools (examples): scout drones, motion sensors, tracer darts/decoys; mid-zoom optics that let you track without tunnel vision. Recon challenges and community chatter emphasize how a single motion sensor or drone pass can flip a Breakthrough hold.
Play patterns that win:
- Spot to enable. Ping the cap room with a motion sensor before your team crashes an objective—your Assault/Engineer get free pre-aims.
- Crossfire builder. Don’t sit at render distance; take mid-range rooftops where you can punish rotations and call live info.
- Drone tricks. Early weeks saw creative drone interactions with explosives—expect patches, but keep an eye on mine/drone synergy in the sandbox.
Loadout logic: In Closed, marksman rifles and snipers define you; in Open, DMRs or even ARs are viable when your team needs mobile intel more than pure sniping. Build for velocity + stability; over-zooming costs fights.
Choosing the Right Class for Each Mode 🗺️
- Conquest: Information and sustain rule. A Recon dropping sensors on flags and a Support chaining drag-revives keep your team on objective while Engineer denies vehicle lanes. Assault uses Deploy Beacon to create flanks behind tough caps.
- Breakthrough: On attack, Assault + Support is the spine—beacons, heals, ammo, and smokes create the breach; Engineer deletes the first vehicle counterpush; Recon paints angles so entries don’t die blind. On defense, Engineer anchors mounts and Support keeps rifles up through the rocket spam.
- REDSEC (BR): Recon intel and Support sustain scale the deeper you go; Engineer tools punish late-circle vehicles; Assault’s Deploy Beacon is a win condition for safe respawns and backstabs. With shared progression, drilling your class here pays off in 6’s core modes.
Open vs Closed: How to Build Smart 🔀
- Open Weapons: Comfort weapon first, class job second. If Recon can run an AR for interior mid-range, do it if your squad still fields long-range pressure somewhere else. The flexibility is powerful, but don’t collapse your team’s composition.
- Closed Weapons: Identity first. Engineer owns AV; Assault owns entries; Support owns sustain; Recon owns vision. Your weapon choice naturally supports the class’s tasks, so gadget selection becomes your special sauce. Community and press agree this feels the most Battlefield.
Starter Builds You Can Copy (Fill with Closest Parts) 🧱
These shells respect the Pick-100 budget and map to class jobs. Swap in equivalents you’ve unlocked.
Assault — “Beacon Breaker”
- Goal: secure a forward spawn and crack interiors.
- Spec: ADS-friendly stock, mid/short barrel for snap, compensator for horizontal control, mid-size mag, Deploy Beacon gadget.
- Usage: smoke → breach → plant → call beacon → defend two spawns → widen.
Engineer — “AV Sheriff”
- Goal: kill armor, deny bridges/rails.
- Spec: long/heavy barrel + mounted grip (you’ll mount often), recoil-brake muzzle, big mag optional; gadgets: guided or RPG + mines, repair tool.
- Usage: two-piece traps and mounted beams on vehicle lanes.
Support — “Drag-Revive Anchor”
- Goal: sustain pushes and holds.
- Spec: velocity barrel + balanced comp, mid-size mag, ADS-neutral stock; gadgets: defib/med + ammo.
- Usage: drag first, revive second; defend immediately—don’t reload mid-swing.
Recon — “Intel Net”
- Goal: reveal stacks and punish crossers.
- Spec: precision/long barrel, stability grip, 2–4× optic, minimal muzzle; gadgets: drone/sensors.
- Usage: sensor on cap room; drone sweep before team crash; take mid-range rooftops, not max range.
Level Faster (So Your Class Feels “Complete” Sooner) 🚀
- Stack objectives with class work. Engineer mines on vehicle caps, Recon sensors on flags, Support heals on points—XP snowballs.
- Play long-life modes. Conquest and Breakthrough = more time alive, more gadget reps. Third-party guides and official notes both highlight how playlist choice affects unlock pace.
- Use REDSEC to grind. Because progression is shared, BR time fills your unlock bars for 6—and vice versa.
If you prefer to invest your time in learning roles and map reads while skipping tedious unlocks, keep it simple: offload the grind to BoostRoom and keep your play sessions focused on class mastery.
Patch Watch — Class Tweaks You Should Know 🧩
Launch-window interviews and notes point to ongoing class balancing: Assault’s solo power is being trimmed in favor of squad value; Deploy Beacon was reassigned to Assault to encourage group flanks; Recon’s pathfinding perks are shifting toward intel; Support revive cadence and defib power are under active scrutiny after beta stats. Keep an eye on the notes and re-audit your picks after each update.
Quick FAQ ❓
Is Open or Closed better for new players?
Closed gives clearer jobs and fewer distractions; Open lets you use comfort weapons while you learn. Try both—the game officially supports both long-term.
Does REDSEC progress help my classes in the main game?
Yes. Cosmetics, account XP, and battle pass progress carry between REDSEC and Battlefield 6 on the same EA ID.
Which class should I main to help random squads?
Support. Drag-revives and ammo transform chaotic solo queues into winnable pushes. Recon info and Engineer AV are close seconds.