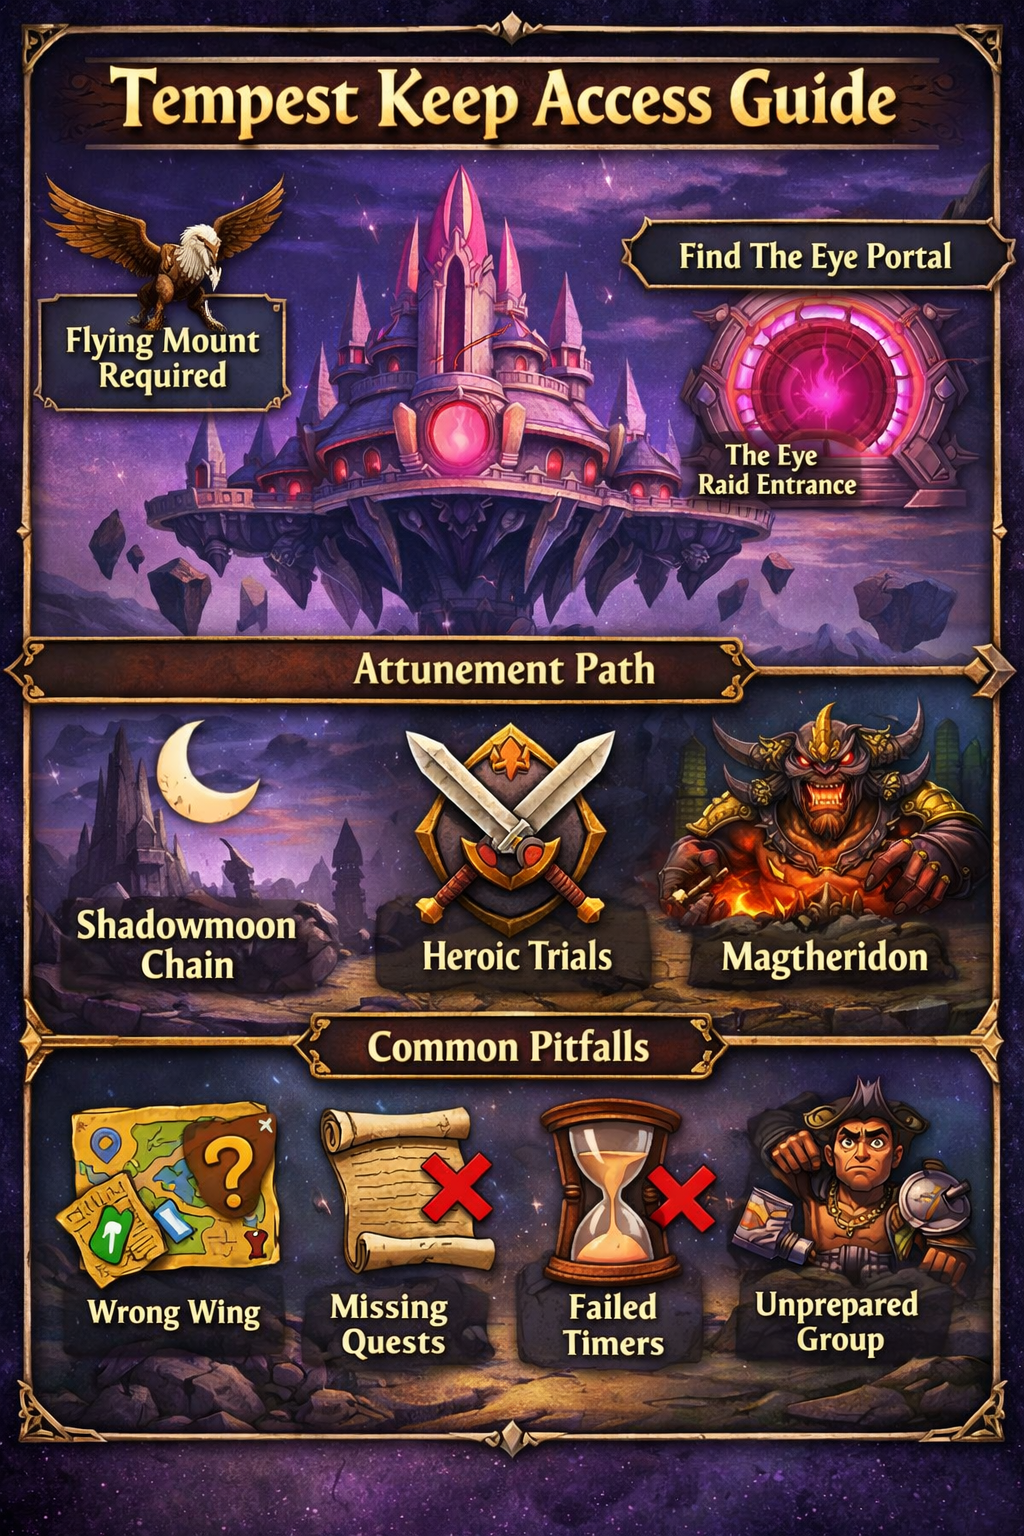
Layout logic (so you stop getting lost)
- You enter and move into Al’ar’s room early.
- After Al’ar, you clear toward the two side bosses (Void Reaver on one end, Solarian on the other).
- Once the side bosses are down, you unlock access deeper toward Kael’thas.
Trash: the “silent wipe” that wastes raid nights
Tempest Keep trash isn’t hard because it’s tanky; it’s hard because the wrong abilities go off in the wrong place and chain-pull or delete someone instantly. Your trash success comes down to kill priority + interrupts + spacing.
Trash kill priority (simple version that works)
- Healers / big casters first (anything that heals or volleys).
- Mind control / knockback mobs next (because they cause chaos and accidental pulls).
- Everything else last.
High-impact trash abilities to respect
- Single-target heals: treat every heal cast as an “interrupt check,” not a suggestion.
- Big volley casts: if you’re eating repeated volleys, you’re choosing to make healers miserable.
- Mind control effects: assign a plan (CC, focus, or controlled damage) so it doesn’t become panic.
Practical trash rules that prevent 80% of trash wipes
- Never fight near the next pack when knockbacks exist. Knockback + one extra step forward = accidental pull.
- Mark one “primary interrupter” for each priority caster and one backup. “Everyone interrupt” often means “nobody interrupt.”
- If mind control happens, don’t freestyle. Your raid should already know whether to CC the target, focus it, or use specific tools to break it.

Movement Basics That Win Tempest Keep (Before Boss Mechanics Even Start)
Tempest Keep doesn’t just test if you can move. It tests if you can move without losing damage, without breaking healer range, and without dragging mechanics onto other players.
The three movement categories you must master
- Personal movement: you move because you’re targeted (bomb debuff, gaze, orb target, conflagration).
- Raid movement: everyone moves because the room changes (Flame Quills response, Gravity Lapse spread, Flame Patch denial zones).
- Tank movement: tanks reposition for swaps, line-of-sight, cleave safety, or to isolate dangerous mobs.
The clean movement habits that separate wipes from clears
- Move early, not late. If you “finish your cast” and then move, you’re already behind in TK.
- Move with a destination. “Run away” causes overlap and panic. “Run to your assigned safe lane” creates consistency.
- Return to your spot fast. The biggest hidden DPS loss in TK is people who move correctly… and then drift for 10–20 seconds afterward.
- Maintain healer geometry. If your movement breaks line-of-sight or range, you didn’t solve the mechanic—you moved the problem onto healers.
Spacing language (use one system and stick to it)
- Stack = tight clump for shared healing and simplified bomb movement.
- Spread = everyone has a personal bubble and you protect it.
- Loose spread = you’re separated enough for splash mechanics, but still close enough for chain heals and quick help.
Tempest Keep will constantly swap you between these modes. If your raid doesn’t call which mode you’re in, it turns into random spacing—and random spacing causes random deaths.
Interrupt System: How to Build a Rotation That Doesn’t Collapse
Interrupts in Tempest Keep are not “nice to have.” They are your control panel. If your interrupt plan is vague, you’ll wipe to the same casts over and over.
Build your interrupt plan around two lists
List A: Must-stop casts (if these go through, your pull is now a recovery attempt)
- Kael’thas: Fireball (constant pressure that spikes tanks and creates healer panic).
- Kael’thas: Pyroblast windows (your raid must break the shield and stop casts; if one lands, you’re usually in triage mode).
- Weapon phase: healing weapon casts (if you let heals freely land, Phase 2 drags on and you enter later phases drained and sloppy).
- High-priority trash heals / volleys (because they waste time and mana and lead to mistakes).
List B: Strongly recommended stops (not always lethal, but they turn clean pulls into messy pulls)
- Stuns/interrupts on dangerous add casts (especially when you’re already handling bombs or movement).
- Anything that chains control effects (disorients, long stuns, or repeated knockbacks that desync positioning).
Interrupt rotation rules that actually work in real raids
- Two-person is a trap on important targets. One miss or one global delay means the cast lands. Use three interrupters for repeated casts and four for “this cannot land” casts.
- Assign by order, not by class. Example: “Kick 1, Shock 2, Pummel 3, Spell Lock 4.” That’s clearer than “rogues get it.”
- Backup interrupts must be intentional. A backup should know they are backup and watch the cast bar—otherwise they’re just hoping.
How to keep interrupts clean under pressure
- Never overlap early. If two interrupts hit the first cast, you’ll be empty on the second.
- Use one voice caller for critical rotations. Even a simple “next-next-next” keeps people honest.
- Track what matters. If your UI doesn’t show enemy cast bars clearly, you are choosing harder progression.
Boss Progression: Al’ar (Movement Discipline, Platform Control, and Swap Timing)
Al’ar is where Tempest Keep teaches your raid to stop “vibing” and start executing. The boss doesn’t wipe you because it’s complicated—it wipes you because people react late and tanks aren’t where they need to be.
What Al’ar checks
- Movement check: reacting correctly to room-wide events (especially platform and center behaviors).
- Tank readiness check: having tanks available where the boss goes and swapping correctly when survivability drops.
- Add control check: adds must be managed so their deaths don’t explode the raid.
Phase 1: Platforms (the “be in melee range” rule)
Al’ar rotates through platforms. The core rule: someone must be in melee range when Al’ar lands, or the raid gets punished hard. Your raid should treat platform coverage as mandatory, not “we’ll see where it goes.”
Movement rules that prevent Phase 1 chaos
- Tanks are pre-positioned (don’t chase late).
- Ranged anchor in the center when possible so you can hit most platforms without running a marathon.
- Melee follow the boss but do not tunnel so hard you miss adds or platform transitions.
Adds (Embers) and the “don’t explode on your raid” rule
When Phoenix adds die, they can punish anyone too close. That means:
- Melee must step out before a low-health add dies.
- Tanks should hold adds away from the raid clump when possible.
- If you’re assigned to adds, your job is controlled killing, not ego meters.
Flame Quills response (the movement that makes or breaks you)
When Al’ar goes to the center and triggers its big room pressure moment, your raid needs one simple response: reset positioning fast and safely. If you delay, you take unnecessary damage and enter Phase 2 already behind.
Phase 2: Center arena (Flame Patch, Dive Bomb, and Melt Armor swaps)
This is where wipes happen. The room becomes a denial-zone puzzle:
- Flame Patch creates “no-go” areas and ramps damage if you stand in it.
- Dive Bomb punishes clustering—if your raid stacks during the wrong moment, people vanish.
- Melt Armor (or equivalent tank vulnerability) requires swaps. The tank with the debuff should not be the one holding the boss.
Movement rules that keep Phase 2 stable
- Loose spread around the boss so patches don’t force everyone into one lane.
- Do not drag the boss through Flame Patch “to be helpful.” That just spreads the problem.
- When the boss leaves the ground, pre-spread so Dive Bomb doesn’t overlap people.
The most common Al’ar wipe causes (and how to fix them fast)
- No tank in melee on landing → assign platform tanks clearly; don’t improvise.
- Adds exploding in the raid → step out before death; hold them away; stop cleaving blindly.
- Melt Armor swap is late → tanks must call debuff and swap instantly; healers must swap targets instantly too.
- Flame Patch denial gets ignored → if someone stands in it “for one more cast,” you’re choosing deaths.
Boss Progression: Void Reaver (Spread Discipline, Threat Rotation, and “Don’t Be the Orb”)
Void Reaver is the cleanest boss mechanically, and that’s exactly why it exposes weak fundamentals. If you wipe here, your raid has a discipline problem—usually spacing, threat handling, or healer coverage.
What Void Reaver checks
- Spread discipline check: can ranged/healers hold assigned spaces?
- Healer coverage check: can every position be healed without chaos?
- Threat rotation check: can tanks stay ahead even when threat gets disrupted?
Positioning that makes the fight easy
- Tank the boss where it stands (centered), so the room stays usable.
- Ranged and healers spread in a wide ring so targeting mechanics don’t splash multiple people.
- Every group should have healer coverage (don’t let someone “float” out of range).
Arcane Orb movement (the “move instantly” lesson)
Orbs are slow, which tricks people into reacting slow. Your rule should be:
- As soon as you recognize you’re targeted, move now.
- Move a meaningful distance, not a tiny step.
- After it lands, return to your assigned spot so you don’t break healer geometry.
Threat and tank rotation (why DPS pull and die on an “easy boss”)
Void Reaver pressures threat. When threat gets disrupted, your raid must not turn into a scramble.
- Tanks need a plan to stay at the top of threat.
- DPS must respect a stable opener (you want clean threat, not a hero pull).
- Tools like misdirect-style threat help can stabilize early moments, but the real solution is a disciplined threat plan.
Pounding-style raid damage (the healer check you can’t ignore)
Your healers will be forced into sustained throughput. The best DPS contribution here is not “more damage.” It’s:
- Don’t take avoidable orb damage.
- Don’t drift out of healing range.
- Use defensive tools if you get clipped so healers can keep the raid stable.
Most common Void Reaver wipe causes
- Ranged/healers clump → orbs become multi-target hits.
- People drift too far → healer range breaks and someone dies alone.
- Threat gets disrupted and DPS don’t react → you pull boss, you die, healers panic, pull collapses.
Boss Progression: High Astromancer Solarian (Personal Responsibility and Add-Wave Control)
Solarian is the “don’t kill your friends” boss. The fight is won by clean reactions, not raw damage.
What Solarian checks
- Personal responsibility check: do you respond correctly when targeted?
- Add-wave control check: can tanks pick up adds fast and can DPS AoE without ripping?
- Composure check: do you keep the room organized while chaos spawns?
Phase 1: No traditional threat (you can’t tank stupidity)
Solarian’s early behavior is weird if you expect normal threat rules. Your raid should treat Phase 1 like a “targeted damage” fight:
- Your raid stacks (tight) to make healing efficient and to make bomb movement predictable.
- When you get the bomb debuff, you leave the stack immediately to a clear lane.
- After it resolves, you return quickly so you don’t stretch healing.
Wrath of the Astromancer-style bomb handling (the #1 wipe mechanic)
This is the moment that ends pulls. The fix is simple and non-negotiable:
- If you are targeted, you move instantly.
- You do not hesitate to finish a cast.
- You do not run through the stack.
- You run to your assigned safe direction and keep going until you are clearly away.
A disciplined raid makes this mechanic look easy. An undisciplined raid turns it into “random one-shots.”
Arcane Missiles-style pressure (why healers feel stressed)
Solarian can rapidly punish random targets. Help your healers by:
- Staying in predictable positions (stack means stack).
- Using a personal defensive if you get targeted while already low.
- Avoiding extra damage sources so heals can be reserved for the real threat.
Phase 2: Add waves (AoE fast, but controlled)
Solarian periodically disappears and spawns waves from portals. Your success here depends on:
- Everyone collapses to the planned AoE point quickly.
- Tanks grab what they can immediately (and the raid helps with controlled threat tools).
- AoE starts fast, but not reckless. If you rip instantly and die, you slowed the phase, not sped it up.
When Solarian returns with elite add(s), your priority becomes:
- Interrupt and shut down any healing or high-impact casts from those adds.
- Kill adds cleanly, then resume boss focus.
Phase 3: Transformation (tank-and-spank with a fear problem)
At low health, Solarian shifts into a sturdier form and becomes more straightforward:
- Tanks take over like a normal boss.
- Fear effects near melee range must be respected.
- This is where many raids finally stabilize—if you reach Phase 3 with enough players alive, you usually win.
Most common Solarian wipe causes
- Bomb target reacts late → the stack dies.
- Bomb target runs the wrong path → clips people and kills them.
- Add wave isn’t controlled → ranged/healers get hit, AoE threat chaos, deaths snowball.
- People don’t return to stack after bomb → healing becomes inefficient and random deaths happen.
Boss Progression: Kael’thas Sunstrider (Movement, Interrupts, and Checks in One Fight)
Kael’thas is the real Tempest Keep progression wall because it asks your raid to do three things at once for a long time:
- Execute movement correctly (not just “move,” but move correctly).
- Interrupt and control the right casts at the right times.
- Pass repeated checks (priority targets, eggs, shields, mind control, and later-phase spread).
Phase mindset: Kael is a marathon, not a panic sprint
Most Kael wipes happen because a raid gets impatient and stops respecting the structure. If you want consistent kills, your raid needs repeatable roles, not “we’ll wing it.”
Before you pull: three assignments that prevent the worst wipes
- Advisor handling plan (who tanks what, where they die, who does what damage).
- Weapon phase pickup rules (who picks which legendary, and when).
- Interrupt and control plan for Kael (who interrupts Fireball, how you handle the shield + Pyroblast windows, and how you break mind control fast).
Phase 1: The Advisors (movement discipline starts here)
Each advisor punishes a different kind of laziness.
Thaladred-style gaze target (movement check)
- This is not tanked like a normal mob.
- If you are fixated, you run—and you run intelligently:
- Don’t drag it through your raid.
- Use the edges of the room.
- Keep it predictable so healers can still reach you if needed.
- If you are not targeted, do not “help” by standing in weird places. Hold your assignment.
Lord Sanguinar-style fear pressure (range and control check)
- Fear effects punish people who stand too close without protection.
- If your raid has fear mitigation tools, they belong where fear matters most.
- Keep positioning stable so fear doesn’t break your entire formation.
Grand Astromancer Capernian-style ranged-only rule (discipline check)
- Melee should not “sneak hits” here. This is how conflagration-style effects become catastrophic.
- Assign a ranged tank approach (commonly a warlock-style tanking plan) and keep her away from anyone who shouldn’t be near her.
- If your raid breaks this rule even once, you’ll pay for it.
Master Engineer Telonicus-style bombs / control (awareness check)
- Stay spread enough that bomb effects don’t overlap multiple players.
- If someone gets controlled or disabled, your raid needs a clean response (not panic).
- Treat every disable as a “fix instantly” job, because Kael phases punish downtime.
Phase 2: Legendary Weapons (interrupt and positioning school)
This phase is where good raids get set up to win and bad raids enter Phase 3 already exhausted.
Weapon phase rules
- Tanks pick up dangerous melee weapons immediately and hold them away from the raid (anything that spins or cleaves).
- Interrupt heals from any healing weapon—if you let heals free-cast, this phase drags and morale collapses.
- Face ranged weapons away if they have cone-style or multi-shot pressure.
Pickups (the part that decides later phases)
The legendary weapons aren’t just loot—they’re tools to solve Kael mechanics.
- Shield (absorb + short immunity tools): used to survive “oh no” moments and prevent lethal casts from ending the pull.
- Staff (utility aura-style immunity to control effects): helps prevent control-based wipe patterns.
- Dagger/Blade (mind control break tool): lets melee break mind control fast and reliably.
- Mace/Infuser (healing enhancement tool): adds survivability value in later phases where fire/shadow pressure matters.
The single biggest Phase 2 mistake is not assigning pickups. If you rely on random looting, you’ll have the wrong tools in the wrong hands and you’ll wipe to mechanics you could have solved cleanly.
Phase 3: Advisors revived together (priority check + multi-tasking)
This is where raids fall apart because everything is active at once. You solve it by keeping the plan simple:
- Tanks stand ready at their assigned advisor location before the phase begins.
- The raid follows a clear kill order that prevents the worst movement/control problems first.
- You keep spacing rules: don’t stack where you shouldn’t and don’t drift out of healer support.
The hidden check: can your raid keep calm while multiple targets are alive?
If your raid starts “free targeting,” your interrupts and movement get random—and random is how Kael wipes happen.
Phase 4: Kael joins (interrupt discipline + priority targets + shield windows)
Now the fight becomes a control exam.
Interrupt rotation for Kael
- Fireball interrupts should be constant and boring. Boring is good.
- If the raid misses interrupts, healing becomes chaos and people start dying in places you can’t recover.
Flamestrike-style ground danger (movement check)
- If the ground lights up, you move immediately.
- You do not “finish a cast.”
- You do not move into another player’s safe zone.
- You return to your assigned lane afterward.
Mind control handling (control check)
Mind control wipes raids when people overthink it.
- Your raid should have a fast, repeatable break method (and the right weapon tools on the right players).
- If you hesitate, controlled players delete healers or disrupt positioning, and the pull collapses.
Phoenix + Phoenix Egg priority (DPS check that ends pulls)
Phoenix spawns are not optional side targets.
- Phoenix is a priority until it’s dead.
- When it becomes an egg, the egg is the priority until it’s dead.
- If the egg survives, you get another Phoenix and your raid falls behind permanently.
Many “mystery wipes” on Kael are actually “we didn’t treat eggs like the top priority.”
Shock Barrier + Pyroblast windows (the biggest interrupt/check combo)
This is the Kael moment that separates progression raids from “almost” raids:
- Kael shields himself (Shock Barrier-style mechanic).
- While shielded, interrupts can be blocked or become unreliable.
- Your raid must burn the shield fast and stop the lethal casts that follow.
- If a lethal cast is about to land, your raid needs a planned mitigation tool (not panic improvisation).
This is not a “healer problem.” It’s a raid check:
- DPS must swap and break the barrier immediately.
- Interruptors must be ready the moment the barrier is down.
- Everyone must know the plan for the first cast if the barrier doesn’t drop fast enough.
Phase 5: Gravity Lapse (3D movement check + spacing discipline)
At around the final threshold, Kael switches into a movement-heavy phase:
- The raid is pulled into the air.
- You gain temporary flight-like movement.
- You must spread in three dimensions and avoid chaining beam effects.
- You must avoid dangerous clouds and reset position so you don’t die to fall damage when the phase ends.
Gravity Lapse rules that create clean kills
- Spread immediately after the lift. If you wait, beams chain and damage spikes.
- Don’t hover directly on teammates—vertical stacking is still stacking.
- Avoid lingering in clouds that weaken you over time.
- As the phase ends, get closer to the ground carefully so you don’t take lethal fall damage.
Most common Kael wipe causes (the real list)
- No pickup plan in Phase 2 → wrong tools, slow mind control breaks, failed shield windows.
- Phoenix Eggs ignored for 3–5 seconds → permanent fight debt, then collapse.
- Barrier not burned immediately → lethal casts land.
- Interrupt rotation not disciplined → healers forced into panic, deaths spiral.
- Gravity Lapse stacking → chained damage deletes groups.
- People drift after moving → healer range breaks and “random deaths” appear.
Loot: What Matters for Progression Value (Not Just “Cool Drops”)
Loot in Tempest Keep is exciting, but progression is about what loot and decisions make you more roster-friendly—the player who gets invited back because you reduce wipe risk.
Progression-relevant loot categories
- Tier chest tokens from Kael’thas (big power spikes that translate into real DPS/healing/tank value).
- High-impact weapons (especially for specs that scale hard with weapon damage or spell power).
- Signature items that patch weak slots (rings, cloaks, and key weapon options that are hard to replace elsewhere).
The hidden “loot” that wins the raid: Phase 2 weapons
Even though these are temporary for the encounter, treating them like “real loot” changes everything:
- Correct pickups make mind control a non-issue.
- Correct pickups make shield windows survivable.
- Correct pickups make the last phase calmer.
If your raid is stuck on Kael, treat Phase 2 distribution as seriously as you treat DKP/loot council. It’s not optional—it’s strategy.
Personal loot mindset that gets you invited
- Roll/claim responsibly.
- Learn what actually benefits your spec in T5 progression.
- Show up with enchants and gems so your upgrades are immediately real performance, not “I’ll fix it later.”
Extraction: A Ready-to-Clear Tempest Keep Checklist (Before, During, After)
This is the extraction plan—the practical workflow that turns wipes into kills.
Before raid (10 minutes that saves hours)
- Confirm boss order and which wing you’re doing second.
- Assign:
- Al’ar platform tanks and swap calls.
- Void Reaver spread spots (at least by healer coverage).
- Solarian bomb safe lane(s) and AoE collapse point.
- Kael: advisor tanks, weapon pickup list, interrupt rotations, egg/phoenix killers.
- Make sure every interrupter knows their order on critical rotations.
During raid (execution habits)
- Use a consistent pull timer and do not “accidentally pull” bosses.
- Between pulls, call one improvement only. Too many changes = confusion.
- After every wipe, identify which category it was:
- Movement failure?
- Interrupt failure?
- Check failure (egg, shield, add control, threat)?
- Then fix that one thing and repull.
After raid (why some groups improve fast and others don’t)
- Record the top 2 wipe causes and assign solutions for next raid night.
- If you’re repeatedly wiping to the same mechanic, stop calling it “bad luck.” It’s a repeatable mistake and it needs a repeatable rule.
Practical Rules: Tempest Keep “Don’t Wipe” Commandments
- If you’re targeted, you move immediately. No cast is worth a wipe.
- If the ground is dangerous, you step out instantly and return to your spot fast.
- Interrupts are assigned by order. “Everyone interrupt” is not a plan.
- Spread means spread. If you can touch someone with an AoE, you are not spread.
- Stack means stack. If you drift, you break healing and bomb clarity.
- Phoenix Eggs are always top priority when they exist.
- Shield windows are DPS swaps, not debates. Barrier first, then everything else.
- Never fight knockback mobs near the next pack. Chain-pulling is the easiest way to lose an hour.
- After you move, return. Wandering is silent DPS loss and silent healer stress.
- Treat Kael as a marathon. Calm repetition beats panic “big pulls.”
BoostRoom: Turn Tempest Keep Into Consistent Clears (and Get Invited More)
Tempest Keep groups don’t just invite “high DPS.” They invite players who reduce risk: people who don’t die to orbs, don’t detonate bombs on the raid, don’t miss interrupts, and don’t tunnel while an egg respawns the fight into a wipe.
BoostRoom is built around that exact goal—helping you become the kind of raider that makes progression smoother:
- Role-focused coaching for movement discipline (so you keep uptime while doing mechanics correctly).
- Interrupt planning help (so your rotations stay clean even when things get hectic).
- Kael’thas phase clarity (weapon pickup rules, mind control break habits, shield window execution).
- Progression habits that translate into faster clears, fewer wipe nights, and more invites.
If you want your Tempest Keep experience to stop being “sometimes we get close” and start being “we farm it,” the fastest upgrade is execution—BoostRoom is where you sharpen it.
FAQ
What boss order is best for Tempest Keep progression?
Most groups go Al’ar → Void Reaver → Solarian → Kael’thas. Some swap Void Reaver and Solarian. Choose the order that matches your raid’s weakness: spread/healer coverage (Void Reaver) or personal responsibility (Solarian).
Why do we wipe on Void Reaver if it’s “easy”?
Because it’s a fundamentals boss. Most wipes come from clumping, drifting out of healer range, or threat chaos after tank disruption.
What’s the #1 rule for Solarian bombs?
If you’re targeted, move immediately to the assigned safe lane. Don’t hesitate, don’t run through the stack, and return quickly afterward.
On Kael, what should we prioritize when things get messy?
Phoenix Eggs (when present), breaking the shield during barrier windows, and keeping interrupts stable. If you let eggs live or let shield windows slip, the fight snowballs out of control.