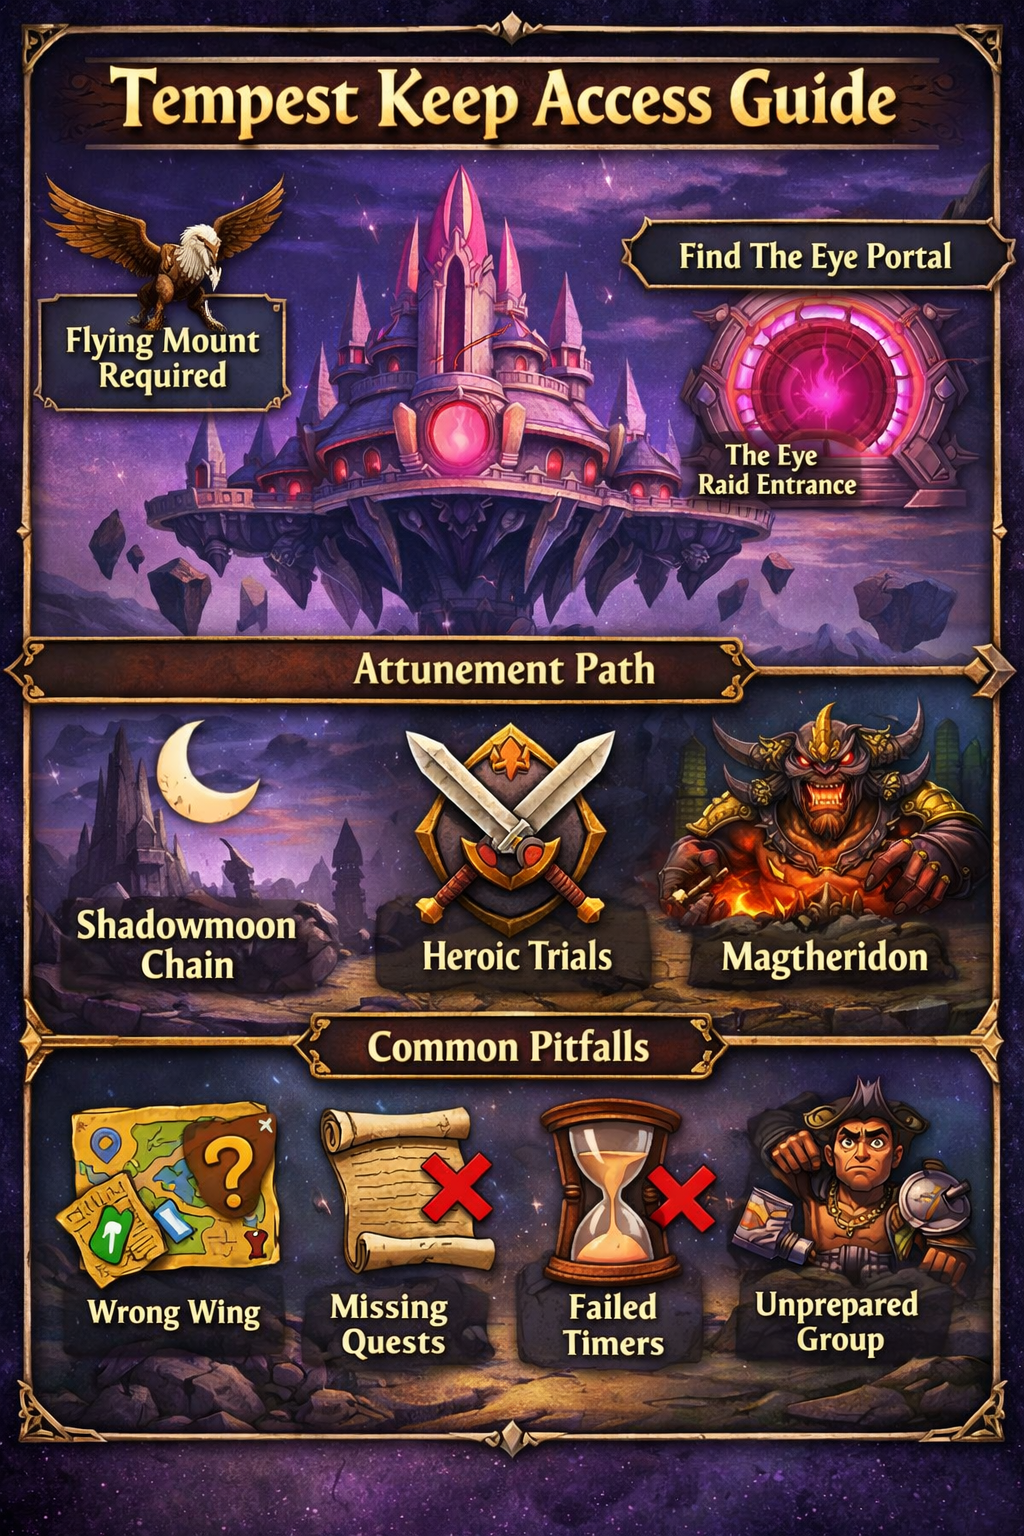
Route: Shadowmoon Valley Progression Goals (What You’re Really Here For)
Shadowmoon Valley can be approached two ways: as a messy late-level quest zone, or as a launchpad into endgame. The second approach is faster and leaves you stronger.
Your Shadowmoon goals should be outcome-based:
- Reach level 70 efficiently (or convert remaining quests into gold once you’re 70).
- Complete the zone’s highest-impact chains that deliver:
- powerful rewards (weapons/amulets/role pieces),
- endgame access items (like raid entry items when relevant),
- reputation and unlocks that become long-term value.
- Set up “post-70 you” with clear priorities:
- Black Temple chain progress (if your ruleset uses it),
- Netherwing unlock (daily hub + mount path),
- gold routes you can repeat without burning out.
Shadowmoon is not a zone you “clear.” It’s a zone you harvest for power.

Route: The Shadowmoon Progression Map (Do This First → Next → Last)
Use this simple three-stage map to keep the zone fast.
Stage 1: Establish your anchors (first 15–20 minutes)
- Anchor hub: Wildhammer Stronghold (Alliance) or Shadowmoon Village (Horde).
- Second anchor: your Shattrath alignment base in Shadowmoon:
- Altar of Sha’tar for Aldor,
- Sanctum of the Stars for Scryers.
- Build a quest log that points in one direction (don’t mix far pockets yet).
Stage 2: Run the two big “power arcs” while quests are still yellow
- The zone-wide hub chains (Legion Hold / Deathforge / Sketh’lon-type pockets).
- One major “story power chain” that pays off hard:
- The Cipher of Damnation (Oronok Torn-heart) is the classic choice.
Stage 3: Endgame priorities (late 69 → 70 and beyond)
- Start or continue the Akama / Ashtongue arc that ties into Black Temple access on rulesets where it’s required.
- Unlock Netherwing pathing so you can immediately pivot into dailies and eggs once you’re 70.
- Convert remaining quests into pure gold after hitting 70.
Shadowmoon becomes easy when you treat it like stages instead of random errands.
Route: Arrival Setup (Flight Paths, Hearth, and the “No-Stranding” Rule)
Shadowmoon is one of the worst zones in Outland to log out randomly, because you can end up on the wrong side of long ridges and hostile roads. Fix that early.
Flight paths and anchor points
- Your faction hub is your first anchor:
- Alliance: Wildhammer Stronghold
- Horde: Shadowmoon Village
- Your second anchor depends on your Shattrath alignment:
- Aldor: Altar of Sha’tar
- Scryers: Sanctum of the Stars (Scryers-only base)
Hearthstone rule
- While leveling: set hearth to the hub you’ll return to most today (not “eventually”).
- If you’re doing faction hub loops: hearth at Wildhammer/Shadowmoon Village.
- If you’re doing attunement/Ashtongue steps: hearth near your Aldor/Scryer base.
- After you hit 70: hearth becomes a gold tool—use it to cash out turn-ins and vendor loops efficiently.
The no-stranding rule
Before leaving a hub, you should have:
- enough bag space for one full loop,
- enough quests (6–10 ideally) pointing to the same pocket,
- a return plan (ride back, hearth back, or turn-in at the next anchor).
Shadowmoon punishes “I’ll figure it out later.”
Route: Power Chain #1 — The Cipher of Damnation (Oronok Torn-heart)
The Cipher of Damnation chain is one of the most valuable quest arcs in Outland because it delivers a real finale, strong rewards, and efficient objective stacking when you route it correctly. It’s level-70 content on many listings, but it’s still a top “power chain” once you’re late-69 or freshly 70 and converting quests into gold.
Why this chain is worth your time
- It’s built as a structured arc rather than scattered errands.
- It has a clear reward payoff:
- you receive an Amulet of the Torn-heart plus a choice of weapon rewards at the end.
- The objectives naturally cluster around the Hand of Gul’dan / Shadowmoon pockets, so you can run it as loops.
How the chain flows (so you can route it efficiently)
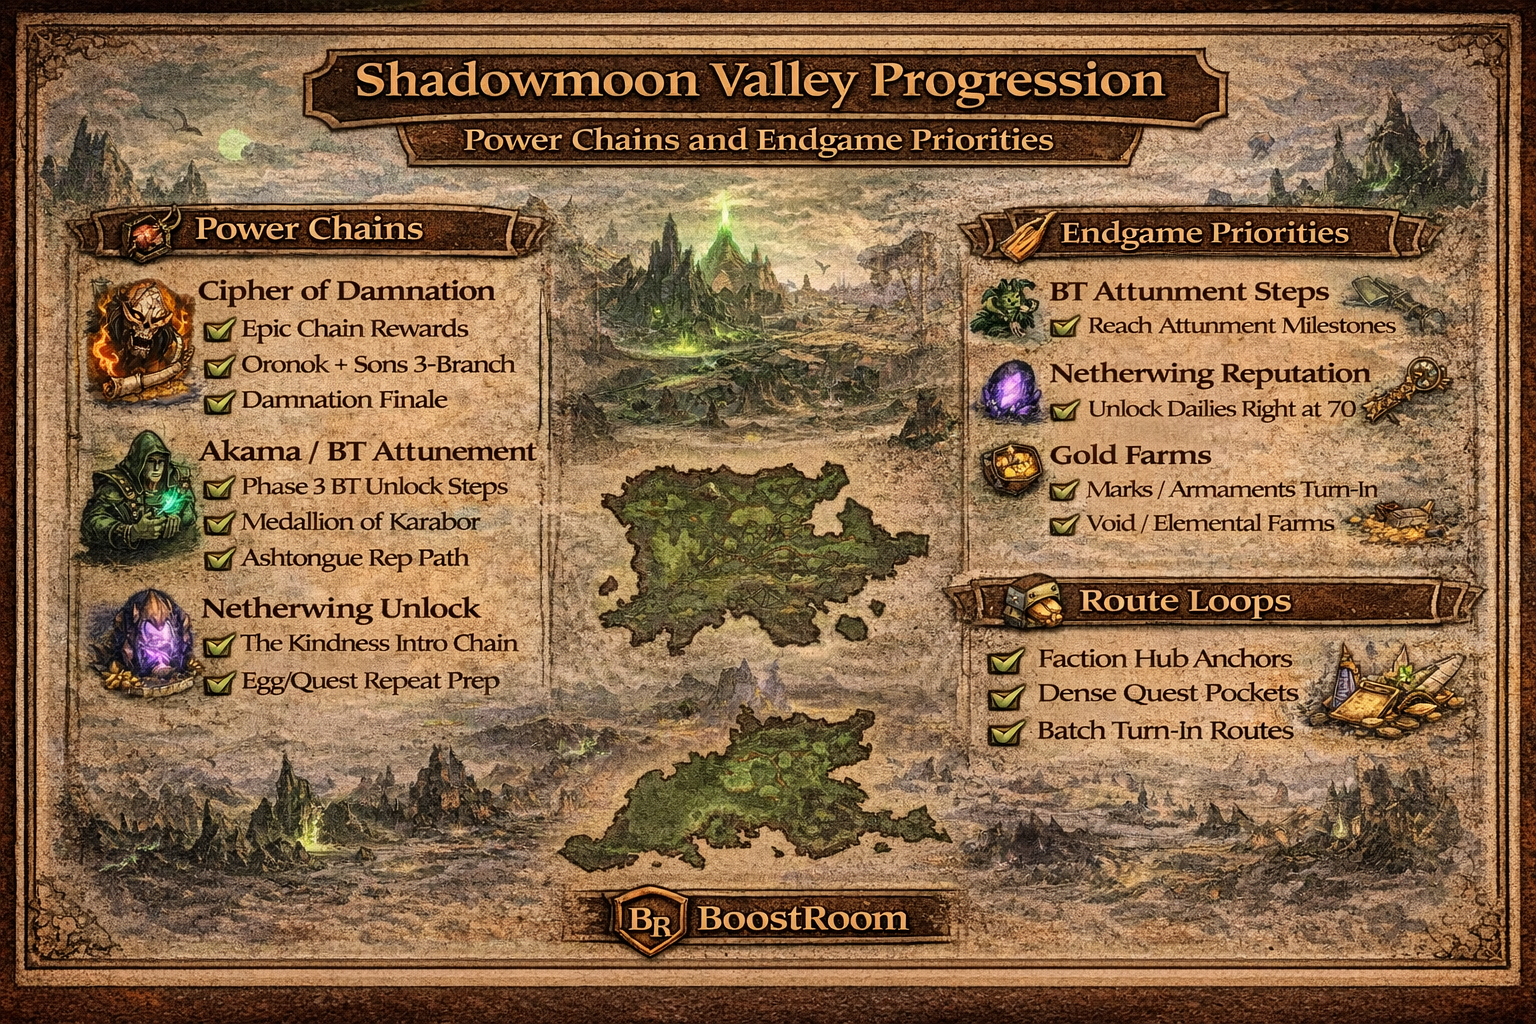
The chain begins with The Hand of Gul’dan and leads into elemental spirit steps and Oronok’s storyline, then splits into three sub-arcs tied to Oronok’s sons (Grom’thor, Ar’tor, Borak), and ends with The Cipher of Damnation finale.
The fast way to execute it
- Don’t treat it like “one quest at a time.”
- Treat it like a three-branch batch:
- unlock Oronok,
- pick up the three fragment arcs,
- complete each fragment arc in one clean sweep.
Loop template for Cipher speed
- Start from your closest anchor (often your faction hub or Aldor/Scryer base).
- Ride to Oronok’s farm and pick up all available steps.
- Choose one son-arc and complete it fully (kills + items + named steps).
- Return to Oronok for a batch turn-in, pick up the next arc, repeat.
Common slow mistake
Players often bounce between arcs halfway through because they “happen to be near something else.” Shadowmoon travel time makes that expensive. Finish one arc, then move.
Route: Power Chain #2 — Akama and the Ashtongue Path (Endgame Access Priority)
If your ruleset uses a Black Temple access chain, Shadowmoon is where it begins. Blizzard’s Phase 3 announcement for Burning Crusade Classic explicitly lists the quest sequence that starts from Anchorite Ceyla at Altar of Sha’tar (Aldor) or Arcanist Thelis at Sanctum of the Stars (Scryers), and continues through key steps like Tablets of Baa’ri, The Warden’s Cage, Akama’s Promise, and later raid-linked steps—ultimately awarding the Medallion of Karabor, which allows entry to the Black Temple.
Why this arc is “power” even if you’re not raiding tomorrow
- It forces you to complete some of Shadowmoon’s best objective pockets (high XP/gold density).
- It creates a clear endgame roadmap instead of “what do I do at 70?”
- It ties into long-term reputation value (Ashtongue Deathsworn inside Black Temple on relevant rulesets).
The listed early steps (what you should prioritize inside Shadowmoon)
From the Phase 3 guide list, your Shadowmoon portion includes:
- Tablets of Baa’ri
- Oronu the Elder
- The Ashtongue Corruptors
- The Warden’s Cage
- Proof of Allegiance
- Akama
- Seer Udalo
- A Mysterious Portent
- The Ata’mal Terrace
- Akama’s Promises (then continues beyond Shadowmoon)
How to run this without killing your leveling speed
- Treat the BT chain steps as “route glue,” not as your only content.
- Stack them with Shadowmoon pocket loops:
- when you go to a pocket for BT steps, also finish local hub quests there,
- and don’t return to turn in until you have multiple completions.
Akama chain starting point
A quest chain that leads to Akama is noted as starting from either Altar of Sha’tar (Aldor) or Sanctum of the Stars (Scryers).
Route: Power Chain #3 — The Path of Conquest and Your Faction Hub Arc
Shadowmoon’s faction hub arc is where you build momentum and keep the zone from turning into a “long rides, small rewards” problem. On many quest lists, The Path of Conquest chain is a core part of the Wildhammer Stronghold / Shadowmoon Village progression criteria.
Why it’s worth doing
- It provides a structured line of quests that push you through core Shadowmoon pockets.
- It’s the cleanest way to generate enough stacked objectives to make the zone feel efficient.
How to make it fast
- Start at your faction hub.
- Accept the full hub bundle, not just the first two quests you see.
- Run one pocket at a time:
- Legion Hold / Deathforge style objectives as one sweep,
- Sketh’lon-style objectives as a separate sweep,
- then cash out in one big turn-in burst.
What to avoid
- “One quest, one turn-in” habits.
- Getting baited into far-off single-target quests unless they unlock a dense follow-up cluster.
Route: The Best Shadowmoon Loop Order (Alliance and Horde)
Shadowmoon has several pockets that become efficient only when you loop them correctly. Below is a route order that keeps travel controlled.
Alliance loop order
- Wildhammer Stronghold quest bundle → complete nearest pocket objectives
- Legion Hold / Deathforge pocket sweep → return with 6–10 turn-ins
- Aldor/Scryer base pivot (if you’re doing Akama/BT steps)
- Cipher of Damnation arc batches (late 69/70)
- Netherwing prep routes (at 70)
Horde loop order
- Shadowmoon Village quest bundle → complete nearest pocket objectives
- Legion Hold / Deathforge pocket sweep → return with 6–10 turn-ins
- Aldor/Scryer base pivot (BT steps / Akama chain routing)
- Cipher of Damnation arc batches (late 69/70)
- Netherwing prep routes (at 70)
The key idea
Your faction hub is your “stack builder,” your Aldor/Scryer base is your “endgame progress anchor,” and the power chains are your “capstone payoffs.”
Route: Netherwing Prep (What to Do Now so 70 Feels Instantly Better)
Netherwing is one of Shadowmoon’s most important endgame systems because it turns into:
- daily quests,
- egg turn-ins,
- and ultimately epic netherdrake mounts when you reach Exalted (requires Artisan Riding).
Critical timing reality
Netherwing daily hub is level-70 content, and daily questing requires flying; many references also note Netherwing dailies requiring Artisan (epic) riding skill for the daily hub flow.
The unlock chain starts with “Kindness”
The Netherwing questline begins by speaking to Mordenai in Netherwing Fields; “Kindness” is commonly listed as the start of the Netherwing dragon quest line and leads toward Neutral standing by the end of the introductory chain.
How to use Netherwing prep without derailing your leveling
- If you’re 69 and close to 70:
- note where Netherwing Fields are,
- plan your first Netherwing session at 70 as a dedicated block.
- If you’re already 70:
- do the “Kindness → Ally of the Netherwing” intro chain immediately,
- then fold egg hunting into your normal Shadowmoon travel (eggs become “bonus value,” not a grind lifestyle).
Egg rule (the only way this stays healthy)
- Pick up eggs when they’re on your route.
- Don’t spend hours circling one area unless you intentionally chose “Netherwing rep night.”
Route: Endgame Priorities Checklist (Your First Week at 70 Starts Here)
Shadowmoon is where your endgame starts to feel organized. Use this checklist so you don’t hit 70 and stall.
Priority 1: Finish the best quest rewards
- Complete Cipher of Damnation finale for the amulet + weapon choice if you haven’t yet.
- Close out any hub chain that ends in a blue-quality reward for your role.
Priority 2: Progress Black Temple chain if relevant
- Complete your Shadowmoon steps (Tablets of Baa’ri → Akama’s Promises) so you’re ready for the raid-linked continuation when your group schedule allows.
Priority 3: Unlock Netherwing intro and start habit-building
- Complete the intro chain.
- Start collecting eggs naturally.
- Plan your daily loop schedule (short, repeatable, low-stress).
Priority 4: Convert leftover quests into gold
- If you hit 70 mid-zone, your remaining Shadowmoon quests become pure gold.
- This is one of the cleanest ways to fund enchants and consumables early.
Loot: Shadowmoon Rewards That Actually Matter (Power Picks, Not Collection Picks)
Shadowmoon loot is about impact, not perfection. You want upgrades that change your pace immediately.
Your leveling and early-70 loot priority order:
- Main damage source (weapons / spell power sticks)
- Survivability (prevents deaths and wipes)
- Sustain (less drinking/bandaging = more progress)
- Everything else
Loot: The Cipher of Damnation Reward Choices (How to Pick Fast)
The Cipher chain’s reward structure is simple:
- You receive Amulet of the Torn-heart, and
- you choose one weapon option from a list that includes items like Borak’s Reminder, Grom’thor’s Charge, Lohn’goron, Bow of the Torn-heart, Oronok’s Ancient Scepter, Torn-heart Axe of Battle, and Staff of the Redeemer.
Fast pick rules
- If your weapon is outdated: take the weapon that replaces it immediately.
- If you’re a caster/healer and your weapon is “fine”:
- prioritize the option that improves sustained output and reduces downtime.
- If you’re a tank:
- choose the option that improves threat stability or survivability—your group speed depends on it.
The biggest mistake
Picking a reward that’s “cool” but not equipped. If it doesn’t go on your character today, it’s not a progression reward.
Loot: Akama / Ashtongue Arc Value (Why It’s Worth the Effort)
Even before you step into raid content, the Akama-linked Shadowmoon steps are valuable because they:
- direct you into high-yield quest pockets,
- keep you on a structured path,
- and give you a reason to finish major objectives instead of drifting.
Treat rewards from this arc as “pre-raid scaffolding”: they don’t have to be your final items to be worth doing.
Loot: Gold-Forward Loot (What You Should Be Picking Up and Why)
Shadowmoon is rich in “sellable progress” if you loot intelligently.
Always loot for:
- vendor trash (Shadowmoon mobs often drop good gray stacks),
- cloth (steady gold and First Aid),
- green items (vendor if it’s not an upgrade—don’t hoard),
- reputation turn-in items when relevant to your alignment.
Netherwing bonus value
- Netherwing eggs (once you’re on that path) become one of the most meaningful “pick up when you see it” items in the entire expansion’s daily economy.
Extraction: How to End Every Shadowmoon Session With Momentum
Shadowmoon is the zone where poor logouts cost the most time. Extraction fixes that.
Shadowmoon extraction checklist
Before you log off:
- Repair, vendor, and clear bag space (Shadowmoon loops are loot-heavy).
- Set hearth based on tomorrow’s first action:
- faction hub if you’re finishing hub chains,
- Aldor/Scryer base if you’re pushing Akama/BT steps,
- a central hub if you’re converting quests into gold efficiently.
- Park at the start of your next loop pocket, not at the far end of the last one.
- Clean your quest log:
- keep quests that overlap the same pocket,
- drop “single-objective long rides” unless they unlock a major chain payoff.
- Write one line for your next login:
- “Next: finish Deathforge sweep + turn in, then start Oronok arc.”
- “Next: BT Shadowmoon steps block, then cipher fragment arc.”
That one line prevents the “log in and wander” trap.
Practical Rules: Shadowmoon Valley Fast-Progress Playbook
- Run Shadowmoon in stages: anchors → power arcs → endgame priorities.
- Never ride out for a single completion. Batch turn-ins are the zone’s speed engine.
- Finish one pocket fully before changing elevation or direction.
- Do Cipher of Damnation as a three-branch batch, not a zigzag.
- Treat Akama/BT steps as route glue—stack them with local quests.
- If a named mob is contested, finish the rest of the loop and return later.
- After 70, prioritize quests with the best gold/time ratio; skip travel-heavy leftovers.
- Start Netherwing unlock as soon as you’re 70 so dailies and egg value start compounding.
- Use hearth like a cooldown: hearth for big cash-outs, not small errands.
- Loot everything, vendor often, and avoid bag clutter that forces extra travel.
- Choose quest rewards you equip immediately; “maybe later” is usually vendor gold.
- Extract every session with a clear next action so Shadowmoon stays fast.
BoostRoom: Shadowmoon Power Progress Without the Time Sinks
Shadowmoon is where players lose time in predictable ways:
- long travel loops with low stacking,
- power chains stalled by contested objectives,
- endgame step confusion (especially around Akama/attunement progression),
- and 70-level priorities (Netherwing prep, gold efficiency) done in the wrong order.
BoostRoom helps you turn Shadowmoon into clean, controlled progression:
- Fast completion support for high-friction chain steps
- Efficient route pacing so you finish the right power chains first
- Help aligning endgame priorities: Akama path, Netherwing unlock, and gold conversion
- A hybrid approach where you keep the fun questing and skip the slowest bottlenecks
If your goal is to hit 70 feeling prepared—strong rewards equipped, priorities clear, and gold climbing—BoostRoom is the shortcut that protects your time.
FAQ
What level should I start Shadowmoon Valley in TBC Classic?
Most players come in late—around 68–70—because the zone is tuned for endgame progression and high-level quest rewards.
Is Shadowmoon worth doing if I already hit 70?
Yes. Once you’re 70, unfinished quests become pure gold, and Shadowmoon contains power chains that set up long-term value (Netherwing and Akama/Ashtongue progression).
What are the top “power chains” I should prioritize?
The Cipher of Damnation (Oronok Torn-heart) is a top reward chain. The Akama/Ashtongue path matters for endgame access on relevant rulesets. Your faction hub arc keeps the zone efficient and unlocks additional high-density pockets.
How do I start the Netherwing questline?
Look for Mordenai in Netherwing Fields and begin with “Kindness.” The intro chain is the gateway to Netherwing reputation and later daily questing.
Do I need flying for Shadowmoon progression?
You can quest without flying, but many endgame systems tied to Shadowmoon (notably Netherwing daily questing) require flying, and some references note Netherwing dailies expecting Artisan riding.
Is Black Temple attunement required?
It depends on your server ruleset/phase. Burning Crusade Classic Phase 3 documentation outlined an attunement quest sequence that awards the Medallion of Karabor for entry on that ruleset.
What’s the best way to make gold in Shadowmoon?
Hit 70 and convert leftover quests into gold, then fold repeatable value into your routine: Netherwing progression (including eggs) and efficient vendor/loot loops while doing your remaining chains.
How do I stop Shadowmoon from feeling slow?
Run loops, not errands. Stay in one pocket until it’s finished, batch turn-ins, and extract every session with your next loop already planned.
