Layer 2: Fight-by-Fight Potions (performance)
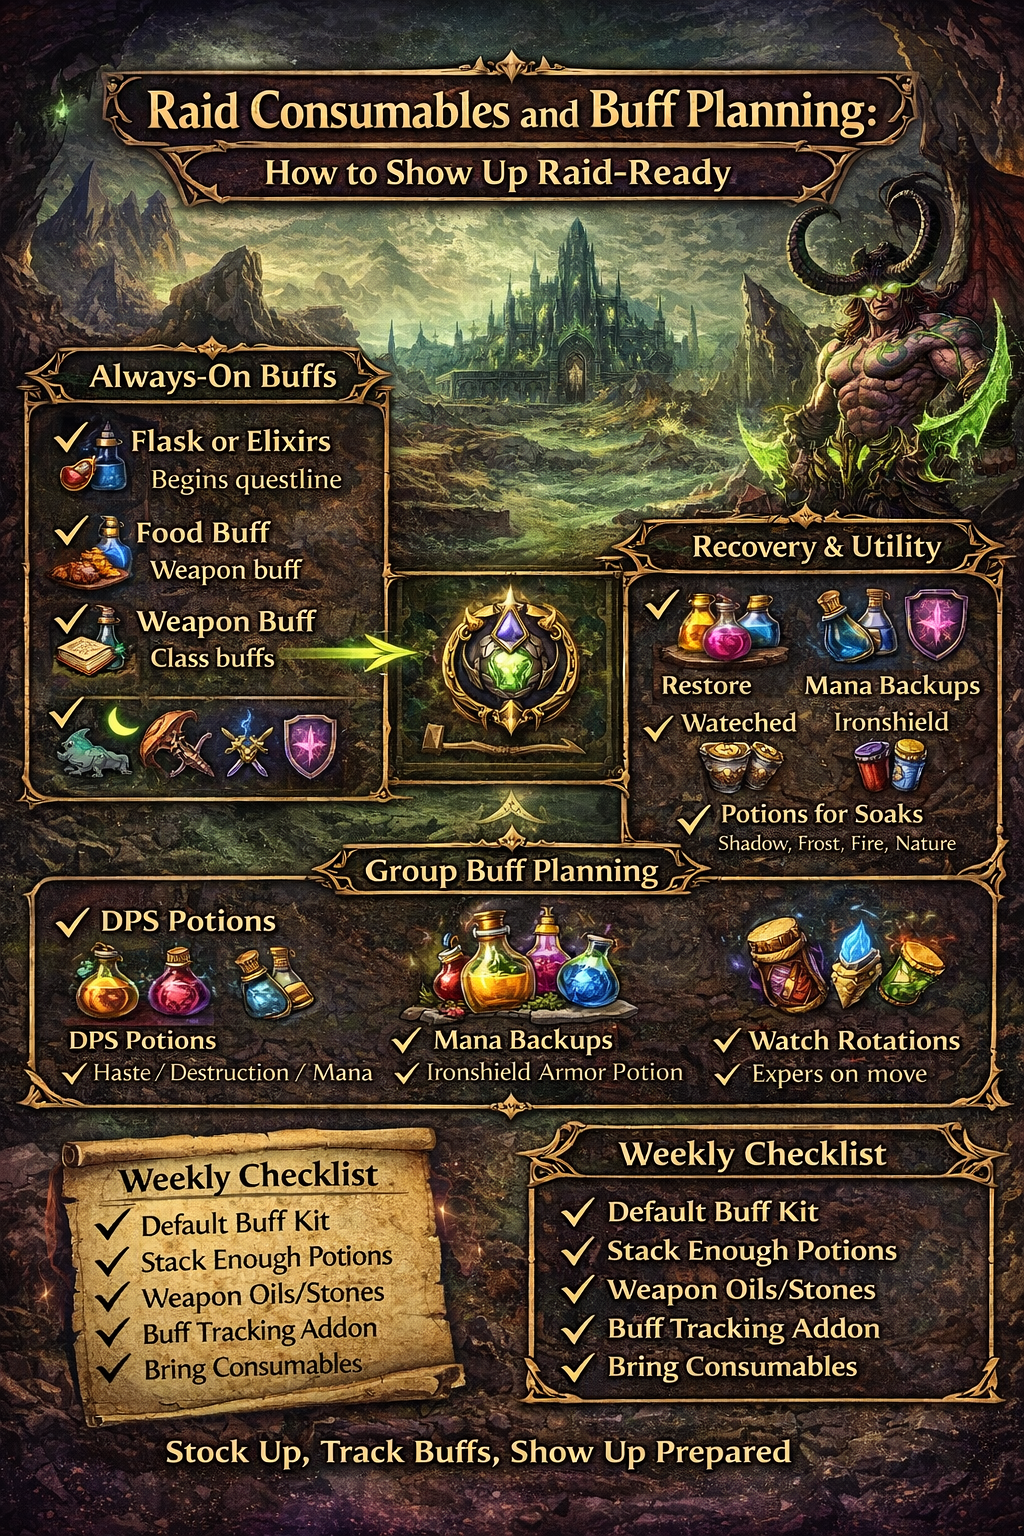
These are the “push buttons” that convert preparation into real DPS/HPS or survival:
- Haste/Destruction/Mana/Healing potions (depending on role).
- Armor potions for tanks (or anyone assigned to soak/cheese).
- Protection potions for specific damage types when your raid uses them.
Layer 3: Recovery + Utility (the difference-maker)
This layer is what raid leaders notice during messy nights:
- Emergency survival consumables (healthstone usage discipline, seeds if used, defensive pot timing).
- Mana “backup plan” items if your spec runs dry.
- Buff tracking so you don’t waste attempts with missing basics.
If you only do Layer 1, you’ll be “fine.” If you consistently do Layers 1–3, you’ll be the player people build rosters around.

Route: Flasks vs Elixirs (What to Use, and Why People Mess It Up)
You have two main choices for your long-duration stat buff:
Option A: Flask
- One flask replaces the need for a Battle + Guardian elixir pair.
- Flasks are the simplest: one button, long duration, and typically the “default” for progression because they’re low-maintenance.
Option B: Battle + Guardian Elixir Pair
- One Battle elixir (offense) + one Guardian elixir (defense/regen).
- Usually cheaper per pull if you don’t die and you’re playing clean.
- Risk: elixirs are easier to lose (and easier to forget to reapply after wipes).
Practical guidance that works in real raids
- Progression nights: default to flasks unless your raid is extremely stable.
- Farm nights: elixir pair can be cost-efficient if you rarely die.
- If you are learning: flask saves you from “oops, I forgot my Guardian elixir after that wipe.”
Common pitfall: overwriting your own long buff
Some temporary buffs count as a Battle elixir and can conflict with your planned setup. If you pop something “situational,” you may need to reapply your intended flask/elixirs afterward. The raid-ready move is to know what you’re using, not spam random consumes.
Route: The Core Flask Lineup (Pick the Right One for Your Damage Type)
Here are the big “anchor” flasks many raids expect players to understand:
Physical DPS (and many threat-focused roles)
- Flask of Relentless Assault: a straightforward Attack Power flask.
Caster DPS
- Flask of Supreme Power: general spell damage.
- Flask of Pure Death: tuned for specific spell schools (commonly used by Shadow/Fire/Frost damage profiles).
- Flask of Blinding Light: tuned for Arcane/Holy/Nature profiles.
Healers
- Flask of Mighty Restoration: mana per 5 seconds (MP5) focused.
Tanks
- Flask of Fortification: health + defense-focused stability.
Bonus concept (Tier 6 style “free-ish” flasking): Shattrath flasks
Later-tier raiding systems can let you use “Shattrath” versions of certain flasks in specific raids if you have the right currency/items from raid trash. This can dramatically lower the “gold pressure” of consistent flasking, and it’s worth planning around once your team is there.
Route: The Best “Always-On” Food Buffs (Simple Choices That Matter)
Food buffs are one of the highest value-per-gold tools in TBC. If you’re missing food, you’re essentially choosing to be weaker for no reason.
Use food that matches your role’s bottleneck:
Physical DPS
- Attack Power food (example: Ravager Dog-style AP food).
- Hit rating food when you’re under cap (example: Spicy Hot Talbuk-style hit food).
- Strength/Agility foods if your spec scales hard with those stats.
Caster DPS
- Spell damage + spirit foods (several options share the same spell power bonus).
- Stamina foods when surviving is the real DPS increase (dead casters do zero).
Healers
- Healing + spirit foods and MP5 foods depending on your regen needs.
- If you’re frequently OOM, MP5 food can beat “more +healing” in progression settings.
Tanks
- Stamina food is the default safety play.
- If you’re trying to solve a threat problem (and survival is already stable), you can swap food toward offense—but do this intentionally, not randomly.
Time management note: many TBC foods have shorter durations than modern expansions. That means you need a habit:
- Eat during trash resets.
- Eat after wipes immediately.
- Keep a stack in your bags at all times.
Route: Weapon Enhancements (Oils, Stones, and the “Why Didn’t You Have One?” Problem)
Weapon enhancements are the classic “small edge” that becomes a huge edge across an entire raid night.
Caster DPS: Wizard oils
- Superior Wizard Oil is a go-to for raw spell damage.
- Brilliant Wizard Oil trades a small amount of spell damage for spell crit (often attractive for specs that value crit spikes).
Healers: Mana oils
- Superior Mana Oil provides MP5 and lasts a long time, making it a practical default.
- Brilliant Mana Oil blends MP5 with a small healing boost, but has shorter duration—plan for refreshes.
Melee DPS and some tanks: Sharpening stones / weightstones
- Adamantite Sharpening Stone is a top-end option that adds flat weapon damage and melee crit rating for a long duration.
- Adamantite Weightstone fills the same role for blunt weapons and can be part of a min-max kit.
One rule that avoids drama:
If your raid uses Windfury setups, coordinate your weapon buff approach so you’re not wasting a stronger effect or clashing with your group’s plan. Even when you’re trying to maximize your personal output, the best raid-ready players optimize without creating buff conflicts.
Route: Potion Packages by Role (Bring the Right Stack Counts)
This is where most players under-prepare: they bring “some potions” instead of a planned kit. Here’s a clean way to pack.
Tank Kit (Survival + Threat Discipline)
Baseline
- Flask (Fortification) or Guardian/Battle plan if appropriate.
- Stamina food.
- Weapon enhancement (stone/weightstone if used).
Potions
- Ironshield Potion: armor spike for dangerous windows.
- Major protection potions when your raid calls them for specific bosses.
- Super Healing Potions as emergency backup (even tanks should carry them; you won’t always get a heal in time).
Recovery/utility
- Items that let you stabilize after a bad hit sequence (your goal is to survive long enough for healers to catch up).
- A “wipe-to-wipe” mentality: you reapply, rebuff, and reset fast so the raid pulls again quickly.
Healer Kit (Mana Plan First, Output Second)
Baseline
- Flask of Mighty Restoration or elixir pair (common Guardian: MP5-focused).
- Mana/regen-friendly food.
- Mana oil on weapon.
Potions
- Super Mana Potion: your core “keep healing” button on longer fights.
- Major Dreamless Sleep Potion (situational): huge regen, but you must use it intelligently because it incapacitates you briefly.
- Super Healing Potion as a personal survival backup.
The healer truth
- The best healers aren’t the ones with the highest “big heal” numbers.
- They’re the ones who never panic, never OOM early, and always have a mana plan for the final 20–30% of the fight.
Physical DPS Kit (Uptime + Cooldown Alignment)
Baseline
- Flask of Relentless Assault or a DPS elixir pairing.
- AP/Hit/Strength/Agility food depending on your needs.
- Sharpening stone / weightstone if appropriate.
Potions
- Haste Potion: strong when synced with your trinkets, procs, and Bloodlust windows.
- Super Healing Potion for survival on progression (staying alive is often a bigger DPS gain than squeezing one more offensive potion).
- Protection potion if assigned to soak a mechanic.
Practical stack planning
- If your raid night is 2–3 hours with wipes, plan on enough potions to use them multiple times across attempts—not one “just in case” stack.
Caster DPS Kit (Damage Profile + Mana Discipline)
Baseline
- Spell flask matching your school/profile (or Supreme Power for general use).
- Spell damage food.
- Wizard oil.
Potions
- Destruction Potion: for burst windows if mana isn’t your bottleneck.
- Super Mana Potion: for long fights where mana is the limiting factor.
- Protection potions if your raid strategy uses them.
- Utility potions if your raid uses skips or specific play patterns (these are niche, but being prepared makes you valuable).
The caster truth
- “I did high DPS for 40 seconds” isn’t the goal.
- “I did high DPS for the entire fight” is the goal—and consumables are how you turn that into reality.
Route: Major Protection Potions (When They’re Worth It)
Protection potions are strategy tools. You don’t use them “because they exist.” You use them when they reliably:
- Prevent deaths during the same dangerous mechanic every pull, or
- Enable a specific assignment (soaker, baiter, emergency backup), or
- Let the raid push damage faster by reducing healing strain.
In TBC, the common protection potion types cover:
- Arcane
- Fire
- Frost
- Holy
- Nature
- Shadow
A raid-ready player does two things:
- Keeps a small reserve in the bank/bags.
- Brings the exact ones needed for the night’s target bosses once the raid plan is known.
Route: Drums and Group Buff Planning (The “Roster Value” Layer)
Buff planning isn’t just “bring consumes.” It’s making sure your raid’s buff ecosystem is complete.
Drums (Leatherworking)
- In TBC, drums are a specialization-style advantage: they’re strong, have limited reuse windows, and are often coordinated in groups.
- Drums also have shared cooldown rules that prevent constant chaining by one person—this means planning who uses what, and when matters.
Why raid leaders care
- Drums (and other coordinated buffs) are not “personal power.” They’re group power.
- Players who understand buff rotation timing and use it cleanly are easier to build around—and get invited more.
How to approach drums without drama
- If your guild expects them, treat it as part of your role package.
- If your guild doesn’t expect them, don’t force it—just be ready if the meta shifts or your team starts pushing harder content.
Route: Buff Tracking (Your Raid-Ready Addon Habit)
The simplest way to look prepared is to actually be prepared—and to prove it quickly. Buff tracking tools let you:
- Confirm you have flask/elixirs/food/weapon buff active.
- Reapply faster after wipes.
- Avoid the embarrassing “pull timer is at 2 and I just realized I’m missing everything.”
A raid-ready approach:
- Put flask/elixir, food, and weapon buff on a visible reminder (icon tracking).
- Do a quick self-check after every wipe.
- If you’re a raid leader or officer, a raid buff status tool can save enormous time by showing who is missing what.
Loot: What Great Consumable Prep Actually Buys You
Consumables aren’t just “numbers.” They buy consistency—and consistency buys invites.
1) More attempts per hour
If your raid wipes and half the group takes 4 minutes to rebuff, you lose pulls. Players who rebuff instantly create more boss practice time, which is the fastest way to progress.
2) Cleaner healing and fewer random deaths
Food buffs and correct flask choices often turn “barely died” into “didn’t die.” That lowers healer panic, lowers mana strain, and improves the whole raid’s performance.
3) Better threat and pacing
When tanks are stable and DPS can go harder safely (because everyone is buffed and using potions correctly), your raid’s pacing improves. Faster kills mean fewer mechanics, fewer mistakes, and fewer wipes.
4) Reputation
Raid leaders remember two types of players:
- The ones who always need to borrow consumes.
- The ones who always show up ready (and often have spares).
Be the second type, and invitations become easier.
Extraction: The Weekly System (How to Never Scramble Again)
If you’re scrambling on raid day, your system is broken. Fix it with a weekly cycle that turns prep into autopilot.
Step 1: Decide your “raid intensity tier”
Pick one based on your goals and budget:
- Budget Tier: flask/elixirs + food + weapon buff + basic potions (minimum).
- Standard Tier: adds offensive potion usage on key bosses, plus resist pots when needed.
- Push Tier: consistent potion usage on cooldown windows, plus utility items and bigger reserves.
Step 2: Create a “default shopping list”
Keep this list stable so you can buy/craft in batches:
- 1–2 flasks (or enough elixirs for the night).
- 1–2 stacks of relevant food.
- 1 stack of weapon enhancements (oils or stones).
- 1–2 stacks of your main potion (mana/haste/destruction/ironshield depending on role).
- A small reserve stack of healing potions.
- A small reserve of protection potions (only top up when needed).
Step 3: Batch craft or batch buy
The difference between “always ready” and “always broke” is often this:
- Buying one stack at a time is expensive and stressful.
- Buying/crafting in batches during low-price windows is calm and efficient.
Step 4: Store your raid kit like a pro
- Keep your raid consumes in one bag section.
- Keep a “spares” stack in the bank for emergencies.
- Refill immediately after raid night, not 10 minutes before the next one.
Extraction: Raid Night Execution (Pre-Pull, Pull, Post-Wipe)
Your consumables only matter if you use them correctly.
Pre-pull (60–10 seconds)
- Confirm flask/elixir is active.
- Confirm food is active.
- Confirm weapon buff is active.
- Decide your first potion plan (offensive vs mana vs defensive).
- If you’re assigned a protection potion, set it on an easy keybind.
On pull
- Use your planned potion at the planned moment (not randomly).
- Align offensive potions with real damage windows (lust, execute phases, trinket procs, burn calls).
Post-wipe (the elite habit)
- Reapply food immediately.
- Reapply elixirs immediately (if you’re on elixir plan).
- Check weapon buff duration.
- Refill from your spares stack if you’re running low—don’t wait until you’re empty.
Practical Rules: The “Raid-Ready” Checklist That Stops Wipes and Saves Gold
Use these rules as your no-excuses standard:
- Never arrive without food. It’s cheap power and it signals effort.
- Always have a weapon buff. Oils/stones are part of your baseline.
- Progression = simplify. Flasks reduce mental load when wipes happen.
- Farm = optimize. Elixir pairs can save gold if you rarely die.
- Potions are for windows, not vibes. Plan your usage.
- Bring more than you think. Running out mid-raid is avoidable.
- Carry a survival potion even as DPS. Staying alive is damage.
- Know your role’s “main potion.” Tanks: armor tools. Healers: mana tools. DPS: burst tools (or mana if needed).
- Protection pots are strategy items. Bring them when your raid calls for them.
- After every wipe: rebuff first, then talk. Be ready before you type.
- Track your buffs. If you “forget sometimes,” tracking fixes that.
- Don’t overwrite your own long buff by accident. Know which consumes conflict.
- If you borrowed consumes twice, you needed a system yesterday.
- Keep a bank reserve. Raid-ready includes “unexpected extra hour” nights.
- Bring extra for learning nights. Progression burns attempts, not just bosses.
- If you’re assigned a job (soak, kite, interrupt), pack for it. That includes consumables.
- If your raid uses drums, plan their use. Random drums are wasted drums.
- Reapply food during downtime. Don’t wait until pull timer.
- Reapply oils/stones on schedule. Weapon buffs quietly fall off and cost you output.
- Make “prep” part of your identity. People invite consistency.
BoostRoom: Turn Raid Prep Into an Advantage (Not a Chore)
If you want the fastest path to being “the reliable one” in your roster, BoostRoom can help you build a real raid-prep system instead of guessing every week.
With BoostRoom, you can level up your raid readiness through:
- Personal prep planning: role-based consumable kits tailored to your spec and goals.
- Raid-ready checklists: what to bring for Kara, Gruul/Mag, SSC/TK, Hyjal/BT, and beyond—without wasting gold.
- Performance support: improve uptime, reduce deaths, and align cooldowns/potions properly so your prep converts into real results.
- Economy guidance: build a weekly routine that funds consumes and enchants without burning out.
The goal isn’t to “spend more.” The goal is to spend smarter, show up prepared every single raid, and become the player leaders trust.
FAQ
Do I need a flask for every raid?
Not always. Flasks are the cleanest choice for progression and wipe-heavy nights. On stable farm content, a Battle + Guardian elixir pair can be cheaper if you rarely die and you reapply properly.
What’s the minimum I should bring to be considered raid-ready?
At minimum: a long-duration buff plan (flask or elixirs), appropriate food, a weapon enhancement, and at least one stack of your core potion type (mana/haste/destruction/ironshield depending on role).
How many potions should I bring for a 2–3 hour raid?
Enough to cover multiple attempts. As a simple rule: one full stack of your main potion is a baseline, and two stacks is common on progression—especially if your group is learning hard bosses.
Should DPS carry healing potions?
Yes. Progression raids often kill players through sudden damage, movement mistakes, or healer disruption. A personal healing potion can save pulls.
Are protection potions worth the gold?
They’re worth it when your raid strategy benefits from them consistently (preventing repeat deaths, enabling assignments, or smoothing a predictable damage event). If you’re “trying them randomly,” you’ll feel like they aren’t worth it.
Which is better for casters: Destruction Potion or Super Mana Potion?
If mana is stable and you have a burst window, Destruction Potion can be strong. If mana is the limiting factor, Super Mana Potion usually wins over the full fight.
What’s the biggest mistake players make with consumables?
They treat consumables as optional and unplanned. The raid-ready move is to build a repeatable kit and use it consistently, not to panic-buy 10 minutes before invite time.
Do I need buff tracking addons?
If you ever forget food, oils, or long buffs—yes. Tracking removes guesswork and helps you recover faster after wipes.
