🧭 Guide Summary:
In this guide, you’ll find:
- A quick decision tool to pick your class in 60 seconds
- Three starter classes with two complete build paths each (Leveling & Bossing)
- First 10 Starmap nodes per class to avoid wasted points
- Talent rows to take early, and when to swap
- Early gear priorities and cheap crafts that matter
- Practice drills, common mistakes, and Duo synergy tips
- A 30-minute “I’m busy” plan, so you still make progress on tight days
By the end, you’ll know exactly what to pick, why it works, and what to do next. Let’s go. ⚡
🧪 One-Minute Class Picker (Honest & Fast)
Answer these without overthinking:
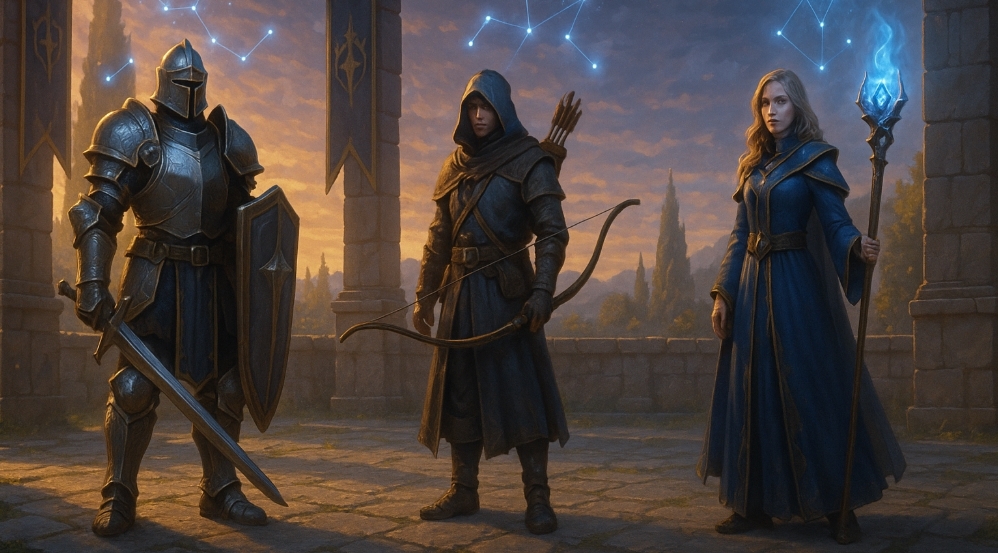
- Do you like being hard to kill and leading pulls? → Guardian
- Do you prefer kiting and safe damage from range? → Archer
- Do you want flashy AoE with a self-sustain loop? → Battle Mage
If two sound good, go with the one that matches how you’ve always played similar games. Most “rerolls” happen because someone ignored their natural style.
🛡️ Guardian — “Anchor and Answer”
Playstyle: Frontline bruiser with simple survival tools, clean punish windows, and forgiving mistakes.
Good for: New players, duo leaders, anyone who wants to learn boss telegraphs without exploding.
🎯 Guardian Leveling Build (Safe Tempo)
Core idea: Keep uptime by blocking heavies and punishing with a burst finisher on a short loop. You’re not racing—you’re cleaning.
Opener (pull): Step with shield up → cone tag to group → light → block (read the heavy) → punish with your strongest strike → repeat.
Rotation (trash): Tag → block → punish → step → repeat. If 3+ enemies, weave a short cleave before the punish.
Rotation (elite): Same, but save your mitigation for obvious ground effects or double-heavy chains.
Stats: Health ≥ Armor ≥ Power.
Why: Health gives you a bigger mistake budget. Armor smooths bad pulls. Power is your “gravy,” not the base.
Early gear checkpoints:
- Weapon: Vendor basic sword with Power or Block Efficiency if you didn’t get a good drop.
- Shield: Take the first upgrade with +Health or +Block you see.
- Accessory: +Health is huge; don’t chase crit early.
First 10 Starmap nodes (order):
- Fleetfoot Paths (move speed OOC)
- Field Rations (potion value)
- Basic Mastery (+primary stat)
- Path of Iron → Block Efficiency
- Safecracker (extra mats from caches)
- Quick Study (first-time XP)
- Iron Reserves (max health)
- Vigilant Guard (reduced damage after block)
- Bunker Step (short DR after dodge/step)
- Basic Mastery II
Talents (Rows 1–3):
- Row 1: Bulwark’s Reward — blocking grants a small shield.
- Row 2: Measured Strikes — first hit after block gains damage.
- Row 3: Firm Footing — less knockback/less stagger on bursts.
Crafts & Consumables:
- Weapon Empowerment I (apply to weapon first)
- Chest Empowerment I (second)
- Stamina Tonic, Whetstone, Camp Kit (comfort = speed)
Checkpoint goals:
- Clear Dungeon 1 without dying.
- Hold a pack for 15 seconds without panic rolling.
- Learn 3-hit boss pattern: normal → normal → big → punish.
🐲 Guardian Bossing Build (Single-Target Calm)
Core idea: Trade block windows for guaranteed burst on exposed boss phases, with minimal movement waste.
Rotation:
- Pre-pull: Whetstone if needed, mitigation ready.
- During boss: Block → guaranteed punish → reset position; skip greed.
- Add waves: Taunt early, cone tag, hold while partner nukes.
Stats: Health ≥ Power ≥ Armor (we flip Power higher than leveling).
Why: Bossing needs your hits to matter during windows.
Talent swaps:
- Keep Bulwark’s Reward. If the fight is extremely movement heavy, swap Row 2 to Steady Guard (block grants brief DR even if you cancel early).
Starmap tweak:
- After Block Efficiency, path to Controlled Fury (slight damage node tied to post-block hits). Avoid deep damage detours until your survivability tree is online.
Practice drill:
- Find an elite with telegraphed heavy. Block → hit once only. Repeat 10 times. If you never get clipped, add a second hit. Build muscle memory slowly.
🏹 Archer — “Tag, Trap, Trim”
Playstyle: Ranged control with clean kites, strong single-target, and low risk if you respect spacing.
Good for: Players who like reading fights at a distance and punishing from safety.
⚡ Archer Leveling Build (Mobile Marksman)
Core idea: Mark → light shots → roll → burst. Always move between shots. Your trap controls the angle.
Opener (pull): Mark priority target → drop slow trap at your feet or their path → two light shots → roll → burst when they cross the trap line.
Rotation (trash): Bounce packs by kiting in an L-shape (never straight back).
Rotation (elite): Keep trap uptime, burst only after dodging the heavy.
Stats: Power ≥ Crit ≥ Stamina.
Why: You’re safe if you keep spacing; put points into damage while holding a stamina cushion.
Early gear checkpoints:
- Bow: Shortbow early (faster feel) → swap to longbow when comfy.
- Accessory: +Stamina or +Crit.
- Cloak/Light Armor: Any +Power/+Crit over raw armor numbers.
First 10 Starmap nodes (order):
- Fleetfoot Paths
- Basic Mastery
- Path of Gale → Dash Cooldown
- Field Rations
- Safecracker
- Quick Study
- Eagle Eye (+range or projectile speed)
- Light Step (sprint/dodge feel)
- Basic Mastery II
- Piercing Setup (synergy node if available on your tree)
Talents (Rows 1–3):
- Row 1: Hunter’s Rhythm — rolling grants a short damage buff.
- Row 2: Piercing Setup — marked targets take more from the next burst.
- Row 3: Fleet Volley — after a critical, your next light shot fires faster.
Crafts & Consumables:
- Weapon Empowerment I → Glove/Chest Empowerment I
- Whetstone (only for elite/boss), Stamina Tonic
Checkpoint goals:
- Clear Dungeon 1 with minimal potion use.
- Keep trap uptime on every elite pull.
- Hit burst only after a safe roll window (no panic bursts).
🎯 Archer Bossing Build (Window Burster)
Core idea: Prep mark + buff, dodge big, then dump burst. You’re fishing for exposed windows.
Rotation:
- Pre-mark target → roll a slow AoE → light x2 → burst → reposition.
- Re-mark before a window ends; never tunnel and lose mark.
Stats: Power ≥ Crit ≥ Stamina (unchanged).
Talent swaps:
- Consider Surefooted (brief DR after roll) for movement-heavy fights.
- If your duo partner handles adds, stay on pure burst; if not, take Splintered Barbs for small cleave.
Starmap tweak:
- Extend down Gale toward minor crit nodes only after Dash CD is online. Mobility is damage.
Practice drill:
- In a safe zone, practice roll → burst timing 20 times. It’s rhythm: move, shoot, move, shoot. No statues.
🔥 Battle Mage — “Burn, Dash, Boom”
Playstyle: Flashy AoE that self-sustains with smart hit timing. You dance in and out, detonate at 3+ stacks, and keep moving.
Good for: Players who like piano gameplay and positioning tricks.
🌪️ Battle Mage Leveling Build (AOE Cleaver)
Core idea: Maintain Burn stacks on packs, detonate at 3+, and dash through enemies to stay safe.
Opener (pull): Burn → step in → detonate → dash through → turn and finish.
Rotation (trash): Tag multiple mobs, keep burns rolling, detonate when they’re stacked.
Rotation (elite): Keep burn up, save dash for telegraphed bursts; detonate only when safe.
Stats: Power ≥ Mana Regen ≥ Health.
Why: You scale hard with uptime; mana regen keeps your loop smooth.
Early gear checkpoints:
- Spellblade/Focus with Mana Regen or Power.
- Accessory: +Mana Regen or +Power.
- Cloak: Any item with resource sustain.
First 10 Starmap nodes (order):
- Fleetfoot Paths
- Basic Mastery
- Path of Gale → Dash Cooldown
- Field Rations
- Safecracker
- Quick Study
- Arcane Efficiency (reduced mana costs)
- Aether Draw (small mana on hit)
- Basic Mastery II
- Tempo Spark (short haste after ability, if present)
Talents (Rows 1–3):
- Row 1: Spell Sustain — ability hits restore a sliver of mana.
- Row 2: Heat Cycle — after three burns, your next detonate gains radius.
- Row 3: Cauterize — small heal when you detonate a burning enemy.
Crafts & Consumables:
- Weapon Empowerment I (huge on spellblade)
- Whetstone is niche; prioritize Stamina/Resource Tonic
Checkpoint goals:
- Clear Dungeon 1 while detonating only at 3+ stacks.
- Avoid all avoidable ground effects by pre-dashing them.
💥 Battle Mage Bossing Build (Rhythm Detonator)
Core idea: Keep burn ticking, detonate right after a safe movement check, never detonate into an incoming heavy.
Rotation:
- Burn → short poke → watch for telegraph → dash → detonate → reset.
- Repeat with resource rhythm (don’t tap out your mana pool).
Stats: Power ≥ Mana Regen ≥ Health (same priorities).
Talent swaps:
- If you feel squishy, take Mage Guard (small DR after cast).
- For longer fights, swap Heat Cycle to Focused Ember (slightly bigger burn uptime) if available.
Starmap tweak:
- After Dash CD, pick Arcane Efficiency nodes quickly; they turn the piano into a song instead of a mash.
Practice drill:
- In open space, practice dash through → instant turn → detonate 15 times without whiffing. Build the muscle memory.
🎒 First Three Sessions — What to Do (Any Class)
Session 1 (60–90 min):
- Settings & binds → story hubs → Dungeon 1 unlock → craft Weapon Empowerment I.
- Starmap: Fleetfoot → Field Rations → Basic Mastery → your class branch.
Session 2 (45–60 min):
- Repeat Dungeon 1 for a cleaner time.
- Buy 3+ potions and Camp Kit; secure accessory with survival stat.
- Spend Starmap points to complete Block/Dash branch.
Session 3 (45–60 min):
- Prep for Dungeon 2: Empower chest, set talents, stock consumables.
- Practice your class drill (block loop, roll-burst, dash-detonate).
- Aim to die zero times; nothing cements progress like a clean run.
🧰 Stat Priorities, Without the Spreadsheet
Guardian — Health ≥ Armor ≥ Power ≥ Crit
- Translation: live first, hit second. Your damage comes from correct punish windows, not glass-cannon stats.
Archer — Power ≥ Crit ≥ Stamina ≥ Health
- Translation: if you keep spacing and roll well, damage pays off. Keep a small Stamina/Health cushion for mistakes.
Battle Mage — Power ≥ Mana Regen ≥ Health ≥ Crit
- Translation: smooth resource flow = real DPS. Without mana, your build collapses.
When is a lower-ilvl item better?
- If it has your top 2 stats in decent amounts, it’s often better than a higher-ilvl sidegrade stacked with junk.
💰 Early Economy & Crafting (Do This, Skip That)
Do:
- Craft Weapon Empowerment I ASAP (weapon first, always).
- Carry Stamina Tonic and Camp Kit—they save time and wipes.
- Vendor junk greens; keep only items that match your top two stats.
Skip (early):
- Deep rerolls (you’ll brick mats).
- Expensive cosmetics.
- Bags—there’s usually an early quest for a free slot upgrade.
10-minute gold route:
- Starter hub cache → nearby mini-event → vendor junk → buy potions. Repeat daily until you unlock better farms.
🧩 Starmap Philosophy (Why This Order Works)
Speed, survival, and economy multiply your power. That’s why all three class trees start with Fleetfoot, Field Rations, and Basic Mastery. If you go deep into damage on day one, you’ll hit faster… walls. Take the “engine” nodes first; then your damage nodes matter more because you’re alive, moving, and stocked.
Rule of three for nodes:
- Tempo (move/dash), Safety (potions/block), Economy (mats/first-time XP).
- Touch all three before you chase fancy percentage damage.
👥 Duo & Party Synergy (Win More Together)
Best beginner duos:
- Guardian + Archer — textbook: one anchors, one bursts.
- Guardian + Battle Mage — safe pulls with big AoE melts.
- Archer + Battle Mage — high DPS duo; requires cleaner kites.
How to be a good partner (easy rules):
- Ping pulls and paths.
- Don’t chest-open mid-pull.
- Rotate potions (one uses, the other kites).
- In dungeons, call the big hits (“heavy next”)—this alone saves runs.
🧠 Boss Basics for Beginners (Universal)
- Learn the cadence: many bosses run two normals + one big.
- Adds first, then window burst. Adds are the real damage taken.
- Whetstone is for phases, not full fights; time it.
- Don’t double-commit after a heavy. Hit once → reposition → reassess.
- Treat movement like a resource. Save a roll/dash for “I didn’t see that coming.”
🧹 Common Mistakes (And Fast Fixes)
- Greed: Trying to fit a hit you didn’t earn. Fix: wait for the big swing.
- Over-crafting: Burning mats before your first dungeon. Fix: Weapon Empowerment I only, then chest.
- Stat traps: Chasing crit on Guardian or armor on Archer. Fix: follow the priority lists above.
- Standing still (Archer/Mage): Your damage lives in movement. Fix: practice move → shoot rhythm.
- Zoomed-in camera: Raise FOV to read fights; your eyes need info.
🧭 30-Minute “I’m Busy” Plan (Any Class)
- 5 min: Buy potions, check vendor for stat-correct weapon/accessory.
- 15 min: Run the daily loop near your starter hub (mini-event + cache).
- 10 min: Starmap spend + talent check + one class drill.
Even on a tight day, you net dust, potions, and practice. Progress isn’t always levels—sometimes it’s confidence and muscle memory.
🎓 Practice Drills (5 Minutes Each, Big Impact)
- Guardian: Block-Punish 10x on an elite without taking chip. Add a second hit when perfect.
- Archer: Roll → burst rhythm for 60 seconds without missing a beat.
- Battle Mage: Dash through → instant turn → detonate on a dummy pack; no whiffs.
These look silly. They win dungeons.
🧭 What to Do After You Pick a Class
- Commit to your Leveling Build first—no early respec spiral.
- Clear Dungeon 1 clean, then craft Weapon Empowerment I (weapon first).
- Spend Starmap points to finish your movement and sustain branches.
- Practice your class drill.
- Move into Dungeon 2 prep and swap to the Bossing Build if the fight demands it.
🏁 Conclusion
Picking the best starter class in Fellowship is about matching your temperament and then stacking early wins: tempo, safety, and clean damage windows.
- Choose Guardian if you want to learn fights up close with a huge mistake budget.
- Choose Archer if you like spacing, traps, and bursting from safety.
- Choose Battle Mage if you want to play a mobile AoE piano with self-sustain.
Follow the Starmap orders, talent picks, and build rotations above and your first hours will feel smooth, confident, and fast—exactly what a new player needs.
If you ever want a tailor-made route, coaching-style sessions, or a done-for-you path to hit key milestones quicker, BoostRoom has your back with gamer-to-gamer help, clean comms, and flexible scheduling.
Learn more: the most complete public resource right now is the Fellowship Wiki (Fextralife) — solid overviews on heroes, rewards, and systems.