Light Tank Scouting Explained
Light tanks exist to create information. In World of Tanks, information is a weapon by itself because spotted enemies can be damaged, avoided, pressured, or forced to stop moving. A light tank that survives and keeps useful enemies visible can change the entire flow of a match.
A good scout does more than drive forward. A good scout answers important questions for the team:
- Where is the enemy going?
- Which flank is weak?
- Which enemy tanks are unspotted?
- Which route is safe to cross?
- Which enemy vehicles are isolated?
- Can our team shoot what I spot?
- Is the enemy scout still alive?
- Is it time to play safely or actively?
The best light tank players understand that scouting value is not only measured by spotting damage. Sometimes your greatest value is preventing enemy scouts from working. Sometimes it is keeping one dangerous lane watched. Sometimes it is surviving until late game, when your vision becomes more powerful because fewer enemy tanks remain.
Light tanks are fragile, so your goal is not to “be brave.” Your goal is to be useful while staying alive. A dead scout provides no vision, no late-game control, and no pressure.
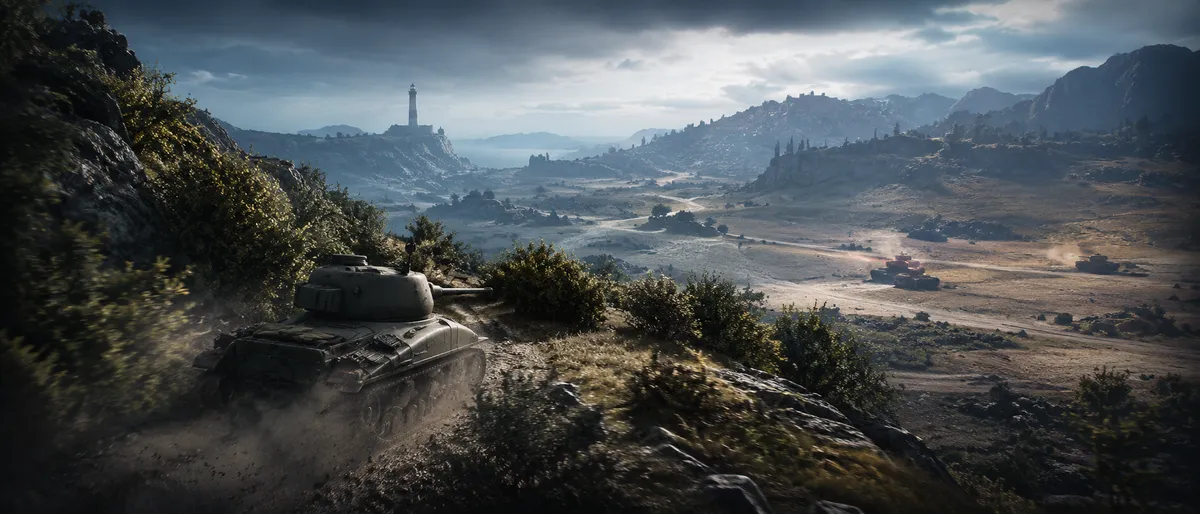
Passive Scouting vs Active Scouting: The Simple Difference
Passive scouting means using concealment, bushes, terrain, and patience to spot enemies while staying hidden. You are usually stationary or moving very little. Your main strength is remaining undetected while your team farms the enemies you reveal.
Active scouting means using mobility, terrain, timing, and movement to create vision while avoiding damage. You are usually moving, rotating, circling safe terrain, or making controlled scouting passes. Your main strength is covering more space and forcing the enemy to react.
The simple difference:
- Passive scouting = quiet information
- Active scouting = mobile information
Neither is always better. Passive scouting can dominate open maps with strong bushes and long firing lines. Active scouting can dominate maps where bushes are risky, enemy positions change fast, or your team needs moving vision.
The strongest light tank players use both. They start passive when the map rewards stealth, switch active when enemies are pinned or distracted, return passive when the enemy scout is hunting them, and become aggressive late when vision control decides the endgame.
The Main Rule: Scouting Is Only Useful If Someone Can Use the Information
A scout’s job is not simply to spot enemies. The real goal is to spot enemies in a way that creates value.
Before taking a scouting position, ask:
- Can my teammates shoot what I spot?
- Will spotting this area prevent enemy movement?
- Will this position reveal early enemy deployment?
- Do I have an escape route?
- Is this information still useful at this phase of the battle?
Many light tank players die early because they rush to a “famous bush” without checking whether allies can actually support it. If no one can shoot your spots, you may be risking your tank for information that does not matter.
This is why minimap awareness is essential. Your own position is only half the scouting equation. The other half is where your team’s guns are. A passive bush with no support is just a hiding spot. An active scouting route with no allied firing lanes is just a dangerous drive.
Useful scouting connects your vision to your team’s ability to act.
Why Light Tanks Are Different From Other Classes
Light tanks usually combine strong concealment, high mobility, and good view range. They often keep excellent camouflage while moving, which makes them uniquely suited for both active and passive spotting. But they also tend to have weak armor and low durability, meaning mistakes are punished quickly.
This creates a unique playstyle:
- You can reach key scouting positions early.
- You can relocate faster than most vehicles.
- You can remain hidden better than many classes.
- You can spot without firing.
- You can survive by avoiding damage, not absorbing it.
The mistake is trying to play a light tank like a medium tank too early. Many light tanks have guns that can contribute, but your gun is usually secondary until the battle opens. If you trade HP early for one shot, you may lose the ability to scout later.
A light tank with full HP in the late game is one of the most dangerous vehicles on the map. A light tank that dies in the first minute because it wanted one extra shot has usually failed its main role.
The Three Phases of Scouting
Scouting changes during the match. Your opening job is not the same as your midgame job, and your late-game job is different again.
Early game scouting
Your goal is to reveal enemy deployment, contest safe vision areas, and avoid dying. This is when enemy guns are fresh, TDs are waiting, and aggressive mistakes are punished hardest.
Midgame scouting
Your goal is to update the map. You identify which flank is winning, which enemies are missing, where enemy TDs might be waiting, and whether your team can move safely.
Late game scouting
Your goal is to control the remaining information. With fewer tanks alive, one good spot can decide the battle. Survival becomes extremely valuable because enemies have fewer counters to your vision.
The common scouting mistake is playing all three phases the same way. Passive early scouting may be perfect. But if you stay passive after the map opens, you may stop helping. Active late scouting may be powerful. But if you drive actively in the first minute against a full enemy team, you may die before your tank matters.
Passive Scouting: What It Really Means
Passive scouting is not “camping.” Passive scouting is controlled vision from a concealed position.
A strong passive scouting position usually has:
- Bushes or vegetation
- Distance from enemy approach routes
- Allied guns behind you
- An escape path
- Low chance of proxy spotting
- A reason to watch that area
- Enough cover or terrain to retreat safely
Passive scouting is powerful because it lets you gather information without revealing yourself. If enemies do not know where you are, they must be careful. They may stop pushing, hesitate, or expose themselves to your team.
Good passive scouting often means doing nothing visibly exciting. You may sit still, avoid firing, and let your team do the damage. That can feel boring, but it can win games if your position is lighting important enemies.
The key is discipline. If you fire too early, move carelessly, or stay after the position becomes unsafe, passive scouting collapses.
When Passive Scouting Works Best
Passive scouting works best when the map provides concealment and your team has firing lanes.
Look for passive scouting when:
- The map is open or semi-open.
- Bushes control key lanes.
- Your team has TDs or support tanks positioned to shoot.
- Enemy movement is predictable early.
- You can spot without being within proxy range.
- The enemy scout is not close enough to rush your bush.
- Your tank has enough concealment to stay hidden.
Passive scouting is especially strong when enemies must cross open ground. If your bush watches a crossing and your allies can shoot it, you can create huge early pressure without firing a shot.
Passive scouting is weaker when:
- The map is mostly city corridors.
- Your team has no firing angle.
- Enemy scouts can easily proxy spot you.
- Artillery or blind fire is likely to punish common bushes.
- You have no retreat route.
- The battle has moved away from your area.
A passive position must stay relevant. If nothing can be spotted there anymore, it is time to think about switching.
The Passive Scouting Checklist
Before you commit to a passive scout position, ask:
- Can I reach it safely?
- Can enemies proxy spot me quickly?
- Does this bush actually cover the enemy approach?
- Can my team shoot what I reveal?
- Is there hard cover or terrain nearby?
- Can I escape if the enemy scout pushes me?
- Is this position still useful after the first minute?
- Am I tempted to fire and ruin my concealment?
If the position fails too many of these questions, it may be a trap.
A famous bush is not automatically good. It must match the current battle. If your allies are not behind you, if the enemy has too many fast tanks, or if the position is commonly blind-fired, a “great bush” can become a quick garage trip.
How to Passive Scout Without Getting Caught
The first rule of passive scouting is: arrive cleanly. If you get spotted on the way into your bush, enemies may pre-aim, blind fire, or send a scout to remove you.
To passive scout safely:
- Use cover and terrain while moving into position.
- Avoid knocking down obvious trees near common bushes if it reveals your plan.
- Stop moving before enemies enter spotting range.
- Do not fire unless the shot is worth losing concealment.
- Watch the minimap for enemy scouts pushing toward you.
- Leave before you get proxy spotted.
- Change position if enemies begin blind firing accurately.
The hardest part of passive scouting is patience. Many players get bored after 30 seconds and shoot, move, or overextend. But if your position is lighting enemies and your team is using the information, you are already doing your job.
Bush Discipline: The Difference Between Hidden and Exposed
Bushes are powerful, but they are not magic. A bush helps only when it blocks the line between the enemy’s spotting checks and your vehicle. If an enemy has an angle around the bush, the bush may not protect you. If you move too much or fire at the wrong time, your concealment can drop.
Good bush discipline means:
- Stay still when enemies are close.
- Avoid firing unless you understand the risk.
- Use distance behind the bush when possible.
- Do not assume one bush protects you from every angle.
- Watch for enemy scouts moving wide.
- Retreat if the bush becomes predictable or dangerous.
A common passive scouting mistake is sitting inside a bush and firing repeatedly. This may work against unaware enemies, but stronger players will punish it. Your main weapon as a passive scout is not your gun. It is staying unspotted while your team uses your vision.
Active Scouting: What It Really Means
Active scouting is controlled movement used to reveal enemies while staying alive. It is not random driving. It is not driving in a straight line across open ground. It is not yolo scouting. Active scouting is movement with a purpose.
Good active scouting uses:
- Speed
- Terrain
- Dips and ridges
- Bush lines
- Safe spotting arcs
- Unpredictable movement
- Minimap awareness
- Enemy reload and attention timing
- Escape routes
Active scouts often make short spotting runs, loop behind terrain, or move between safe pockets of cover. They reveal enemies, disappear, and repeat from a slightly different path.
The goal is not to be permanently spotted and dodge everything. The goal is to create short windows of vision while giving enemies poor shots.
When Active Scouting Works Best
Active scouting works best when passive positions are unsafe, useless, or already cleared.
Use active scouting when:
- The map is too closed for passive spotting.
- Enemy positions are unknown and the team needs updated information.
- Your passive bush no longer spots anything.
- Enemy tanks are distracted by a fight.
- The enemy scout is dead or far away.
- You need to light hidden TDs before your team advances.
- The late game has opened and fewer enemies can punish you.
- You have safe terrain loops to use.
Active scouting becomes stronger as the battle progresses because fewer guns are alive. In the opening minute, active scouting can be dangerous because the full enemy team may be ready to shoot. In late game, active scouting can be decisive because one spotted TD or isolated heavy can decide the battle.
Active scouting is about timing. A route that is suicide at 14:30 may be perfect at 7:00 after several enemy guns are destroyed.
The Active Scouting Checklist
Before making an active scouting run, ask:
- What exactly am I trying to spot?
- Who can shoot what I light?
- Which enemy tanks can shoot me?
- Do I have terrain to break line of sight?
- Am I crossing open ground for too long?
- Where do I go if I get spotted?
- Is the enemy scout alive?
- Are enemy TDs likely watching this route?
- Will this run create value, or am I just driving because I’m bored?
Active scouting should always have a purpose. “I want to check this bush line,” “I need to reveal TDs before our heavies push,” or “I need to confirm whether the flank is empty” are good reasons. “Nothing is happening, so I will drive forward” is not a good reason.
How to Active Scout Without Dying Early
The secret to active scouting is controlled exposure. You are not trying to avoid being spotted forever. You are trying to make sure that when you are spotted, enemies do not get easy shots.
Useful habits:
- Never drive in a straight predictable line for too long.
- Use ridges and dips to break vision.
- Avoid crossing the center of open fields without an exit.
- Turn before the enemy finishes aiming.
- Do not slow down in obvious firing lanes.
- Do not drive directly toward enemy guns.
- Keep enough distance to avoid proxy spotting unless intentional.
- Use your Sixth Sense timer and intuition to know when to reset.
- Change routes after enemies start pre-aiming your old path.
Active scouting is not about panic movement. It is calm, planned movement where you know your exit before you start.
The Biggest Difference: Passive Spots Positions, Active Spots Changes
Passive scouting is excellent for watching predictable enemy movement. It punishes enemies who cross known lanes or sit in visible positions.
Active scouting is better for detecting changes:
- enemies rotating
- TDs relocating
- a flank becoming empty
- hidden tanks behind a ridge
- enemies preparing a push
- isolated tanks that can be surrounded
- late-game defenders hiding near base
This is why switching matters. Passive scouting may reveal the opening. Active scouting may reveal the midgame. Passive scouting may again become useful if you find a new bush after the enemy push stalls.
A good scout is not married to one style. A good scout asks, “What kind of information does the team need right now?”
When to Switch From Passive to Active
Switch from passive to active when your quiet position stops creating value or becomes unsafe.
Signs it is time to switch:
- You have not spotted anything useful for a while.
- Your team has already fired on everything your bush can reveal.
- The enemy flank in front of you is destroyed or retreating.
- Enemy scouts are hunting your position.
- Your allies are moving forward and need fresh vision.
- The battle has shifted to another area.
- Your current bush is being blind-fired.
- Your team needs to know whether a lane is clear.
- The enemy TDs are still unspotted and blocking a push.
The most common passive scouting failure is staying too long. Many light tank players do a great opening spot, then remain in the same bush for five minutes while the real battle happens elsewhere. If your position no longer answers an important question, move.
Switching does not mean driving straight into danger. It means leaving with a plan and becoming useful somewhere else.
When to Switch From Active to Passive
Switch from active to passive when movement becomes too risky, when enemies are watching your route, or when a concealed position can create more value.
Signs it is time to switch:
- Too many enemy guns are aiming at your route.
- You are low HP and cannot risk another open run.
- Enemy light tanks are still alive and close.
- Your team needs a lane watched, not a run.
- You have a strong bush with support behind you.
- The enemy is pushing into your vision zone.
- Your active route is being predicted.
- The battle has slowed into a standoff.
- You can win by staying alive and keeping enemies lit.
Active scouts often die because they keep moving after the enemy has adapted. If enemies are pre-aiming your loops, if your HP is low, or if your team has guns ready behind a bush line, becoming passive again may be the smarter play.
The best light tank players change pace. Fast when needed. Quiet when useful. Hidden when survival matters.
The Enemy Scout: Your Most Important Rival
Your biggest threat is often not a heavy tank or TD. It is the enemy light tank. Enemy scouts can:
- proxy spot your passive bush
- outspot your team
- deny your active routes
- force you to play defensively
- reveal your TDs
- win late-game vision if they survive longer
Your scouting decisions depend heavily on whether the enemy scout is alive.
If the enemy scout is alive:
- passive bushes near common routes are riskier
- active runs must account for counter-spotting
- you should avoid predictable paths
- survival is extremely important
If the enemy scout is dead:
- your vision becomes more powerful
- passive positions become safer
- active scouting becomes easier
- your team may be able to push with less fear
- late-game map control often becomes yours
Many light tank battles are decided by scout survival. You do not always need to destroy the enemy scout yourself, but you must respect their ability to ruin your vision plan.
Early Game Scouting: Safe Information First
The opening minute is when light tank players throw games most often. You feel fast, you want early spots, and you know your team expects information. But the opening is also when enemy guns are ready, TDs are pre-aimed, and enemy scouts are racing to contest you.
Early game scouting goals:
- spot enemy deployment
- avoid taking early damage
- avoid being proxy spotted
- identify enemy scout direction
- give your team safe early shots
- preserve HP for midgame
Early game mistakes:
- rushing too deep
- driving through open ground without cover
- firing from a passive bush too early
- fighting the enemy scout unsupported
- taking a famous position without checking team support
- staying spotted while trying to “get one more spot”
A good early scout creates information and survives. If you survive the opening with HP and map knowledge, you are already ahead of many light tank players.
Midgame Scouting: Update the Map
The midgame is where scouting becomes more dynamic. Some tanks are dead, lanes open up, and the enemy’s original positions may no longer be accurate.
Midgame scouting questions:
- Which enemy tanks are still unspotted?
- Is this flank empty?
- Are hidden TDs blocking our push?
- Is the enemy scout still alive?
- Can I rotate to a better vision area?
- Can I spot without becoming trapped?
- Which flank needs information most?
- Is my team ready to shoot?
Midgame scouting is often about controlled active movement. You may make a run to check a bush line, then return to passive cover. You may move from one flank to another. You may take a new forward bush after your team gains space.
The key is not to chase damage. Your job is to reveal the next layer of the battle.
Late Game Scouting: Survival Becomes Power
Late game is the scout’s reward for surviving. With fewer enemy vehicles alive, there are fewer guns to punish you and fewer scouts to counter you. This is when a light tank can completely control the match.
Late-game scout priorities:
- stay alive
- track last-known positions
- spot isolated enemies
- avoid unnecessary duels
- reveal TDs before allies push
- reset or pressure base if needed
- use mobility to create safe information
- choose when to shoot carefully
A light tank with HP in the late game can win by spotting enemies who cannot see back. But overconfidence is still dangerous. One hidden tank can end your game if you drive carelessly.
Late-game scouting should be calm. You do not need to rush. Use the minimap, count guns, check last-known positions, and force enemies to reveal themselves before you commit.
Map Types and Scouting Style
Different map types favor different scouting styles.
Open maps
Passive scouting is often strong early because bushes and long firing lanes matter. Active scouting becomes stronger later as enemies are destroyed and movement becomes safer.
Mixed maps
You may start passive, rotate actively, then settle into another passive position. Mixed maps reward scouts who switch styles often.
City maps
Pure passive scouting is usually weaker because lines are blocked by buildings. Active information, proxy awareness, and careful corner checking become more important.
Ridge maps
Active scouting with terrain breaks can be powerful, but ridges can also expose you quickly if you crest too far. Passive ridge bushes can work if support exists.
Corridor maps
Light tanks must be patient. Sometimes your job is not early spotting but surviving until the map opens.
A scout who uses the same opening on every map will be inconsistent. Map shape determines scouting style.
Bushes, Trees, and Vision Lines
Vegetation is a scout’s best friend, but only when used correctly. Bushes and trees create concealment along specific vision lines. They do not protect you from every direction.
Good vegetation use:
- Place vegetation between you and the enemy.
- Avoid sitting where enemies can approach within proxy range.
- Use bushes that your allies can shoot through or near.
- Understand that firing can reduce your concealment.
- Watch for wide angles that bypass your bush.
- Leave if the enemy knows your position.
A bush is only useful if it creates information or safety. Sitting in a bush that spots nothing and threatens nothing is not scouting. It is waiting.
The best scout positions combine concealment with purpose: they watch enemy movement that matters and connect that information to allied guns.
Proxy Spotting: The Danger Zone
Proxy spotting means enemies can spot you automatically at close range, even through cover. For light tanks, this is both a tool and a danger.
As a danger:
- enemy scouts can rush your bush
- city corners can reveal you unexpectedly
- sitting too close to an enemy route can get you detected
- rocks and buildings do not prevent close-range proxy spotting
As a tool:
- you can reveal hidden enemies behind cover
- you can confirm tanks hiding in late-game positions
- you can pressure enemies who rely on concealment
- you can scout city corners carefully when needed
Do not accidentally proxy spot yourself into death. If an enemy scout is likely to rush your position, leave before they reach that range. If you are using proxy intentionally, make sure you have an escape or enough support.
Scouting and Your Team’s Guns
A scout without team support is just a fragile tank alone. Before any scouting move, look at your team’s gun positions.
Ask:
- Are allied TDs aimed at this lane?
- Are mediums close enough to support?
- Are heavies too busy behind buildings?
- Did my team abandon this flank?
- Can anyone shoot what I spot?
- Are allies reloading or moving?
- Is the firing lane blocked by terrain?
Many light tank players blame teammates for not shooting their spots, but sometimes the scout chose a spot no one could use. Strong scouting means choosing positions that match your team’s ability to fire.
Good scouts do not only ask “Where can I spot?”
They ask “Where can I spot something useful?”
Spotting Assistance: Why Damage Is Not Always Your Job
Light tanks often earn value through spotting assistance. You reveal enemies, allies damage them, and your team gains control. This can be more valuable than firing your own gun.
There are times to shoot:
- when it is safe
- when enemies cannot spot you back
- when finishing a low-HP tank matters
- when the enemy scout must be removed
- when late-game damage is needed
But there are also times not to shoot:
- when firing reveals your passive position
- when your team is farming your spots already
- when the shot is low value
- when staying hidden is more important
- when you need to preserve your HP and camo
A light tank gun is a tool, not the main identity. If firing loses your vision control, it may cost more than the damage is worth.
How to Know If You Are Doing Enough
Scouting can feel strange because your best moments may not look dramatic. You might not fire much. You might sit still. You might spend minutes denying a lane simply by existing.
You are doing enough if:
- enemies are spotted before they damage your allies
- your team can shoot your spots
- enemy scouts cannot freely spot your team
- you survive into midgame and late game
- your team moves safely because of your information
- enemies hesitate to cross lanes you control
- hidden TDs are revealed before your team pushes
You are not doing enough if:
- you sit in a bush that spots nothing for several minutes
- you die early every match
- you never check whether allies can shoot your spots
- you chase damage instead of vision
- you drive actively with no purpose
- you stay passive after the map changes
Scouting is about useful information, not constant motion.
Common Passive Scouting Mistakes
Passive scouting mistakes usually come from impatience or poor position choice.
The biggest mistakes:
- going to a famous bush with no team support
- firing from the bush too early
- staying after being blind-fired
- ignoring enemy scout movement
- sitting too close to a proxy route
- staying in the same bush after the flank is won
- not having an escape route
- assuming bushes protect from every direction
- knocking over obvious trees that reveal your position
- refusing to switch active when nothing is being spotted
A passive scout must always be asking: “Is this position still helping?” If the answer becomes no, the position is no longer passive scouting. It is wasted time.
Common Active Scouting Mistakes
Active scouting mistakes usually come from overconfidence.
The biggest mistakes:
- driving in straight lines
- scouting too deep in the first minute
- crossing open ground without knowing enemy positions
- making active runs when allies cannot shoot
- repeating the same route until enemies pre-aim it
- slowing down in dangerous lanes
- turning too late after being spotted
- trying to active scout when low HP and unnecessary
- ignoring the enemy light tank
- confusing active scouting with yolo rushing
A good active scout is controlled and hard to punish. A bad active scout is predictable and easy to delete.
The Switch Decision: A Simple Rule
The core question of this guide is: when should you switch between passive and active scouting?
Use this rule:
Switch when your current scouting style no longer creates useful information at acceptable risk.
That rule has two parts:
- useful information
- acceptable risk
If passive scouting is safe but reveals nothing, switch.
If active scouting reveals enemies but gets you killed, switch.
If passive scouting reveals enemies your team cannot shoot, move.
If active scouting is too dangerous because enemies are ready, go quiet.
If the map opens up, become more active.
If the map locks down, become more passive.
If the enemy scout dies, expand your vision control.
If you lose HP, reduce risk and preserve late-game value.
Great scouting is not passive or active. Great scouting is choosing the correct risk level for the current map state.
A Practical Scouting Flow for Random Battles
Use this simple battle flow:
Opening minute
Choose a safe scouting plan based on map, spawn, enemy light tanks, and ally support. Avoid early HP loss.
Early contact
Identify enemy deployment. Do not fire unless it is safe or necessary. Watch where the enemy scout appears.
First rotation window
If your position is no longer useful, rotate. If enemies are pushing into your vision, stay hidden and keep spotting.
Midgame
Use active scouting to update unknown areas, or take new passive positions after your team gains ground.
Late game
Preserve HP, control vision, spot isolated enemies, and avoid unnecessary duels unless they decide the match.
This flow keeps your scouting flexible without making you reckless.
Light Tank Survival Rules
Survival is not cowardice. Survival is your greatest strength.
Rules to live longer:
- Never spend HP for low-value early damage.
- Do not fight enemy scouts without support.
- Do not drive into unknown TD lanes.
- Do not stay spotted longer than needed.
- Do not repeat predictable active routes.
- Do not sit in a known bush after being blind-fired.
- Do not fire if staying hidden is more valuable.
- Do not rotate without checking the minimap.
- Do not trade like a medium unless the battle is already safe.
The longer you live, the more valuable your tank becomes. Many light tanks are strongest when the enemy team has fewer vehicles left to counter them.
How to Practice Scouting
Scouting is a skill you build through review and repetition. Use simple practice goals instead of trying to master everything at once.
Session goals:
- Play five battles without dying in the first three minutes.
- Check the minimap before every scouting move.
- Do not fire from your first passive position unless safe.
- Make one purposeful rotation per battle.
- Track enemy scout location every match.
- Ask whether allies can shoot before taking a spotting position.
- Survive into late game as often as possible.
After each battle, ask:
- Did I die because I was spotted too early?
- Did my team have shots on what I spotted?
- Did I stay passive too long?
- Did I switch active too early?
- Did I know where the enemy scout was?
- Did I preserve enough HP for late game?
One clear lesson per battle is enough. Scouting improves quickly when you review decisions, not just results.
BoostRoom: Learn Light Tank Scouting Faster
Light tank scouting is one of the hardest skills to learn alone because mistakes happen fast. One wrong route, one overaggressive bush, one late retreat, or one unnecessary shot can end your battle before you understand what went wrong.
BoostRoom helps players improve scouting by turning confusing vision moments into clear decisions:
- choosing safer opening scout positions
- understanding when passive scouting is useful
- learning active scouting routes without reckless driving
- recognizing when to switch styles
- reviewing enemy scout matchups
- improving minimap awareness and survival
- building late-game vision control habits
The goal is not to make you drive faster. The goal is to make you scout smarter, survive longer, and create more useful information for your team.
BoostRoom: Build Your Personal Light Tank Playbook
Every light tank feels different. Some are excellent passive scouts with tiny profiles and strong camouflage. Some are active scouts with speed and mobility. Some are hybrid vehicles that can scout early and deal damage later. A good scouting plan should match your vehicle, maps, and comfort level.
BoostRoom can help you build:
- a safe opening plan
- passive scouting rules
- active scouting timing
- switch triggers
- map-specific vision habits
- enemy scout response plans
- late-game survival routines
When your scouting improves, your whole account benefits because vision control affects every battle. You stop dying early, stop guessing where enemies are, and start controlling the pace of the match.
FAQ
What is passive scouting in World of Tanks?
Passive scouting means using concealment, bushes, terrain, and stillness to spot enemies while staying hidden. It works best when your team can shoot what you reveal.
What is active scouting in World of Tanks?
Active scouting means using movement, speed, terrain, and safe routes to reveal enemies while avoiding damage. It works best when the team needs updated information or when passive positions are no longer useful.
Which is better: passive or active scouting?
Neither is always better. Passive scouting is stronger when concealment and firing lanes matter. Active scouting is stronger when the map changes, enemies are distracted, or hidden positions need to be checked.
When should I switch from passive to active scouting?
Switch when your passive position stops spotting useful enemies, when your team advances and needs new vision, when your bush becomes unsafe, or when the battle shifts to another area.
When should I switch from active to passive scouting?
Switch when enemies are ready for your active runs, when you are low HP, when a bush can safely watch an important lane, or when staying alive is more valuable than moving.
Should light tanks shoot often?
Light tanks can shoot when it is safe, but firing can reveal your position or reduce your scouting value. Vision is often more important than one extra shot, especially early.
Why do I die early in light tanks?
Common reasons include rushing too deep, taking famous bushes without support, fighting enemy scouts alone, active scouting in straight lines, and not having an escape route.
How important is the enemy light tank?
Very important. The enemy scout can counter your vision, proxy spot your passive positions, and control late-game information. Tracking their location is one of your main jobs.
What is the biggest light tank mistake?
The biggest mistake is treating scouting as one style forever. Strong scouts switch between passive and active based on map flow, enemy positions, support, and risk.



