How Loot Decisions Actually Win Matches
Loot doesn’t win because it’s “strong.” Loot wins because it solves problems at the exact moment you need it. Most matches are decided by a few repeatable moments:
- You get surprised and need an instant defensive plan.
- You need to recover quickly and safely after taking damage.
- You need to rotate through risky space without getting caught.
- You need to finish a fight without running out of options (ammo, reloads, healing, mobility).
A good inventory gives you an answer to each moment. A bad inventory forces you to improvise with the wrong tools.
The goal of this guide is to make your inventory feel like a checklist, not a gamble.
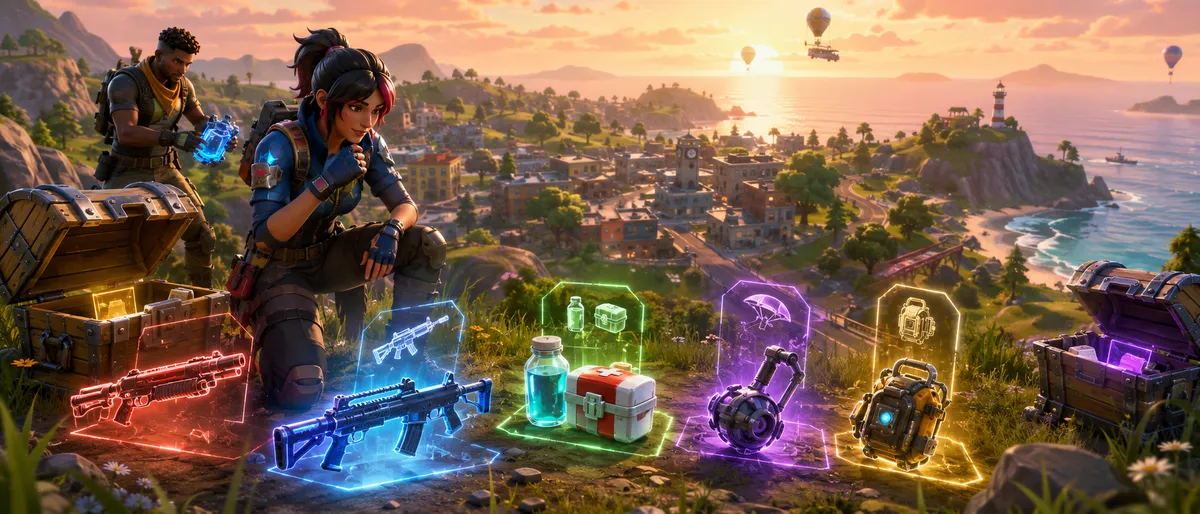
The Inventory Blueprint: 5 Slots, 5 Jobs
Think of your inventory as “jobs,” not items. Most players get stuck because they carry five things they like, instead of five things they need.
A strong default blueprint looks like this:
- Slot 1: Close-range finisher
- Your “panic-proof” option when someone is right on you.
- Slot 2: Mid-range workhorse
- Your most-used tool for consistent damage and pressure.
- Slot 3: Recovery
- A heal you can rely on when things go wrong.
- Slot 4: Mobility or escape
- The “get out of bad spot” button.
- Slot 5: Flex slot (utility, extra heal, or situational tool)
- This is where you adapt to the match.
You can swap which slot holds what, but the jobs should stay. When you always fill the jobs, your loadout stays stable even when the loot pool changes.
A Simple Swap Rule: Upgrade Function, Not Hype
Most bad swaps happen because players see something shiny and drop something essential.
Use this one rule before every swap:
Only swap if the new item improves one of your five jobs without breaking another job.
That’s it.
Examples of “good swaps” (thinking in jobs):
- Swapping a clunky mid-range option for a more consistent mid-range option without losing your only close-range tool.
- Replacing a slow heal with a faster heal when you expect more pressure and need quick recovery windows.
- Trading a second weapon for mobility when rotations are getting dangerous.
Examples of “bad swaps”:
- Dropping your only recovery for a third weapon.
- Dropping mobility because “I want more damage,” then getting stuck during rotation.
- Carrying two items that do the same job and leaving another job empty.
Your Default Loadout Shapes
You don’t need a single perfect loadout. You need a few reliable shapes you can build quickly.
Here are the most common “shapes” that work almost everywhere:
Loadout Shape A: Balanced Everyday
- Close-range finisher
- Mid-range workhorse
- Heals
- Mobility
- Flex utility
This is the most reliable template for most players because it stays useful in every phase of a match.
Loadout Shape B: Safer Survival
- Close-range finisher
- Mid-range workhorse
- Big heals
- Quick heals
- Mobility or utility
This shape is great if you’re focusing on lasting longer, practicing rotations, or playing calmer matches. Your damage is still fine, but your recovery is stronger.
Loadout Shape C: Mobility Priority
- Close-range finisher
- Mid-range workhorse
- Heals
- Mobility 1
- Mobility 2 or utility
This is best when you expect a lot of movement: long rotations, chaotic endgames, or maps where reposition tools matter.
Loadout Shape D: Utility Control
- Close-range finisher
- Mid-range workhorse
- Heals
- Mobility
- Utility (problem-solver)
This is best when you want an “answer” for specific problems (more on utility later).
Close-Range Slot: What to Carry
Your close-range slot should be the option that feels dependable when your heart rate spikes. It’s not about theoretical strength; it’s about reliability under pressure.
When choosing a close-range tool, prioritize:
- Fast ready-time: it works quickly when you swap to it.
- Consistency: it performs even if your movement is messy.
- Low punishment: small mistakes don’t instantly lose you the fight.
When to swap your close-range item
Swap when the new option improves one of these:
- Faster “panic response”
- More consistent output at typical close distance
- Better reload feel for repeated fights
When not to swap
Don’t swap if it makes you less confident. Confidence is a real stat in Fortnite. If you hesitate because your close-range tool feels awkward, you lose time—time you can’t afford.
Mid-Range Slot: Your Main Workhorse
This slot does the most work in the average match. It handles:
- Tagging opponents at medium distance
- Applying pressure when you have an angle
- Finishing damage when opponents retreat
A strong mid-range choice should feel:
- Stable during movement
- Reliable at common distances
- Easy to manage with ammo and reloads
When to swap your mid-range item
Swap when you find a mid-range option that:
- Feels easier to control at your typical engagement distance
- Lets you conserve ammo better
- Makes you miss fewer “easy” shots in real gameplay
The most common mid-range mistake
Carrying a mid-range option that’s too specialized. If it only feels good in perfect conditions, it’s not a workhorse.
Optional Long-Range Slot (Only If It Fits)
Some players love a dedicated long-range option. It can be useful for:
- Getting information from distance (seeing where people are moving)
- Creating pressure without committing
- Forcing opponents to heal before they can push
But here’s the important part:
A long-range slot is a luxury, not a requirement.
If carrying long-range means you lose:
- mobility, or
- heals, or
- your close-range reliability,
- …it usually hurts more than it helps.
When a long-range slot makes sense
- You already have strong heals and mobility.
- Your team covers other roles and you want to be the “distance pressure” player.
- You feel calm using it and don’t tunnel vision.
When to swap it out
As the match moves toward smaller circles and closer engagements, long-range often becomes less valuable. Many players swap long-range into extra heals or utility in late game.
Heals: Build a Recovery Ladder
Heals aren’t one category. You want a “ladder” that matches how fights actually happen.
A recovery ladder is:
- Quick recovery for short windows
- Bigger recovery for safer windows
If you only carry slow heals, you often won’t have time to use them. If you only carry tiny quick heals, you may not be able to fully stabilize.
The Best Beginner Heal Rule
Always carry at least one reliable heal item. Always.
If your inventory has zero healing, you’re playing on hard mode for no reason.
When to Swap Heals
Swap heals based on how the match is feeling:
- If fights are frequent and messy: favor quicker recovery options.
- If rotations are long and you take chip damage: favor bigger heals that stabilize you after travel.
- If you’re in team modes: consider carrying something that helps you support teammates, not just yourself.
Healing Slot Priorities (Simple Decision List)
When choosing between healing options, prioritize:
- Can I use it safely in common situations?
- Does it give enough recovery to matter?
- Does it take too long for the fights I’m taking?
- Does it stack well so it doesn’t waste space?
Your goal is to reduce “I had heals but couldn’t use them.”
Mobility: The Slot That Saves Your Match
Mobility is what prevents you from getting trapped by:
- bad zone pulls
- third parties
- awkward terrain
- low ground exposure
- “I need to leave right now” moments
A mobility item doesn’t need to be fancy. It needs to be dependable.
Mobility Swap Rules
Swap into mobility when:
- you notice you’re frequently caught during rotations
- the match is moving toward tighter circles
- you’re in a lobby where staying still becomes dangerous
- your team needs regroup options
Swap out extra mobility when:
- you’re already in a safe, strong endgame position and need more recovery
- you have too much “movement” and not enough survival tools
- you’re carrying mobility that you never actually use
Common mobility mistake: waiting until late game to pick it up.
Mobility is strongest when it prevents problems early, not only when you’re already in trouble.
Utility: The “Problem-Solver” Slot
Utility items are the things you carry because they solve specific problems better than weapons do.
Depending on what exists in your loot pool, utility can include:
- tools that help you take space safely
- tools that help you break or bypass cover
- tools that help you scout or gain information
- tools that disrupt opponents’ positioning
- tools that help your team recover or regroup
How to Choose Utility Without Overthinking
Ask: What problem keeps causing my eliminations?
Then pick utility that answers that problem.
Common problems and utility thinking:
- “I get stuck with no safe space” → carry a tool that helps reposition or create safety.
- “I lose track of people” → carry something that improves information or awareness.
- “I get pressured when I’m healing” → carry something that buys time or creates separation.
Utility is only good if you use it. One useful utility item beats three “cool” items you forget to press.
Build Mode vs Zero Build: Different Loot Priorities
Your mode changes what “best inventory” means because cover works differently.
Build Mode Loot Priorities
Build mode often rewards:
- reliable close-range tools (because fights compress quickly)
- consistent mid-range tools (to punish peeks)
- heals that fit short reset windows
- mobility that helps you reposition between builds or disengage cleanly
- utility that helps you control space
In Build mode, you can create safety more easily, so you may get away with fewer heals—until you can’t. Keep at least one strong heal option.
Zero Build Loot Priorities
Zero Build rewards:
- mobility and reposition tools (because you can’t build cover instantly)
- more dependable healing (because you must rely on terrain)
- mid-range consistency (because open space punishes mistakes)
- utility that helps you cross dangerous areas
In Zero Build, “extra heals” and “extra mobility” are often more valuable than a third weapon.
Solo vs Teams: Inventory Changes
Team size changes your job.
Solos
In solos, your inventory must be self-sufficient:
- one close-range tool you trust
- one mid-range tool you trust
- strong recovery
- mobility
- a flexible slot that covers your weaknesses
Solos punish missing essentials because nobody can cover you while you heal or rotate.
Duos
In duos, you can coordinate roles. One player can lean more into:
- utility and support, or
- distance pressure, or
- extra heals
But do not over-specialize if you’re not communicating. If you and your duo both carry the same “extra” item and neither carries a key job, you’ll feel it.
Trios and Squads
In squads, role thinking becomes powerful:
- One player can carry more recovery for team stability.
- One player can carry more utility for space control.
- One player can keep stronger mobility to regroup the team.
The biggest team loot mistake is everyone copying the same loadout. Teams win more when roles complement.
Early Game: Stabilize First, Optimize Second
Early game loot decisions should be fast. Your goal is not perfect—it’s stable.
Use this early game rule:
Pick the first decent close-range tool + first decent mid-range tool + first heal you find.
Then you can optimize later.
Early game swap priorities:
- Replace “no heal” with “any heal”
- Replace awkward close-range with reliable close-range
- Add mobility if you see it early
- Add a flex utility if it fits your style
The “Two-Minute Stabilize” Checklist
After your early looting, do a quick check:
- Do I have a close-range option I trust?
- Do I have a mid-range option I can use consistently?
- Do I have at least one heal?
- Do I have any mobility?
- Is my fifth slot doing something useful?
If you’re missing two or more, your next goal is not fighting—it’s improving your loadout.
Mid-Game Swaps: Prepare for Rotations and Third Parties
Mid-game is where many players lose because they carry “fight-only” loot and forget the match is still moving.
Mid-game priorities:
- A heal plan you can use under pressure
- Mobility for rotations and escapes
- A loadout that doesn’t run out of ammo immediately
- A flex slot that prepares you for the next phase (more heals or more utility)
Mid-game swap pattern that works for many players
If you’re carrying three weapons, consider swapping one into:
- mobility, or
- extra heals, or
- a problem-solver utility
Three weapons feels powerful until you take damage and realize you can’t recover safely.
Endgame Swaps: Simplify and Make Every Slot Count
Endgame is about speed of decisions. Your inventory should be simple enough that you always know what to press.
Endgame inventory goals:
- Close-range and mid-range you fully trust
- Heals that can be used in realistic windows
- Mobility that gets you into safer space
- A flex slot that either stabilizes you or helps you take/hold space
Common endgame swaps:
- Swap a slow, hard-to-use item for a faster recovery option.
- Swap a long-range luxury item into extra heals or utility.
- Swap a “fun” item you never press into something you will definitely use.
Endgame punishes unused inventory slots.
What to Carry vs What to Swap: A Fast Decision Framework
Use this quick framework anytime you’re staring at loot on the ground:
Step 1: Identify the job
What job does this item do?
- close-range, mid-range, heal, mobility, utility, or luxury
Step 2: Compare it to what you already have
- Is it strictly better at the same job?
- Is it better for the next phase of the match?
- Does it create overlap (two items doing the same job)?
Step 3: Check what you would lose
If swapping breaks your blueprint (5 jobs), it’s usually not worth it.
Step 4: Decide in under 3 seconds
If you take too long, you lose more than you gain. Loot speed is a real skill.
Rarity vs Fit: When a Lower Rarity Is Better
A common trap is treating rarity like a rule. Rarity matters, but “fit” matters more.
A lower rarity item can be better if:
- you perform better with it (confidence matters)
- it solves a job you’re missing (heals/mobility/utility)
- it has a friendlier reload or handling feel
- it keeps your inventory simpler and more consistent
Rarity is a bonus, not a plan.
Managing Ammo and Reloads Without Stress
Ammo and reload management is part of loot strategy. If you carry tools that share the same ammo type or drain ammo quickly, you can run dry at the worst time.
Simple ammo rules:
- Don’t carry multiple weapons that drink the same ammo unless you’re confident you can support it.
- If you notice you’re constantly reloading during fights, consider swapping to an option with a more comfortable reload rhythm.
- If you’re low on ammo, prioritize a loadout that uses ammo more efficiently rather than forcing constant pressure.
A good loadout is one you can actually sustain.
Stack Sizes and Inventory Space
Many players “waste” inventory space without realizing it.
Space discipline tips:
- If two items both do “healing,” make sure they’re different types of healing (quick vs big) instead of duplicates that don’t add options.
- If an item stacks poorly and eats a slot, it must be worth it.
- The flex slot should be chosen intentionally; otherwise it becomes random clutter.
Your inventory is limited. Make every slot prove its value.
Looting Speed: The 30-Second Inventory Check
Use this quick habit every time you leave an area:
- Slot 1: close-range tool I trust
- Slot 2: mid-range tool I trust
- Slot 3: healing I can use
- Slot 4: mobility or escape option
- Slot 5: utility or extra heals (chosen on purpose)
If you can’t name each slot’s purpose instantly, your inventory is probably messy.
Common Loot Mistakes (And Easy Fixes)
Mistake: Carrying three weapons and no plan
Fix: pick two weapons you trust, then fill the other jobs.
Mistake: No healing
Fix: treat heals as mandatory before you take optional fights.
Mistake: Holding items you never use
Fix: if you haven’t used an item in multiple matches, replace it with something that supports your survival (heals or mobility).
Mistake: Overlapping jobs
Fix: don’t carry two items that do the same thing unless you have a specific reason.
Mistake: Taking too long to loot
Fix: decide faster by using the blueprint. Loot with purpose, not curiosity.
Mistake: Swapping mid-fight and panicking
Fix: reorder your inventory the same way every match so your hands know where everything is.
A Simple Practice Routine to Improve Loot Decisions
You can train inventory instinct the same way you train mechanics: repetition.
Routine 1: The “Blueprint Build” Challenge
In a calmer environment, practice building the same loadout shape repeatedly:
- two combat slots
- one healing slot
- one mobility slot
- one utility/flex slot
Your goal is to make your decisions fast and consistent.
Routine 2: The “Swap Test”
Whenever you see a new item, ask:
- What job does it do?
- Would it improve one job without breaking another?
Say your answer out loud. This trains your brain to categorize items instantly.
Routine 3: The “Endgame Prep” Habit
Before the match reaches late game, take 15 seconds to ask:
- Do I have the right heals for pressure?
- Do I have mobility for repositioning?
- Is my flex slot actually useful right now?
This prevents “late game regret.”
BoostRoom: Build a Loadout System That Fits Your Playstyle
If you want faster improvement, BoostRoom helps you turn loot decisions into a consistent system—so you stop guessing and start playing with confidence.
BoostRoom can help you with:
- A personalized inventory blueprint based on your mode (Build or Zero Build) and your comfort level
- Practical swap rules that match your real matches (not “perfect theory”)
- A routine that improves looting speed and reduces panic swaps
- Clear role guidance for duos and squads so your team loadouts complement each other
- Habit building: consistent slot order, consistent healing plan, consistent mobility plan
When your inventory is stable, your gameplay becomes calmer—and calmer gameplay wins more.
FAQ
What’s the best basic loadout for most players?
A balanced blueprint: one close-range tool, one mid-range tool, one heal, one mobility item, and one flex slot (utility or extra heals).
How many weapons should I carry?
Most players do best with two. A third weapon is only worth it if it doesn’t take away heals or mobility you truly need.
When should I swap into extra heals?
When fights are frequent, endgame is approaching, or you’re taking chip damage during rotations. Extra heals also help a lot in Zero Build.
When should I prioritize mobility?
When rotations feel risky, you’re getting caught in bad positions, or you’re entering phases where repositioning matters more than extra damage.
Should I always pick higher rarity items?
Not always. Higher rarity helps, but a lower rarity item can be better if it’s more reliable for you or if it fills a missing job in your blueprint.
What if my inventory feels messy every match?
Use the same slot order every time and assign a job to each slot. If you can’t name what a slot is for, replace it.
How do I loot faster without making mistakes?
Categorize items by job (close, mid, heal, mobility, utility) and only swap when you’re improving a job without breaking another.
What’s the biggest loot mistake beginners make?
Skipping healing and carrying too many weapons. Fix that first and your survival improves immediately.
Can BoostRoom help me choose what to carry?
Yes—BoostRoom helps you build a personalized blueprint and swap rules that match your playstyle, so your inventory decisions become automatic.



