Why Great Defense Feels “Easy”
The best defensive teams don’t win because they out-aim everyone. They win because they make the round predictable:
- Attackers are forced to show their hand early (utility, noise, numbers).
- Defenders trade efficiently (no free 1v1s).
- Rotations happen on clear triggers, not on fear.
- Retakes are layered (smokes, flashes, swings) instead of five solo duels.
Defense “feels easy” when you stop trying to hard-hold every site with brute force and start playing defense as a system: one player delays, one player survives, the team rotates with information, and the retake happens with numbers.
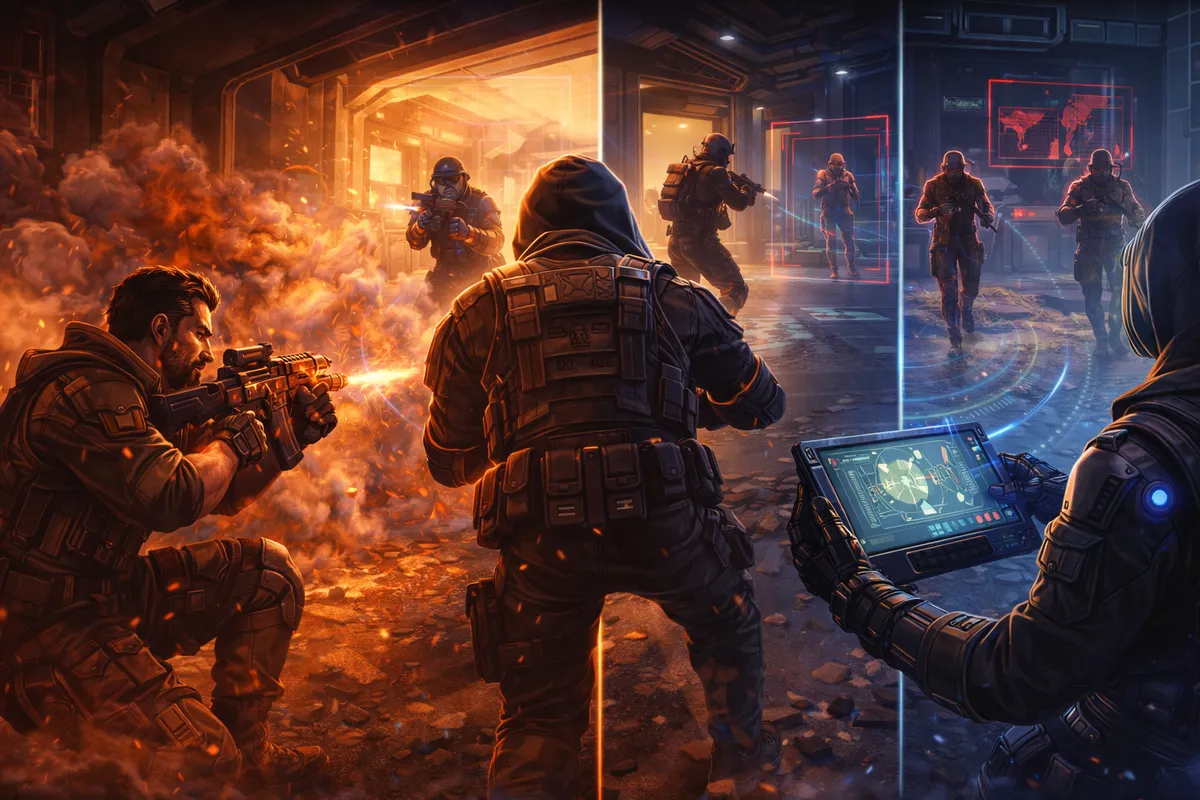
The Three Defensive Win Conditions: Hold, Delay, Retake
Every defensive round has one of three win conditions. If you don’t know which one you’re playing, your positioning becomes random.
- Hold: You stop the hit on the site itself. This is common when you have strong anchors, strong early damage, or a map where defenders can fight safely.
- Delay: You don’t need to stop the hit. You need to slow it long enough for help to arrive, while staying alive and tradeable.
- Retake: You give up part of the site on purpose, preserve your lives and utility, then retake together with structure instead of panic.
A mature defense switches between these win conditions based on:
- your agents (do you have heavy stall or heavy retake tools?)
- the enemy’s style (fast executes vs slow defaults)
- the economy (rifle vs eco/force)
- the score (when you need a high-percentage round vs a high-variance gamble)
Build a Default Defense That Works in Ranked
A default defense is your “starting shape” before you have information. It should cover three things:
- both sites are not free
- the map’s most important connector (usually mid) is not free
- you have at least one player who can rotate fast without giving up their job
A simple ranked-proof default is:
- 2 players on Site A
- 1 player mid/connector
- 2 players on Site B
That doesn’t mean everyone stands still. It means your first job assignments are clear:
- one anchor per site (their life is valuable; they stall or fall back)
- one “helper” per site (plays trade/crossfire and can rotate)
- one central player (info + fast rotation)
If you’re on a three-site map, your default becomes:
- one anchor on the far site
- two central players who can flood rotate
- two players covering the remaining site and connector lanes
The goal is always the same: never let one site be “one smoke away from free.”
Strong Side and Weak Side: The Reality of Defensive Resource Allocation
Most defenses naturally become “strong side vs weak side.” That’s not a mistake—unless you ignore it.
- Strong side: more players, more utility, more ability to fight early
- Weak side: fewer players, but better escape plans and earlier rotate routes
Weak side is not “the place we lose.” Weak side is “the place we delay and survive.”
A strong defense chooses its weak side on purpose based on:
- which site is harder to retake
- which site your comp anchors better
- where your sentinel utility gets the most value
- where attackers are strongest
If you treat both sites as full-hold sites every round, you often end up with the worst outcome: late rotates and messy retakes with no utility left.
Site Setups 101: Crossfires, Layers, and Escape Routes
A “site setup” isn’t a single position. It’s a relationship between positions.
A strong site setup has three layers:
- Layer 1 (Contact layer): the first fight. This can be a one-and-done angle, a trap angle, or a crossfire designed to get the first kill or force utility.
- Layer 2 (Trade layer): where you guarantee the trade if Layer 1 dies. If your first contact can’t be traded, your setup is fragile.
- Layer 3 (Retake/escape layer): where you live if the hit is too strong. This layer turns a lost site into a winnable retake.
Your setup must answer two questions:
- If they hit fast with utility, how do we avoid dying for free?
- If they hit slow and clear us, where do we reposition without giving them free space?
If you don’t have an escape route, your “hold” is actually a coin flip.
The Crossfire Rule That Stops Most Site Throws
A crossfire is not “two people looking at the same door.” A real crossfire forces attackers to take two fights at once or expose themselves to one angle while clearing the other.
Crossfire rules:
- Different elevations or different widths beat “same line” angles.
- One player holds the swing, one holds the clear (the attacker can’t clear both cleanly).
- Trade spacing matters: if you can’t swing within a second, it’s not a trade—it’s a hope.
A good mental model: if the first defender dies, the second defender should instantly have a high-percentage trade kill. If that trade isn’t available, your setup needs to be rebuilt.
Sentinels on Defense: Information, Flanks, and Safe Anchoring
Sentinels are the backbone of information control. Your goal is not to take duels constantly. Your goal is to make the enemy’s round feel unsafe everywhere.
A sentinel’s defensive value usually comes from:
- early warning (so rotations happen on time)
- delaying pushes with utility that forces clearing
- locking down one side so the team can stack elsewhere safely
- protecting against lurks and late-round splits
Sentinel rules that win rounds:
- Your utility should “tell a story.” If something breaks or triggers, call what it implies (close vs far, timing, likely direction).
- Don’t anchor with no escape. Your job is to delay and survive, not die first.
- Move your setups. Predictable setups get pre-cleared. Variety creates free damage and free time.
A high-rank sentinel mindset is simple: you are trading your utility for time. If you bought 8 seconds with a trap and still lived, you basically won the rotation battle.
Controllers on Defense: Stalling Hits and Building Retakes
Controllers are defensive glue. Smokes and area denial tools do three huge jobs on defense:
- they deny attacker information
- they delay the execute timing
- they isolate angles during retake
The most common controller mistake is panic-smoking on the first sound cue. A smart controller asks: “What does this smoke achieve?”
High-value defensive smoke types:
- Stall smokes: placed on the choke as the hit begins to break timing and force attackers to commit utility.
- Info denial smokes: placed to stop attackers from seeing whether you rotated or stacked.
- Retake smokes: saved to isolate angles and create safe entry paths during retake.
Controller rules:
- One smoke now is good; one smoke later is often better. Don’t spend your entire kit before the fight is decided.
- Smoke the attacker’s decision point. If you smoke where they must choose “push or stop,” you control the pace.
- Retake smokes should cut the site into slices. Your team retakes one slice at a time, not the whole site at once.
Initiators on Defense: Stop Rushes, Confirm Numbers, Win Retakes
Initiators are defensive accelerators. They let you:
- confirm whether the hit is real
- punish rush timing
- retake with structure
Initiator defensive rules:
- Use light info early, heavy disruption on contact. Early information is for decision-making; contact utility is for stopping the execute.
- Don’t waste your retake toolset. If you used both flashes and your strongest info tool early, your retake becomes dry peeks.
- When you confirm 4–5 attackers, call it immediately. Late calls cause late rotates, which cause lost rounds.
A great initiator also understands the difference between “noise” and “commitment.” One footstep is noise. Multiple abilities + coordinated pressure is commitment. Your utility should help your team separate the two.
Duelists on Defense: Space Denial and Timing Aggression
Duelists on defense aren’t just “fraggers.” Their best defensive value is controlling space:
- taking early map control with a safe escape plan
- punishing predictable default clears
- getting a first kill and living
- creating pressure so attackers can’t slowly set up
Duelist defensive rules:
- Aggression must be paired with a trade or an escape. If you push alone with no plan, you’re donating a rifle.
- Fight for valuable space, not random space. Valuable space is the connector that controls rotations or the lane that unlocks fast retakes.
- After one kill, reset. Don’t chase into five attackers. Your job is to create an advantage, then let the round play out.
The best defensive duelists make attackers hesitant. Hesitation is time. Time is rotations. Rotations are round wins.
Mid Control: The Hidden Engine of Defensive Rotations
On many maps, mid is not a third site—but it behaves like one. Mid control decides:
- whether attackers can split
- whether rotations are safe
- whether you can push for information
- whether your anchors can survive
Mid control is not “someone stands mid and hopes.” Mid control is usually:
- a safe angle that watches a key choke
- a utility layer that denies a fast push
- a fall-back route that preserves the mid player’s life
Mid control rules:
- Control mid with tools, not ego peeks. Use utility to confirm, then hold a tradeable angle.
- If you lose mid, your rotations must be earlier. Without mid control, attackers can split faster and punish late rotates.
- If you own mid, your weak side becomes safer. You can stack a site more confidently because you can rotate through mid quickly.
Think of mid as your “rotation highway.” If the highway is blocked, your whole defense becomes slow.
Information Control: Get Real Info, Deny Fake Info, Hide Your Numbers
Defense is an information war. If attackers can always read your setup, they will hit the weak point every round. Your goal is to control what both teams know.
There are three types of information:
- Hard info: confirmed bodies, confirmed utility usage, confirmed Spike seen.
- Soft info: sound cues, one ability spotted, one player seen.
- Negative info: nothing happened in a lane where something usually happens.
Hard info triggers rotations. Soft info triggers caution. Negative info triggers suspicion.
How defenders throw with bad info
- calling “A” off one footstep
- rotating off one piece of utility that could be a fake
- leaving a site with no anchor because “I think they’re B”
- pushing for info after your team already rotated, causing the lurker to kill you
Information control habits that win rounds:
- Call what you know, not what you feel. “Two spotted” is better than “they’re here.”
- Use consistent language for commitment. Your team needs one phrase that means “rotate now.”
- Hide your stacks. Don’t run as five through spawn loudly. If you must rotate, do it quietly and quickly.
- Show presence on the weak side. One smoke, one trap, or one sound cue can stop an attacker from calling the site “free.”
Rotation Timing: The Four Triggers That Decide Rounds
Most defensive rotation mistakes come from rotating on the wrong trigger. Use this system.
Trigger 1: Spike information
If the Spike is seen heading toward a site, that’s a huge commitment clue. Rotations should accelerate.
Trigger 2: Multiple bodies + utility layered
If you see 3+ attackers and they start layering utility (smokes, flashes, drones, walls), the hit is likely real. Rotate early enough to fight before the plant is fully set.
Trigger 3: Contact + map control loss
If your anchor is forced off the main choke and the attackers take control of the entry space, you may need to rotate sooner—because retaking a fully planted site is harder than fighting the hit at the door.
Trigger 4: Time pressure
If it’s late in the round and attackers haven’t committed, they’re often preparing a fast execute. Late-round executes punish slow rotations and isolated anchors. Be ready to “flood” when the commitment appears.
Rotation rule: rotate on hard info or layered commitment, not on a single sound cue.
The “One Anchor Always” Rule
In ranked, the most reliable defensive rule is:
Never leave a site completely empty unless you have hard confirmation the Spike is on the other side.
Why? Because attackers love late pivots. One silent pivot can win a round if your defense fully abandoned a site.
Even if you rotate three players, keep one anchor or at least one player who can re-clear and hold the “free site” path. Your anchor can play safe and retake-ready. Their job is simply to prevent the free plant.
Rotation Paths: Don’t Rotate Through the Most Punishable Lane
Good attackers don’t only hit sites. They trap rotations. If you rotate through a predictable corridor every round, you’ll be punished by lurks and late flanks.
Rotation path rules:
- Rotate through cover or through smokes when possible.
- Avoid rotating through attacker-controlled space. If attackers own mid, rotating through mid is often death.
- Clear one lurking pocket before fully committing to the rotate. One quick check prevents the “lurker wins the round” moment.
- Rotate with a buddy when possible. Solo rotators are free picks for lurkers.
The safest rotations are not always the fastest rotations. The best rotations are the ones that arrive with guns still alive.
Retake Protocol: How to Retake Like a Team (Not Five Solo Peeks)
Retakes are where information control becomes everything. The best retakes follow a simple structure:
- stop bleeding kills
- gain information
- isolate angles
- enter together
- defuse with a plan
Step 1: Stop the bleed
If two teammates died trying to “hero retake,” your retake is already broken. The first retake rule is: regroup and trade.
Step 2: Confirm positions with utility
Use info tools to locate anchors, common post-plant angles, and flank threats. If you can’t confirm everything, confirm the most dangerous position first.
Step 3: Isolate with smokes and walls
Turn a messy site into manageable slices. If defenders can fight only one angle at a time, the retake becomes a sequence of 2v1s, not five 1v1s.
Step 4: Enter on a countdown
Retakes must be synchronized. Even one second of delay between players turns a 5v5 into a chain of 1v5s. Use a countdown: “swing in 3.”
Step 5: Defuse with roles
Someone watches the close swing. Someone clears the last pocket. Someone taps/holds the defuse. If everyone stares at the Spike, you lose to a single swing.
Retake win condition: create trades and time pressure. The attackers should feel like they’re being squeezed, not like they’re taking five separate duels.
Defuse Timing: Tap, Stick, and the “Utility Window”
Defuse decisions are often emotional in ranked. Make them logical.
- Tap defuse to force peeks when your team has the crossfire advantage.
- Stick defuse when you have strong cover, smokes, or a teammate who can protect you.
- Half defuse changes the attacker’s decision-making: they can’t wait as long, and they often peek earlier and sloppier.
Utility window concept:
If you have a smoke that blocks the strongest angle for 4–5 seconds, that smoke is a defuse window. If you have a flash that can stop the defuser swing, that flash is a defuse window. Plan your defuse around these windows, not around hope.
Anti-Execute Defense: How to Survive the Full Utility Dump
Sometimes attackers do everything right: drones, flashes, double smokes, and a coordinated entry. Your job is to not die for free.
Anti-execute rules:
- Give up the first inch to save your life. If your position is guaranteed to be cleared, fall back early.
- Trade the entry, not the bait. Attackers often send a first player to pull shots; the real entry is second. Be ready to trade the second wave.
- Keep one piece of stall for the plant. Even one molly, smoke, slow, or stun at plant timing can turn a clean execute into chaos.
- Call the utility count. If attackers burned everything, your retake improves. If they still have everything, your retake needs patience.
A defender who lives through an execute is not “passive.” They are preserving the only resource that matters: a rifle and a body.
Anti-Lurk and Anti-Split: Stop Losing Rounds to the Quiet Player
Lurks kill defenses that rotate on fear. To beat lurks, you need two things:
- consistent flank information
- rotation discipline
Anti-lurk rules:
- One lane must be monitored at all times. Either by a trap, a camera, a turret, or a player positioned to hear/see.
- Don’t push for info after you rotate. If your team rotated, you are now the lurker’s target.
- Use “negative info” correctly. If your sentinel trap hasn’t triggered and mid hasn’t been pressured, the lurker’s path is limited. Call that.
Anti-split rules:
- Don’t rotate your mid player too early. Mid is the bridge for splits. If mid is abandoned, your rotate becomes a pinch you can’t escape.
- If attackers take mid, anchors must play safer. Sites become harder to hold because angles multiply.
- Fight one front at a time. If the split is coming, fall back and play for retake rather than dying in two directions.
Economy + Defense: When to Fight, When to Save, When to Hunt
Defense decisions should be tied to economy. A round win is great, but a round win that breaks your economy can still lose the half.
Defense economy rules:
- If you win, don’t donate guns. Avoid hero chases that hand attackers rifles for the next round.
- If you lose the site fast with low kill chance, save early. Saving a rifle can stabilize the next buy—unless saving puts you in a situation where you get hunted and lose it anyway.
- Hunting is a team decision. Hunting one-by-one is how you flip a won round into a loss.
- If attackers are broke, play anti-eco spacing. Don’t give isolated duels to pistols; play trades and safe distance.
A defensive round is not only about the scoreboard point. It’s about preserving the ability to win the next two rounds.
Common Defensive Mistakes That Create “Free Rounds” for Attackers
If you want to instantly improve, stop doing these:
- Over-rotating off weak info: one sound cue should not pull three defenders.
- No-trade anchoring: dying alone on site with no trade and no delay.
- Panic utility: wasting smokes and stuns early, then retaking with nothing.
- Mid abandonment: leaving the connector and getting split every round.
- Retake trickle: peeking one-by-one instead of regrouping and counting down.
- Chasing kills after winning the round: donating rifles into eco rounds.
- Predictable setups: placing the same traps and holding the same angles every round.
Defense punishes predictability. Attackers live off it.
A Practical Defense Checklist You Can Follow Every Round
Use this as your “mental UI” in ranked.
Pre-round:
- Who is anchoring each site?
- Who is the fast rotator?
- What is our plan if they hit my site: hold, delay, or retake?
- What utility do we save specifically for retake or plant denial?
Early round:
- Hold for pushes for the first few seconds.
- Collect light info without dying.
- Keep trade spacing.
Contact:
- Call numbers and utility used.
- If you’re weak side, prioritize survival and delay.
- If you’re strong side, trade aggressively and deny the plant.
Rotation:
- Rotate on hard info or layered commitment.
- Keep one anchor unless Spike is confirmed elsewhere.
- Rotate through safe paths and avoid lurk traps.
Retake:
- Regroup.
- Use info.
- Smoke to isolate.
- Countdown swing.
- Defuse with roles.
If you do nothing else but follow this checklist, your defense becomes calmer and your win rate rises.
BoostRoom: Build a Defense That Wins Even on Off-Aim Days
If your defense feels like constant guessing—late rotates, messy retakes, and getting picked by lurkers—BoostRoom can help you build a defensive system that works in real ranked games.
With BoostRoom, you can level up defense fast through:
- VOD reviews focused on defensive mistakes: identifying exactly where your setup broke (no trade, no escape, wrong rotation trigger).
- Personalized site setups: simple anchor + trade + escape structures you can repeat across maps.
- Rotation and comms training: short callouts and trigger rules so you rotate on facts, not panic.
- Retake playbooks: step-by-step retake sequencing (info → isolate → entry → defuse) tailored to your agent pool.
A good defense isn’t “never losing a site.” It’s losing sites in a controlled way and still winning the round. That’s the skill that climbs ranks.
FAQ
How many players should defend each site at the start of the round?
Most ranked games succeed with a simple 2–1–2 structure on two-site maps: two on each site and one mid/connector. The key is not the numbers—it’s having one anchor per site and one player who can rotate fast without abandoning responsibilities.
When should I rotate on defense?
Rotate on hard info (multiple attackers seen, Spike confirmed, layered utility) rather than on a single footstep. If you rotate too early, you give free sites to pivots and lurks.
Should I always fight for site control, or should I play retake?
It depends on your comp and the enemy’s execute strength. If your setup can stall and survive, delay and retake is often higher percentage than dying on the first wave of utility.
How do I stop getting picked by lurkers when rotating?
Rotate with a buddy, avoid predictable corridors, and keep at least one form of flank information active (trap, camera, turret, or a player holding a lane). Don’t push alone after your team rotated.
What’s the best way to win retakes in ranked?
Stop trickling. Regroup, use information, isolate angles with smokes, and swing on a countdown. Retakes are won through trades and timing, not through heroic 1v1s.
How do I anchor a site without dying every time?
Anchor with an escape plan. Play a position that buys time, forces utility, and allows you to fall back into a tradeable layer. Your life is valuable because it powers the retake.
Why do my rotations feel late even when I start moving fast?
Because the trigger was late. If you only rotate after the plant is already going down, you’re forced into a tougher retake. Rotate earlier on confirmed commitment, not after the site is already lost.
Should we hunt attackers after winning a round?
Only if it’s a team decision with numbers and safe spacing. Random solo hunting donates guns. The goal is to win the next round too.



